


JMWendt
-
Posts
82 -
Joined
-
Last visited
Content Type
Profiles
Forums
Events
Blogs
Gallery
Store
Everything posted by JMWendt
-
 Just make sure your burnisher shaft hole size matches the size of the motor shaft. I tried to use a 5/8" burnisher on a 1/2" motor shaft, thought I could "joogie" it and get it to work. No way. Too much vibration. Horrifying, really. I finally used that 5/8" shaft air compressor motor and it turned out very nice.
 -
I'm sure no matter what you 'd like him to do, he'll do what he wants anyway. Good to keep him well founded and give him a big base from which to make life decisions, but in the end, our children are their own persons. I hope he loves leatherworking as much as I do, in any case.
-
Hobby only. I wouldn't wish this as a career on anyone. Have your son go into software. Not soft wear.
-
So I've used beeswax . . . used it exclusively for years before I used a burnishing wheel. Still use it with the wheel, not as often. I was just using a canvas sheet to burnish for many years. Pure beeswax works fine. You should burnish, wax, then burnish again. Heating the edges with a heat gun after you've applied the wax soaks the wax back into the leather and removes the burnish, so don't do that. Pre-heating the wax a bit before rubbing is effective, however. Do any dyeing or coloration you want PRIOR to the beeswax or you won't get good absorption of the dye into the edge. The wax blocks dyes.
-
Something I haven't seen before -- how to clean it up?
JMWendt replied to llucas's topic in Leather Sewing Machines
I've found the best contact cement is Duall 88. Great stuff. Much less expensive than anything else as well. And it can be thinned. I've never had it delaminate. It's easy to work with, pliable, dries very rapidly, and is clear, not yellow. It can easily be removed from the outside of most leathers by rubbing. The thinner removes it as well. Check out http://www.jlsmithco.com/s.nl/sc.13/category./.f?search=duall for the cement itself and the thinner. It comes with a brush in the can, which is great for most applications. I also use artist spatulas to apply this glue (and other glues). See http://www.amazon.com/Anself-Stainless-Palette-Scraper-Painting/dp/B014W9B6ES?ie=UTF8&psc=1&redirect=true&ref_=oh_aui_search_detailpage for these. They're extremely handy for spreading a micro-thin glue layer evenly across an large or long surface, and they clean up by wiping with a rag. The Duall 88 is heady stuff. Use adequate ventilation. -
One thing I'd like to suggest is just dive in and do some prototyping. You know . . . if you want to try a gusset of some kind, mock it up in paper and then do it in leather, see how it comes out. You'll learn a lot about what will and won't work with regard to sewing and finishing. I've learned more from my own attempts and mistakes than I have from all the many books and videos. These days, if I want to try something new, I do it in inexpensive leather, no tooling, and take my time to figure it out. Once I have done a design once, then I can use better materials, stamp work, etc, on future versions.
-
Those are really nice.
-
I really like that cocobolo. It's so slick. I previously used a piece of pine that was hand grooved. Compared to that, this thing is like butter to sand.
-
I have to disagree. Depends on the effect you want. Although a bad dye job can make a piece look bad, hand dying can be used to lend an effect not unlike really nice wood grain, subtle and beautiful. The trick is in the details, just like any aspect of an art. I think on the tote bag to which I was referring, I used an old torn up t-shirt rag, not a dauber, so maybe I've misrepresented the method. I'm not sure where you've seen it "argued by crafters that the poor quality of work shows it was done by hand." Sounds like there are probably reams of forum space devoted to both sides of that argument. And poor quality work can be produced on or with machines as well. I guess I know what junk is when I look at it. I also know machine versus hand sewn-- or hand dyed versus dip dyed / airbrushed-- when I look at them just by looking at the little things. The methods used to make something themselves are not indicators of inherent quality. A piece can be hand sewn and be junk. A piece can be machine sewn and be junk. Or either can be awesome. Same applies to dyeing. I'm not saying I prefer dying by hand. I'm just saying don't discount it as amateurish until you've experimented your way through it and reached the acme of your own skill set. A lot of the details that go into a piece being "high quality" are nuanced through practice of the basics, and hand dying is one of those basics. If you think your work is poor quality when you are dying it by hand, maybe you haven't mastered the skill set yet. Just saying. Same thing with learning to use a head knife and hand cutting things that a lot of people use punches to cut. That being said, I feel like I have hand dying mastered, since it is what I've done for decades now. Airbrushing is a new skill that I am developing. I don't think my airbrushed items look as good as some of my hand dyed works. They are almost too even. But my aesthetics are my own, so what do I know? And I still eff things up frequently while hand dyeing. So by mastered, I guess I really mean I am unable to learn anything new more than I'm saying I know a lot. Regarding dip dyeing . . . I recommend that you use a large flat container (big flat storage bins work well) and dilute the heck out of your dye with alcohol (or water-- dye dependent obviously), and then pour off the remainder and rebottle it (glass jars work well). The dye goes a long way this way and you don't waste much. You probably use less, in the long run, dip dyeing in diluted solution and rebottling than you do hand dyeing. Airbrushing seems to win if you want to conserve dye in the long run. Air brushing is usually surface only, so it won't wear worth a damn. Scuffs and gets scratched up. Dip dyeing rules the roost if you want durability. Second place is hand dyeing.
-
I took a 1 hp capacitor start motor off an old air compressor in my shed and mounted it on my work bench, wired it to a 120v wall switch also mounted on my bench and then plugged that to the wall socket. I used a burnisher I got off Amazon (http://www.amazon.com/Motor-Burnisher/dp/B00JI645PS?ie=UTF8&psc=1&redirect=true&ref_=oh_aui_search_detailpage -- great item, by the way). The thing is awesome. 3400 rpm is perfect. I thought about setting it up for variable speed, but with a cap start motor, this was not an option. The static speed of 3400 rpm is perfect anyway. Glad I didn't bother. Total cost-- the cost of the burnisher, around fifty bucks. The best part is how smoothly the thing runs. Perfect burnishing every time too. It's made me realize what crappy work I used to produce.
-
So two things. First, using a dauber or small cloth to dye a larger piece of leather can actually give you nicer results than dip dyeing or airbrushing . . . it creates subtle streaks and shades in the dye job that actually enhance the look and are quite appealing to the eye, especially as the piece ages. I made a tote bag for my wife a few years ago that was (and still is) 11 x 14 x 4-1/2, and I dyed the whole thing piece by piece using Fiebling's light brown. At the time I dyed it, I thought I was botching it as it appeared streaky and inconsistent. These days, when I look at it, I realize the streaking of the hand dye job is really quite appealing and looks great. Second, airbrushing . . . you don't need a lot of equipment. I set myself up with an airbrush last year. Since I already owned an air compressor, my total cost was around fifty dollars. If I'd had to buy a compressor, I could have still done it for less than $135. All you need is a cheapo (and I mean the cheapest one you can find) airbrush from Harbor Freight Tools, hoses to connect to your compressor, and that's about it. If you'd like more details, let me know and I'll post some pics and a specific parts lists. My shop is set up now with a port for the airbrush, adjustable pressure regulator, and my cheap airbrush. I recommend you get a half mask respirator as well. I have an exhaust fan that was already in place in my shop, but that's optional as well. The evenness and consistency you can get using an airbrush is unparalleled. You also save on dye. The dyeing is almost too even and perfect . . . lacks that hand dyed streaking effect. But it is fast, easy, and clean up is quick too. I recommend it for many (but not all) dye jobs.
-
Very true. The Chinese right now are just coming into their own with metallurgy in many ways. We're seeing an influx of cheap reasonable punches and hand tools. We're also seeing some real garbage. I personally don't mind spending seven dollars for a set of 12 punches that may or may not work . . . then when they do work and work well enough for a couple years, it's great. If they don't, well, recycle or retool if you can. I myself prefer an nicely done hand tooled belt. They are piece of art. I make my own for just that reason . . . a unique wearable piece of art can't be beat. But I also wear my shirt over my belt to hide my massive gut plus all the extra body hair, so it's just for me, not for dressing up. Plus I like tooling . . . more than any other aspect of working with leather, I like tooling the most. If you want to pick up some decent tools for relatively cheap, you can sometimes find vintage or used Blanchard, Dixon, etc. on ebay. Sometimes. It takes a lifetime to collect a shop's worth of tools. Sometime's it's somebody else's lifetime and you get it on ebay. My advice, if you want to do belts, start doing belts. When you realize you need something, get what you need or make due. In other words, do it, figure it out, and make it work for you. Another reason I like working with leather . . . self education, a constant learning process. Good stuff.
-
All nice tools and great to have, but not essential to making belts. You can cut your own ends (use a pattern) and get great results. You can use a cheapo strap cutter and get great results. You can use standard cheapo Hong Kong punches and get great results. You can also use expensive tools and get crappy results. I'd save my money and do things old-school. Focus on tooling and details like edges and stamping. Makes a better product in the end. Just my two cents.
-
You can always pick up a couple premade belt blanks to try out first, then start cutting your own. Strap cutters are faster, sometimes straighter . . . once you know how to use one. There aren't any special belt tools. Same things with which you work on any leather. Depending on what you want to do. Double shoulders are good for belts, up to big fat guy sizes where they tend to not be long enough. Otherwise, use sides. Avoid the belly, tends to be stretchier. The higher up the animal, the better the belt leather. Belts are really nice gifts and projects because people really love them. My father still wears, on special occasions, some of the really nice belts I tooled for him many years ago. And the requests I get from family members for gifts are more often belts than anything else. Plus a handtooled handmade leather belt lasts so many years longer than an off the shelf piece of junk.
-
I have a Cowboy 4500 and use it without the table attachment more often than with the table attachment. I do, however, use the table attachment for some things. The answer is both. Or maybe the answer is your own personal preference. I wouldn't give up my cylinder arm. And I'm super happy about picking up the table top attachment.
-
There are a couple vids on tension adjustment. See Al Bane's instructional video for the Cobra, right around 32:54. Also, there is the video for tension adjustment on the Cowboy 4500 which is identical, really. That's at https://www.youtube.com/watch?v=udRtllp0TAo.
-
I really like mine (Cowboy). I like the machine and the table top. They work great and have increased the enjoyment I get from my hobby by 10x.
-
If you're talking about the soft suede type deer hide (what I usually see), it won't stamp. I've never seen veg-tanned deer hide for stamping, but I suppose it could exist.
-
Switch back to 207 and see if the shredding issues continue. Then you know it was not switching threads that was the issue. If the 207 shreds too, then you have some other problem that just coincided with changing threads. If the problem goes away with 207 in the machine, then rethread with 138 and try a larger needle than the 22. The needle chart is a guideline, and should not be considered the gospel. You may need to adjust the primary and secondary tensioners for the new size thread. I use 69 to 277 thread in my machine with very little adjustment, but it's a Cowboy, and all machines may not be created equal. I did see a video where they said if you went two sizes smaller (e.g. 277 to 138) you should adjust the tension disks and the bobbin tension. But if you went one size smaller, (277 to 207), you might not have to adjust. Was your machine originally set up for 277 or did it come setup and tested with 207? Check for burrs or subtle misthreading. I accidentally had my thread wrapped around the tension spring on the guide just above the final needle hole and it f'd up some stitches. Hard to spot.
-
I have a Cowboy 4500, and use it for everything from thin wallet innards to thicker bags, beefy holsters and straps. I do a lot of holsters and belts. I have the stirrup plate, holster plate, slotted plate, and the blanket set, as well as the roller feed (material) guide and the table top attachment. I use my machine with thread ranging from 69 to 277, with an assortment of needles that I match up with thread size (with some variation). The stirrup plate is useful (sometimes) for very difficult items (obvious example is stirrups, or some holsters, or sharp box corners on totes that you should have put a round gusset on instead). Using the stirrup plate requires removing the feed dog, and because the feed dog is removed, you have to help with the feed a bit. This takes some getting used to, but is easy with some practice. It is a ten minute job setting the machine up to use the stirrup plate. The holster plate is useful slightly more often than the stirrup plate. Although some people seem to be under the impression that the holster plate requires the removal of the feed dog to be used, this is not the case (at least with the holster plate I have, which I believe is the standard Cowboy holster plate). It fits on the machine without removal of the feed dog and does not interfere with the feed dog. The feed dog does not touch the material being sewn when the holster plate is being used, so you could remove the feed dog, but you don't have to do so. Like the stirrup plate, using the holster plate takes a little experience to get used to helping the feed process, but it is a useful plate for some holster situations where you are trying to get close to an edge. I find it very useful for holsters that are formed first, then sewn-- where you are trying to follow a bulging region on the backside or get around an installed piece of hardware (clip). In cases where you are sewing first, then forming, you won't find the holster plate as useful as the regular plate-- if you have a flat pancake holster and sew it up, then wet it and form the holster into it, the holster plate is not worth putting on the machine. For both the stirrup and holster plate, I find myself using the right foot only most of the time. With either the stirrup or holster plate, you'll have to greatly increase the stitch size to match up with what you normally set the stitch arm to . . . the thickness of the plates decreases the stitch length. Stitch length is a variable that is based primarily on your own aesthetic preferences, but the plates will change your stitch length. 6 is no longer 6 (if it ever was) when you use the holster or stirrup plate. I tried using the material guide (roller), but found it to be cumbersome. I prefer freehand work. There's probably a time I might use it, but don't usually. I wouldn't sell mine, but it may gather dust. The slotted plate is nice for very thin straps or softer material where the item may tend to get partially sucked into the feed dog itself. The slotted plate can help make a nicer finished backside on an item. It does require the removal of the feed dog to be installed. It also requires you to help with feeding, since the feed dog is removed to use it. Like the stirrup plate and holster plate, it has limited usefulness, but if you are willing to take the ten minutes to set up for a job specific to it, it can improve your quality for those jobs. I also have the table top attachment and use it 40% of the time overall. I don't bother to screw it down, just set it in place and it stays just fine, so it is easy to remove and put back on when I need to. It's great when you need it for larger items or flat work. I have found that I have had to adjust tensions very little for all the various items I sew. I have never had to adjust the bobbin tension. I have only adjusted the primary and secondary tensions on the upper for use with 69 thread. 138, 207, and 277 sew very well at the same tension settings. They all appear to sew wonderfully no matter what leather I am sewing, and sew perfectly on canvas and cordura as well. From my research, I assumed I would be adjusting these to sew thinner materials, but this has not been the case. I had though I might even need another machine to sew thinner materials, but at this point, the only reason I am still considering getting another machine (like a Consew 206 or the equivalent) would be due to the heavy duty marking on thin / soft materials from the feet on the monstrous Cowboy 4500, not due to limitations on what thinness of material the machine sews properly. It appears to sew anything I throw under it, no matter how thick or thin, even items well under 6 oz in thickness. It even sewed a patch on a judo uniform without issue-- basically thick fabric. Even if I found I had to adjust tensions for different thread sizes and thickness of leather, it would be just fine . . . it may vary from machine to machine, but don't be afraid to tinker. You are the boss of your machine. Experiment. If you are broke/cheap/miserly, you could easily not have a stirrup plate, slotted plate, material guide, or holster plate and still manage to do a hell of a lot with the machine nonetheless. If you can only afford one or two adders, I'd recommend the table top attachment and the holster plate, and don't bother with the rest (especially given how spendy they are). With just the table top and holster plate, you cover most of the situations you'll see. You should also have the right foot only as well as the double foot. If you were to only use one thread size, I'd probably recommend 207, but I highly recommend having 69, 138, 207, 277 on hand in black, white, and brown. You can just do more that way. Adjust needle size based on the standard chart, but even this can be fudged. Changing the machine per job to do what you want it to do is a chore, and gets a little repetitive, but when the only other option is to have two or even three machines, each configured specifically to a type of job, well, it's just fine. I hope this helps. I asked a lot of questions when I first started using my machine, and tried a lot of things. Still more to try and to ask, but this is a fairly decent summary of what I've learned so far.
-
Let them know that the lead time is ten weeks plus three days for every time they ask for another update on the lead time. Or it resets to ten weeks each time they ask. Either way, you should get a reduction is requests for updates.
-
Tandys Printable Tracing Sheets. Whats The Best Type Of Printer?
JMWendt replied to Jarednem's topic in How Do I Do That?
I trace my art onto 3 mil plastic and then trace again onto the leather. Use it once and then tack it to the wall (or discard). Everything I do is freehand anymore. I like it better. http://www.amazon.com/Clear-Lay-Roll-inches-wide-feet/dp/B0027A3HKG?ie=UTF8&psc=1&redirect=true&ref_=oh_aui_search_detailpage This stuff could potentially be used in a plotter printer, I assume. Might be able to cut it into small sheets for a laser printer or equivalent also. -
puckers in waxed canvas stitching
JMWendt replied to georgeandgracie's topic in Leather Sewing Machines
Have you tried ironing it down? -
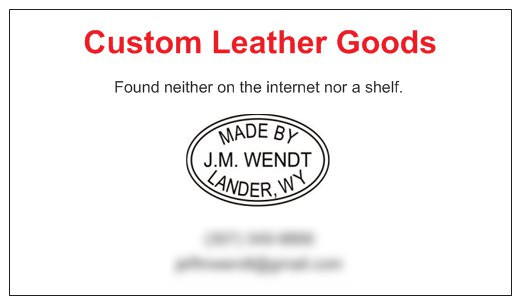
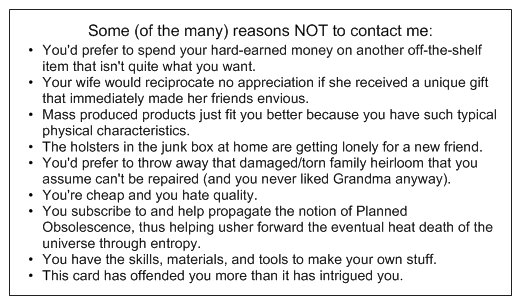
Just ordered a new batch of business cards to use to drum up limited amounts of local business. Thought you might enjoy seeing them. I've blurred my contact information, since I don't really want any non-local business.
-
Are you sewing damp leather when you are having this problem? I've sewn successfully with my machine (same machine, different company) on leather down to 4 oz without leaving marks-- wallet innards made from 2 oz pigskin. I used the slotted plate without the feed dog. You have to "help" the material feed, but the pressure is less and there is no tendency of the material to be crammed into the hole. I was using small needles and 69 thread. I only had to barely adjust the tension from the setting I have it for sewing 277 thread on beefy thick holster leather.