CraftyNick
-
Posts
78 -
Joined
-
Last visited
Content Type
Profiles
Forums
Events
Blogs
Gallery
Store
Everything posted by CraftyNick
-
 I thought I would respond with an update: I took the wool mass out of the jar and let it sit in the open air for a day or so which seemed to help it oxidize affectively. For whatever reason, the solution seems to be working now, with the intended black color showing upon contact with vegetable tanned leather. It has actually been less than two weeks since I started the batch. Thanks for the help and info of people on this board to help me learn about this. BTW, I did have to try setting some steel wool on fire just because... Interesting.
 -
I used new wool from a craft store, I didn't burn it though. Should I have? I am keeping the jar loose.
-
Hi leather workers, I heard of this natural leather blacking solution called vinegaroon from this forum, so I got myself what I heard to be the proper ingredients: 0000 steel wool, vinegar, and a glass jar, put the steel wool in it, (fluffed-up) and poured the vinegar in it. What happened is that the steel wool under the vinegar in the jar is being completely preserved from oxidizing (I presume because the vinegar is keeping it from getting oxygen). I know the wool is rust-able, because the part of the wool fuzz that is sticking up above the vinegar-level in the jar is rusting well. Has anyone had experience making vinegaroon who could explain what I am not doing right? I am confused. Thank you!
-
Beautiful! Nice job on the Navajo pattern.
-
I think the technique has potential, though as you said easier for smaller stamps. I think making use of a block of wood as the backing is a good way to go. Thanks for sharing your ideas.
-
Try some more pictures TinkerTailor. I'm intrigued to see somebody else's attempt.
-
Thanks Spindrift57, I did enjoy making the project very much. Thanks for the pointer on the book.
-
This is the 1 1/2 inch roller buckle with the center bar that Tandy sells. It's not as quality as I would like it to be, but there are not many options for this style of buckle apart from this one that I have found.
-
First project, for my daughter
CraftyNick replied to richco's topic in Purses, Wallets, Belts and Miscellaneous Pocket Items
Looks real fine for a first project. Nice color. -
There is a front/back bear paw stamp on etsy but yeah, they are $22 a piece. I bet it could be done a lot better than my first, sort of, crude attempt. Using a press might be a good idea, if you have one. Adding some backing to the stamps would be very helpful. I used a piece of leather for backing, but there are probably better materials. It was hard to hit the stamps without a post attached, so I put a regular stamp to the back of the homemade stamps and pounded the stamp indirectly through the other stamp post, which is what broke it, so a rigid backing on the homemade stamp is advisable if you are going to do that.
-
Thanks for the comments
-
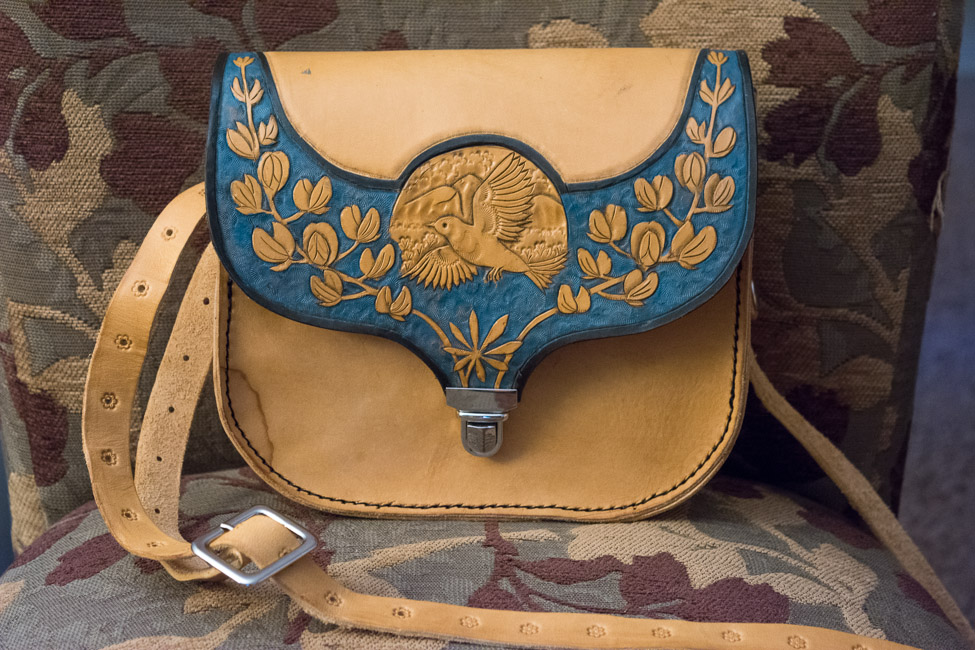
Thanks Gary. I was attempting a bit of pictoral carving there with the bird and mountains, I see what you you mean about the lack of contrast, though I was kind of confused how to pull it off with the pictoral and floral carving together. Comes from being a novice I guess. Let's just say the stitching was functional rather than fashionable on this project, along with hopes for improvement in the future.
-
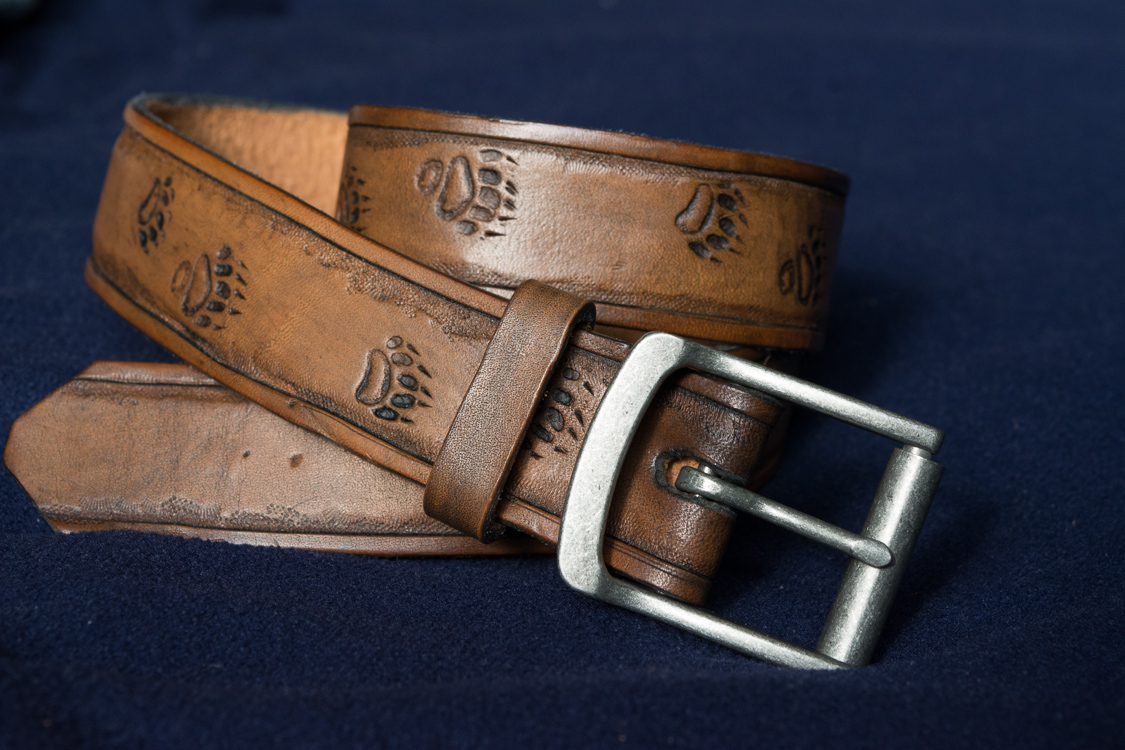
I am not asking any questions in this post about whether this would work, because I already tried it. Nor am I recommending this unconventional idea to anyone because it didn't work all that well. Just sharing for the sake of interest or discussion, or in case anyone else out there is wondering about the idea. To begin, I carved a set of tracks that I had drawn deeply into a piece of leather (one front and one back bear paw - no, I didn't bother to make a right and left - they're both left ). Then, after soaking the leather in neatsfoot oil, I filled the impressions with JB weld. After removing the JB weld nuggets from the leather cast I had semi functional stamps. The front paw was too thin so it cracked during use, the back paw just lost it's fifth toe, but they stayed together enough to get the project done. Best part of it all was that I got the belt decorated just as I had imagined. That was the whole point. (Yeah, I could have just bought a bear paw track from etsy, but I had no time to order one because I had to get the belt done for somebody's birthday and I never plan ahead very far).


-
How Do You Photograph Belts And Guitar Straps?
CraftyNick replied to UKRay's topic in Leather Photography
No fancy photography here, but as I just photographed a belt not an hour ago, I thought I would post this to show a way that looks natural to me. 35 to 50 mm focal length at f 5.6 works well to isolate the subject while not making the depth of focus too narrow.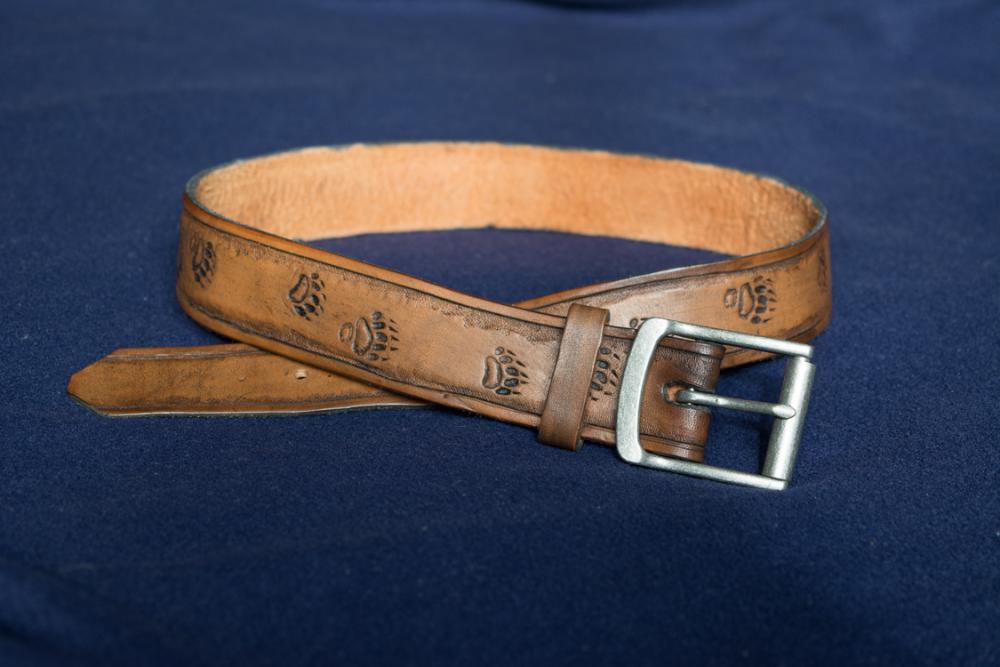
-
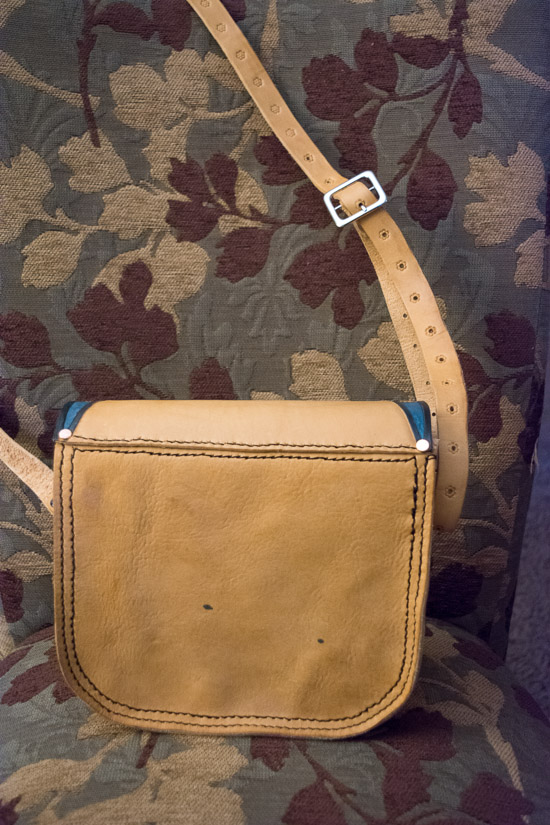
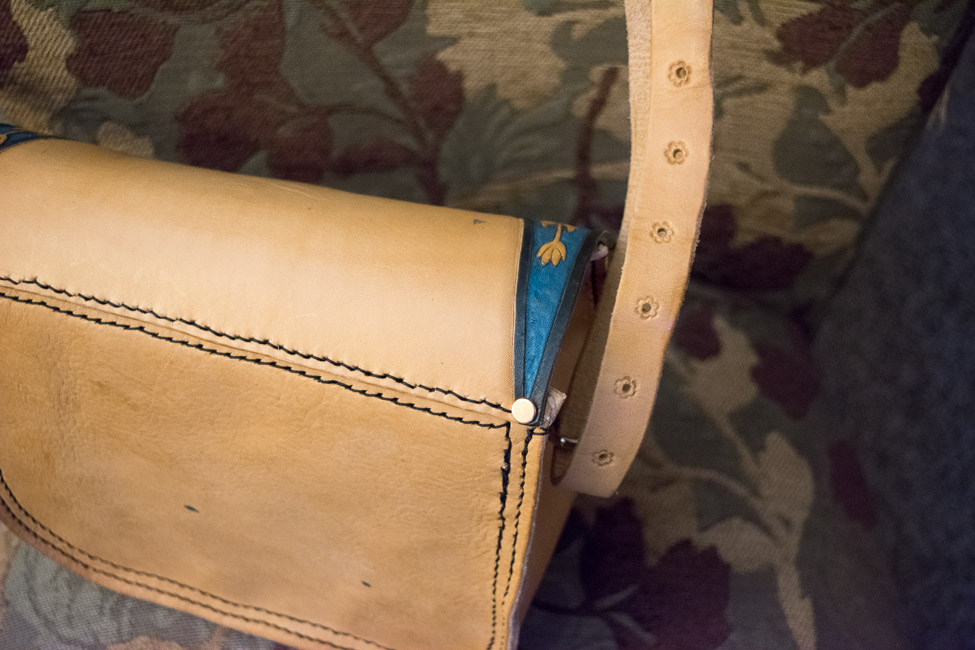
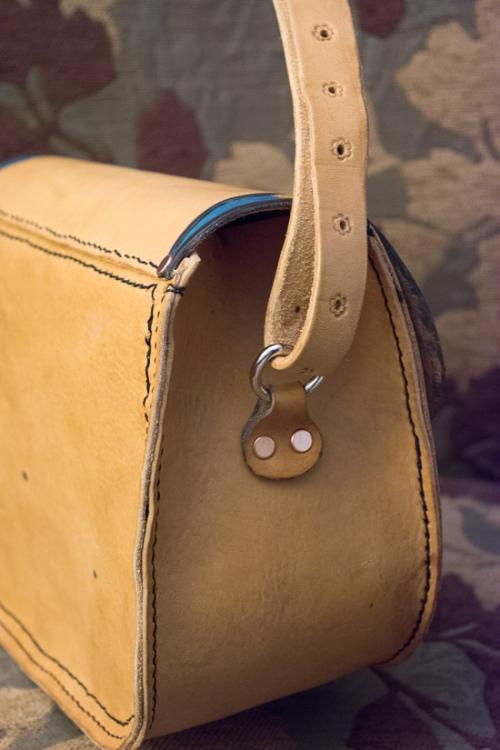
Hey thanks for the comments. Keeping the project out of trouble while shuffling it around on the work bench proved to be unsuccessful for me. I'm glad to hear there is a way to remove the water stain in the corner. Thanks for telling me about oxalic acid. I did actually try to finish the edges of the bag and strap, though obviously I need to improve my technique on that too. I did not borrow the design for the bird. I made my own design and patterns for this project.
-
Classic Leather Belt
CraftyNick replied to graybullleather's topic in Purses, Wallets, Belts and Miscellaneous Pocket Items
Nice to see someone is offering belts made the right way for everyday use. Since I'm working on a belt myself I was wondering what do you do to the insides to make them uniform? -
Saddlebag handbag
CraftyNick replied to Buttons's topic in Purses, Wallets, Belts and Miscellaneous Pocket Items
Sure looks good! I bet that took a long time. I just finished a leather bag/purse and it took me like two weeks. -
Wife's New Wallet
CraftyNick replied to ltracy1000's topic in Purses, Wallets, Belts and Miscellaneous Pocket Items
Looks like it was as rather large project. Not surprised it took a while. Did you paint the different parts of the decoration different colors with acrylic based paint? -
What kind of stitching to use for a leather bag?
CraftyNick replied to CraftyNick's topic in Sewing Leather
Thanks for the tip. I did find that the prongs tend to stick a little. -
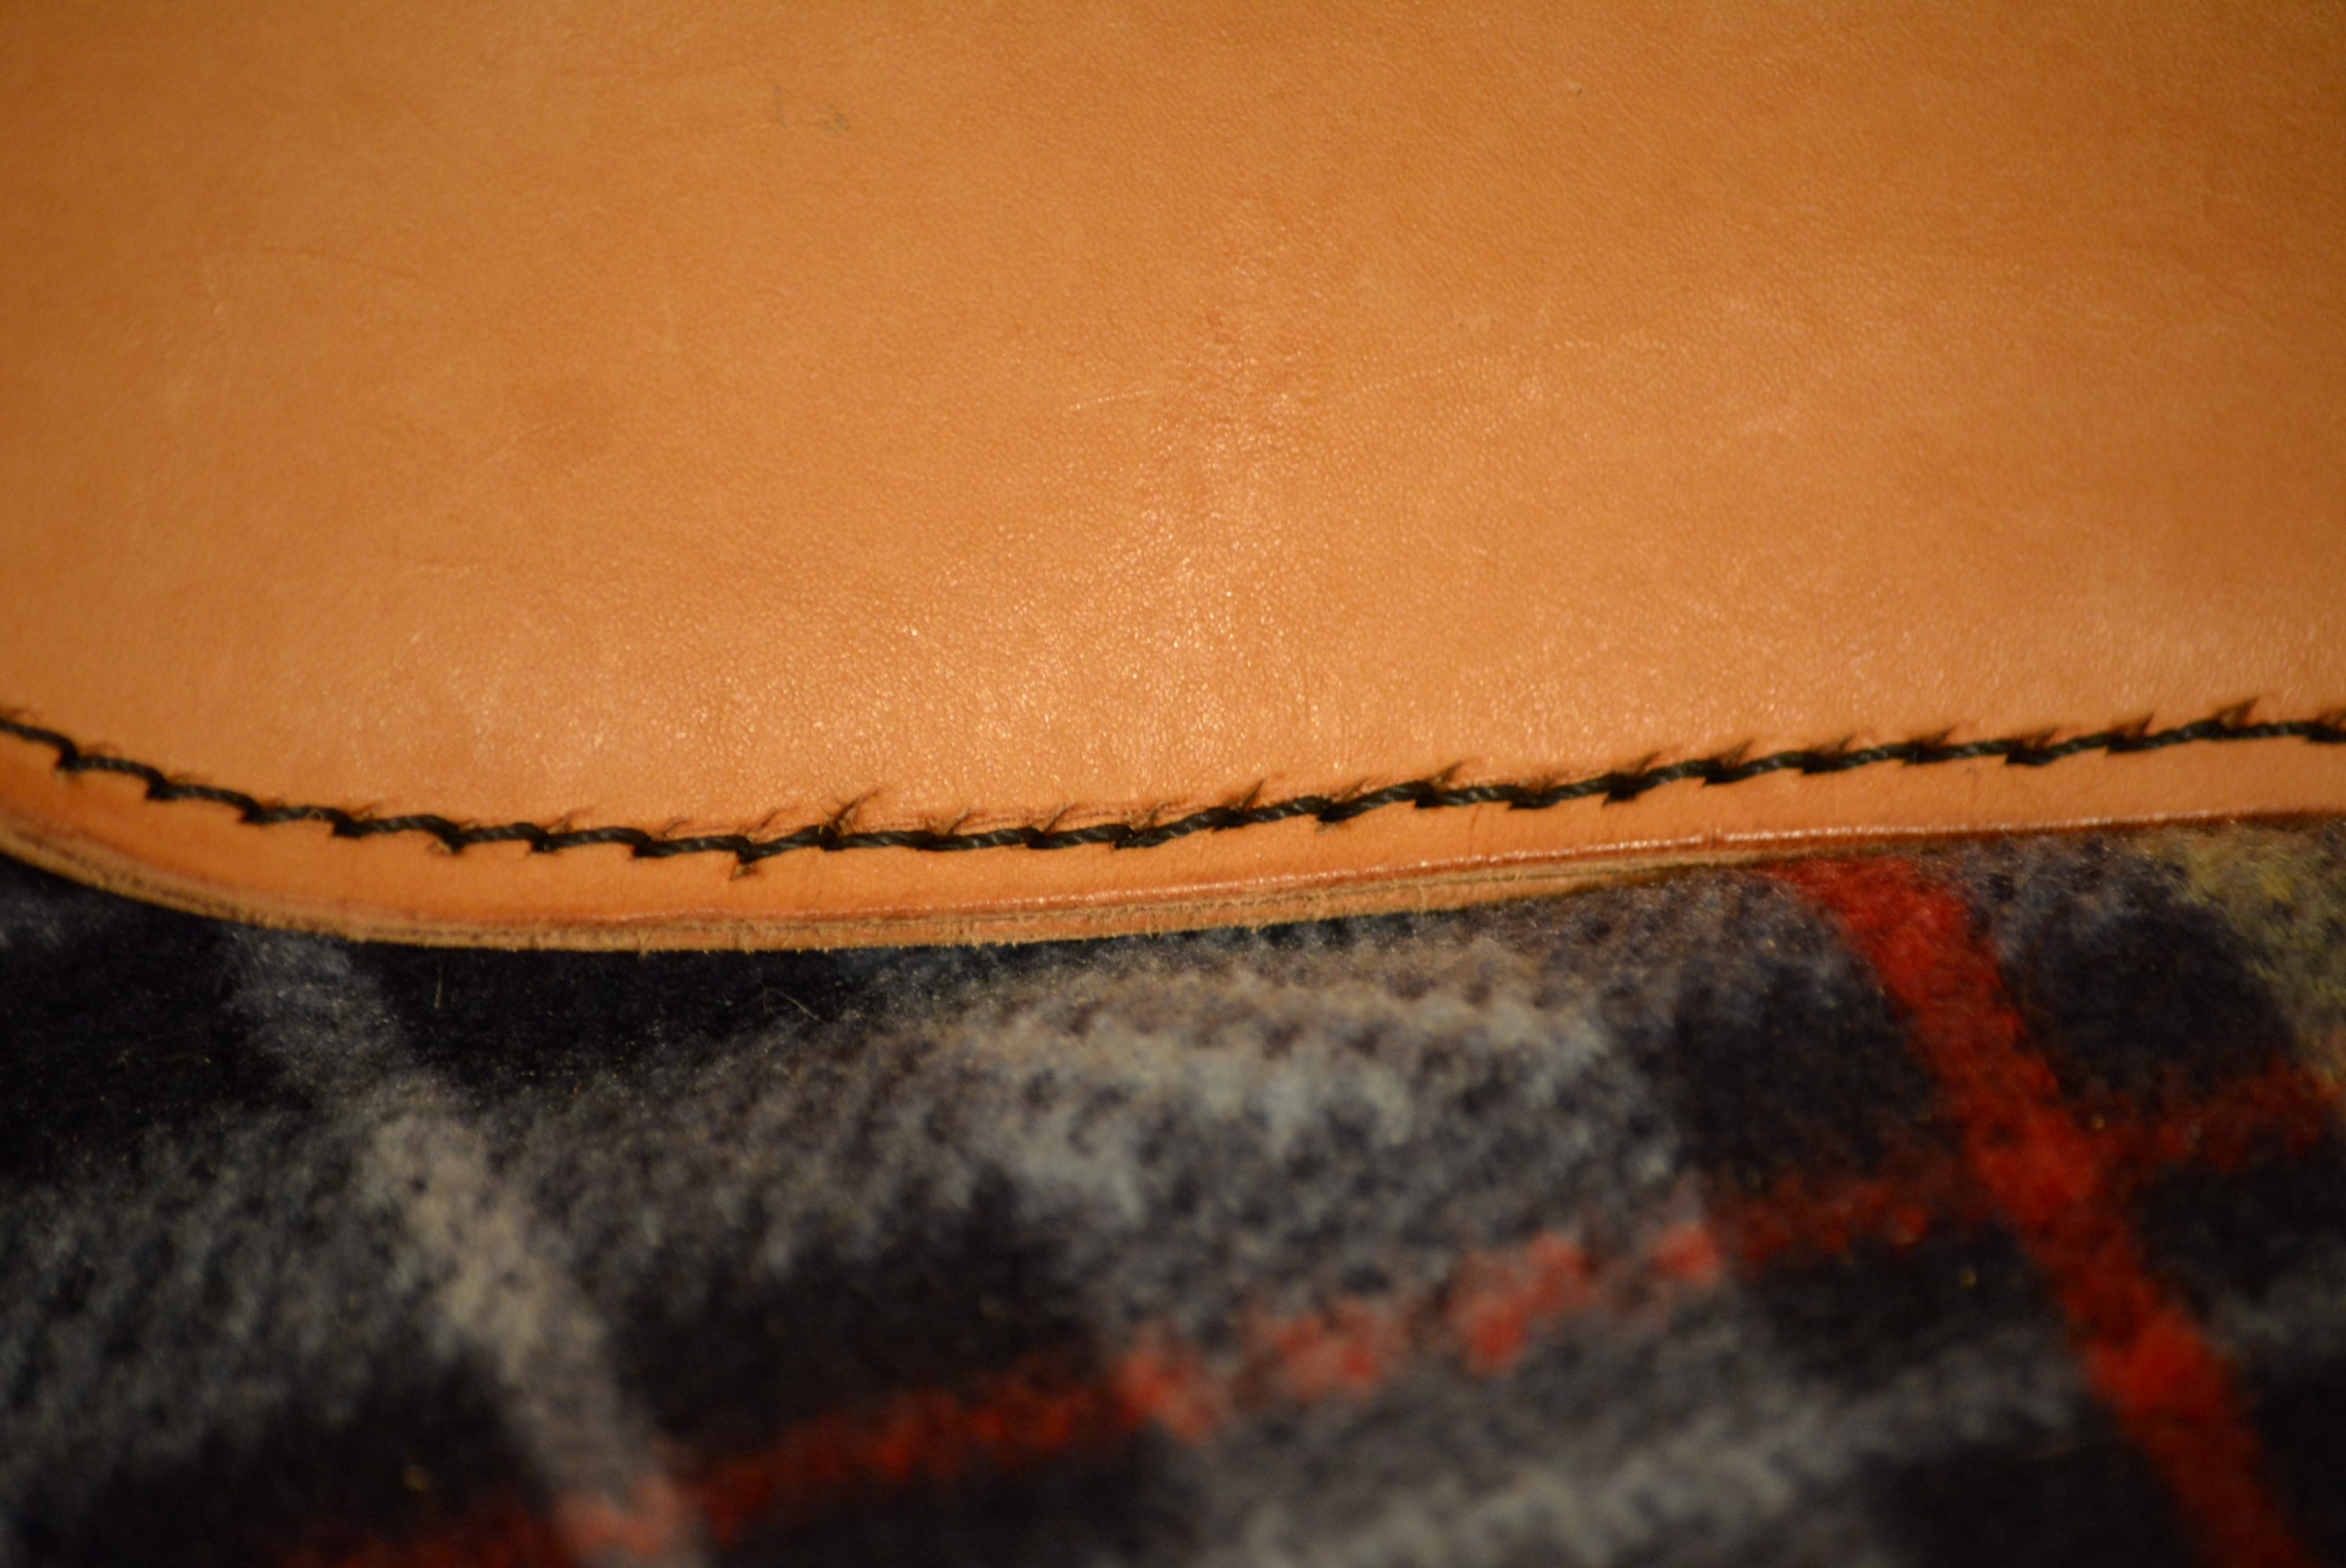
Hi Tugadude, Thanks for your comments. I see based on your pictures that I do have room for improvement in the stitching. I will have to figure out what's going on with it. I think I was doing the same thing for most stitches, but it may have gotten flipped and what not now and then. I may have noticed some mess-ups in at the time without going back to correct because I had to get the thing done. It took me like 2 hrs to sew one panel. I hope I willbe able to get my stitching to look better. I think I might have too thin thread for the holes this chisel makes. What guage/thickness thread do you use with the Craftool 3mm spacing tool?
-
I'm still learning the ropes of crafting with the leather medium, but I have not much patience for practicing rituals. Why shouldn't a beginner start with something they are excited to make? Anyway, just finished this bag/purse for my Mom as a birthday gift. Since I have been learning a lot from this board, I just thought I'd share my project Thanks for looking. I enjoy learning from suggestions and critique!


-
What kind of stitching to use for a leather bag?
CraftyNick replied to CraftyNick's topic in Sewing Leather
Thanks everyone for the replies. I'm using the 3mm spacing Craftool stitching chisle from Tandy. I thought it was a reasonable choice for a start; however, I don't expect everyone to love that brand, so please let me know if you think otherwise. I'll have to re-examine my stitching pattern. I thought I had gotten it correctly, but I'll double-check my process and see if I can improve it. There is a chance, of course, that I've gotten in incorrect. -
What kind of stitching to use for a leather bag?
CraftyNick replied to CraftyNick's topic in Sewing Leather
Here is part of the project. I think my thread was too thin to get the stitching to look angled like it is supposed to in a real saddle stitch. I learned from Nigel Armitage (or watched on youtube ) so I must have been doing it right. I was using a stitching chisel with 3 mm spacing and I don't know what thickness of thread, but I don't think it was thick enough. Do you agree?
-
I got a wing divider for the purpose of making circles, among others. It still leaves room for error in the cutting, but the line it makes with a pencil attached should be a correct circle.
-
What kind of stitching to use for a leather bag?
CraftyNick replied to CraftyNick's topic in Sewing Leather
Thanks folks for your helpful and friendly replies. I looked up a box stitching tutorial from Armitage, and after watching it I decided not to use that technique. I think I'll do a saddle stitch with the flat sides stitched together of the panels and the gusset. I watched Amitages' video on making a messenger bag which demonstrated that technique. https://www.youtube.com/watch?v=Jo_LjeRUQ_A Thanks very much. Maybe I'll post some pictures when it gets done. (Or maybe not, depending on whether I'm proud of it or just want to hide it under the bed )