-
Posts
105 -
Joined
-
Last visited
Content Type
Profiles
Forums
Events
Blogs
Gallery
Store
Everything posted by HENDREFORGAN
-
The extent to which you drive the burr or washer down the post is also something that requires knowledge of where to stop. There is a temptation with several pieces of thicker hide to truly hammer this home . . often you do yourself no favours. For the burr or washer to work efficiently it must retain it's cup shape to be able to "bite" into the copper post. Hammer it fully down and likely you'll flatten out that washer . . then it will probably slide up as you're trying to cut the post. The true beauty of this rivet system is it's ability for the metal to deform and thus make ANY removal extremely difficult . . unlike say tubular rivets it doesn't need to grasp the hide truly tight to 100% perform.
-
Undoubtedly it is and more people are prone to it than they know. A barrier of nail varnish will only work until it's eroded and never rule out that perspiration may leach the nickel contaminant out from within the leather itself? It is possible to find much larger stainless steel eyelets, etc. within fittings for maritime use but, on a smaller scale, I don't think you'll find them. The base metal is much more brittle than the mild steel beneath the electro-plating for the norm, tends to prevent the metal from "flowing" as it's condensed. One option, though a more expensive one, is solid copper rivets often refered to as "copper hose rivets" or "conveyor belt rivets". Guaranteed to give a very hand-made finish?
-
-
There are two distinct lines of discussion here, one the question that is there a universal, call it international, standard for quantifying the leather trade and two how simply crossing a countries borders can change this entirely. All things leather will, hopefully, hang onto it's unique position as a way of life that refuses to be digitized. The animals that provide the hides and the workers who remove them to continue on into the tanning process do not come in neat increments so it's not unreasonable that the trade should hold onto traditional terms. However things are changing as our world gets smaller. Both of the two suppliers I use, Abbey England and Metropolitan Leather, have long since dropped their use of "weight to measure thickness" and ALL their products are shown in millimetres . . yet they also give guide sizes for the hides in feet, inches and square feet. I suspect they, and others, made that chioce as in the worldwide trade of leather by far the most use the metric system. Does it matter that another country uses different words and terms? No, it's simply the same as understanding another language, your brain effortlessly converts that at faster than the speed of sound and, as has been said, a "cut is a cut is a cut". Many years ago, whilst devouring episodes of "the New Yankee Workshop", I could never understand the principle for sizing nails that Norm Abraham used . . he would say "a penny nail" . . how on earth could you decide to make the cabinet of your dreams on the cost of the damn nails!!! Years later I found out he was using a "penny" as a thickness gauge for the ironmongery. But then he was also using a definition for a coin that isn't even technically in your legal coinage! May your cuts always be as you want them to be no matter whatever language you use and your straight-edges always be straight no matter what measurements are on the side of the ruler your using.
-

Were machines used for leather sewing, Civil War era?
HENDREFORGAN replied to Tallbald's topic in Leather History
@TinkerTailor As an old re-enactment hand I can confirm our impossible "geekieness" . . many the hour I and others have spent discussing what the exact width in microns was for the slightly raised line around the edge of our uniform buttons . . question never seemed to get any clearer no matter how much beer we drunk either. Strange that. @Tallbald you know when you think that the US Civil War was almost solely responsible for manufacturing, more particularly assembly line production, as we now take for granted . . the Springfield Rifled Musket . . you would have thought that bright minded entrepreneurs in the North would have cashed in on the advantages of the sewing machine, driven by leather belts presumably, in turning out the many hundreds of thousands of pieces of kit that were needed, not just leather but canvas and heavy wool too. Seek the answer amongst the history of clothing suppliers at the time I would say . . if you find that sewing machines were in regular use to turn out even larger numbers of clothing then surely some machines were adapted for heavier work? An interesting question and, as one who personally strove to ensure I accurately represented the past, a keenness for truth that I applaude. -
Whilst I have used many suppliers over the decades, included oddments purchased off eBay, the only two who I 101% trust to replicate a hide that might have originally been bought from them but some of it has been on my stock shelf for several years are Abbey England (formerly known as Abbey Saddlery) and Metropolitan Leathers. You do have to accept that for that quality of service you're not going to get a cheap hide. Each and every country will have it's own unique hides that buyers in other countries will drool over . . I do with some of the leather readily available to US customers that I can't import as our authorities regard the original animal as an endangered specie . . but, on the whole, when it comes to full grain, even top grain, veg-tanned hides many will quote British hides as amongst the finest available. This isn't because we have some miracle process that we're keeping to ourselves, no, it's to do with our farmers. You see our beef cows are very well looked after during their average life span of 30 months, most fields don't have barbed wire fences and any fly infestation is quickly treated by a vet. The result is a flawless hide when tanned. You get what you pay for . . .
-
We don't think the "fluffy pipe cleaner system" is good for a sewing machine either and, maybe showing it's ability to "quote" . . "transport liquids" is bit too good, before we carried out our "cleaning operation" at the commencement of stitching leather about six or so stitch holes were tarnished with oil . . that is now only the first if the machine has been sat idle for some hours. More pix attached . . if the system will allow me that is?
-
A less than respectful set of comments Dwight, not even accurate. Like many my age - and older - I was educated in feet and inches and spent pounds, shillings and pence. Do I yearn for those earlier times? No, not at all. The reason is very simple and as clear as glass. The metric system or "decimation" if you prefer is about as easy as it can get, everything works on a factor or 10. Easy. To quote one of Western Europe's finest comedians . . . "May your god go with you". Speaking as one whose daily life is blissfully ignorant of guns and ammunition sizes . . .
-
-
Well . . we just found ourselves in a total pickle regarding this subject and our latest machine, a 205-370 which we think is an early Global clone . . it's maker's plate simply states "Fine Sewing Machine" nor does it give Country of manufacture . . and having now sewn with it we very much agree. Getting familiar with the machine, creating a snag-list and working out what accessories we might need we notice what appeared to be the remains of PURPLE pipe cleaners left inside the needle end of the sewing head. Given we might need to speak to the sales agent about these we took pix before removing the mangled pieces. Then we noticed the same wire twisted pipe cleaner was attached elsewhere to the oil feed tubes . . . poo! Had we removed something we shouldn't of? The pix below show what we found and where they were as well as the chopped pieces we removed, there is still some "purple fluff" left inside in places that needs cleaning out. So we started extensive research . . what on earth did we all do before the Internet? Pop down the local community library I seem to remember. Durkopp Adler's parts book is rubbish for this sort of investigation, I've done technical drawing in my past and I can assure the readers that whomever drew that lot of scraggly lines knew exactly where everything went blindfolded and had no intention of passing on those facts! Worse was to follow. We found reference on the web-site of a Scottish manufacturer of industrial pipe cleaners that ( sic ) "Perhaps less well known is their usage as the perfect “wick” to slowly draw and transport liquids and other volatile substances". Ohh . . double poo!! But wait . . more was to follow! @Uwe in your excellent video about "Adjusting the foot lift" at roughly 38 seconds you can clearly see GREEN pipe cleaner inside your machines sewing head. But it got worse . . a photo on Hightex's web-site for 205-370 parts showed one of the rods we found with pipe cleaner hanging off it with ORANGE pipe cleaner neatly wound around the elbow . . . Aagghhh!!! We now have to consider refitting and/or servicing ALL the lubrication system for our 205-370 given that, in all innocence, we might have disabled part of it. We do claim at least one thing in our favour though M'Lud, not only was what we removed doing nothing but, since being removed, the machine has lost a slight tight spot when being turned over by hand. So . . despite all the options discussed above . . . pipe cleaner!?! What sordid little fart thought it a great idea to wrap disposable material around thin wire and then put that in close contact with moving parts!!! Help?
-
So true, "Necessity is the Mother of invention". I began to take a dislike to the lop-sided design of my copper rivet setting tools where the hole to drive the washer down is one side of the dished recess to peen the cut rivet, it caused more lop-sided rivets applications that my judgement should have performed! So I now use a small section of brass thick walled tube and peen over the cut rivet with only my small hammer to complete the job. The diameter of my "tubes" are a more comfortable fit to the rivet stems than the proper tool and - thankfully - not had the previous sticking issues.
-
Hide of this kind defies most traditional rules, doesn't it? Your marking out and punching/pricking stitches all have to be from the inner, flesh side which, usually being a dull grey on bovine hides, is fairly clear to see. I never, ever, though stitched this hide with any form of overlap seam . . always reckoned that would be an utterly, endless, mindless game trying to find the damn hole to put the needles back through.
-
. . . probably spent all their energies painstakingly drawing Idle hands . . .
-
From amongst my list of "Useful Data Links" this one should give you hours of reading and some very useful research : http://www.therionarms.com/links.shtml Without knowing what items would be your preference my advice for guidelines would be as follows : 1. Though archaeologists argue over when the first tanneries can be dated . . boy, do they just want only 1000% proof . . man has been tanning leather since the Stone Age. One fairly new piece of important data that blew a lot of counterargument out of the water was the leather items found with the "Ice Man " Otzi, he has now been dated to about 3239 to 3105 BC and the copper items found on him shows there was no definitive "roll over year" from Stone Age to Bronze Age in Central Europe. He has tanned leather items that not only display accurate stitching but some evidence of tooling too! So, use only and/or keep to FULL GRAIN veg-tanned hides for animals that existed in the time and country for which you are recreating items. 2. Stitching was by notched thorns with animal gut sinew but rolled linen thread would be plausible too . . so much less smelly . . but NEVER make the oft-repeated mistake of assuming that just because an item was made a very long time ago it wasn't sophisticated, you'll be amazed what our very earliest ancestors did with no metal tools and only fat-lamps for light! So regular hand saddle-stitching is just fine! 3. Many leather items were entirely functional and not decorative so they were often worn, or shaped, "inside out". This is especially valid with early shoes for, with the grain innermost, it's more comfortable on a bare foot and, with the rough flesh outermost, the easiest to keep saturated with animal fat to maintain solid waterproofing. 4. Fittings. Now here is one small aspect of "period reconstruction" that truly upsets an old hand like me. Electroplated buckle and/or rivets and eyelets!! Stick to what could ONLY have been available. Brass, iron and - of course - copper hose rivets. Above all know that what you can do today can completely bring back to life something lost many, many hundred's of years ago. Enjoy!!!
-
Many of these . . leather skins . . are a triple laminate construction. The bulk of the overall thickness is virtually leather waste, often pulped and then extruded into guaranteed thickness's, in itself totally unable to provide "wear and tear". So it gets . . plastered . Top surface, being this is often only all the retail customer sees, is a plastic with a machine rolled grain and - unlike Henry Ford - customers can have it in any colour. Underside is ironically often a very thin but genuine facing of leather, this is so that in applications like bags and belts the item looks and feels right . I use a little dodge to tell if a new leather item I'm being shown is the pukka item. Hold the leather horizontal between hands and then "flex" several times, almost as if you were trying to make it fly. Now look at the top surface again . . does it now have clearly visible corrugations or even tunnels across it's surface? If it does then almost certainly you've "lifted" the plastic top coat! Homogeneous leather hide, no matter how it is split, will only have marks that will "iron out".
-
Along with the original owners manual which I've mentioned above I also have a video download from YouTube of the same thing in German, whomever posted it uploaded it as stills with dissolves between frames, to read it you pause the video. I went back to YouTube to fetch it's URL and - guess what - I can't find it. However, like the English one in our possession, I would be happy to convert the German version . . perhaps that should read "original original" . . into pages? @RockyAussie . . thanks for the tip, we'll take a close look at ours though it's producing clean stitches . . except for the usual sewing machine frustration . . getting the tension right.
-
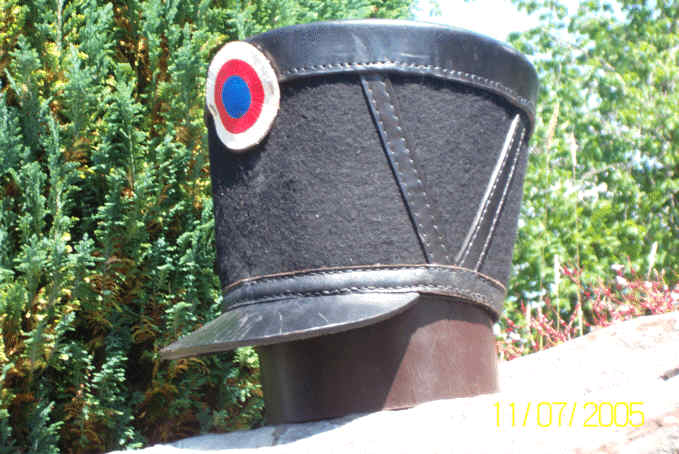
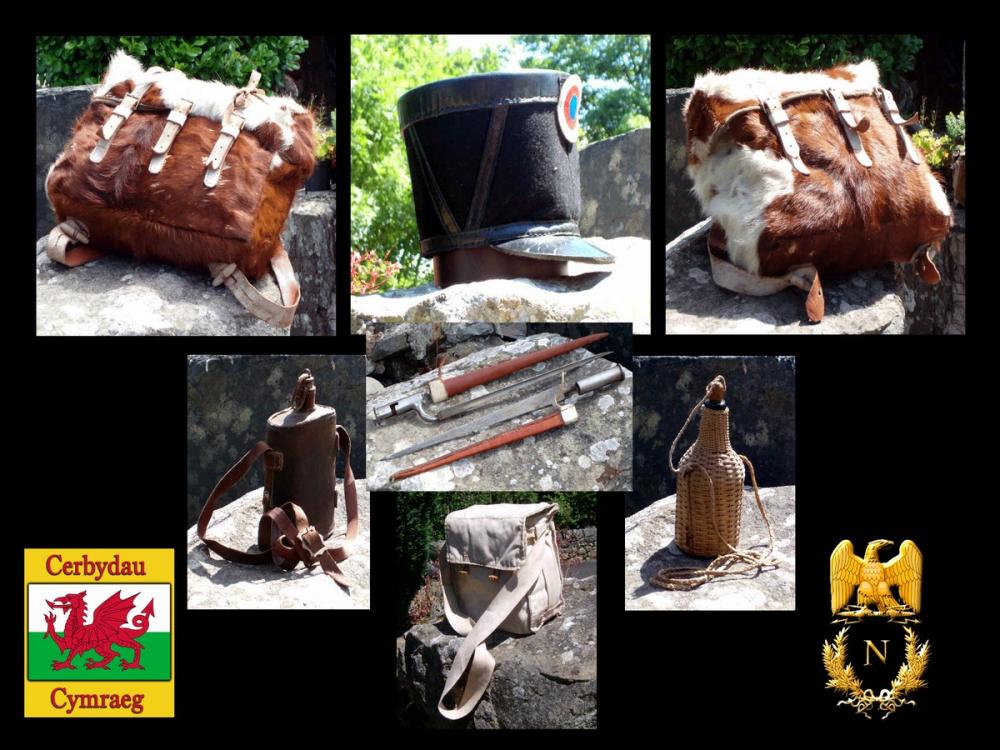
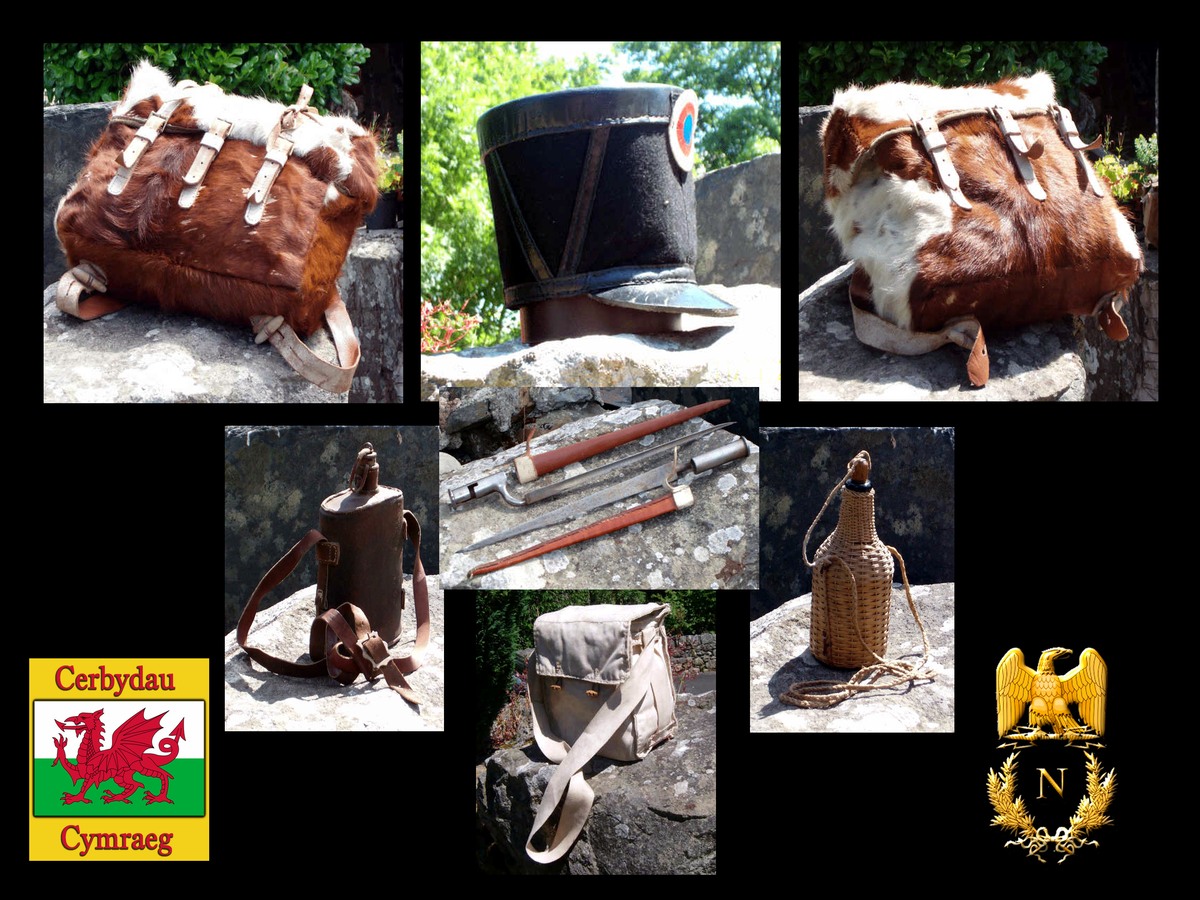
Do I still remember hand stitching the mitred corners on reproduction Napoleonic cartridge boxes . . more than 20 years since I made the last one and my thumbs still ache at the thought! Front, base and back - and that extends to form the large flap - is one piece of approximately 5mm veg tanned with the sides from the same, cut with a 45 degree mitre to fit neatly . . however as they needed to be as weatherproof as possible the corner seams were externally overlain with 2mm calf . . all leather was stained black prior to assembly. This meant that when making your holes with a really sharp awl you needed to push through - and then saddle stitch - four layers of good quality hide. They would have used an adapted post bed sewing machine if only they knew how to invent one! BTW the mitre stitching on the bayonet scabbards in the photo below are a walk in the park compared to the corners of a cartridge box.
-

Hi from West Sussex, UK. My first ever leather project
HENDREFORGAN replied to Raf65's topic in Member Gallery
I like the touch of the natural hide with your stamped logo on it being part of the "hidden detail" . . never seen that used before . . very subtle and classy. I use a five prong straight stitching iron from C. S. Osborne and Co which is measured out at 10 stitches to the inch, it's not easy to find in the UK these days and "straight holes" as opposed to "lacing holes" seems to have fallen out of favour. Yet punched into a deep groove on harness work it provides clean stitching in a nicely recessed line. Though I've used it since about 1988 I've only ever needed to lightly dress the points twice and that's because I use a "soft block" for my pricking . . actually I'll be brave enough to state that though originally trained by a saddler to use it ONLY for pricking out lines I use a rawhide mallet and I wallop the pricking iron through the total thickness of leather . . . saddler's that have passed on are turning in their graves at hearing this. If necessary I use a round dull pointed awl to clean up any holes but the punch I use give a good sized rectangular hole and it's not often I need to use the awl. Again though I was taught to use a lump of lead as the block I applied my woodworking skills to my needs and made a rectangular box about 15" x 9" and about 3" deep with glued dovetailed corners into which I put off-cuts of 3" x 3" softwood exposed end grain facing up. These are firmly secured by tapered wedges and, when the "top" gets chewed up, you turn them over. When they're done on that side too then they become firewood and are replaced by new off-cuts. Simple, cheap and highly effective. -
As for "just started crafting with leather" those images show some very clear and well presented work . . you're going places!
-
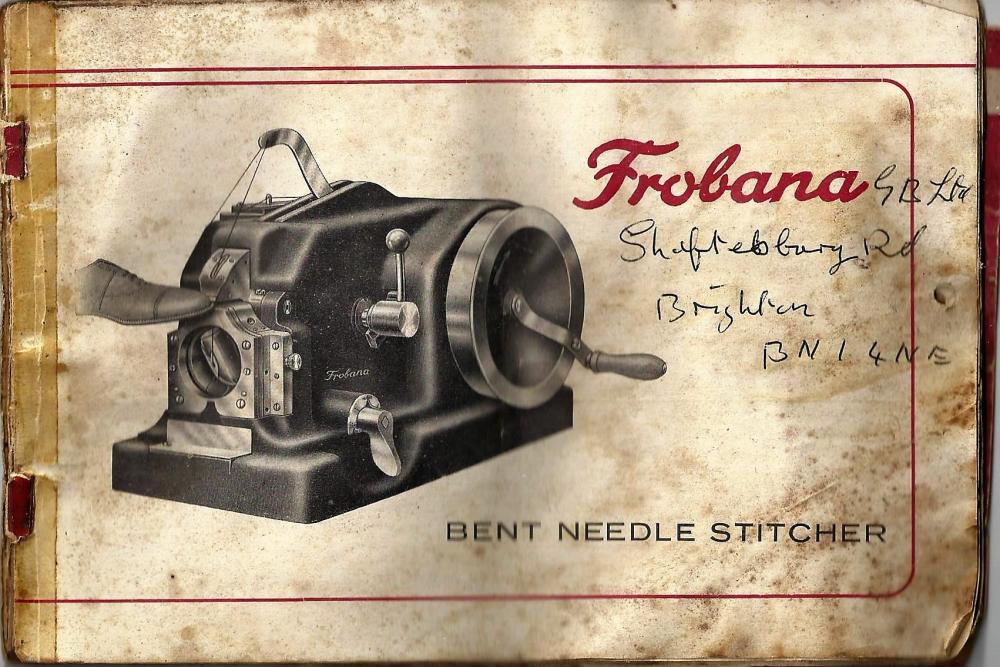
Hello Alex, I'm hoping we can help you there as our Frobana Bent Needle Stitcher (side sole stitcher) came with an old but complete instruction book in English, we've scanned the pages to digitise them but I really need to clean the files up to make those clear to read? When I do I don't know whether I can upload them onto here . . maybe there is a library somewhere in the site where the manual can then be accessed by others? Attached an example showing why the images need cleaning up. But you'll need to identify EXACTLY which of the small range of models your example of the Frobana you have, changes to the "case" seem to have made small changes to the internal mechanism. Never knew this until Google and then YouTube came along. When I got my Frobana as part of a deal in buying a Singer 29K from a retiring cobbler in the late 1980's he gave me the Frobana for free as he hadn't been able to properly use it as the safety people "condemned it" as "unsafe" . . personally I think they should have been shown video of a "Campbell Highlift" working first? They wouldn't have worried about the Frobana then! Sat in my workshops as I moved about for years and it's only now that I'm putting it into use . . I now know how lucky I was as my example is the fully fledged item on it's cast alloy pedestal. Drop me a message? Roger


.jpg.f99194d51664d05796aa8efd467793fa.jpg)
