Lobo
-
Posts
1,065 -
Joined
-
Last visited
Content Type
Profiles
Forums
Events
Blogs
Gallery
Store
Everything posted by Lobo
-
Lining is usually only a concern with blued steel pistols, as a means of minimizing holster wear. Suede lining has been very popular for many years. Personally, I prefer glove leather, with a nice buttery soft and smooth surface. Either suede or glove leather in about a 2-oz weight works very well. When lining a holster I cement the lining to the holster material (8-9 oz. shoulder), then stitch the edges where there will be no seams sewn in constructing the holster, then sew up the holster. I offer both to my customers, and find that about 10-15% of my customers want a lined holster. Lining leather adds only a small amount to material costs (maybe $2 total per holster), but it does require another half-hour of work, so I do charge extra for this. Hope this helps you.
-
Wet molding and Boning a holster
Lobo replied to jlopez's topic in Gun Holsters, Rifle Slings and Knife Sheathes
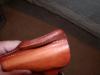
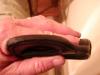
Well, we all have processes that work for us. Personally, I dye prior to even sewing up the piece. Wet-forming: -I like warm water in the winter (keeps my hands warm while I work), but cold water in the summer (same reasoning). I don't see any difference at all in the finished product. -Step 1 is to center the pistol in the holster (nothing worse than a fully-formed holster that shows the pistol to be out of line with the sewn edges or welts, if used). -Step 2, I like to work around the outer edges of the pistol first, detailing those areas and establishing the finished shape (the leather will stretch considerably during the wet-forming) and pressing in all of my stitching. -Step 3, I like to work the high areas next, rolling my tool over the slide sides of autos or cylinder of revolvers. -Step 4, I detail the recessed areas (ejection port, cylinder flutes, etc) using a rounded tool. -Step 5, I burnish my edges. For this I like to use a wooden thread spool with a bolt through the hole, chucked into my drill press. The little lips at top and bottom of the spool are perfect for working the edges. As others have noted, taking a round file and cutting a groove in the wood (spool or dowel) will provide a perfect means of dressing finished edges. I have several cut like that for various applications (thicknesses of finished edges). Then I let the piece air-dry completely, and it is time for final finishing (dye touch-up, etc). I use a liberal application of neatsfoot oil compound on everything for long-term protection, then after the oil has set up overnight I apply Fiebings Bag Kote to seal the surfaces and leave a nice eggshell luster. Attached are a few typical finished pieces from my shop.

-
Beltslide Holster For Kahr PM45
Lobo replied to Randyc's topic in Gun Holsters, Rifle Slings and Knife Sheathes
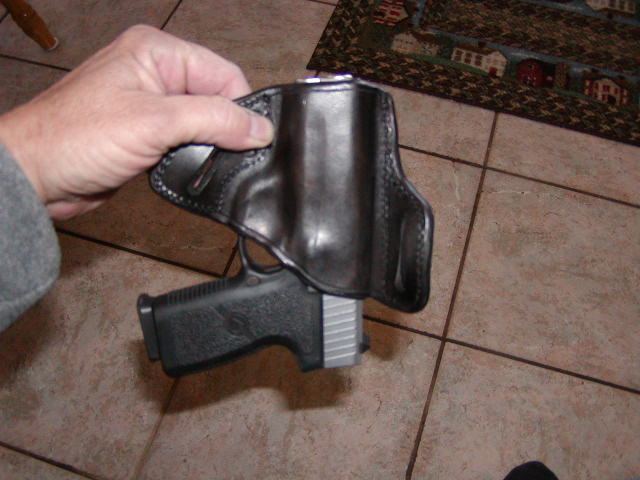
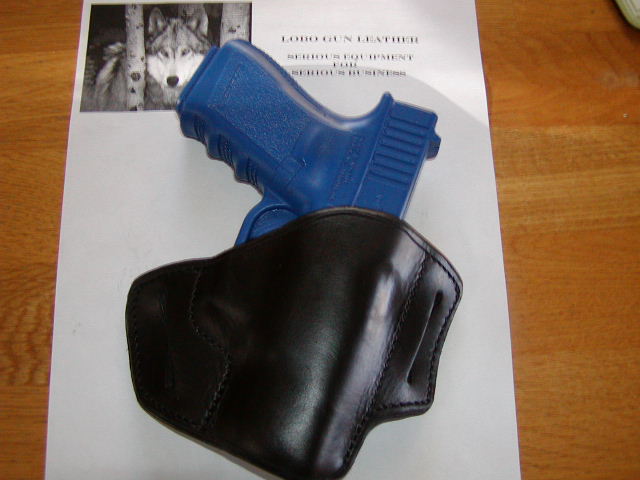
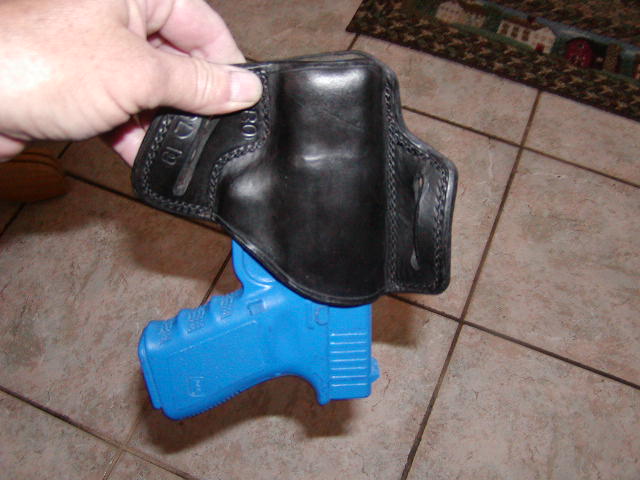
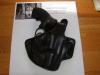
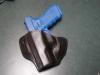
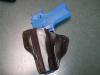
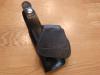
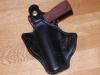
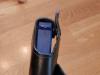
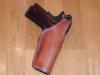
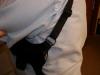
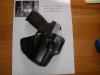
Beautiful workmanship, sir. Your execution of this piece demonstrates top notch skills. You asked for comments, so I will comment only on the basic design of the holster. I like to keep the area around the pistol grip as open as possible so the a proper "shooting grip" can be achieved during the draw. Otherwise, the pistol will require shifting in the hand prior to use. I have attached a photo of my basic pancake style with the Kahr P40 in it to show what I mean. By lowering the line of the holster at the rear belt slot area we can allow the hand better access to the pistol grip during the draw. My holster is made from 8-9 oz shoulder which, as you have noted, does not mold as easily as the 6-7 oz leather. But the second photo shows that my holster is tightly fitted enough that the fully-loaded P40 will not fall out when held upside down. Even though the molding does not show as clearly on the outside of the leather, the leather is molded to the pistol on the inside of the holster. As always, my opinions are free and worth every penny! Again, excellent job.
-
Please don't forget that your leather will stretch during the wet molding process. This is part of getting that snug fit that makes the difference in a holster. Personally, I am disappointed with any holster that I complete that will not retain the handgun when held upside down, and the pancake design adds to that by the belt applying constant tension to the handgun when holstered on the belt. High ride is fine, maximizes concealability and all. But keep in mind that the pancake design also improves retention by applying pressure to the holstered weapon (being pulled into the body by the belt), so that if the revolver cylinder is above the belt line there will be very little retention capability in the finished product. Weight of leather being used makes a huge difference. Personally, I make almost all of my holsters from 8-9 oz. shoulders. I make holsters for very light handguns (J-frame revolvers, Kahr autos, etc) from 7-8 oz. with good results. The finished holster, properly formed, becomes a structure to contain, retain, and enhance concealability of the handgun. Too light of a structure will not properly do any of these things with too heavy a handgun. Also, your question about sight channels: the basic pancake design creates a natural sight channel (provided you have front and rear leather panels of equal sizes and form the holster correctly on the axis of the handgun). This can be emphasized, where needed, to accomodate oversized or very high profile sights. Keep after it! Once you have finalized your pattern to one that works well, keep that pattern on hand!
-
PANCAKE HOLSTER FOR A BRICK
Lobo replied to BruceGibson's topic in Gun Holsters, Rifle Slings and Knife Sheathes
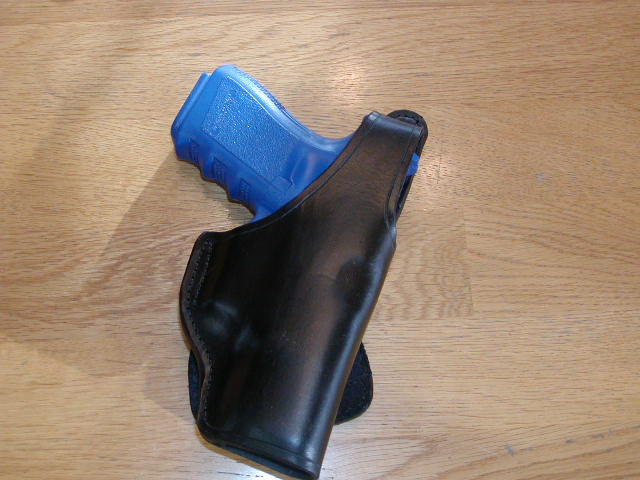
Beautiful workmanship! Holsters for Glocks make up probably 1/3 of my workload and, personally, I have never figured out just why anyone would want to carry one of them around! Glocks have all the aesthetic appeal of a brick, and provide all the comfort to be expected when one carries a brick around. Oh well, guess I'll just keep taking the customers' money and giving them what they order. -
One side double, one side single
Lobo replied to Shorts's topic in Gun Holsters, Rifle Slings and Knife Sheathes
Shorts: For me, the primary consideration would be the leather being used. For most of my work I use 8-9 oz. shoulders, which is a thickness of about 1/8", sufficiently strong for just about any holster for any weapon. For very lightweight pistols I frequently go down to about a 7 oz. leather, plenty of strength for the task, but significantly thinner and lighter, molds much more easily, and will retain its finished shape pretty well. I don't recall having a customer over the past 36 years who has worn out one of my holsters. In fact, I know of several still in use after 3 decades. So, I can see no advantage to using double thickness of leather. -
Thoughts on the classic oiled-tan finish
Lobo replied to Lobo's topic in Gun Holsters, Rifle Slings and Knife Sheathes
Room temperature on everything. Avoid cold temps for the Bag Kote (and other final finishes) as they can blotch and streak badly when cold. Couldn't agree more. My favorite by a long shot. No, I have not. Perhaps not enough time permitted between finish applications? -
Thoughts on the classic oiled-tan finish
Lobo replied to Lobo's topic in Gun Holsters, Rifle Slings and Knife Sheathes
Keeping your applications light, I think you can do 2 or more before you start to effect the structure created by the wet-forming process. I think that we develope a feel for this stuff with experience, and I have developed my processes over the years. I just load a 1-inch paint brush with neatsfoot oil and slather it all over the outside surfaces, then set the piece aside to absorb the oil from that one application and this is the result I get with good consistency. You may find some differences when making several items from different hides, with each piece taking different amounts of oiling to become more uniform in color to the others. In that type of situation, I think I would try multiple lighter coats so that the belt, the holster, the mag. pouch, etc. being made for one customer come out as close as possible in coloration. Too much oiling will definitely cause any formed piece of leather to become limp and useless. All of my holsters and belts are cut from 8-9 oz. shoulders, so there is a lot of strength there, and a lot of leather to absorb oil. Lighter weights will certainly behave differently. Hope this helps with your projects. -
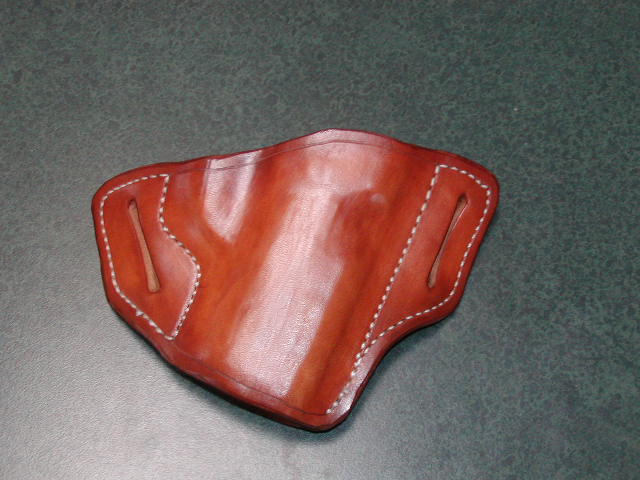
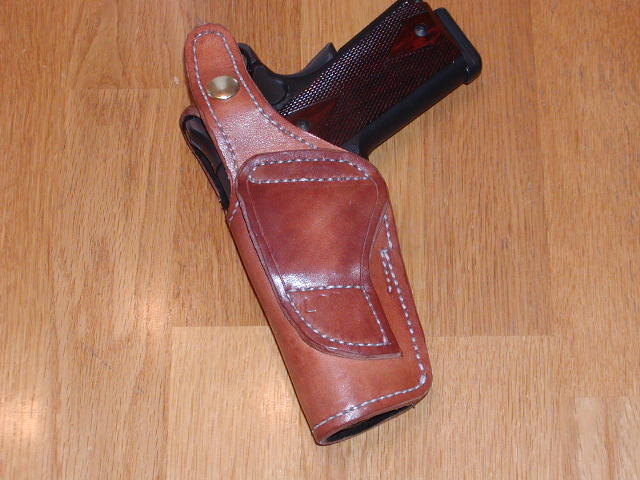
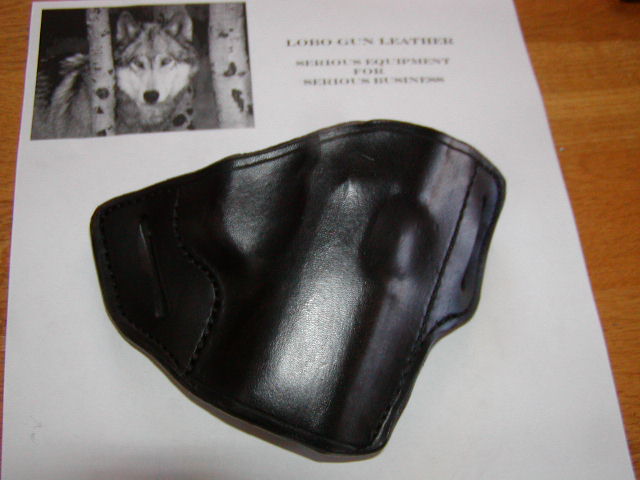
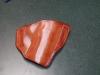
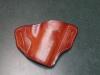
Howdy. Busy week here at Lobo Gun Leather, making serious equipment for serious business. After several years of heavy demand for black, black, and more black, I have recently noticed that more customers are ordering my traditional oiled-tan finish. Personally, I much prefer this on a finished piece, and it is dead-easy to do, so I don't mind. I don't do any other finishes (well, OK, there was that one cute female detective a few years ago who desperately wanted belts, holsters, and mag pouches to coordinate with whatever shoes or purses she was wearing, but customers like that don't come along every day). When I have finished wet-molding the holster and have burnished all the edges, I allow the piece to dry overnight (I live in Colorado, borderline desert conditions, so you might have to adjust the drying time). When thoroughly dry, I simply apply a moderately heavy application of neatsfoot oil compound. I use a paint brush, but a swab or other applicator should work as well, leaving a thorough saturation on the surface of the flesh side only. Then I allow the leather to absorb the oil for several hours. Neatsfoot oil is the traditional finish for leather goods. It is readily absorbed into the fibers and voids, providing very good long-term protection against moisture and the elements. It also provides a natural coloring and finish that cannot be matched by any stains or dyes. NOTE: TOO MUCH NEATSFOOT OIL WILL LEAVE ANY LEATHER ITEM LIMP AND USELESS. Don't overdo the oil! Two light coatings are far better than applying too much when attempting to achieve a shade or coloration. When the neatsfoot oil has been fully absorbed, I then treat the surfaces (inside and out) with Fiebing's Bag Kote to seal the surface and provide a nice eggshell luster to the finished item. Attached photos show several that I finished this morning. Notice that the edges require no additional treatment (no waxes, etc., only the routine burnishing of the finished edge, for which I use a wooden thread spool chucked into a drill press to quickly slick up the edges of each piece, takes about 2 minutes per holster). I know that many of you folks are truly artists, although masquerading as leather crafters, so you may not agree with me that this is the ultimate finish for gun leather. So be it! We all have our druthers, but I'm just an old retired copper who paid a lot of bills doing leather work over the past 36 years, and now that I am retired I find my business just growing and growing. Happy I am to give the customers what they want, since that is what pays for my adult beverages, poker games, and other bad habits. The photos were taken less than 2 hours after oiling, so the oil is still "migrating" from the edges and a few darker areas may be seen. This disappears after a day or two and the resulting finish is very uniform. As usual my opinions are free, and worth every penny of it.


-
New holster attempts
Lobo replied to Peterk's topic in Gun Holsters, Rifle Slings and Knife Sheathes
Beautiful work there. Stitching appears about flawless. Edges look great. Best regards, Lobo Gun Leather, serious equipment for serious business. -
leather paddle for holster
Lobo replied to Peterk's topic in Gun Holsters, Rifle Slings and Knife Sheathes
I make my paddles from 24 gauge galvanized sheet metal, readily available at heating and air conditioning shops. Cuts easily with hand shears (then I dress the edges on the belt sander). I place the paddle between two thicknesses of 4-5 oz. leather and sew up the paddle. You will find with paddle-style holsters that the holster itself requires some additional reinforcement. I do this by sewing a piece of the sheet metal into the back side of the holster also, lining it in with the 4-5 oz. leather. Without the reinforcement the back side of the holster quickly wears to a point that it sags and droops. Connecting the paddle to the back of the holster can be done with rivets or Chicago screws, simply drill holes through the two reinforced pieces and then fasten them together. Try leaving the rough side out on your paddles, this will add friction against the clothing and hold the holster in position much better than a smooth paddle. ] You can also make your paddle with the holster reinforcment metal extended into the body of the holster, sew it in place, then bend the metal of the paddle over a mandrel to final shape. This is how I prefer to do them now. See photos for a recently completed piece. Lobo Gun Leather, serious equipment for serious business.


-
.45 holster questions
Lobo replied to Scary Leatherworks's topic in Gun Holsters, Rifle Slings and Knife Sheathes
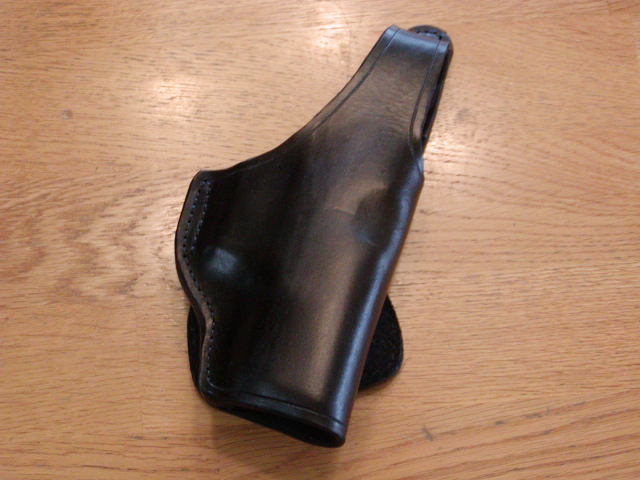
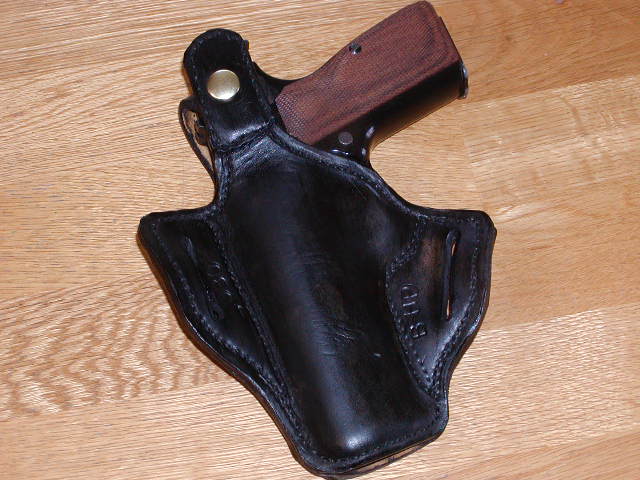
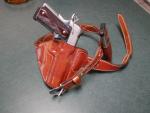
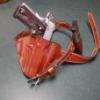
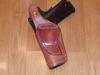
Here are some photos of holsters I have made with thumb-breaks. I reinforce the thumb-tab with a strip of 24-gauge sheet metal sewn in between two pieces of leather, then pierced for the snap. For the 1911-style pistols, when used for defense purposes, "Condition One" (cocked and locked) is the sensible method of carry. Thus, the thumb-break design not only provides for retention, but also provides an added measure of safety to the practice. If using the "blue gun" to make this holster, it is advisable to cut the hammer off of the blue gun so that the strap and snap fit is correct. Lobo Gun Leather, serious equipment for serious business. Colorado Territory, USA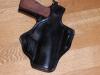

-
Newbie in Michigan. Need help with holster
Lobo replied to Snakebyte's topic in Gun Holsters, Rifle Slings and Knife Sheathes
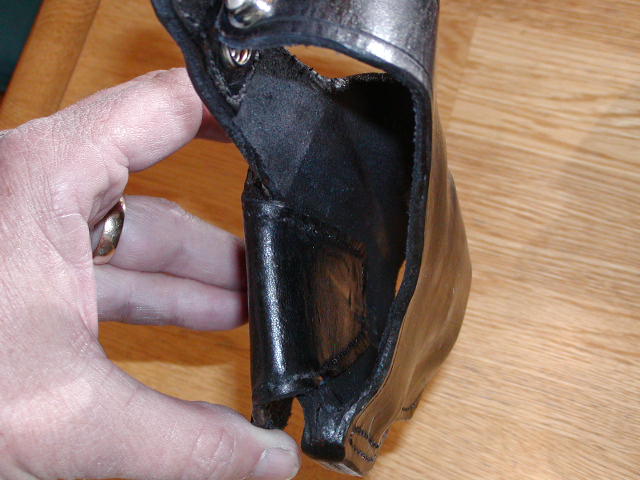
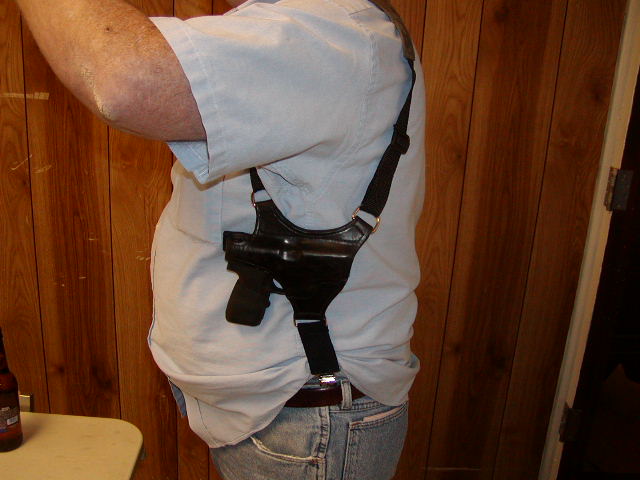
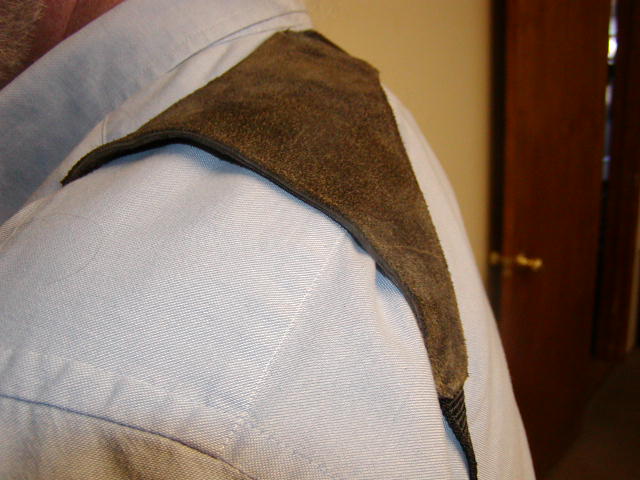
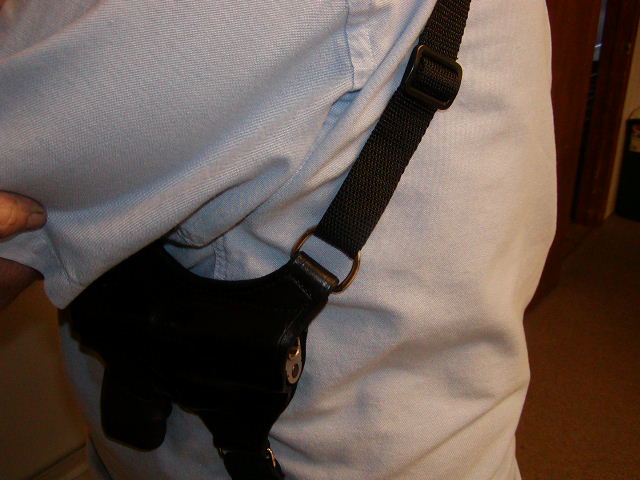
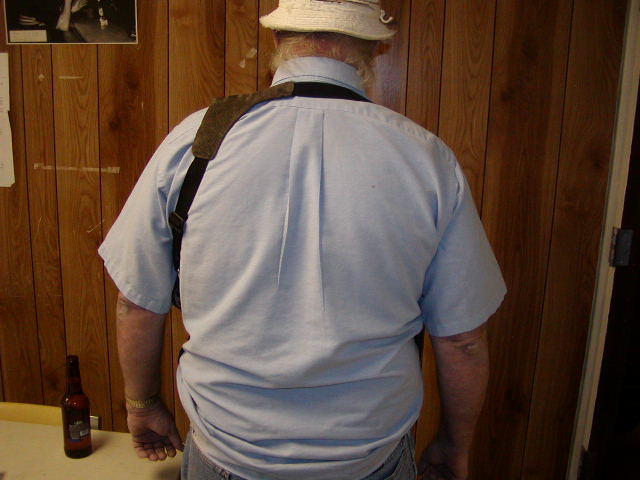
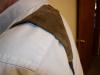
I like simple solutions for simple problems. Here are my suggestions, based upon 36 years of holster-making (and using them during my 24 year law enforcement career): 1. Leather: for lighter-weight pistols, 6-7 oz. vegetable tanned works well; for larger and heavier pistols, 8-9 oz. provides better service over the long term. 2. Tools: sharp utility knife (an Xacto knife can be handy as well), overstitching wheel (6 stitches per inch works well), stitching groover, stitching awl, harness needles, waxed thread (synthetics like polyester or nylon work very well). These are the basics; I talk a little about others as we go along, but you can improvise. 3. Execution: -trace the exact outline of the pistol on heavy paper (manila file folders work well) -draw two parallel lines horizontally through the pistol outline at the point you wish for the holster to ride on your belt. Note: belt size is critical to how the holster will ride, so make belt loops or slots to the exact size of the belt to be used. -draw the outline of the holster shape. Note: allow clearance around all handgun "controls"; you don't want your holster to pop the magazine release or slip the safety off. Also, I like to allow as much clearance as possible around the handgun grip so that a proper "shooting grip" can be taken during the draw, and you don't have to shift the pistol in your hand prior to engaging a target. -measure the thickness of the pistol, divide that by two, then draw an outline around your pistol tracing to identify your stitching lines. -transfer your pattern onto your leather. A standard #2 pencil works well to mark your pieces for cutting. -cut your pieces, mate them together, and cement them in the areas where they will be sewn together. Contact cement works best, but for a one-time or occasional project good old Elmer's Glue works quite well. Note: when cutting, don't try to force it; two or three passes with the knife will result in a better job than one heavy push that will rip and tear all over the place. -lay your pattern over the outer holster piece, use the overstitching wheel to mark the stitching lines around the pistol. The points on the stitching wheel will mark right through the manila file folder material, leaving an easy to follow pattern on the leather. -set your stitching groover to about 3/16", then cut a stitching groove around the perimeter of the holster on the outer side, then use the overstitching wheel to complete the stitching pattern (from the lines around the pistol, connecting with all the perimeter to be sewn). -use the stitching awl and mallet or hammer to pierce all stitching holes -using two harness needles and your thread, saddle-stitch the pieces (one needle at each end of about 5 or 6 feet of thread, through the first hole then matching up the thread on each side to even lengths, then through each stitching hole with one needle from one side then the other needle from the other side, pulling snugly every second or third stitch to a uniform tension). Note: make your final stitch along an edge, pushing the needles through between the leather to the outside, then tie a knot inside the two pieces of leather. The small "bump" of the knot can be smoothed out during the wet-forming process, and you won't have to worry about the stitching coming loose. -for a pancake design, now is the time to cut your belt slots. Try a 1/4" hole at each end of the slots, then use a sharp wood chisel to complete the slots. Then dress the edges of the cuts to a smooth finish. -after stitching, thoroughly wet the sewn holster, then force the pistol into its position inside. Using a smooth, rounded tool (like the handle of your overstitcher), gently and firmly work over the formed holster to force a very tight molding around the outline and details of the pistol). Note: try and leave the gun unloaded during this operation! Also, now is a good time to insert your belt through the loops and pull those into the final form desired and needed. -allow the holster to air-dry with the pistol in it for an hour or two (depending upon weather and humidity, this time can vary. I live in Colorado, where we have very little humidity and the leather dries quickly. You may have to adjust). -When the leather has begun to dry, remove the pistol and allow the holster to complete drying. This allows a small amount of shrinkage, thus a tighter final fit. Final drying will probably take 12 to 24 hours. Clean and oil the pistol now, don't let it rust up on you! -good time to dress all of your edges, removing any irregularities. A belt sander works great. A small drum sander chucked into a drill press works wonders in tight areas. A nice even surface is what is required. Careful with the sanding process, it is easy to build up too much heat and scorch the leather. -burnish the edges, if desired. A wooden thread spool with a bolt or machine screw through the hole, then chucked into a drill press, will polish the edges very quickly, and the little lip on the thread spool will work the cut edges down very nicely. -when fully dry, apply any dyes that you wish to use and allow that to completely dry. -I like to apply a moderate amount of neatsfoot oil compound at this point for long-term protection of the leather. Using a swab or brush, apply the neatsfoot oil liberally, then set the piece aside for an hour or two to allow the leather to fully absorb the oil. Too much oil will make the leather limp, thus pretty useless for the intended purpose, so don't over-do the oil. -apply your final finish. I like Fiebings Bag Kote for an eggshell luster. If you want a higher gloss, try Leather Sheen. Final step: strap it on your belt, insert your sidearm, and call it a done deal. Assuming you are going to rely on this rig for self-defense, practice with the holster and your pistol (unloaded, of course) for 5 minutes every day until the act of drawing the pistol becomes part of your memory, as familiar to you as picking your nose. Should the day ever come when you have to deal with a threat warranting deadly force, you don't want to have to stop and think about what you are doing; you want it to be an automatic response, smooth and natural. I hope this helps you. When I started in 1972 I didn't have a clue. I just kept making another one until I got what I wanted. Other cops starting coming to me and wanting a holster for their new gun, so I kept getting more experience. Now I turn out 12 to 20 per week, and I still keep coming up with a little innovation from time to time. Keeps an old retired copper out of trouble, and provides a little income to cover my beer and poker money. My latest project: a holster for a retired copper who can't wear a belt because of an old back injury. I just love a challenge now and then! Pictures attached. Horizontal shoulder holster with thumb-break, suede leather shoulder piece to carry the weight gently, 1.5" suspender strap with alligator clips to connect to the waistband. Very comfortable! Best regards. Lobo Gun Leather, serious equipment for serious business. Colorado Territory, USA -


-
Exceptionally nice piece, Randy. Top marks on your execution. It is always nice when a customer advertises your work for you! You made your customer happy, and you deserve it. Lobo Gun Leather
-
stitch line allowances on holsters
Lobo replied to Peterk's topic in Gun Holsters, Rifle Slings and Knife Sheathes
About 90% of my production is pancake-style holsters in 8-9 oz. shoulders. When making a new pattern I always lay out the stitching exactly one-half the thickness of the pistol away from the outline of the pistol. Wet-forming will result in considerable stretching, so the resulting fit will be a small distance from the pistol outline. The only way I know of overcoming this would be to use a pneumatic or hydraulic press to form the leather prior to stitching, and that would make the sewing a real chore! Attached are some pictures of a few recent production holsters; these were posted here a few weeks ago with my comments on fitting pancake-style holsters. As you can see, the fit is so close that the guns will not fall out of the holsters. Sounds to me like you are doing just fine as it is. I wouldn't worry about little things that make no difference in the usability or overall appearance of the finished product. My customers never have, and I've been making holsters for 36 years. Lobo Gun Leather, serious equipment for serious business.


-
Going To Try Some New Leather
Lobo replied to Randyc's topic in Gun Holsters, Rifle Slings and Knife Sheathes
Randy: For the finest in custom leather work, I agree with the admonition to use knives. However, since my production has grown (now doing 15 to 20 holsters per week), I have been looking for methods to speed up some of the processes. For cutting 8-9 oz. shoulders I am now using an electric sheet metal shear (auto body tool) with very good results (I can cut a dozen patterns in under an hour). I do not use this tool for any very close work, leaving that for the knives. But for straight cuts and modest curves it works just great. The tool does leave a slight "trail" on the underside of the surface being cut, so I lay out my patterns on the smooth side and cut with that side up. Greatly speeded up my production and saves me a lot of pain in my old grampa hands, wrists, elbows, shoulders (well, you get the idea). Lobo (Lobo Gun Leather, serious equipment for serious business). -
oil and moisture inhibitor for leather
Lobo replied to Peterk's topic in Gun Holsters, Rifle Slings and Knife Sheathes
The oil is almost without a doubt neatsfoot oil compound. Personally, I don't dunk my holsters, but each gets a liberal application done with a loaded paint brush. The leather absorbs it quickly and neatsfoot provides excellent long-term protection. Excessive application of neatsfoot oil will leave any leather limp and useless, so until you get a feel for working with the stuff remember that multiple light applications are better than one heavy application. After oiling (and 24 hours for the oil to settle into the leather) try Fiebing's Bag Kote, an old saddle-maker's favorite. Sprayed or swabbed over the exterior, it provides an excellent surface seal and cures quickly to a very nice egg-shell luster. Apply it inside to seal the grain side and it will also make the interior surfaces lie flat and smooth for a very nice finished appearance. For a higher luster on the exterior, try Fiebing's Leather Sheen, also can be sprayed or swabbed. Tip: Always use the Bag Kote and the Leather Sheen at room temperature. If it is too cold it can blotch and streak with no corrective processes known to me. Lobo (Lobo Gun Leather, making serious equipment for serious business). -
My first holster attempt...
Lobo replied to Peterk's topic in Gun Holsters, Rifle Slings and Knife Sheathes
Excellent first attempt. Nice wet-molding and the stitching looks very good. Burnishing: I use a variety of old wooden thread spools with a bolt or machine screw through the hole, chucked into a drill press. I do my burnishing while the holster is still damp from the wet-forming process. Glass-smooth finish and those little lips on the ends of the spools work very nicely for getting the very edges slicked up. Various spool sizes work out all the little curves. Burnishing requires friction and no hand method can provide the friction that several hundred RPM's can! Edge finishing, generally: I use a bench-top belt sander to smooth out the edges, especially where two or more layers are sewn together. Works great. Also best done while the leather is just damp (avoids too much heat and scorching the edges from the friction). Any sanding belt will work, but I usually use about a 100 grit. Hand-stitching: I use a stitching groover to assure even spacing from the edges. Lay out your stitching with a simple stitching wheel (about 6 stitches per inch works well for most work). Then I punch the holes using a stitching awl chucked into a drill press, the drill press table provides a nice solid horizontal surface and the hand-crank dropping the awl to the marked holes provides all the pressure needed to pierce two or three layers easily and quickly. For sewing, nothing beats a stitching pony, holding the work conveniently and securely. A small pair of pliers is a great aid in pulling the needles through the work. Keep at it! You are doing great work. Lobo (Lobo Gun Leather, making serious equipment for serious business). -
1st holster completed! S&W 629 Pancake
Lobo replied to gavingear's topic in Gun Holsters, Rifle Slings and Knife Sheathes
Looks great! For a first project I would say this is an exceptional result. -
Fitting for pancake style holsters
Lobo replied to Lobo's topic in Gun Holsters, Rifle Slings and Knife Sheathes
Thank you, sir. My process appears to be very similar to yours. Stretching is very much a part of the wet molding process. I have not tried the rubbing alcohol treatment, but I imagine it would work quite well (I live in an area where the average humidity is just above desert conditions, so water works well for me). Close forming definitely eliminates the concerns of loosening with wear. I have customers still using holsters that I made in the mid-1970's. Best regards. -
Fitting for pancake style holsters
Lobo replied to Lobo's topic in Gun Holsters, Rifle Slings and Knife Sheathes
Thanks for your comments. I allow exactly the amount needed to fully encase the pistol into the leather, relying upon the natural stretching of the leather during the forming or "boning" process. For a pancake-style holster this means that I outline the stitching exactly one-half the thickness of the pistol around the outline of the pattern. All of my holsters are made with 8-9 oz. shoulders, so there should be little difference if you are using lighter weight materials. I am selling 12 to 15 holsters per week, all concealment oriented models, mostly to cops and other professionals that not only need to carry, but want to keep it truly concealed. The pancake design is one of the best and most popular. Properly fitted, this style can provide excellent retention qualities without additional features like the thumb-break. Best regards, Lobo -
Fitting for pancake style holsters
Lobo replied to Lobo's topic in Gun Holsters, Rifle Slings and Knife Sheathes
Thanks for the note. I wet the stitched holster with luke-warm water until it has absorbed as much water as it will hold, then set it aside. Excess water will evaporate in a few minutes (here in southern Colorado where we are in nearly desert conditions). Then the fitting and boning process is done, as described. Dying is usually done prior to the wet-forming process, but will require touch-up afterwards. I only do oiled-tan and black finishes, so I don't have the headaches some of you folks have with elaborate dyed finishes (all of my production is for concealed-carry use, so I don't do any fancy finishes or tooling). Final finish for all of my holsters involves a liberal application of neatsfoot oil compound (allowed to settle for about 24 hours) followed by surface treatment of Fiebing's Bag Kote, leaving a nice egg-shell luster with excellent protection of the finished product. Note that I apply neatsfoot oil compound to all finished products, whether dyed or left natural. The long-term protection provided is well worth the effort, and it provides a finish that no dye can match on undyed leather. The Bag Kote is an excellent product, easy to use, and the resulting finish is superb. Over-application of neatsfoot oil is to be avoided, as it will leave any leather product limp and useless. One moderate to heavy application, then seal the surfaces completely with the Bag Kote. Be careful with the Bag Kote, it must be applied at room temperature or it will streak and blotch with no remedy known. Keep on doing it! Lobo -
My First Two Pocket Holsters For Sale
Lobo replied to okie44's topic in Gun Holsters, Rifle Slings and Knife Sheathes
Nice looking work and a good design. I agree with the others on applying a finish coat, those pockets can become damp places and untreated leather will absorb moisture like a sponge. Good handguns deserve protection. Lobo -
Fitting for pancake style holsters
Lobo replied to Lobo's topic in Gun Holsters, Rifle Slings and Knife Sheathes
Sorry, all the photos didn't attach. Trying again.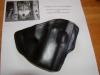


-
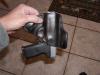
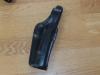
Howdy again. Another passably good week here at Lobo Gun Leather, making serious equipment for serious business. Pancake style holsters have been very popular since the early 1970's, and I imagine that you have all seen (just like I have) some very good examples and some lesser specimens. In my opinion, fitting the holster to the weapon it is to carry is one of the more critical requirements. I make my patterns carefully for cutting the leather and marking the stitching lines, taking careful measurements of the thickness of the pistol as well, which allows for a stitching pattern that will allow very close fitting. I then wet-form the sewn holster to the pistol, boning the leather carefully to mold it exactly. Then I allow the piece to sit for about one hour (here in very dry Colorado), then take the pistol out and allow the holster to dry fully (usually overnight). Attached are a couple of examples of recent work. One is for a Kahr P40, shown upside down with a fully-loaded magazine with the holster fully retaining the pistol. The other is for a Glock 19/23, shown upside down with a weighted 'blue gun' fully retained. This design allows for a correct 'shooting grip' to be taken when drawing the weapon, and the weapon can be easily drawn without any interference. But the very tight molding of the holster retains the pistol very well, even when running, jumping, climbing, rolling around on the ground, and all the other activities an armed combatant can be expected to engage in. I also make holsters with thumb-breaks and other retention devices, as specified by the customer. But I have no qualms about recommending my open-top pancakes for regular concealed carry without having to worry about losing your piece. As usual, my opinions are absolutely free and worth every penny! Hope you all have a great day.