-
Posts
73 -
Joined
-
Last visited
Content Type
Profiles
Forums
Events
Blogs
Gallery
Store
Everything posted by Wulfing
-
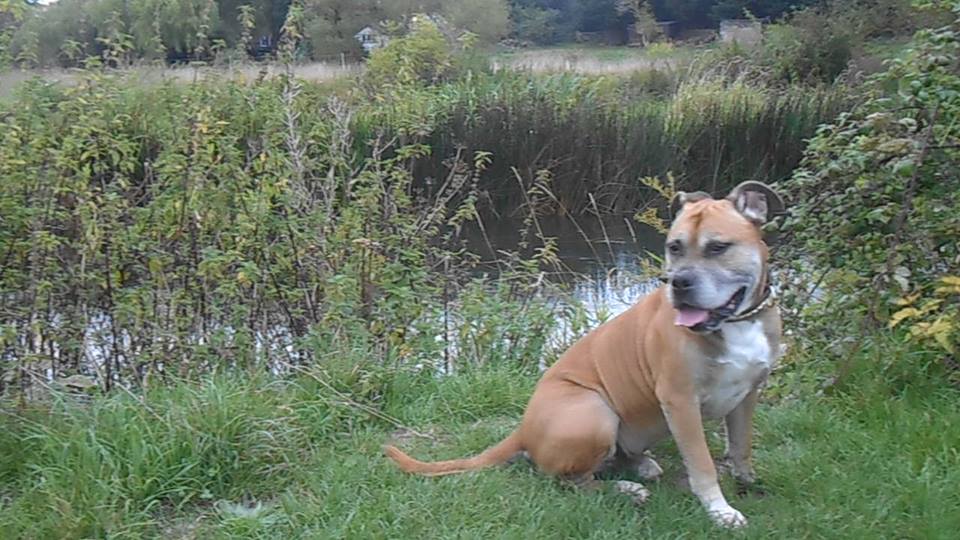
here's a few pics of Hank heres a few pics of hank. Hes 10 now so getting a bit grey round the chops lol
-
Another idea is to make the stitching lines part of a carved design rather than just a line around the edge. I'll hunt out the picture I saw on pinterest. I'll give it a go when my stitching gets better.
-
Thought I'd tell you all about a mistake I've been making with skiving. I thought I'd be a clever and skive with my dremel tool sander rather than with a skiving knife. Not only is it messy as leather dust everywhere but for the last week my left eye has been swollen shut with a bad infection............... It seems leather dust can carry all kinds of chemicals and bacteria into your eye. The doctors had to cut into my eye it was so infected. They kept me in hospital for 2 days. It's starting to open now but just thought I'd say to people wear protective glasses or 100% better use that skiving knife!!!
-
In the uk Le prevo do some good quality stamps. The ones I brought from amazon for 15£ for a pack of 10 were awful..... The background shader wasnt sharp enough so just left a flat shape and the beveller was kind of smooth / nearly rounded so it didnt dig into the bottom of the cuts!! Infact I've pretty much thrown away all the cheap tools I started out with and got new ones that actually work! The sciver was just useless, the edge groover kept moving as it wouldnt tighten up, the cheap hole punches went blunt after 2 minutes lol I guess some of it was down to me being new and a lack of skill but it's so much easier when you're new if you have good tools.
-
I've just had a delivery of some lovely pigskin suede (suede both sides. It's beautiful and soft, I cant imagine a material that would feel better for lining wallets. My question is that I'm a bit paranoid that the edges of the suede will fray or go fuzzy over time? Will this happen or will the suede hold its shape? Do I need to do something like put glue on the top of the edges or treat them somehow or will it just hold its shape? Also when I burnish the leather edges wil this affect the suede as the burnishing tool may come into contact with it? Thanks for any advice :-)
-
I've made a padded dog collar for my dog hank, he's had it 7 months now and it's stil going strong. It was my first leather project. Here's a good video with lots of detail. Also look up a company online called equias leather (I think) They make stunning dog collars with rolled edges and other points of quality - a good place for inspiration
-
I've tested it on 3.5mm vegtan full grain and 2mm horween dublin so far. o2 saddlers harness needle. and waxed tiger thread tigre 25 - 1mm braided
-
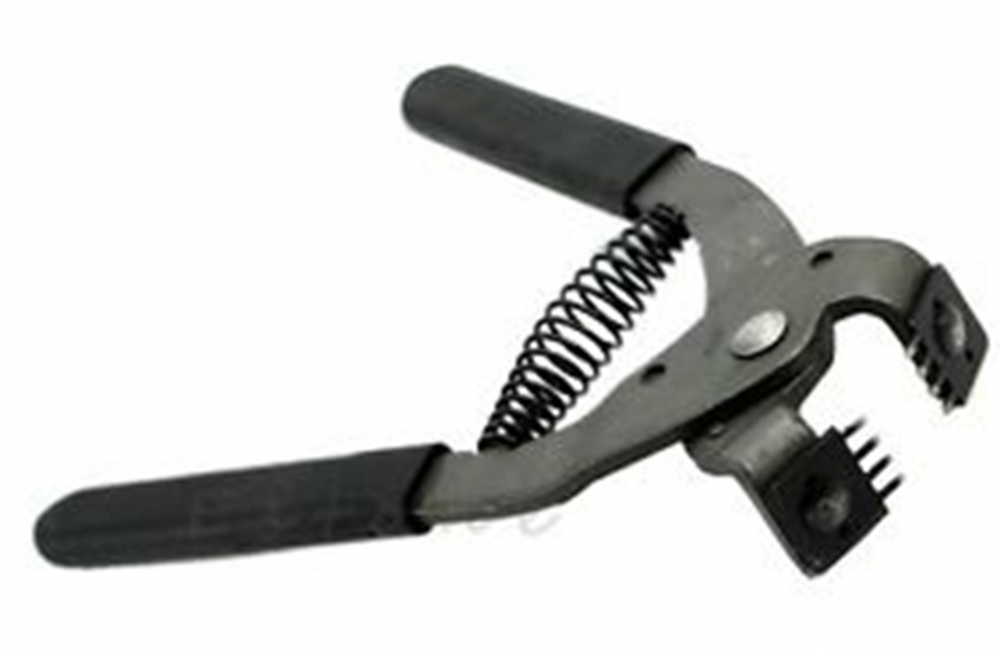
Thought I'd let you know my stitching pliers arrived. I cant believe how easy they are to use! Every hole is perfect allowing the needle to go through easily and you dont even have to squeeze the pliers hard. Really happy with this equipment as making the holes is a nightmare with a stitching wheel and awl. Prob only negative is they are no good if you need stitch holes that are not on the edge. Also tricky to line up, you have to be very careful or the holes on the back wont be in the right place!
-
I'm a beginner but i use the attached dremel tool attachments. I dye the edges rather than use edge paint then burnish. I use my home made wax and oil based product to do both burnish the edges and nourish the leather. http://www.ebay.co.uk/itm/7-Sizes-Leather-Burnisher-Wood-Edge-Leather-Craft-Slicker-Tools-Kit-for-Dremel-/302079111397?hash=item46555170e5:g:0HsAAOSwYIxX36kk
-
I made a water bottle pouch that attaches to my dogs harness for long walks but he kept rolling around as he didnt seem to like it in the same way he doesnt like muzzles lol. It was my 3rd leather project. Hank is an English mastiff / staffie cross. I didnt make a pattern though
-
Are you in uk?
-
In the advert, after the description put a 'points of quality' list. with the words 'points of quality' at the top. Bullet points like . 2 lines of hand stitching, leather washer between the leather & the snap to stop the snap biting into the leather and tearing over time, Hand dyed, Number of hours worked on it, How the edges are finished, Solid copper hardware, type of thread used & why, Link to a basic video (shorter the better 1 minute just looking at the product from different angles in good light with a nice background), How long the leather could last with proper care, Pro oil dyes rather than cheaper spirit dyes, How the leather is finished & why. etc etc
-
I've pretty much decided to make my own patterns as I had a couple of bad experiences with patterns I purchased and a lot of the free ones on the net are not always good. My thinking is my own patterns will give me a product thats within my own skillset to make, as my skills improve I can adjust my patterns. It will also be a learning curve. Recently 3 out of 4 patterns I paid for didnt meet my expectations or ended up being a bit complicated for a beginner like me. What is everyone else's view on this??
-

How to stitch leather letters to a beanie????
Wulfing replied to Wulfing's topic in How Do I Do That?
thanks. I thought it might be that. Just dreading all the stitching lol. Must get a machine when im rich!! -
I had the same issue. I dont own a press. I also want to avoid hammering as I live in an apartment. I put my brass makers mark on a flat piece of wood with my granite work top under the leather. Then I use 3 sturdy G clamps. I got the idea from a comment on this forum. It does work. If you make the already dyed or pre dyed leather damp, that also helps but dont forget to let it dry and finish it with resolene or something after to seal it. Whilst this is working ive ordered an arbour press from Ebay for £36 which is so cheap. Im a beginner though so Look up Ian Atkinson on youtube - he has a long detailed video on using makers marks and other embossing stamps.
-
The best bet is to go on youtube and watch videos from 4 or 5 different craftsmen. Search Ian atkinson on youtube. he is a teacher of some kind by day so makes some good videos, some of them are an hour or more long, really great detail. I sort of took (what I thought was) the best ideas from 4 or 5 craftsmen. Write questions down as you go then research the answers. Even then after your first wallet you'll prob decide to do it slightly different next time lol (or is that just me!) Also put wallet into the forum search bar here and click on each one. You will see all the problems people have had and there solutions and also find templates etc. If you haven't got the patience to do the research you may find you wont have the patience to do leatherwork as it's very slow and there is zero room for errors so you have to be totally focused. I've not long started and I'm struggling a bit as I'm always reaching for perfection, my mistakes have been due to trying to run before i can walk kind of thing. I guess if you find it quick and easy you might be doing it wrong! take your time - experiment - waste a few pieces of leather.
-
I've been asked to add leather runes to a beanie hat. At the moment im thinking just stitch it on with one row of stitches up the middle of the rune? Would bigger rune with stitches all around the outside of the rune be better? I'm wondering how someone with more experience than me would do it?
-

Leather Heresies #1: Does Neatsfoot Oil Go Rancid?
Wulfing replied to LeatherNerd's topic in Getting Started
My grandfather gave me a recipe for a leather cream he used. Bees wax, Boiled linseed oil, Neetsfoot oil, eucalyptus oil and vodka. When warmed up and mixed together it sets as a creamy substance. I rub it in to the leather with an old tshirt after dying then wave a hairdryer over it and buff the leather with a horse hair brush. I leave it for 24 hrs, buff again and then put resolene on top to finish. I'm a beginner and have come up with this process through research and based on what my grandfather said. It seems to work so far but obviously I dont know what it will be like in the future. I also use it to burnish my edges. Be grateful for anyone's opinion on this method / recipe? -
A simple strap that any watch can sit upon by weaving the original watch strap in and out of burnished slits on your leather strap. Prob needs lining with something soft like pigskin suede and some basic tooling on the borders of the strap would look nice.
- 4 replies
-
- noob newbie
- beginner
-
(and 1 more)
Tagged with:
-

First post and some of my stuff
Wulfing replied to Joeymc's topic in Purses, Wallets, Belts and Miscellaneous Pocket Items
Love that you took the design from a historical source. Def no copyright issues there! I'm a little obsessed with the norse and celtic world so i'm hoping to put that into my work. Very straight n tidy lines. -
metropolitan leather and Le prevo are my favorites for small 1x hide orders. AA crack and sons are supposed to be good and have been around for a long time. Im new to leather work though. I've only had 5 orders so far.
-
Very neat lines. Looks good. How do you burnish the oblong hole that the buckle pin goes through? It looks very smooth?
-
Use an old tshirt to apply the dye. When you put the dye on the cloth touch the cloth to another cloth. Then apply it pressing hard in circular motions. It will put less dye on the leather and in most cases appear lighter in colour than if you applied it with sponge or dauber. Good for achieving gradient / marbled dying as well. Some projects that may end up getting scratched a lot need dye all the way into the leather so not good for those jobs PS im a beginner. Others may have better ideas. Lots of different colours of dye out there. Spirit dyes tend to be lighter than oil dyes
-
thanks. I've ordered 2


