


Stetson912
-
Posts
1,431 -
Joined
-
Last visited
Content Type
Profiles
Forums
Events
Blogs
Gallery
Store
Everything posted by Stetson912
-
Yes, the hardest part is stitching near the belt loop. My presser foot is realy wide, I should have swapped it out for mt left toe foot. The loop causes the holster to not lay flat so get some deflection sometimes. Probably my inexperience with my outlaw machine. Definitely going to try again
-
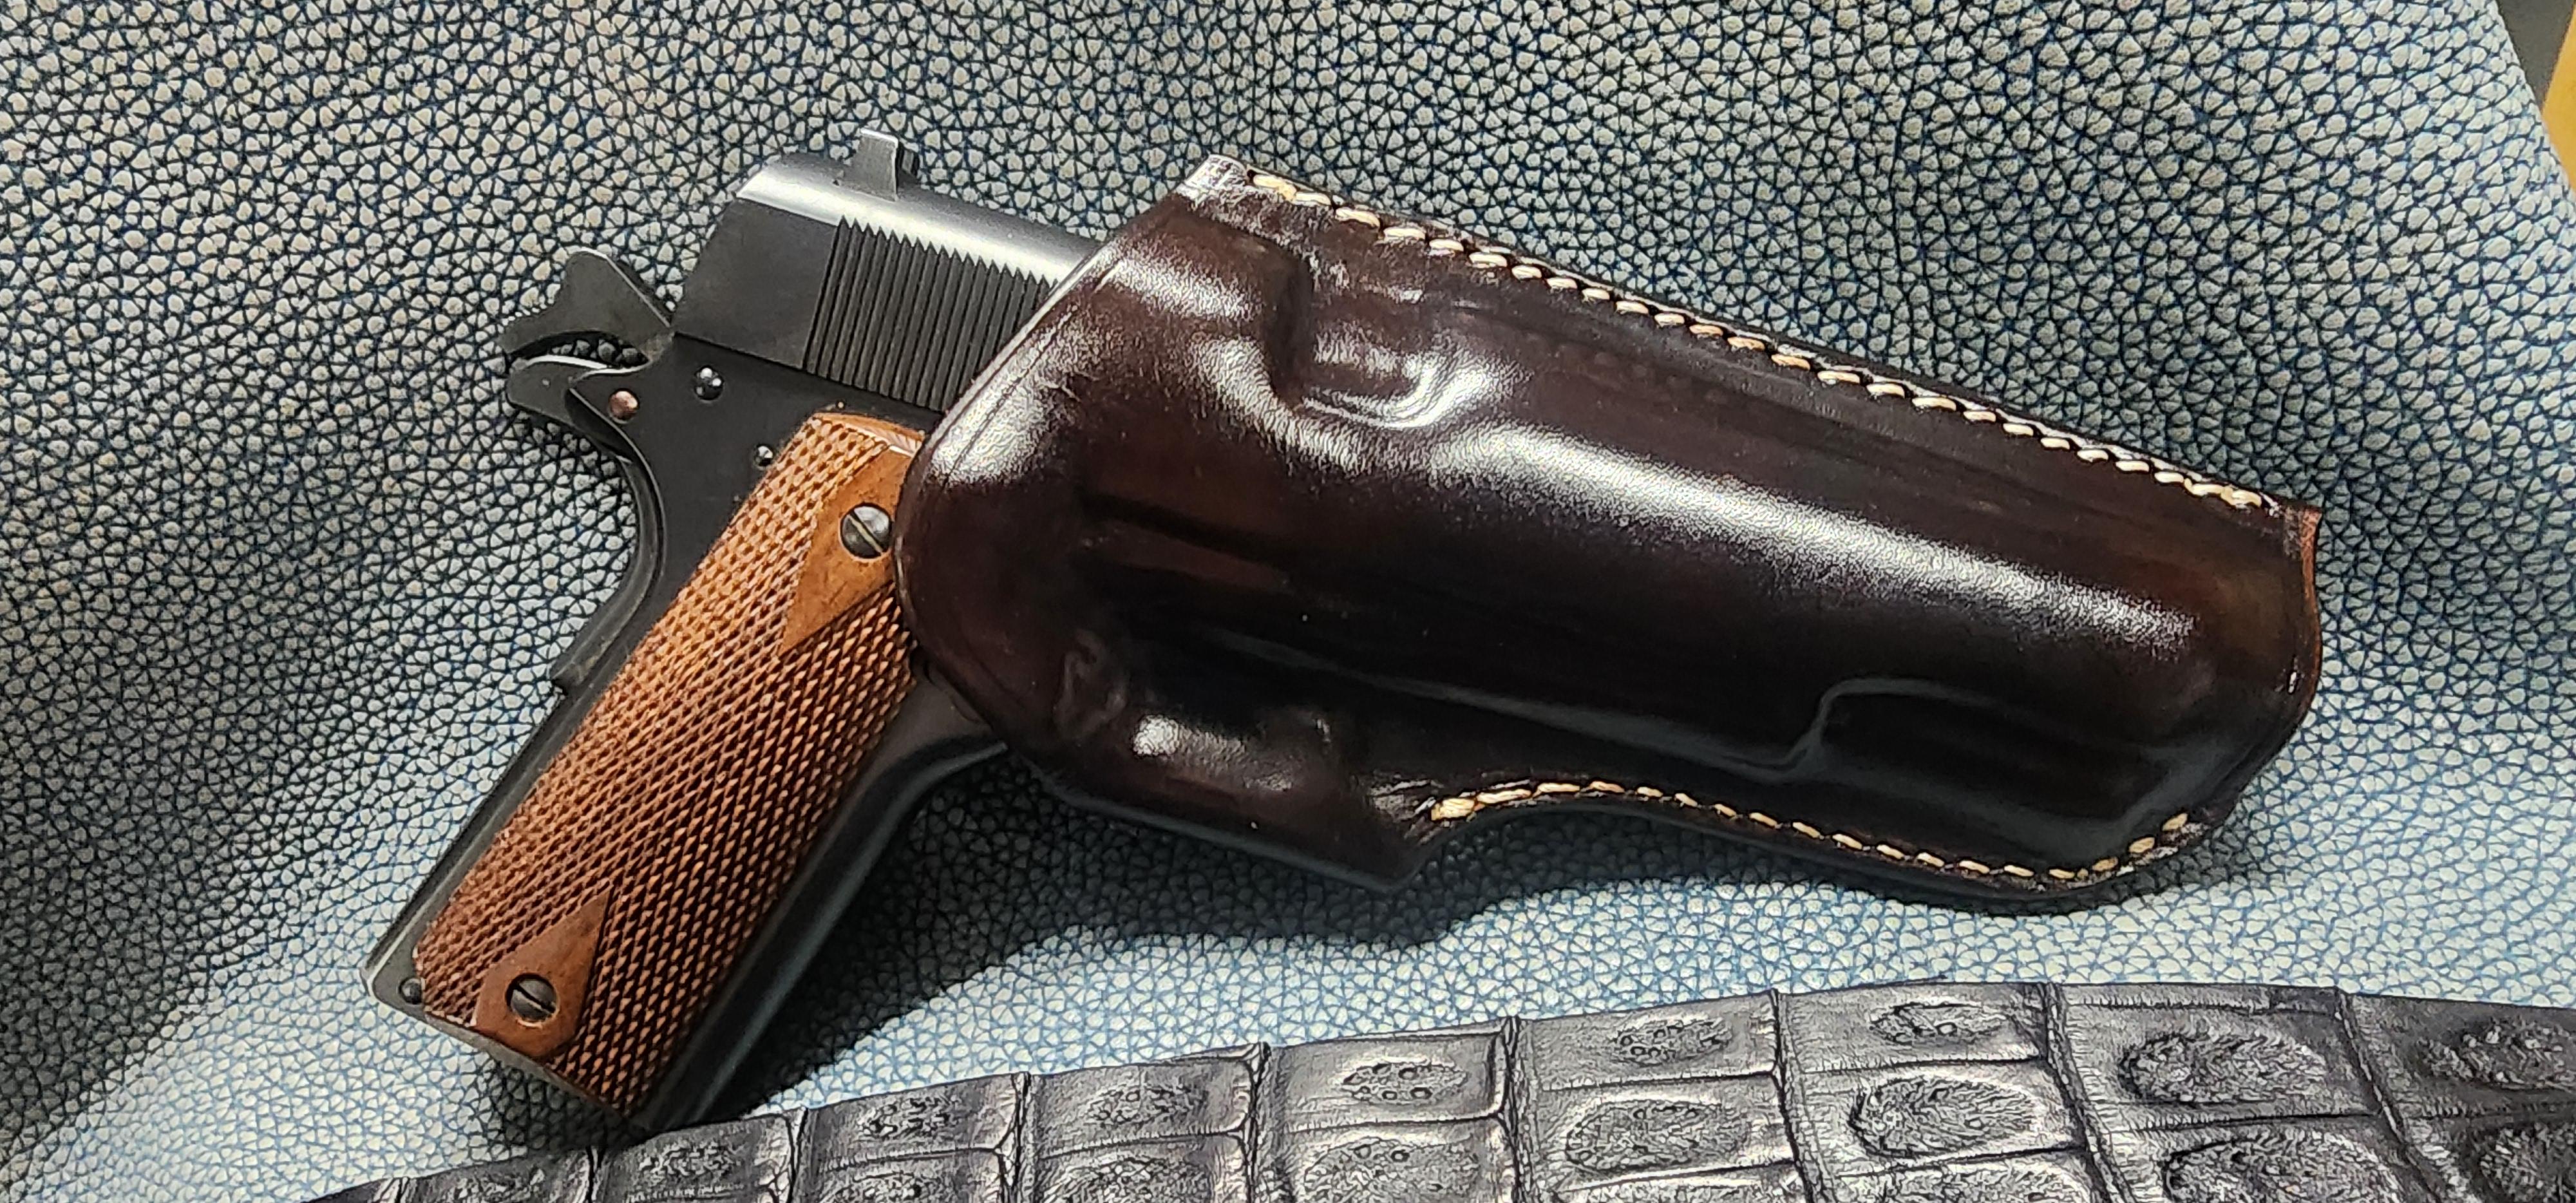
I like how this came out. Simple design but kind of unique. 1911 rhodesian holster in show brown. This leather is heavier than i like at about 9 oz. But it still works.
-

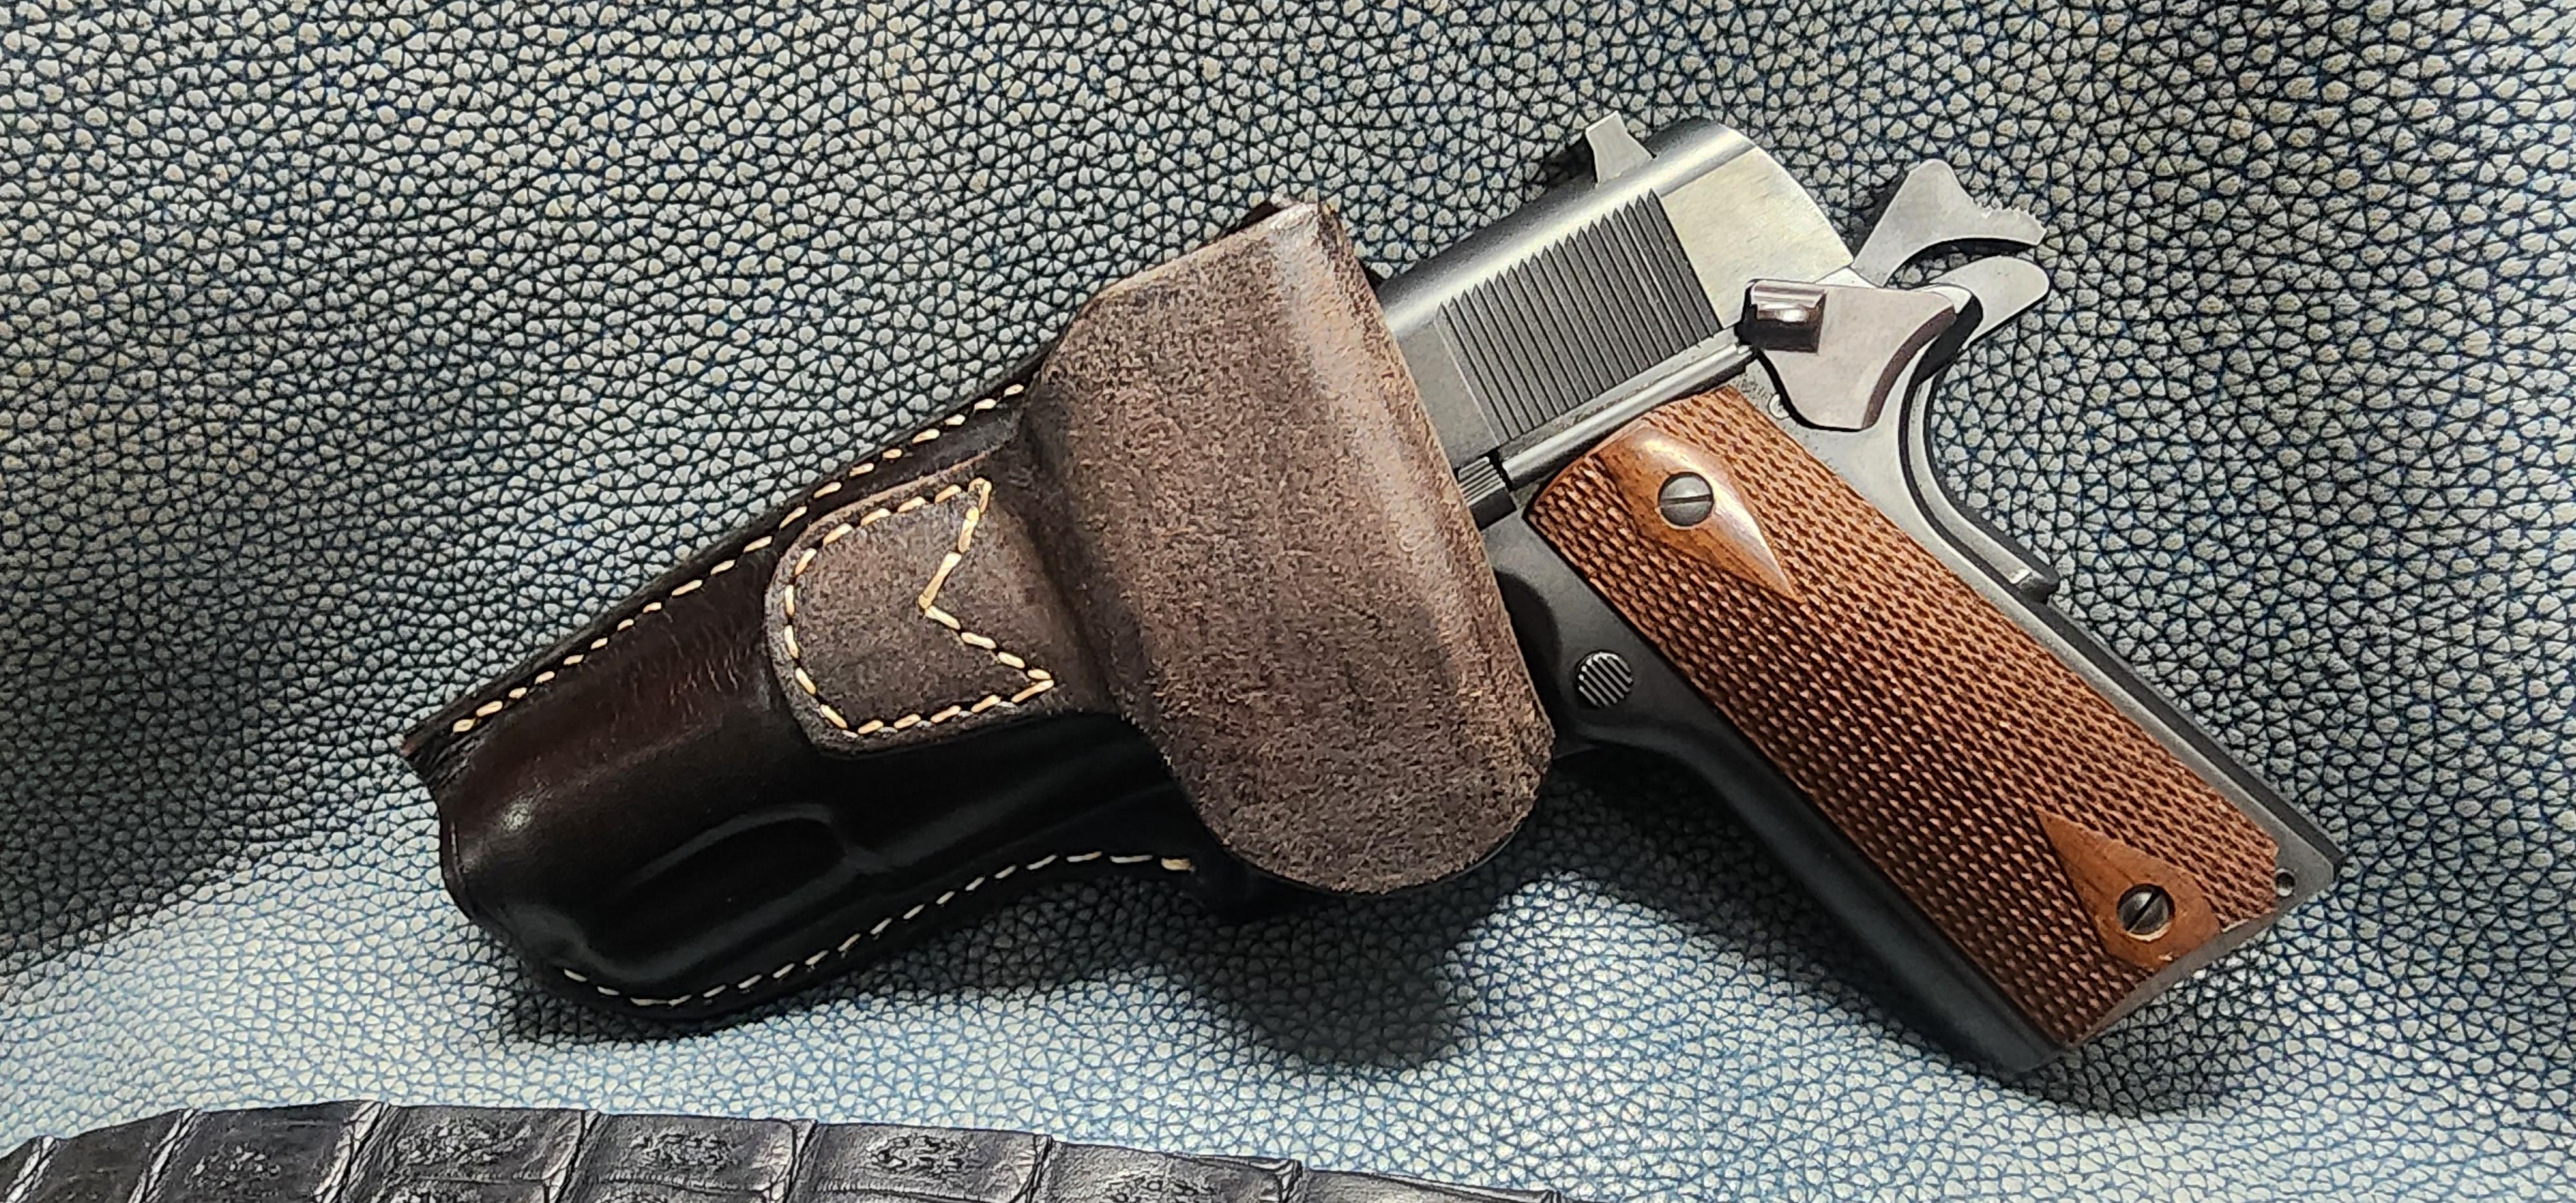
My take on the Alessi PCH IWB
Stetson912 replied to Stetson912's topic in Gun Holsters, Rifle Slings and Knife Sheathes
Thanks, it's a fun little thing to make too. It does use a lot of leather though. Rather, with it being one piece it requires a larger piece. But, if you make the loops separate and stitch them on, it would free up some space on the hide. But, Sticking with tradition ya know. -
This is an interesting one for me. A unique design I haven't seen before and therefore had to figure out. Lou alessi designed this to be made from one piece of leather. It utilizes an 's' curve that creates an arch along the slide side. This keeps the mouth open and prevents collapse. Really a genius design, and one you seldom see.
-
Removing molding marks?
Stetson912 replied to larry1096's topic in Gun Holsters, Rifle Slings and Knife Sheathes
That's looking pretty good. Leather weight is also a factor. I believe jason uses 7/8oz. As for retention, the trigger area and ejection port are the only places retention can be achieved with molding, so focus on those areas. The rest is, as you said, is more for looks -
Removing molding marks?
Stetson912 replied to larry1096's topic in Gun Holsters, Rifle Slings and Knife Sheathes
Jason is a great holster maker. His work is top notch. He does his molding by hand. Molding is an art form in itself. Learn leather has a video of him molding a holster in detail if memory serves. But, In a nutshell; proper casing, smooth tools, and progressive molding. Start with the larger molding tools and work down to finer tools as the leather dries. As it dries it holds more detail but be careful, if you slip thats it, leather is marked. Burnishing in my experience comes as a result of rubbing the leather with something that causes friction, like a wood handle or slicker that isn't completely polished and smooth. Popular molding materials are bone/antler, stainless steel, and smooth plastic. But really anything smooth is your friend. Look up Eric larsen (of hbe leatherworks) youtube. He has a few short videos of holster molding that are useful too. -
Looks a bit chunky to me. I think it's cuz your leather is a bit on the thinner side. The second photo looks like your holes are getting blown out too, which can happen with improper needle feeding or overly large thread or dull stitching chisels. Thicker leather will allow you to seat your stitches better with more tension. I'd try .8mm or .7mm and see how that works for you.
-
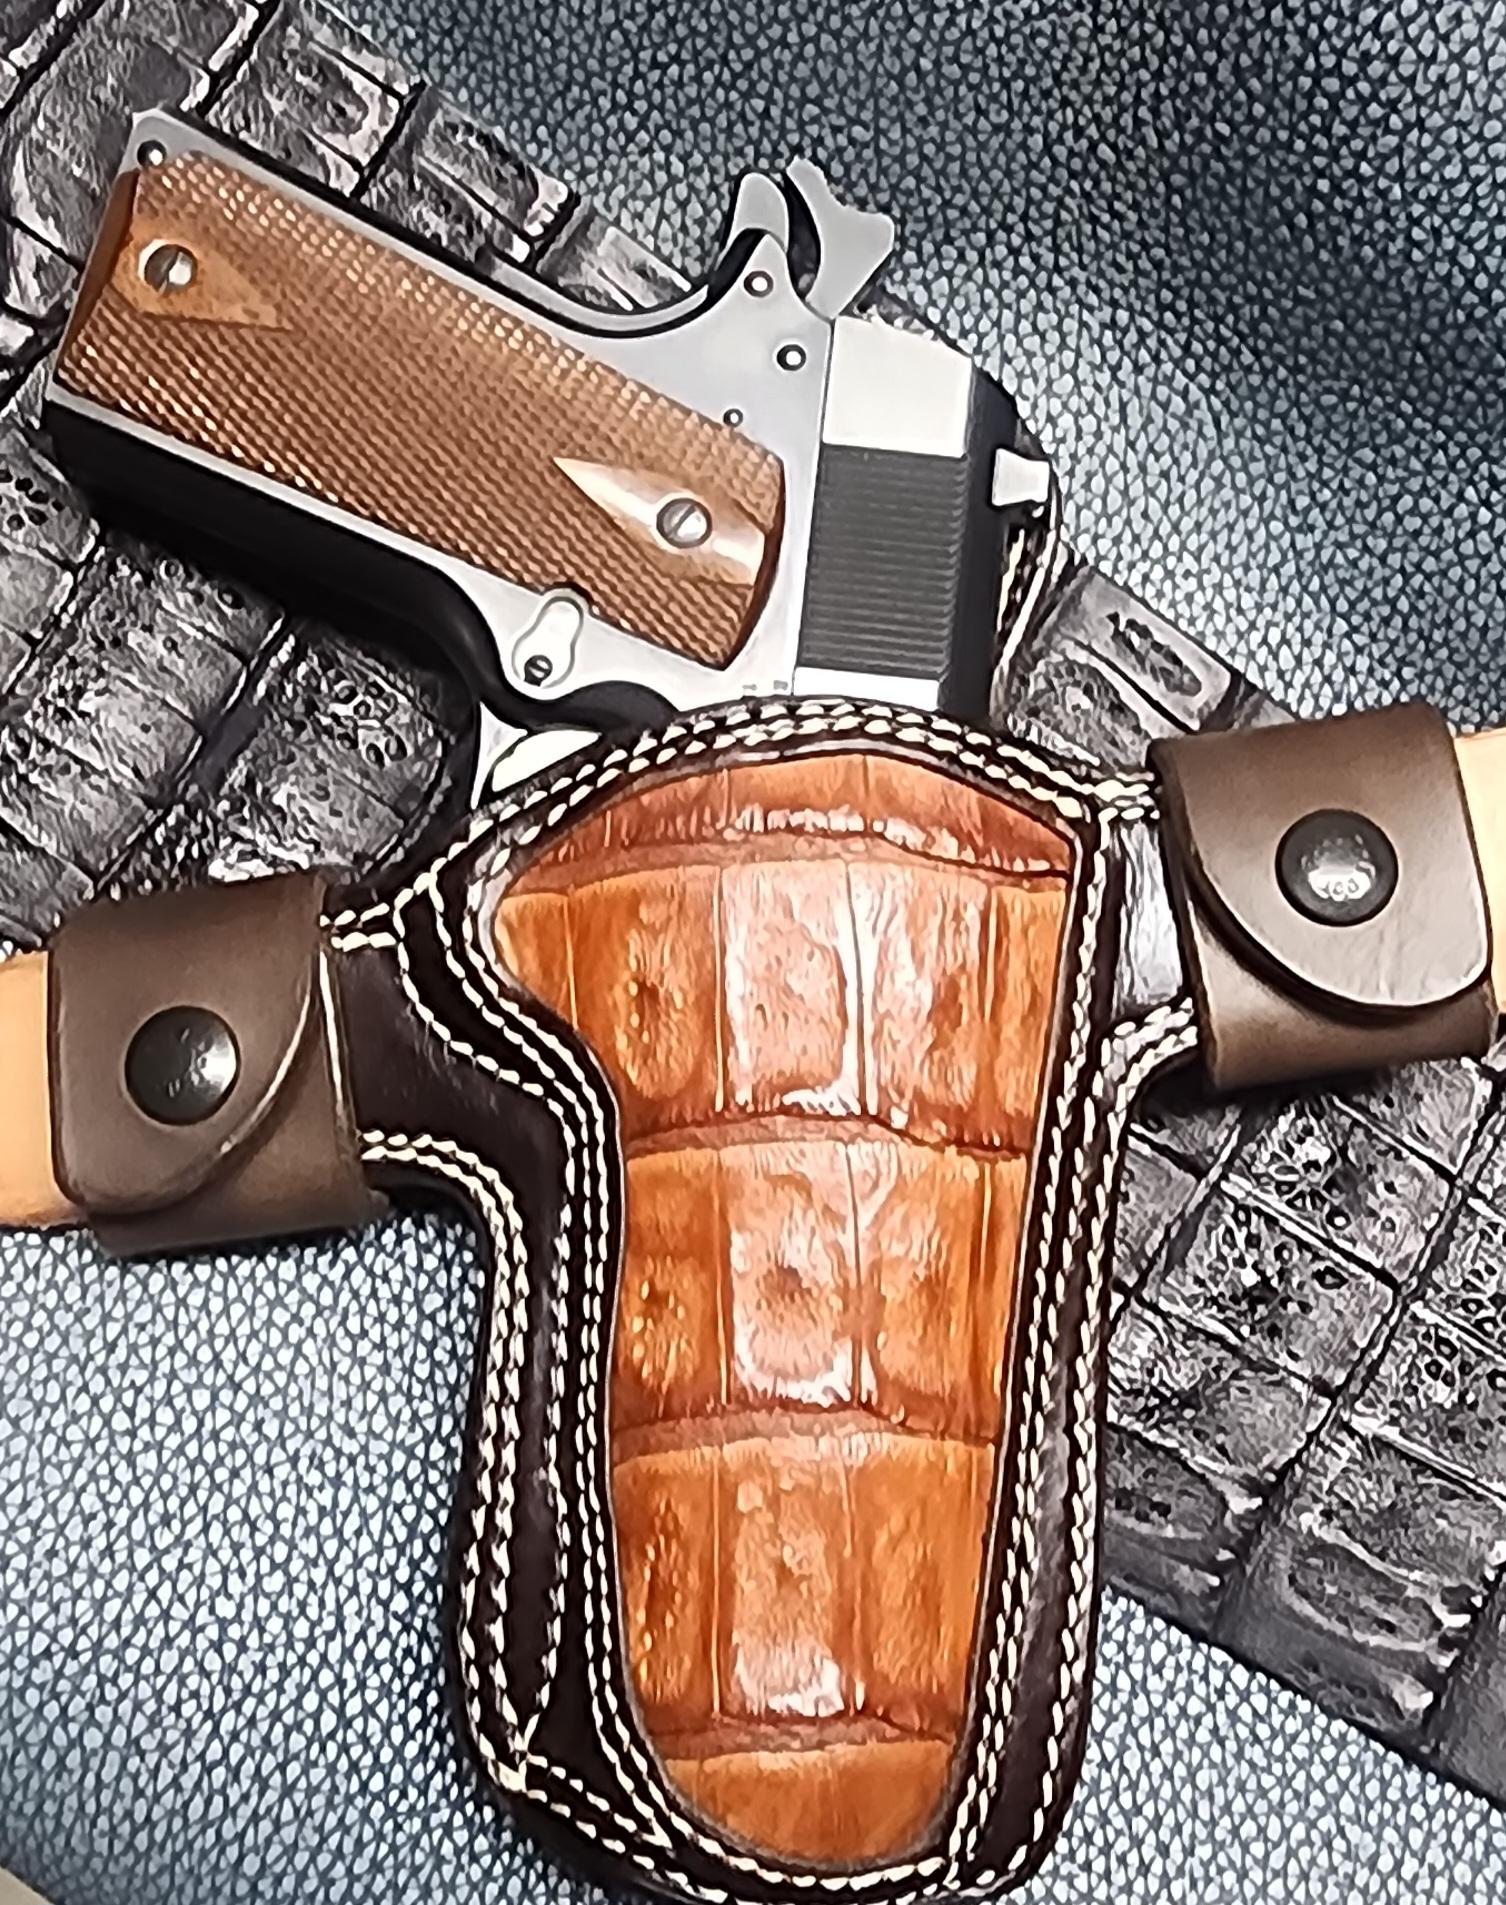
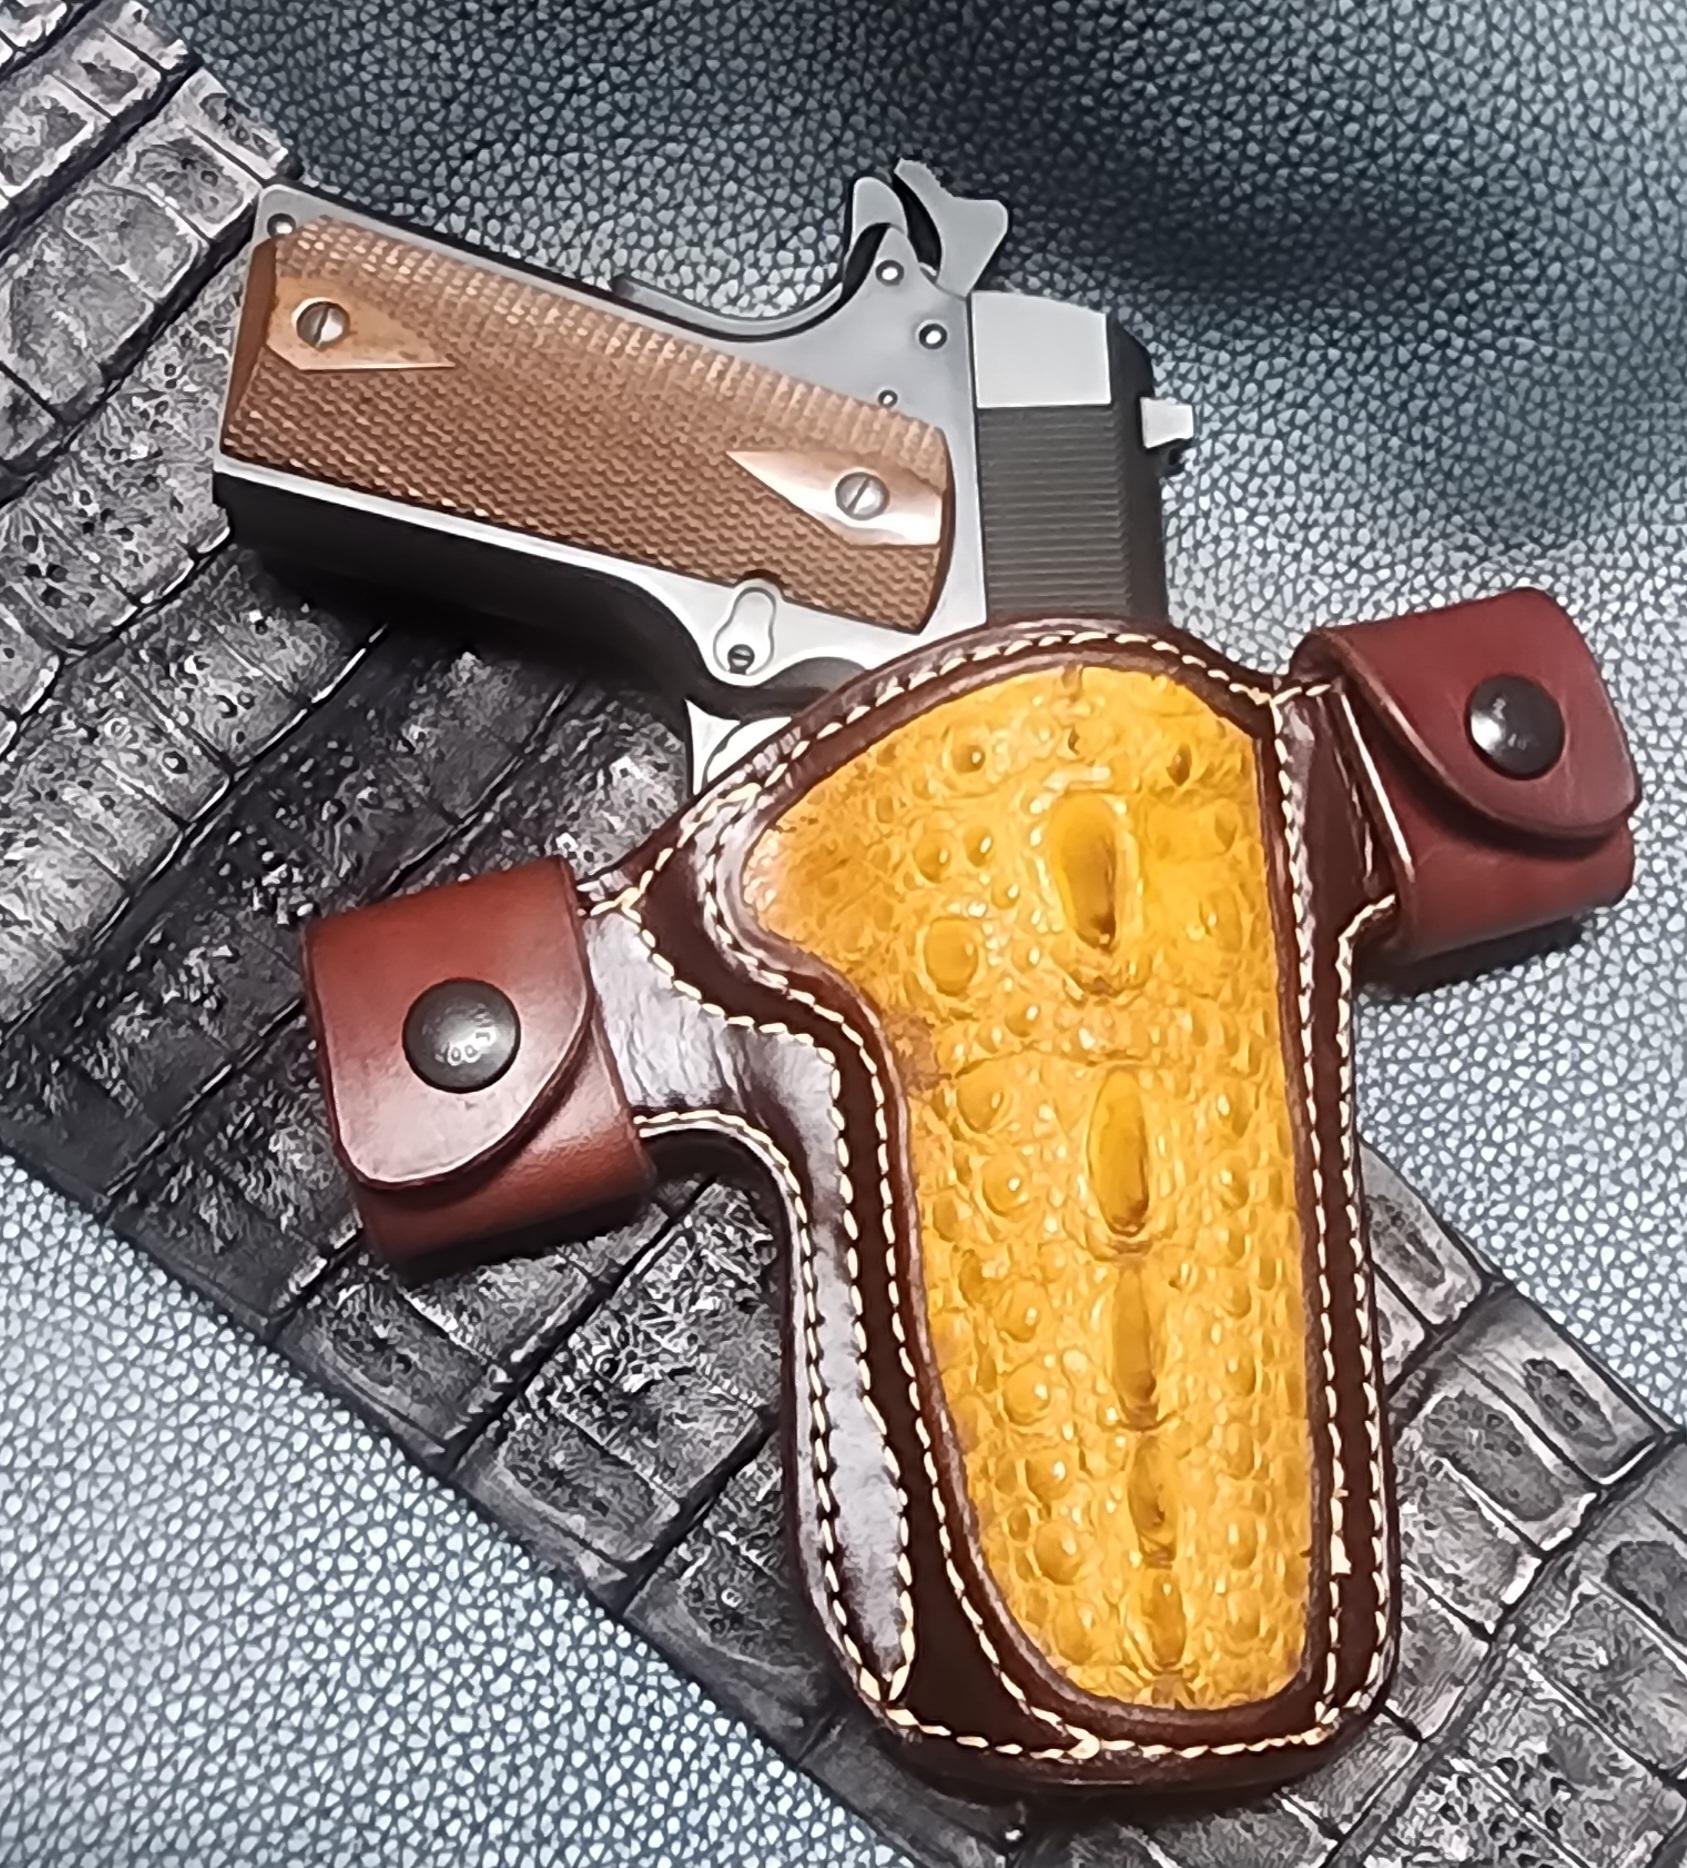
Some exotic inlay for 1911
Stetson912 replied to Stetson912's topic in Gun Holsters, Rifle Slings and Knife Sheathes
You can use 8 oz for the panel then cut v the window from 4 oz and glue it on top. The skiving of the window panel reduces the thickness on the "wings" making it a bit cleaner and I think more comfortable. You need the 8 oz for the holster structure. I jmloke using the 2 layers of 4 oz laminated because it gives me a liner and is a bit stronger. You could take your 8 oz and make the front panel rough out and then the window on top, but then you would have to line the back panel or have a half lined holster hahaha -
Some exotic inlay for 1911
Stetson912 replied to Stetson912's topic in Gun Holsters, Rifle Slings and Knife Sheathes
Thanks Sure! Postage may be expensive though haha Thanks! -
Some exotic inlay for 1911
Stetson912 replied to Stetson912's topic in Gun Holsters, Rifle Slings and Knife Sheathes
I had used multiple layers. Both of these were made from laminated 4-5 oz leather to make the front and back panels. The front panel requires additional work obviously. I cut the window out, trimmed and skived the plug, skived the areas of the panel from the stitch lines to the edges, glued the plug in place, glued the caiman over the plug, then glued the window over everything and stitched it together. -
Some exotic inlay for 1911
Stetson912 replied to Stetson912's topic in Gun Holsters, Rifle Slings and Knife Sheathes
Thanks. The caiman is a bear to work with. The snapping turtle was far simpler. Thanks. Fun builds. I Definitely like the snapping turtle and need to get some more of that haha -
These were fun. Hope you like em.
-
Far from masterful but i appreciate the kind words, Brandon corral at swift hammer is a skull and metal wizard. He does things his own way too, you should look him up.
-
Thanks for the kind words and questions. This has been traded and I no longer have this card. I'll try and remember what I did haha. This is all carved, no lasers or anything. The eye socket texture was done with a modeling spoon as was most of the skull. I used a triangular beveler around the pom and trim and faded that out. I used a fine stylus to make the fur textures in the pot and trim as well as fabric for the hat. I cant recall what background texture I used but you can use whatever suits you. As for color, it's a trick i saw on youtube by kirill latypov. The whole piece is dyed black then painted with a thin layer of black acrylic paint. And the color is added by using a dry brush technique with acrylic paint. The cast iron is a result of gray over the black. Oh, and the pitted skull texture is done by laying coarse sand paper over the areas to texture and rubbing it in with a modeling spoon.
-
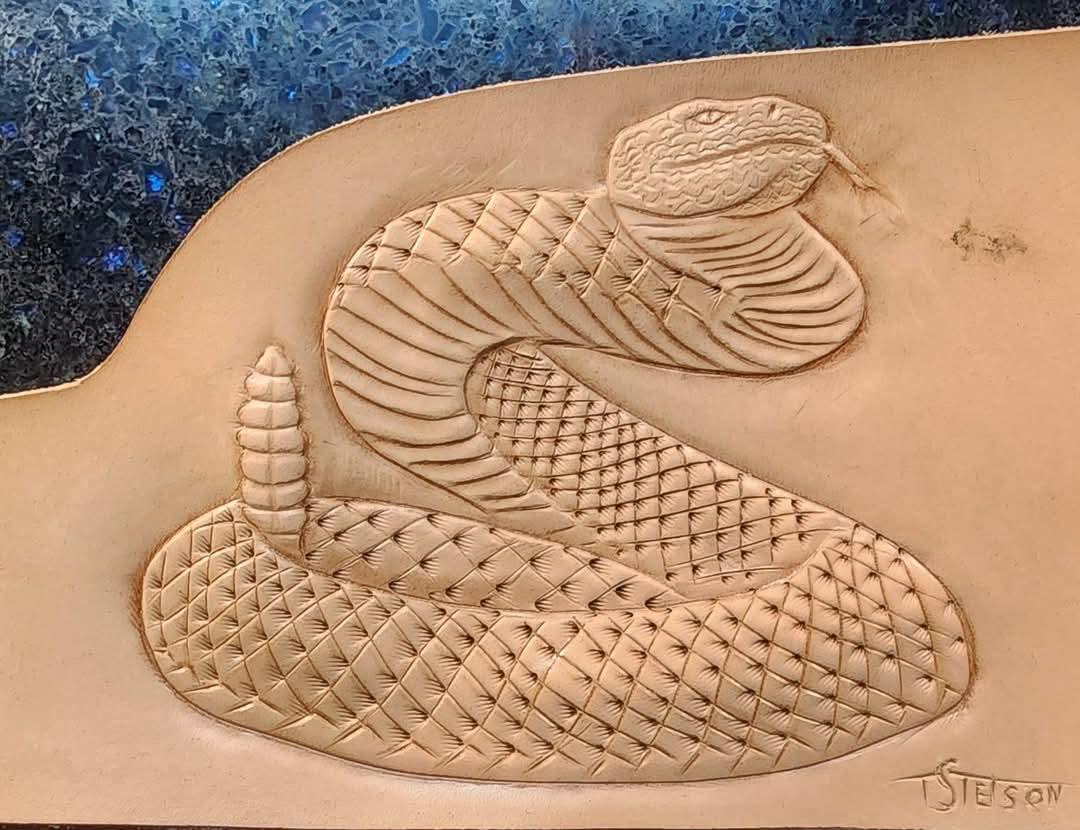
Thanks, it was fun Thanks, scales could be better. But live and learn I may ruin it with color next hahaha. Credit to stohlman for this one. Just followed his directions from his book. I'm thinking a sidewinder or sand viper next
-
Found this ole stohlman pattern and figured, why not haha. Scales didn't quite work how I wanted but over all not too bad. Pointers always welcome.
-
Finished this back quiver for a friend
Stetson912 replied to dhaverstick's topic in Archery Quivers and Bow Cases
Awesome as always -
Thanks
-
Happy holidays and merry Christmas everyone

-
I think what rm is offering is different than what should be used for holsters. I can't say for sure, after all they are horse butt hides. It says they are good for boots and small leather goods that need durable leather. But it didn't mention molding or holsters. I think the temper of the hides rm may be too soft fir holsters. And given that you can get 8 horse butt strips for the same price, I think I'd rather try that. Tannery row has then for about $20 each, plain veg tan. Can be carved and molded. I imagine this is similar to mavericks offerings
-
Maverick and tannery row(horweens public facing store) sell them. If I remember they are pretty cheap. I want to try them myself. I wasn't aware rm had it. Looks functional. One thing that would add some rigidity is a band stiffener that wraps around the holster mouth. It's the folding of the holster and reinforcement band that adds rigidity
-
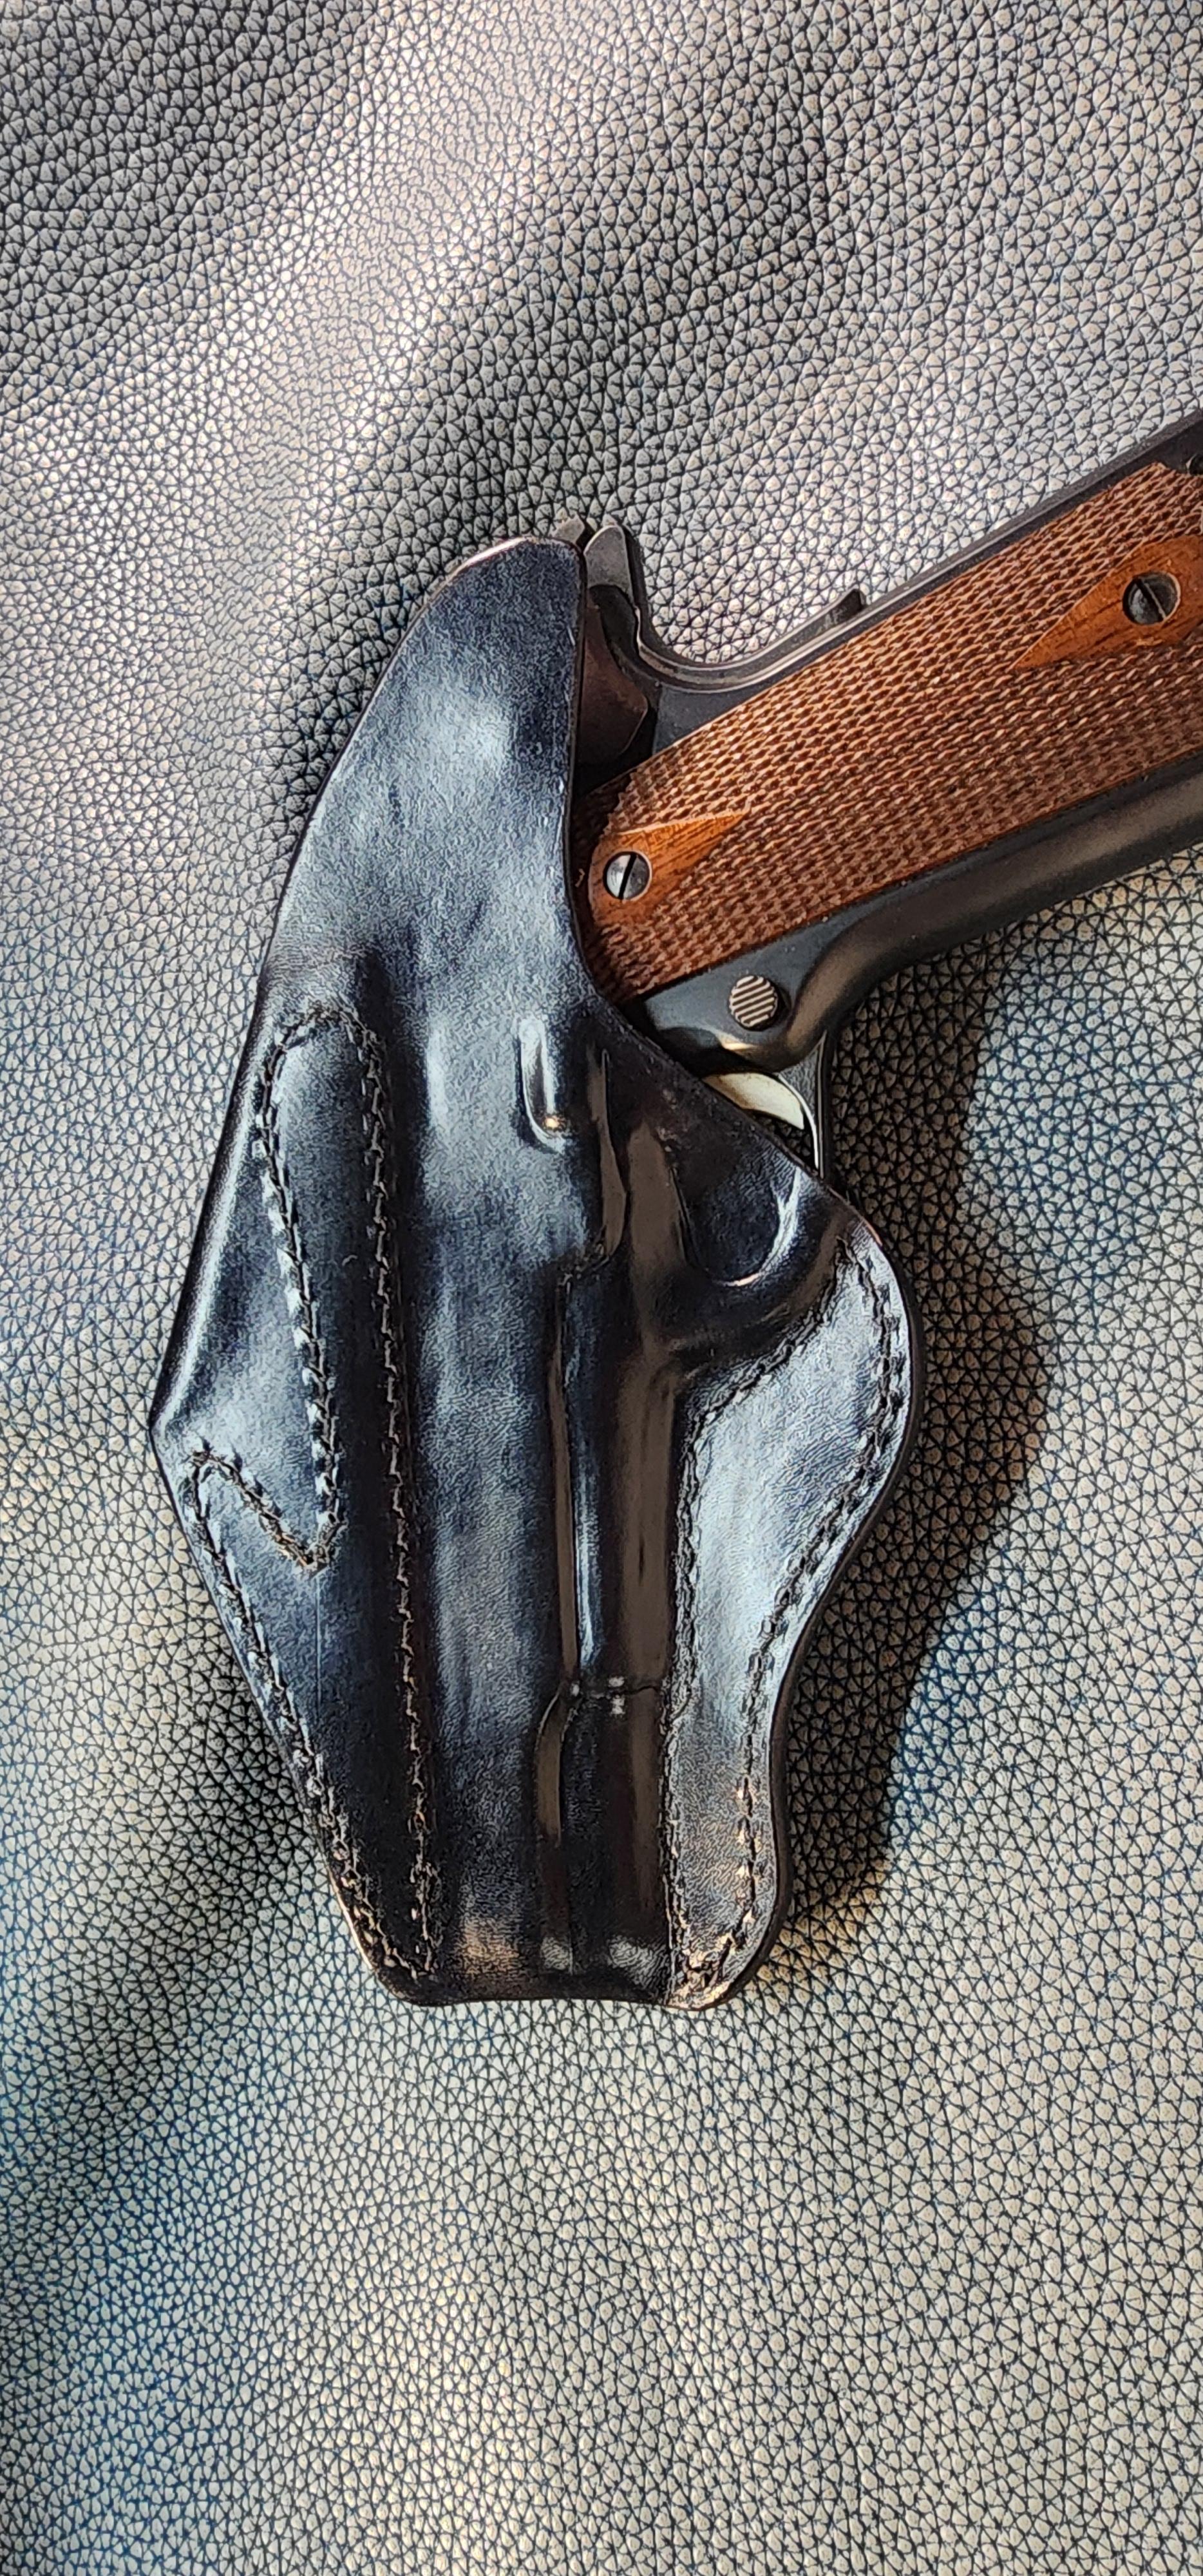
K frame thumb break
Stetson912 replied to Stetson912's topic in Gun Holsters, Rifle Slings and Knife Sheathes
Sounds like a fun project. I wanted to keep it simple, I only wish I remembered to wrap my snap cap :| maybe next time haha. -
K frame thumb break
Stetson912 replied to Stetson912's topic in Gun Holsters, Rifle Slings and Knife Sheathes
Thanks -
K frame thumb break
Stetson912 replied to Stetson912's topic in Gun Holsters, Rifle Slings and Knife Sheathes
3 layers of 8/9 oz. Closer to the 9 side of things, so a bit shy of 1/2". 3/8" at best. And that is just around the trigger guard area to about half way down the holster because that's where I started to taper off the welt -
K frame thumb break
Stetson912 replied to Stetson912's topic in Gun Holsters, Rifle Slings and Knife Sheathes
Leatherpoint needles give it that angled hand stitched look. I'm still getting familiar with the machine but it makes light work of these projects
