Stetson912
-
Posts
1,431 -
Joined
-
Last visited
Content Type
Profiles
Forums
Events
Blogs
Gallery
Store
Everything posted by Stetson912
-
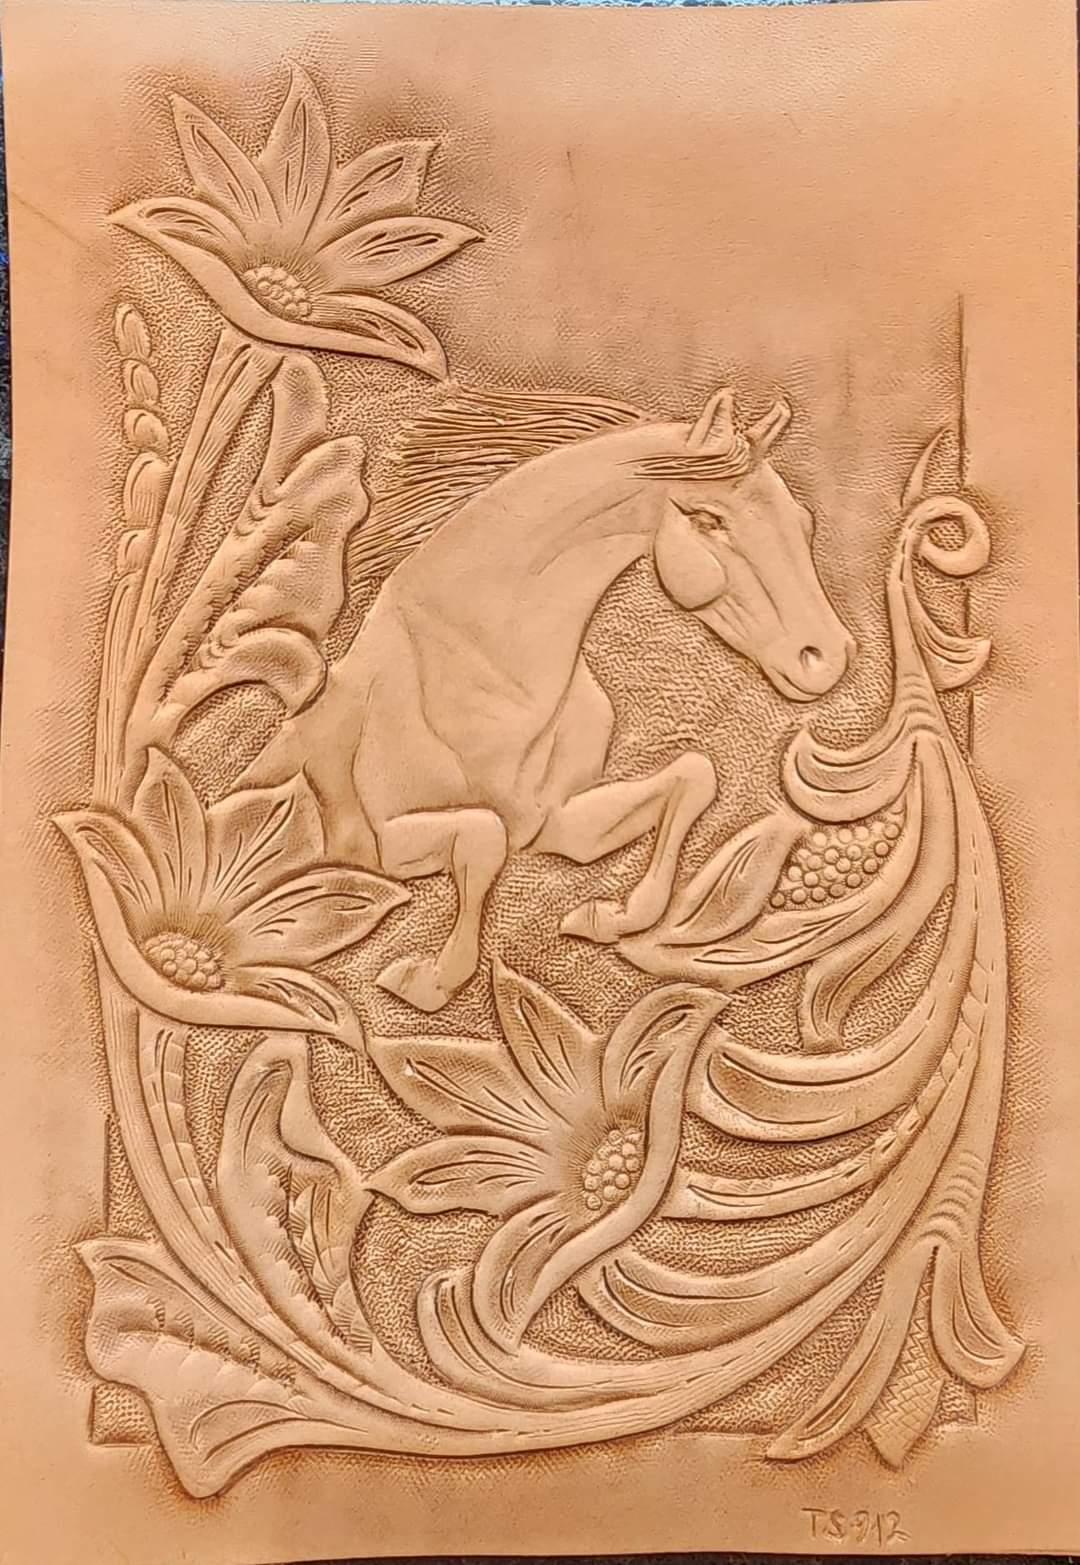
I spent 2 full (late) evenings on it. About 7 or 8 hours I think. I was deliberately trying to go slow. It's relatively small for me and I always rush steps and that's where i mess it up haha. I'm debating if I should antique it or not
-
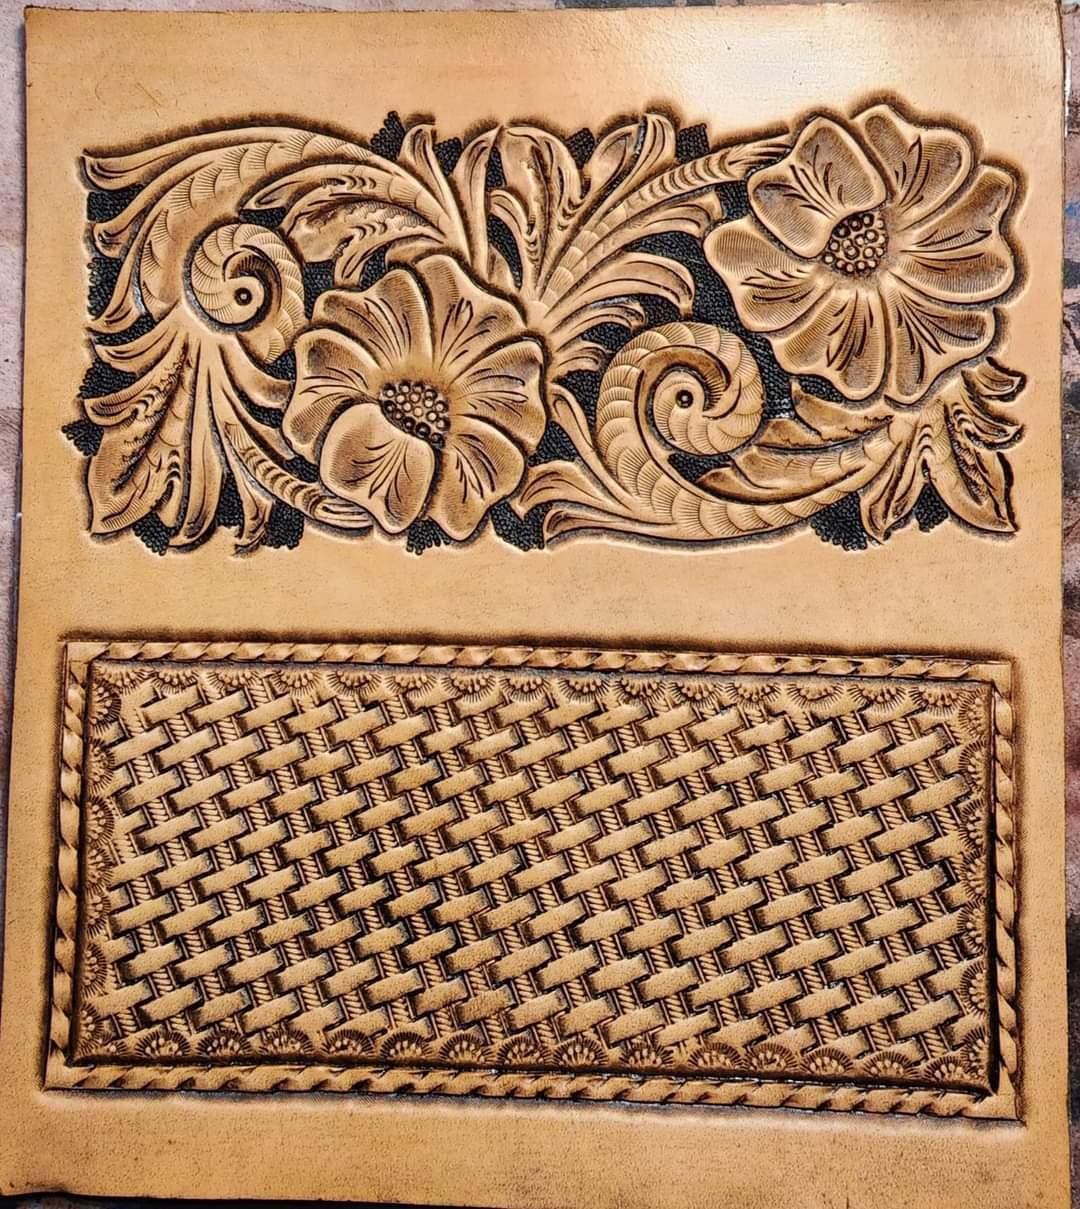
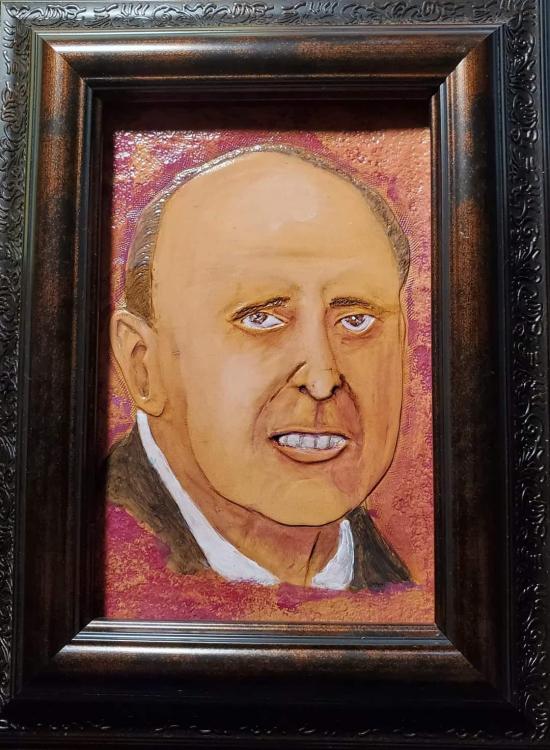
This was a fun carving. This was done in one of jim linnel's classes on detail figure and floral carving. This piece made me realize the advancements I've made and I'm happy with it for a change. Hope you enjoy. It's 5x7 on 4/5 oz

-

Finished this back quiver and arm guard
Stetson912 replied to dhaverstick's topic in Archery Quivers and Bow Cases
Fantastic as always -
Well, im no expert nor do I own either machine. But in my research I'd vote for the outlaw. It's has a cast iron housing instead of cast aluminum, Has all steel internal parts, and you can call or email the guy who created the machine Ryan Neel. It also has 3 more inches of throat clearance and boasts nearly identical sewing specs to the boss. For me it seems like a better built machine, at least where materials are concerned. My opinion only of course.
-
Me too haha
-
Figure carving finesse by al stohlman. Not much on insects except a couple pages. But it's a great book anyhow
-
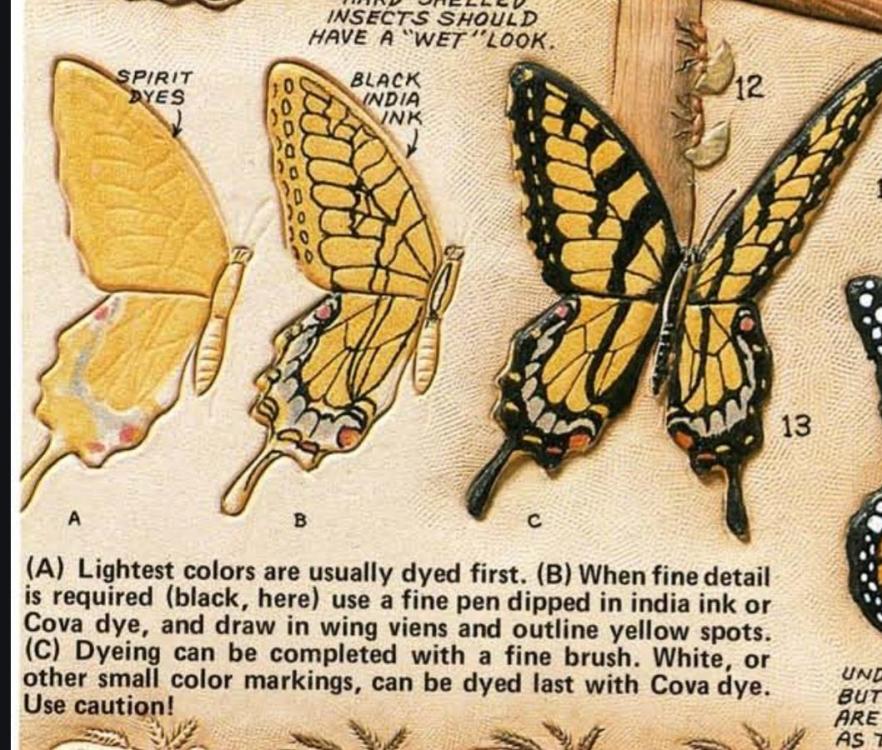
I might be late to the game here, im no expert and not very good at figure carving yet bit I found this that may help illustrate some of chuck and sheilajeans points.you can see not everything is cut as chuck mentioned. A stylus or spoon was probably used for the veins and you can see the 3 segments of the body also.
-
Always wanted to give this a go. Looks great
-
Are Basket-Weave Stampers Negligent!?!
Stetson912 replied to RVM45's topic in Gun Holsters, Rifle Slings and Knife Sheathes
My 2 cents, if it's a molded holster, the only side that could be molded and retain the front stamping would be the back. Leaving it plain would keep the best anesthetics after molding. If it's not to be molded, it could be stamped all around. Personally, if it's an owb not molded or a western style holster, I would probably stamp all of it, otherwise I'd have to rely on molding the back panel for retention and that would destroy any adornment in the end -
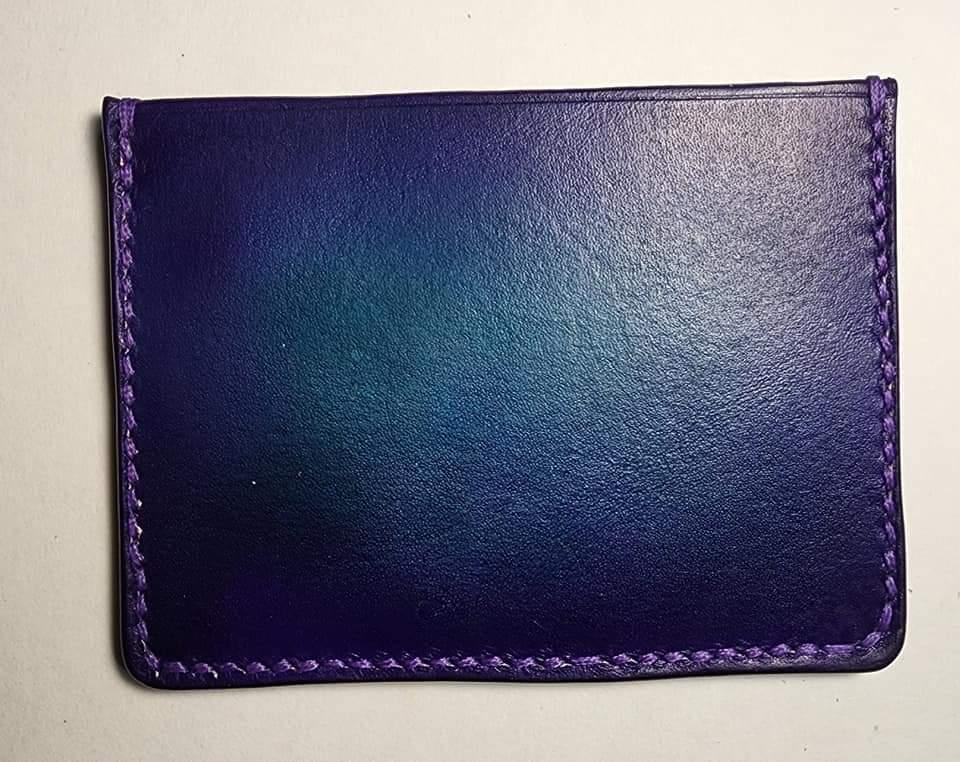
I used an airbrush for all of it, I had to fight it too, my airbrush isn't very good hahaha, but it does make it easy I buffed it then used aussie conditioner and sealed with tan coat
-
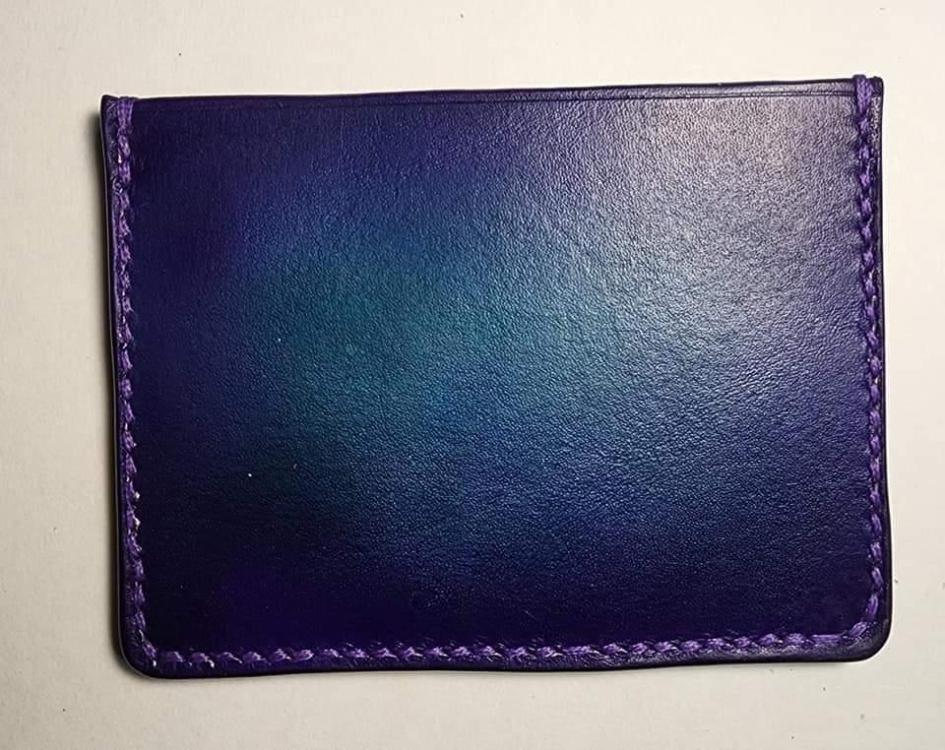
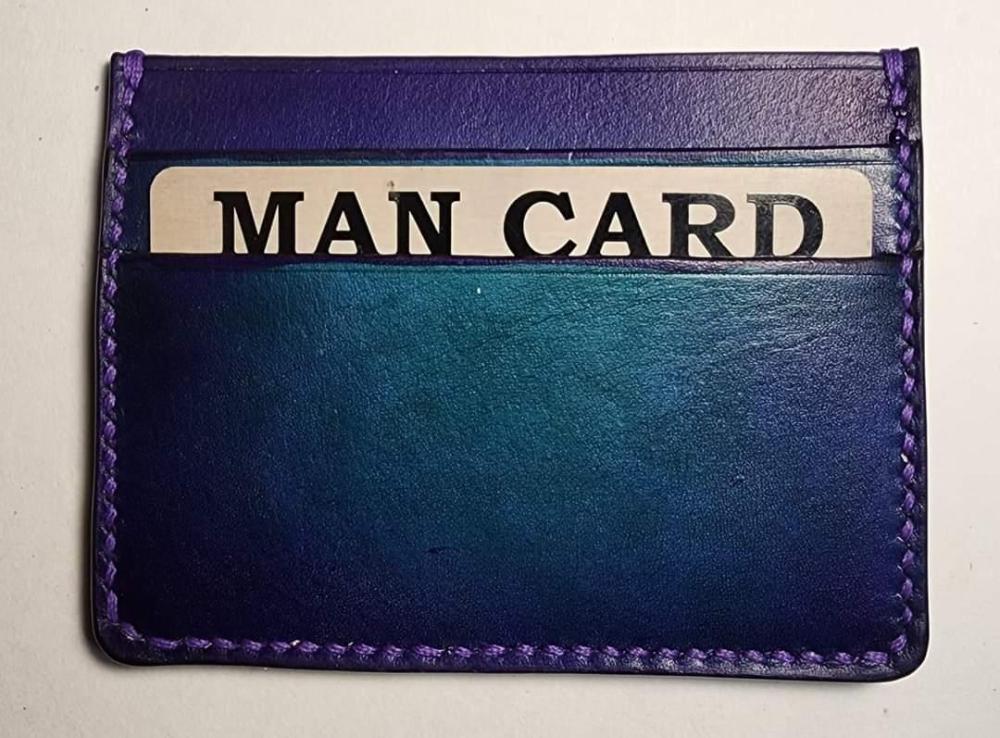
I had some purple and jade angelus dye lying about and decided to try something different for me. It's a simple sunburst but the colors are fun. This has 2 card slots and a pocket, it can easily be expanded but I wanted to showcase the dye on one side.

-
Many approaches. As mentioned you an line it with very light leather or fabric. But. If you didn't want to line it there are other methods. I used to use tan coat and apply it then burnish it with my slicker best I could. But now, my go to method for glossy smooth unlined interiors is to use toconole and a glass burnisher. Just spread a light coat of toconole on the entirety of the back side and burnish. Comes out great. Obviously, you want to dye it first haha.
-
Made this belt bag
Stetson912 replied to dhaverstick's topic in Purses, Wallets, Belts and Miscellaneous Pocket Items
Cool stuff as usual -
Nice and clean, I like it
-
Arizona style clutch wallet back
Stetson912 replied to Stetson912's topic in Floral and Sheridan Carving
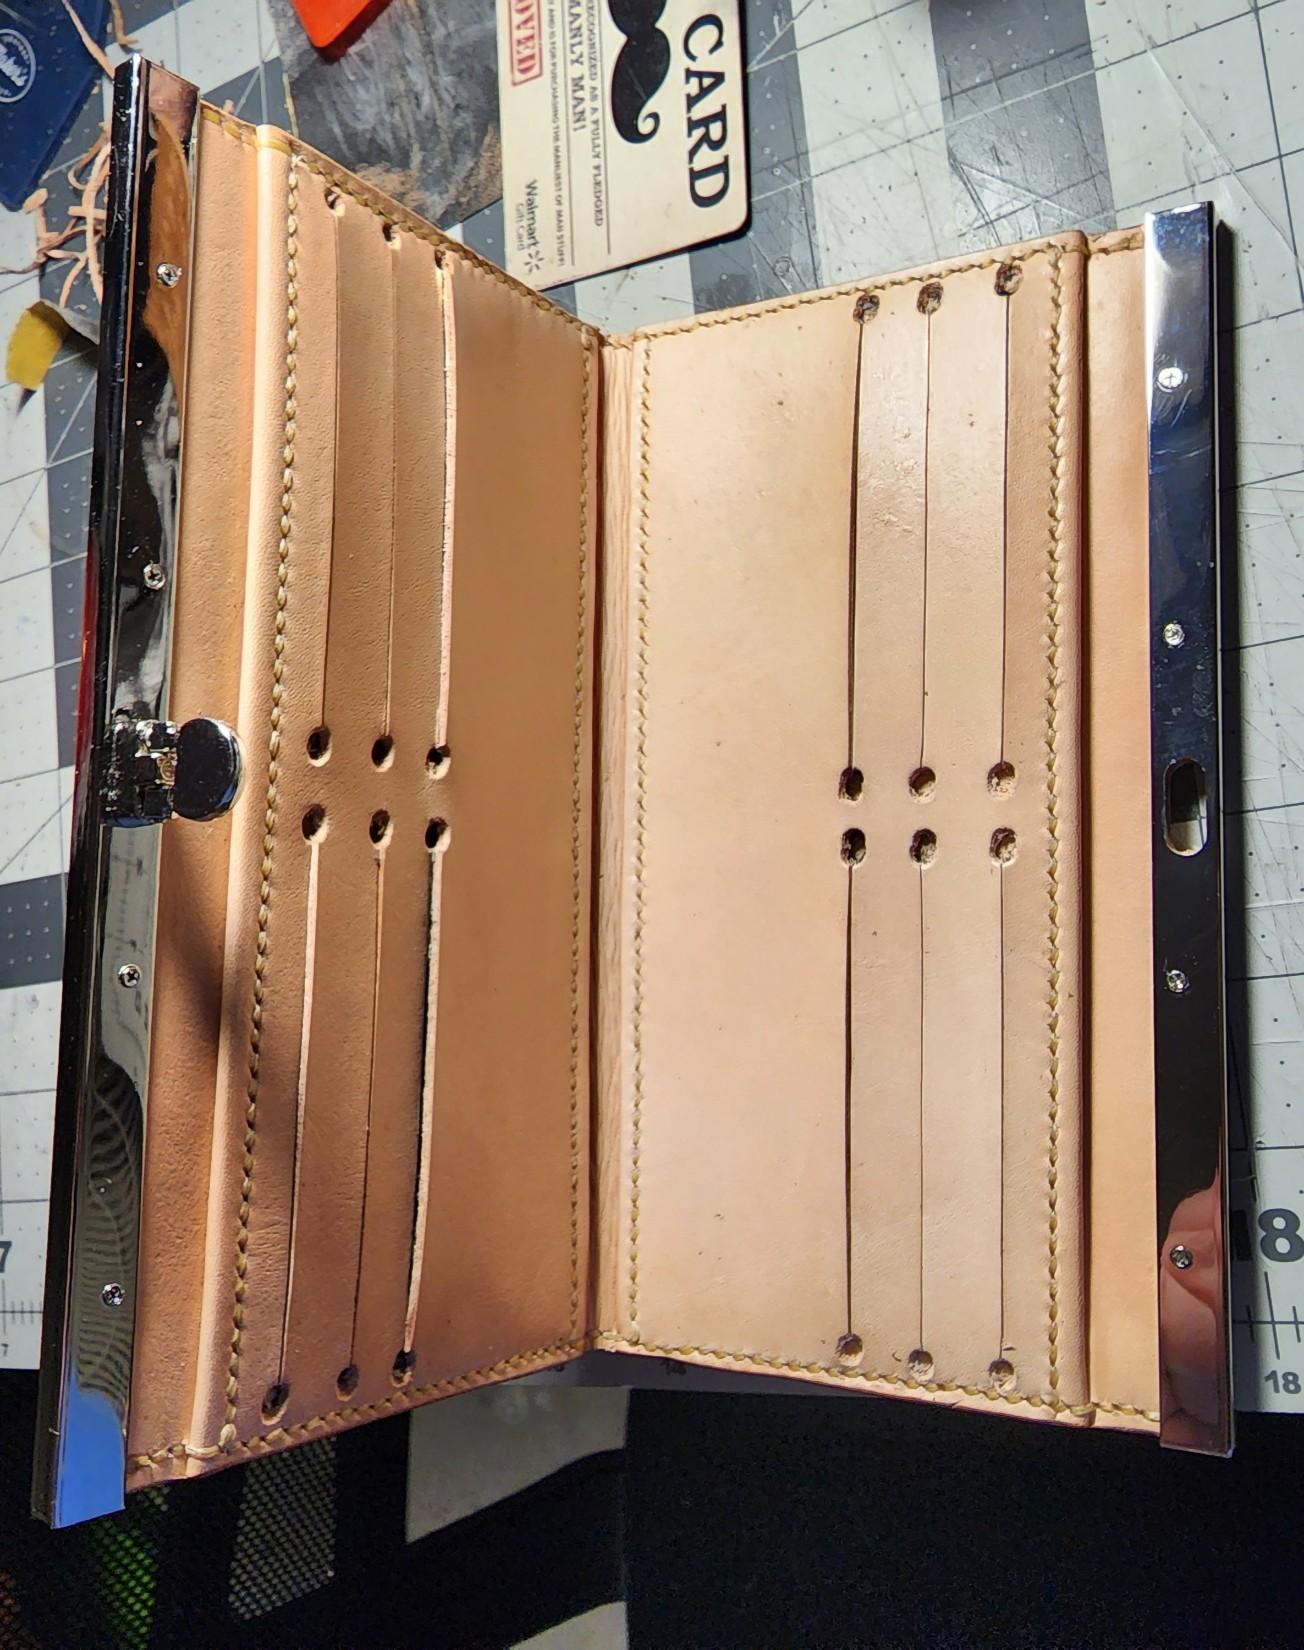
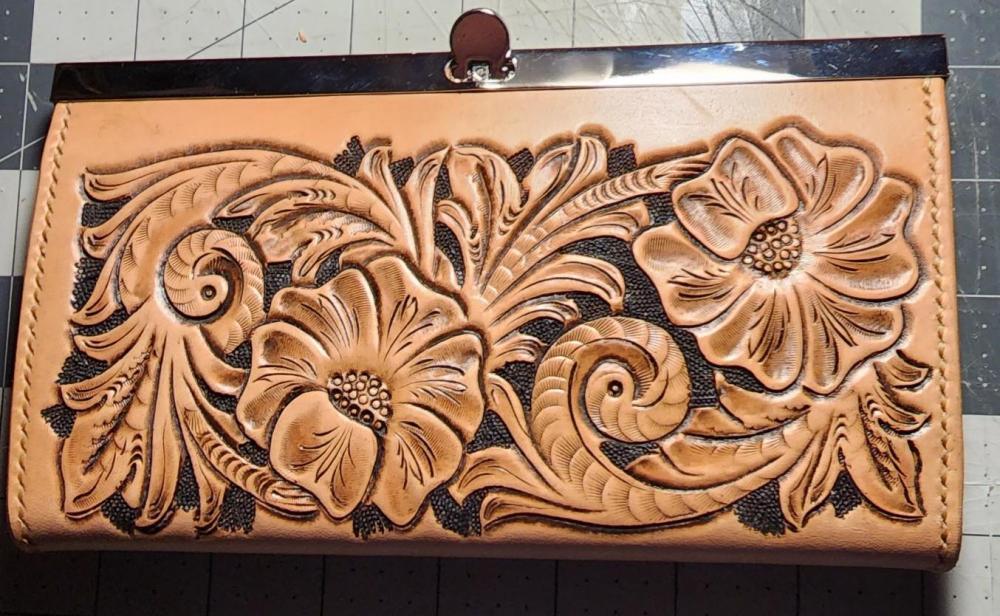
The finished piece. I'll be redoing it most likely as the interior card slots are too thick
-
Arizona style clutch wallet back
Stetson912 replied to Stetson912's topic in Floral and Sheridan Carving
Thanks Bruce, I was able to take his class last year. I wish I could again this year, or get some 1 on 1 time with him to learn some things. I love the palosanto edger and the draw gauge I got from you too, thanks again Thanks, I will post the finished piece soon. It is done but, as I was afraid of, the leather I used for the interior was too thick so its not so functional, but looks nice haha. I will be redoing this one with thinner interior leather. Can't win them all, but it was my first attempt at this new pattern too -
Arizona style clutch wallet back
Stetson912 replied to Stetson912's topic in Floral and Sheridan Carving
Thank you -
Arizona style clutch wallet back
Stetson912 replied to Stetson912's topic in Floral and Sheridan Carving
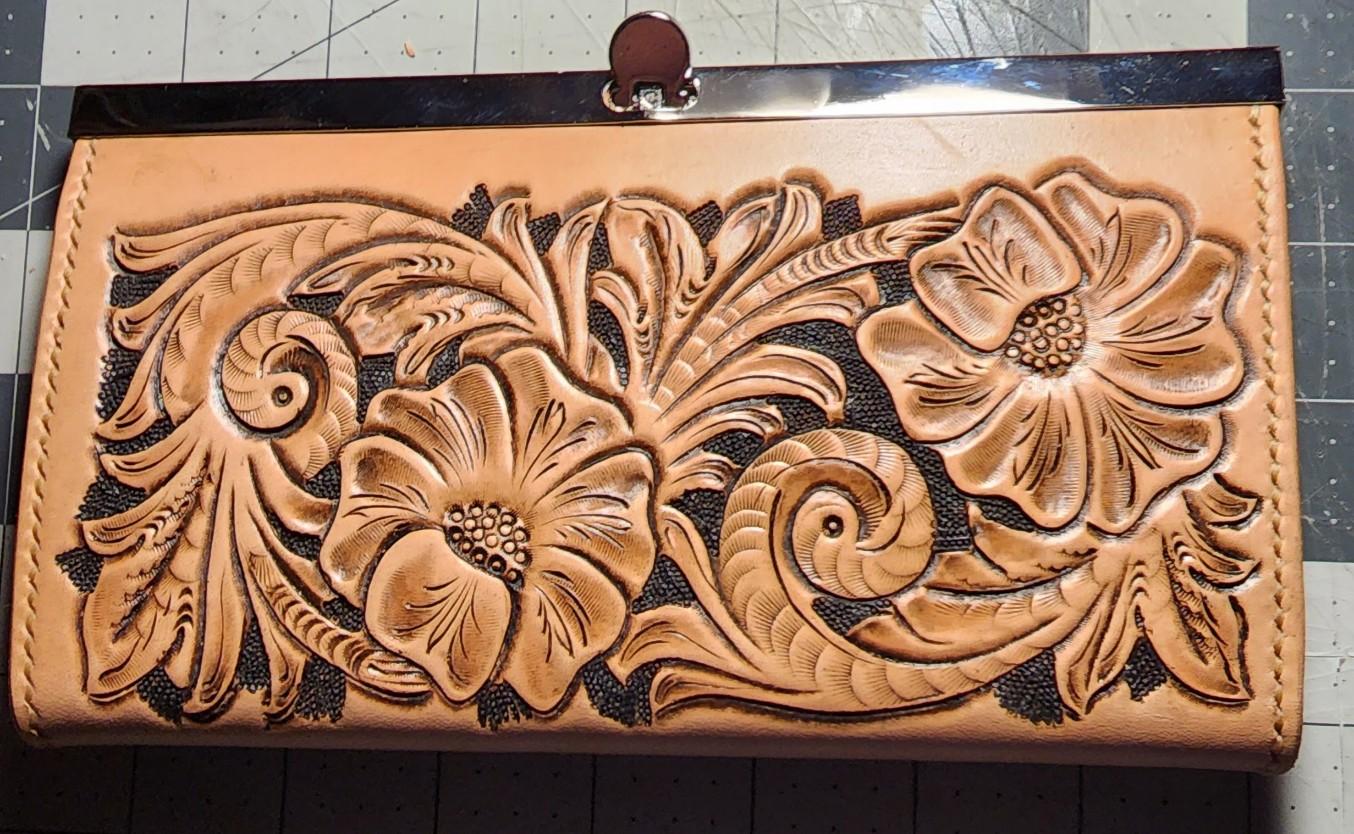
I know what you mean. But I do kinda like it. I was originally going to have a border but, I made the pattern a bit too big so I did it this way -
Arizona style clutch wallet back
Stetson912 replied to Stetson912's topic in Floral and Sheridan Carving
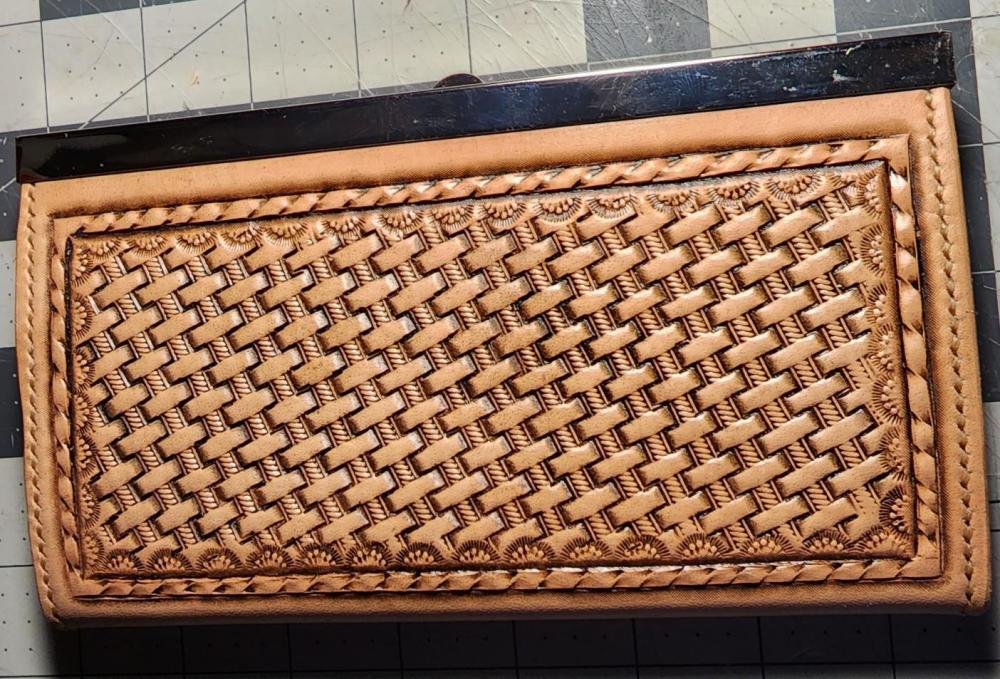
It will be stitched. It has a metal bar type closure that will be installed too -
Here's a pattern by Rocky Minster that I decided to put on this clutch wallet back
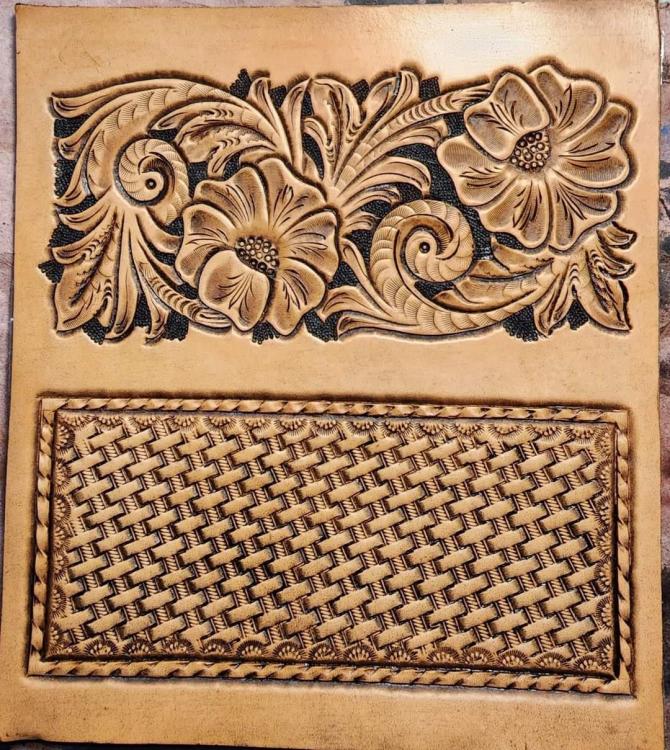
-
Very cool
-
It is scary starting out. I used sibil johos glazing method, and it was easier than I thought haha. Still scary worrying about messing it up haha
-
I'm always afraid to color my work, but this came out ok so I thought I'd share, after a long radio silence, here it is. Thanks and enjoy
-
Valet tray
Stetson912 replied to Simplejack1985's topic in Purses, Wallets, Belts and Miscellaneous Pocket Items
Looks like a Heizer skull and web haha. Looks nice to me. I have to make myself one one of these days -
Always a pleasure seeing your "stuff" on here. Always really cool