Stetson912
-
Posts
1,431 -
Joined
-
Last visited
Content Type
Profiles
Forums
Events
Blogs
Gallery
Store
Everything posted by Stetson912
-

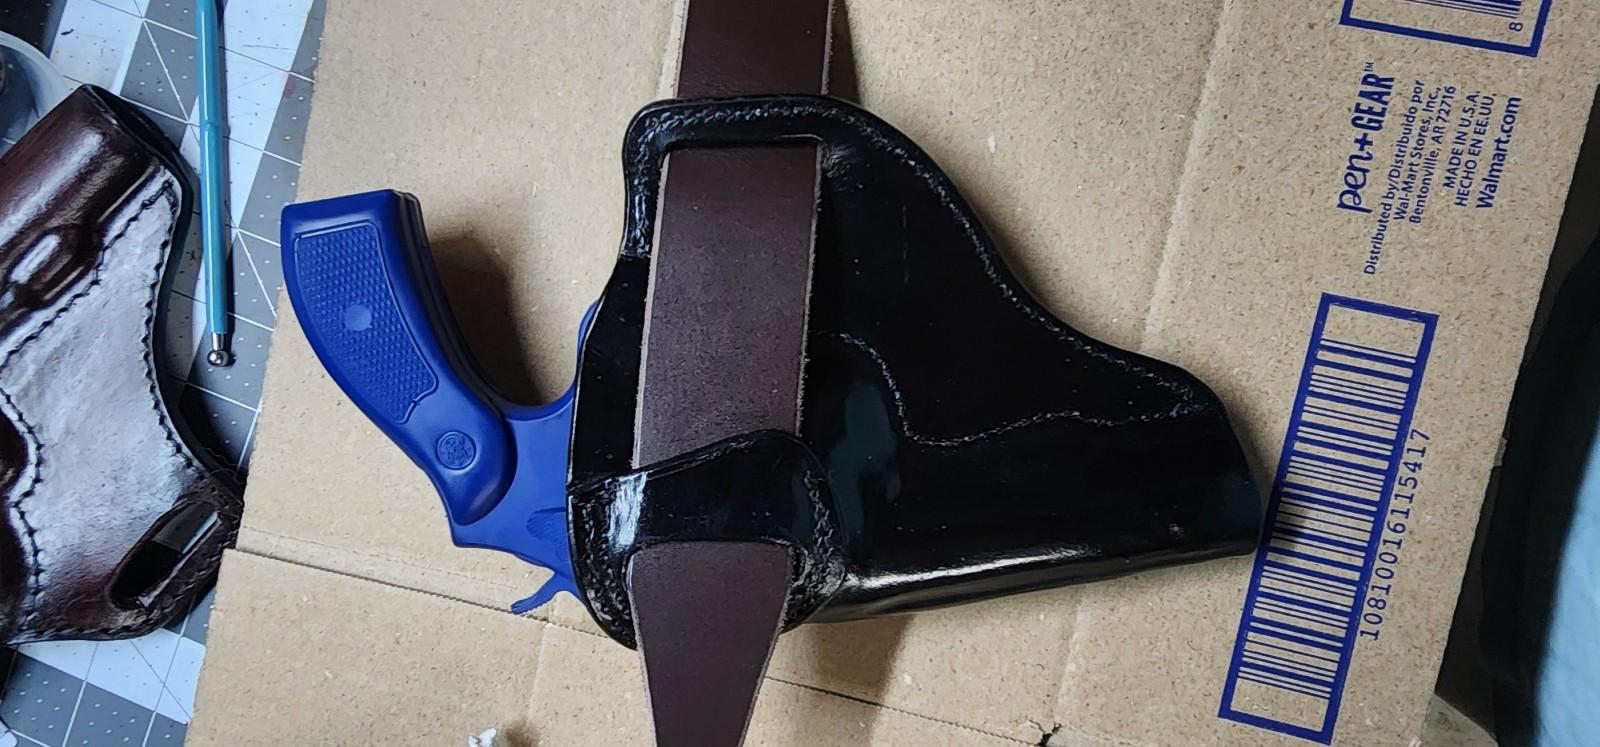
K frame thumb break
Stetson912 replied to Stetson912's topic in Gun Holsters, Rifle Slings and Knife Sheathes
Thanks Thanks. I used my cowboy outlaw to stitch it. 277 thread -
K frame thumb break
Stetson912 replied to Stetson912's topic in Gun Holsters, Rifle Slings and Knife Sheathes
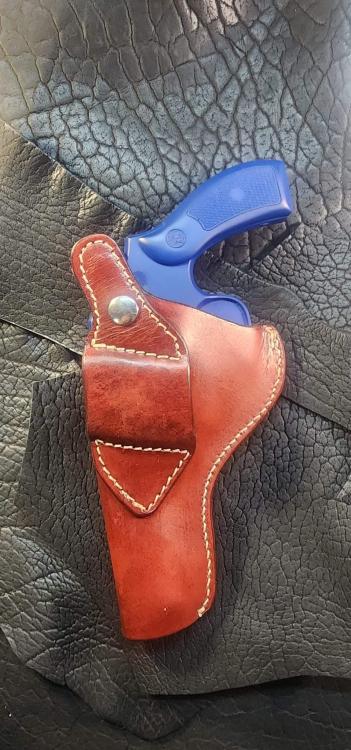
Thanks. Its Bordeaux waterstain -
K frame thumb break
Stetson912 replied to Stetson912's topic in Gun Holsters, Rifle Slings and Knife Sheathes
Thanks. It's a surprisingly easy effect that's fun to do -
K frame thumb break
Stetson912 replied to Stetson912's topic in Gun Holsters, Rifle Slings and Knife Sheathes
Thanks, it was fun to make -
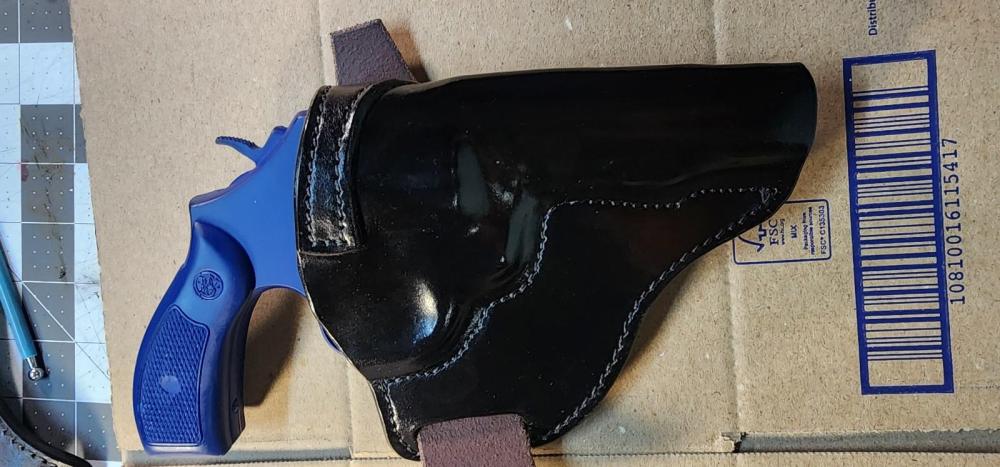
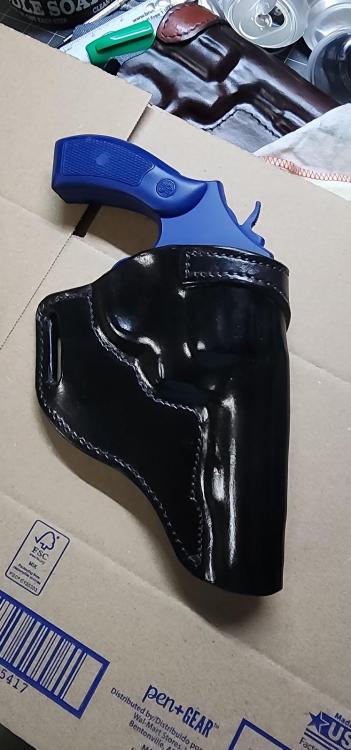
Latest off the bench. I used Bordeaux waterstain and dark brown antique. I used a piece of hose clamp to make a break stiffener and placed it between the holster body and belt slot panel. It has a 1/2" full tapered welt also.
-
Im no expert by any means. Ive made a few holsters though. I think your leather is too thick for an iwb. As Dwight mentioned the gun plays a factor. But I wouldn't go heavier than 8 oz personally. If you want to line your holster I'd recommend using the same weight leather for the liner and outer shell. This was taught to me by Chris Andre, in his class we used 2 pieces of 5 oz and used a glass slicker to press them together which compressed the leather a bit. His reason was that the same weight leathers added more strength. In your case, I'd use that 3/4 oz and make your laminated panels out of that. The issue with tightness could be due to the leather thickness too, as your stitch lines are based on leather thickness. If you do the Facebook, look up holsters for handguns. it's a great group with a lot of people willing to help.
-
Well, it's my thinking that if the gun is functioning properly, you have to really design the holster for it to unintentionally fire. That is, if the holster is molded to the gun, even with heavy molding in the trigger guard, the rest of the molding will prevent the gun from moving downward in the holster causing it to unintentionally discharge. You would have to have really deep molding in the trigger guard and push the gun through the stitches to cause it to fire. And that's just not feasible and would suggest a peoblem with the operator not the holster
-
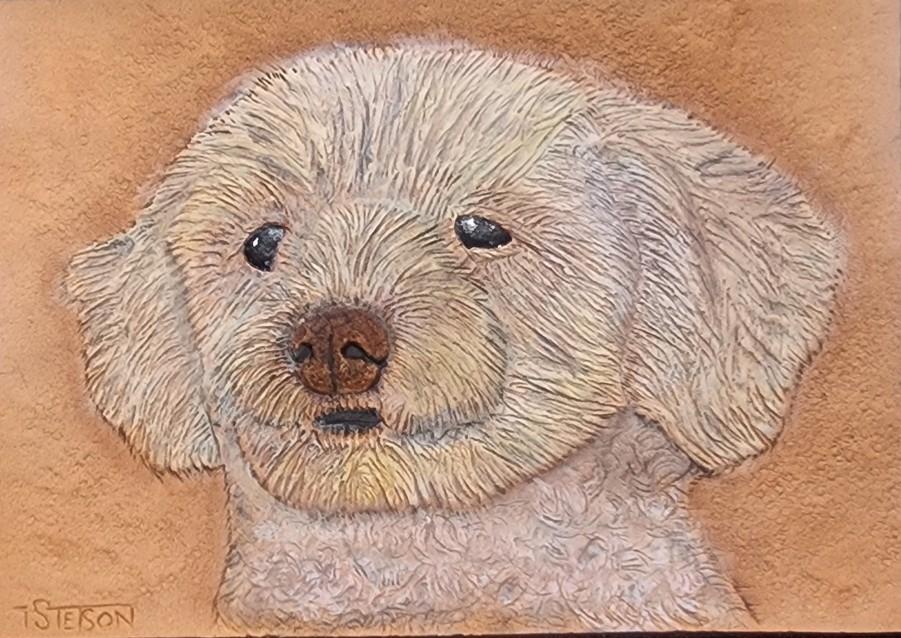
Thanks. Dogs are the best haha
-
I agree with the eyes, the photo had them blocked by his long muzzle fuzz and I wasn't able to portray that very well. I nee more practice haha Thanks, it was a fun challenge
-
I was asked to make a portrait of my dad's dog for my step mom. I'm no great figure carver but this was a first for me. I haven't don't many dogs, and this is the first from a photo. I had to make my own pattern and did heavy research into texturing. Painting is also not my steong suite but I think little Fozzie came out alright. Cheers
-
Dachshund bag
Stetson912 replied to Stetson912's topic in Purses, Wallets, Belts and Miscellaneous Pocket Items
Thanks! -
Dachshund bag
Stetson912 replied to Stetson912's topic in Purses, Wallets, Belts and Miscellaneous Pocket Items
Thanks. It was fun to learn and do -
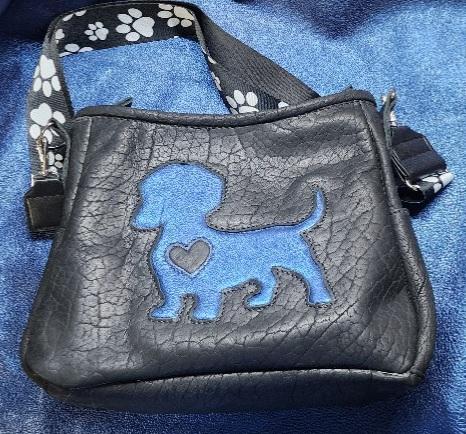
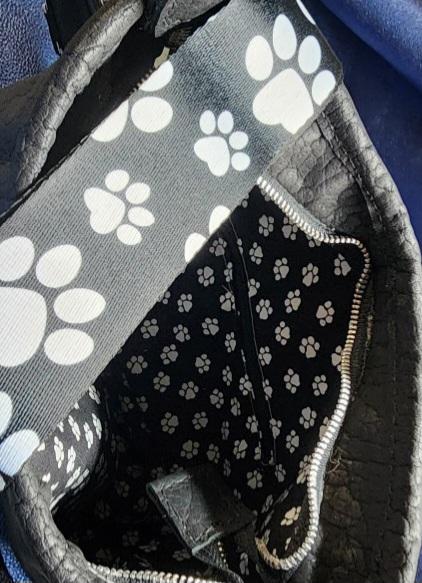
I posted the inlayed panel of this bag but here is the finished piece. Black buffalo(I think, i bought it forever ago) metalic blue for the inlay. The wife is happy with it and as luck would have it, I found a strap to match the interior lining! Not perfect but came out ok I think

-
First inlay work
Stetson912 replied to Stetson912's topic in Purses, Wallets, Belts and Miscellaneous Pocket Items
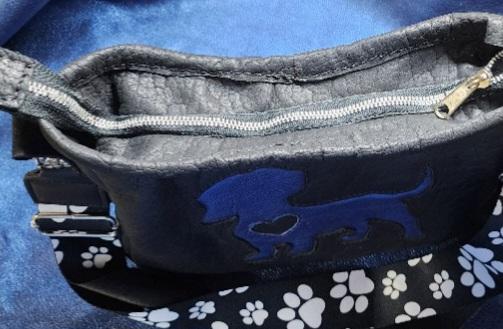
It was a little bit. Most of ot is prep work. A lot of skiving. The heart is inlayed into the blue which is inlayed into the bag front. Once it was skived and fit together It came together pretty quick Thanks. Challenging but I like the result -
I'm making a bag for my wife. I showed her a picture of a bag aaron hizer at makers made and had to try it. The inlay design is what I'm taking from Aaron. The bag is a different pattern. It is my first attempt at inlay work too so, If anyone knows where to do better let me know. Cheers!

-
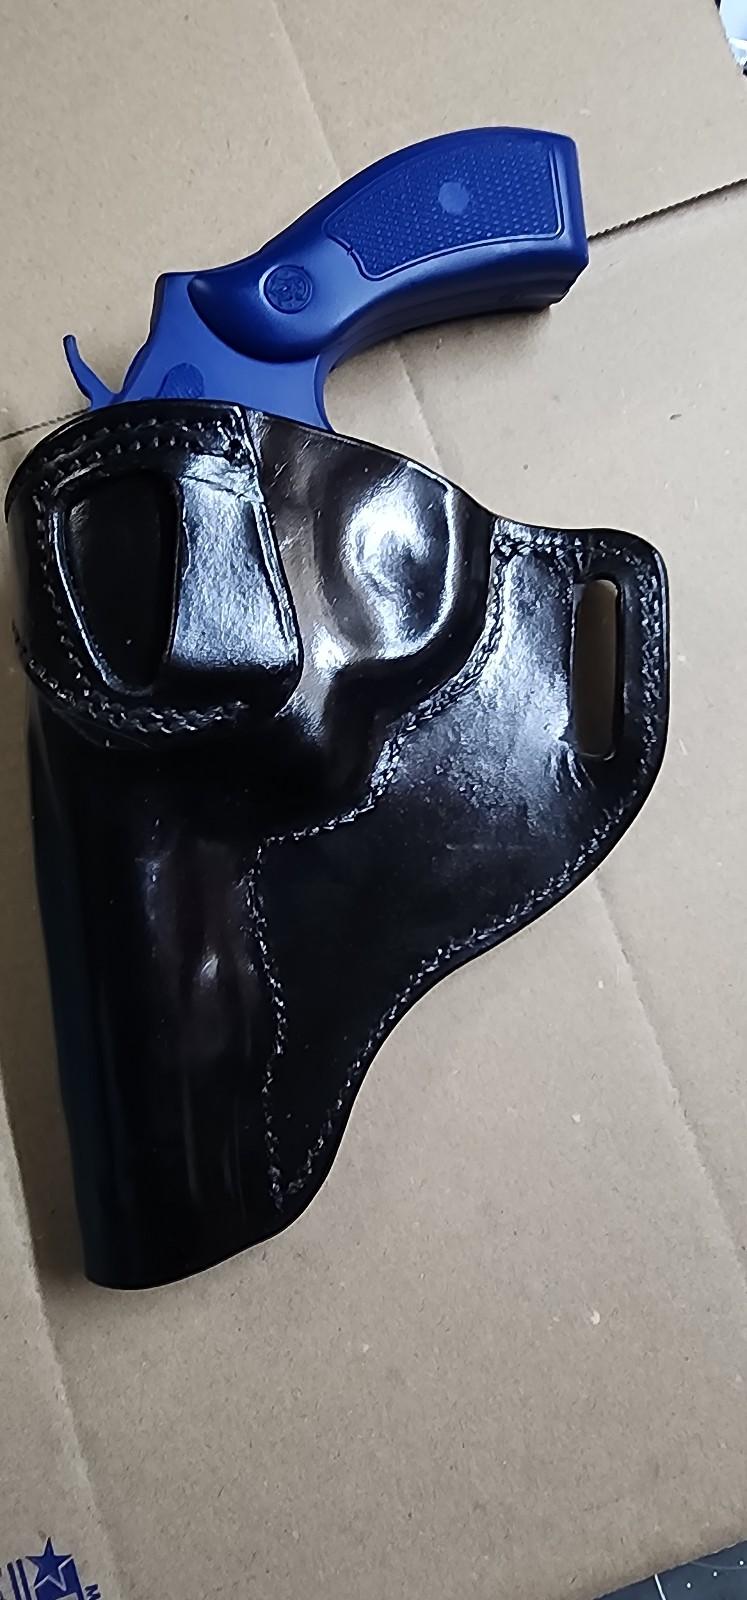
K frame avenger style
Stetson912 replied to Stetson912's topic in Gun Holsters, Rifle Slings and Knife Sheathes
Thanks. I used a foam brush to apply a few coats of angelus satin finish and Buffed with a rag after it dried. -
Made a few iterations and landed on this. It's for a k frame s&w for a friend. Critique welcome.


-
As a first go it looks function as l. However there are some safety design elements I'd recommend. First is your magazine release being covered, it shouldn't be. It cam potentially cause your magazine to be released when it shouldn't be. Second is grip clearance. You should strive for about an inch or so. This design looks like it's ok but something to keep in mind. Keep at it!
-
Thank you for the info. Based on that it isn't what I need. Thanks again for saving me time and money
-
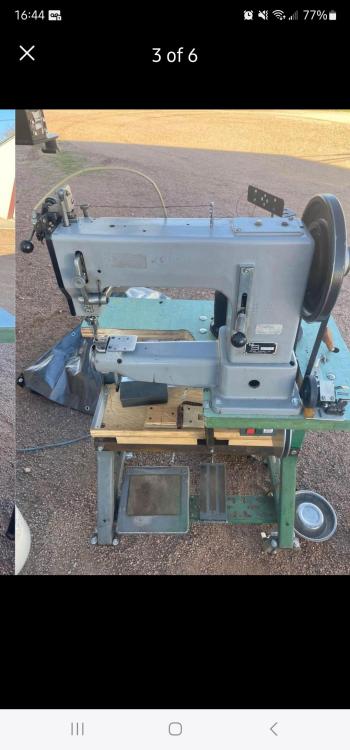
It's listed for 950 also, which is why I'm tempted, also has video of it sewing on the post
-
I found this machine listed semi locally for a good(I think) price. But I'm completely ignorant and don't wanna be had. I'm hoping someone can tell me about it and let me know what I'm in for. It looks like an older adler 205-370 but I really don't know. Thanks in advance for the aid.
-
Thank you. It was a fun one @JLSleather coloring I am not good at. Idk what to do with it haha. I have peter main and stohlmans books on it and still cant figure it out quite right haha. I need to practice it more for sure
-
Something just clicked with this one haha. I know how you feel, all I can say is thank you and just keep practicing it'll fall into place @MarshalWill I'll keep that in mind thank you
-
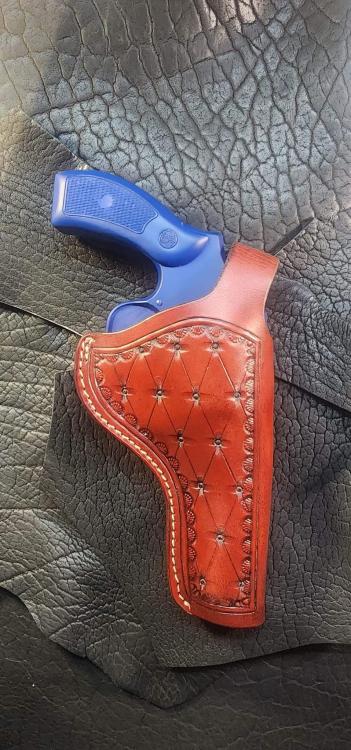
Thanks, the pattern is not mine, i just carved it. I agree though. It is a very nice pattern for those reasons. That's going to be my next learning adventure, drawing patterns... terrifying!
-
Thsnks and Yes, it's available for download on his site now.