Double U Leather
-
Posts
655 -
Joined
-
Last visited
Content Type
Profiles
Forums
Events
Blogs
Gallery
Store
Everything posted by Double U Leather
-
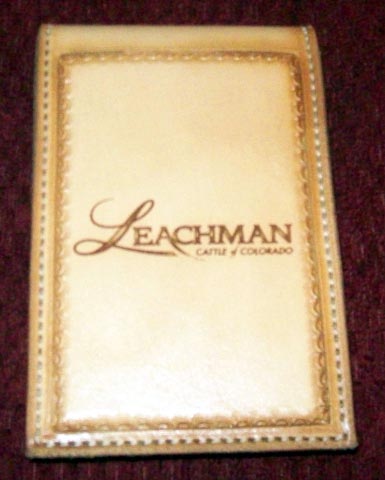
Thanks King.....I wish I could leave that business card in the projects since it's mine!!! Unfortunately, they are going to put their own cards in them advertising their bull sale.
-
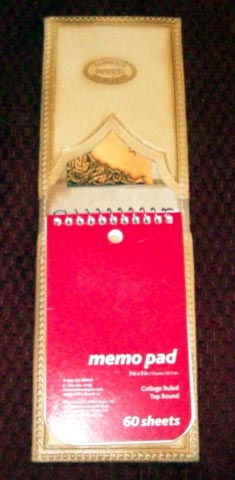
Thanks Welder.....no I didn't gouge the fold line. The leather is 3-4 oz. premium HO, and is fairly soft and pliable while still being sturdy enough to no be floppy. After they were completed, I simply folded them and they stay folded.....no rubber hammering on the fold, no gouging, no nothing. It was a very nice piece of the leather. Thanks for the compliments.
-
Thanks for the compliments guys. Elton, I thought about a push beveller but there were a couple drawbacks. 1) I don't have one. 2)Umm.....refer to A. LOL I was fortunate to land the gig however. I've got some people on the inside, so that helped. Hopefully, they'll order more.
-
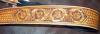
Here's 1 of 20 of these that this outfit commissioned me to make. They are laser engraved. Not alot of tooling, but good golly it felt like several miles of beveling. I smelled like the Ben Gay poster boy after finishing the bevelling process. Anyway, the pics stink but the product turned out nice. Let me know what you think.

-
Newest Square bottom chinks
Double U Leather replied to Tkleather1's topic in Clothing, Jackets, Vests and Chaps
Tim, I think they look great. I'm by no means talented enough to offer criticism, nor advice. The only thing I would have done different is on the bottom of the flowers. I probably would have bargrounded the spaces between the border and the tooling. Not toward the front with the single leaf, but along the bottom under the circle and the tiny spaces where the tips of the leaves reach the border. I don't know if that makes sense. It's hard to explain with a keyboard. But, again, I'm not near talented enough to offer alot of input. They look great. -
Headboard piece
Double U Leather replied to Double U Leather's topic in Furniture: Inlays and Upholstery
I'm not totally sure, but I think probably upholstery tacks. I've made several toilet seat covers and I always use that method to put 'em on. -
Those pine cones definitely rock!!! Nice work!
-
Guitar strap/Christmas present for my son
Double U Leather replied to Double U Leather's topic in Guitar Straps
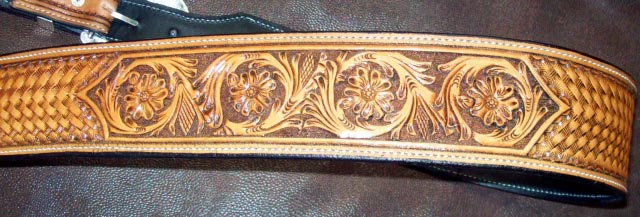
Thanks for the compliments. If not for the screwed up arrowhead basket weave, I'd have really been pleased with it. Scottish......all I did for the dying process was typical sheridan antiquing i.e., neatsfoot, neatlac, antique, tan kote. I did dye the initials with black. -
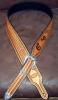
Here's the next project done. It's the second guitar strap I've done. I think it turned out pretty well for the most part. I hosed up the arrowhead weave basket stamp, but oh well. I nailed the arrowhead deal on a practice piece, but when it came time to play for all the chips, I choked. I guess that's why I'm still a rookie....LOL. Take a look and let me know what you think. I'm open for any critiques as well. Thanks.

-
Headboard piece
Double U Leather replied to Double U Leather's topic in Furniture: Inlays and Upholstery
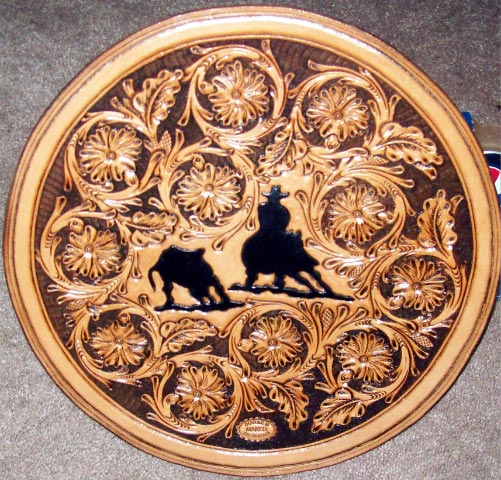
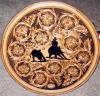
Here's the headboard piece with the edges sewn and dyed. It doesn't look all that much different than the original pic, but I promised I post when it was complete. And...I promise to post a pic when the lady attaches it to the bed. Thanks for looking.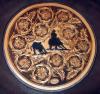
-
Headboard piece
Double U Leather replied to Double U Leather's topic in Furniture: Inlays and Upholstery
Thanks Hilly..........now if I can make the reining horse one look the same. Shoot, I'll be happy if the reining horse one is even similar.......LOL -
Storm........those look great. I really like the center one. Can you explain the "negative and positive" space thing. I'm not sure I understand what that means.
-
Headboard piece
Double U Leather replied to Double U Leather's topic in Furniture: Inlays and Upholstery
Thanks Ms. Bronco........I told the customer that part of the deal was that she was to send pics when she had it on the bed. I think it will look pretty spiffy. -
Headboard piece
Double U Leather replied to Double U Leather's topic in Furniture: Inlays and Upholstery
Thanks WV. I'll try to remember to post a finished pic. It probably won't look alot different than it does now though. -
Good work Storm. Bet it was hard to make the little fella sit still while you made his portrait.
-
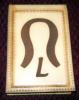
Here's the latest from the bench. It's going on a headboard for a lady. I'm in the process of making a reining horse for the footboard, but I just was so excited at the way this turned out, I had to show it off. Speaking of excited, I haven't sewn it, nor have I finished the edges. I just put the finish on it and was so thrilled I brought it in and took pictures. Maybe I'll post another pic when it's sewn and the edges done!!! Let me know what you think, and any critiques are welcome. Thanks.
-
Thanks Tim. I hope Bob was confusing me with you, cuz your work is real nice stuff. I'd be honored to be confused with you.
-
Thanks Bob, 'cept my name isn't Tim...LOL. I'm just the resident rookie. You can call me Wayne though. LOL. Thanks for the compliment.
-
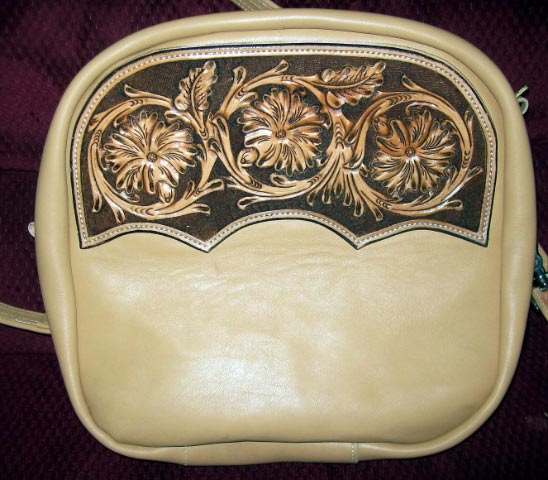
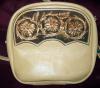
Here's the first purse I've ever built. Thanks to Bruce Johnson for the patterns. Of course, being the engineering wonder that I am, I had to tweek the pattern to make it a bit different. When it's all said and done, what was supposed to be a purse, looks more like a bowling ball bag!! Oh well, hopefully the wifey will like it. If not, she can sell it at the flea market. Anyway, give it a look and let me know. Any critiques are welcome. Thanks.
-
Photo Album / Guest Book
Double U Leather replied to hidepounder's topic in Books, Journals and Photo Albums
Good gawd man...........you need to stop. You're going to make us wanna-be leather guys jump head first under slow moving steam roller!! You're work is incredible. Absolute perfection. Words can't begin to describe your work. And I thought I was about to get a handle on this leatherwork stuff. Geez....after looking at your stuff, I'm estimating it will take me approximately 4,981 years, working 29 hours a day, to even be able to unroll a side of leather for you. Bottom line.....you and your work is amazing. -
My first Checkbook Cover
Double U Leather replied to Chris B's topic in Purses, Wallets, Belts and Miscellaneous Pocket Items
Nice work Chris. I haven't laced anything since I was in 4H. I need to try to remember how to do it. It looks so good. -
New Bronc Halter
Double U Leather replied to Double U Leather's topic in Saddle & Tack Maker Gallery
Thanks Chris. I just replaced the nose piece on this one. I haven't built a complete halter yet, but I do have one coming on order I think. I'm just going to take a nylon halter and cut it up for a pattern, and also look carefully at a leather one and go off of those measurements. If this person comes through and orders one, I'll let you know how it went. -
New Bronc Halter
Double U Leather replied to Double U Leather's topic in Saddle & Tack Maker Gallery
Uh oh.........not many views and no responses. I musta hosed this up worse than usual....LOL -
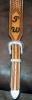
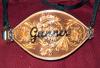
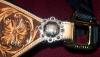
Here's a bronc halter I just finished. I should have made the circles a bit bigger and added more leaves. Way too much bar grounding for my old feeble eyes and hands....LOL. Anyway, let me know what else I need to work on. The conchos were cool seein' as how the horse's name is Gunner. Thanks for looking.
-
I saw my very first push beveler the other day at my buddies leather shop. He simply took a beveler, drilled a hole in an old mop handle, cut it off to about 2' in length, and voila.....there ya have it. He said he uses it alot. I'll have to give it a whirl I guess. Although, I'm pretty old school....I'll probably just keep doing the mallet/walking of the beveler routine.