Double U Leather
-
Posts
655 -
Joined
-
Last visited
Content Type
Profiles
Forums
Events
Blogs
Gallery
Store
Everything posted by Double U Leather
-
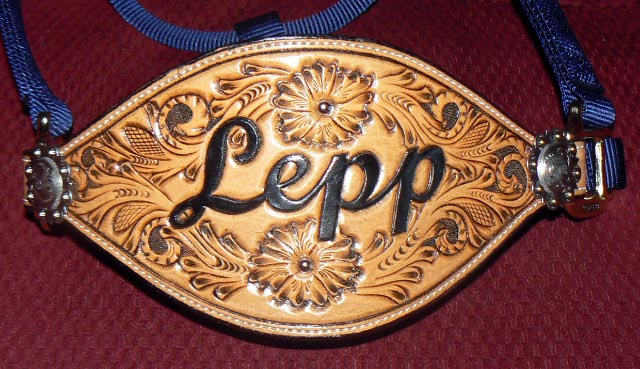
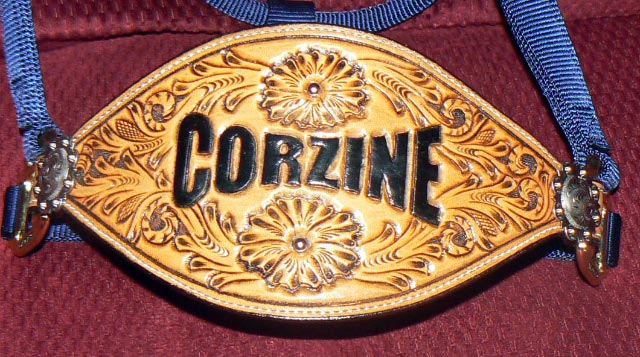
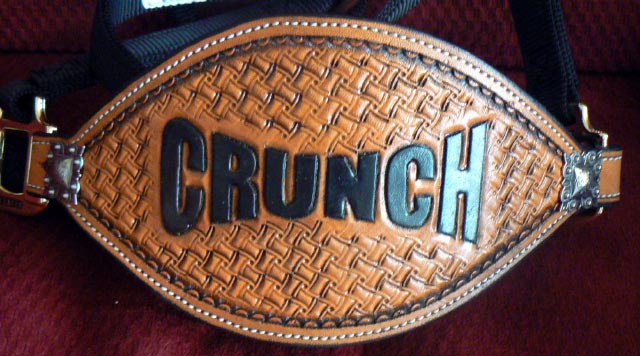
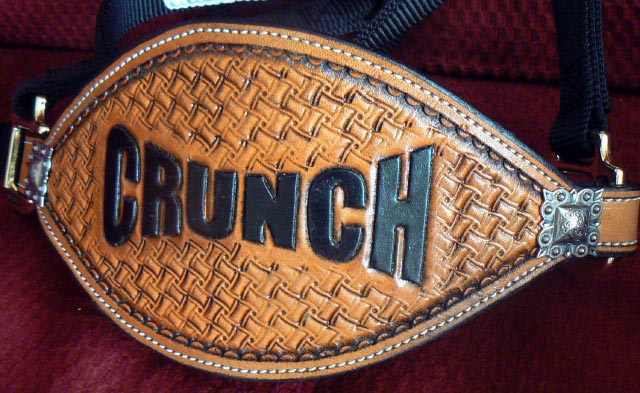
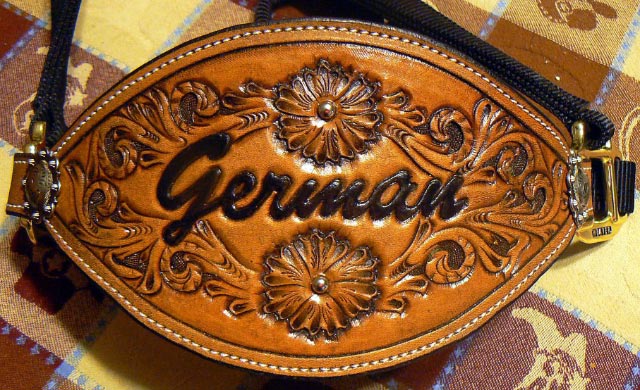
Here's the latest. Let me know what you think. Thanks for looking.

-
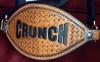
Tooled Flower Belt
Double U Leather replied to MADMAX22's topic in Purses, Wallets, Belts and Miscellaneous Pocket Items
Looks good Max. You did well. -
Small Purse Round 1
Double U Leather replied to MADMAX22's topic in Purses, Wallets, Belts and Miscellaneous Pocket Items
Nice work Max. My first purse turned out a whale of alot different than what I had envisioned!! Looked more like a bowling ball bag than a purse. You did well. -
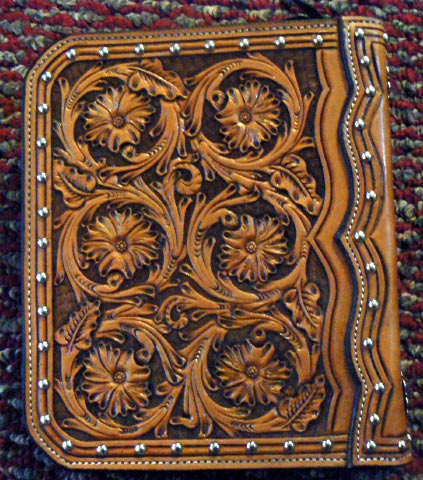
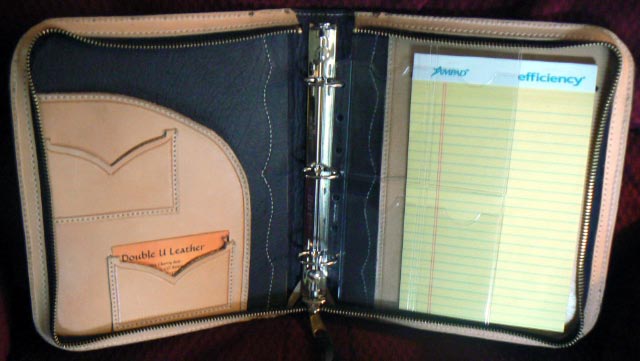
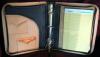
3 Ring Binder Daytimer
Double U Leather replied to Double U Leather's topic in Books, Journals and Photo Albums
Well, I was finally able to deliver this to the customer. Our schedules didn't mesh for a while. Anyway, the customer was totally satisfied, estatic, pumped, and whatever else!! I don't know about the rest of you, but sometimes I get nervous when delivering the finished item hoping it's what the customer had in mind. It makes me feel good when they enthusiastically comment on the finished product. Anyway, just thought I'd throw that out there. -
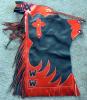
Here's the second bronc halter to fill the order. This one, and the one I posted a few days ago are for the same customer. Let me know what you think. I personally liked the other one better, but this one is okay. First time using the "whoopty do" stamp.
-
Hey gang.....here's the latest. I fiddled with a scroll/floral design and came up with this. I thought it turned out okay. Let me know what you think of it. Thanks for looking.

-
3 Ring Binder Daytimer
Double U Leather replied to Double U Leather's topic in Books, Journals and Photo Albums
Thanks Max. I can assure you, zippers are no fun. I had to rip this one out and re-assemble it twice. And, it still is just a tick off. Just enough to make the notebook have a small twist. Oh well. -
3 Ring Binder Daytimer
Double U Leather replied to Double U Leather's topic in Books, Journals and Photo Albums
Thanks Doc. -
It's been a while since I posted anything, but here's the latest. The camera still ain't the best, but it's what I have. Let me know what ya'll think of this project. I was pretty happy with the way it turned out. There was one boo-boo that I wish I had a mulligan for, but no one other than a fellow leather worker would ever see it. Thanks for looking.
-
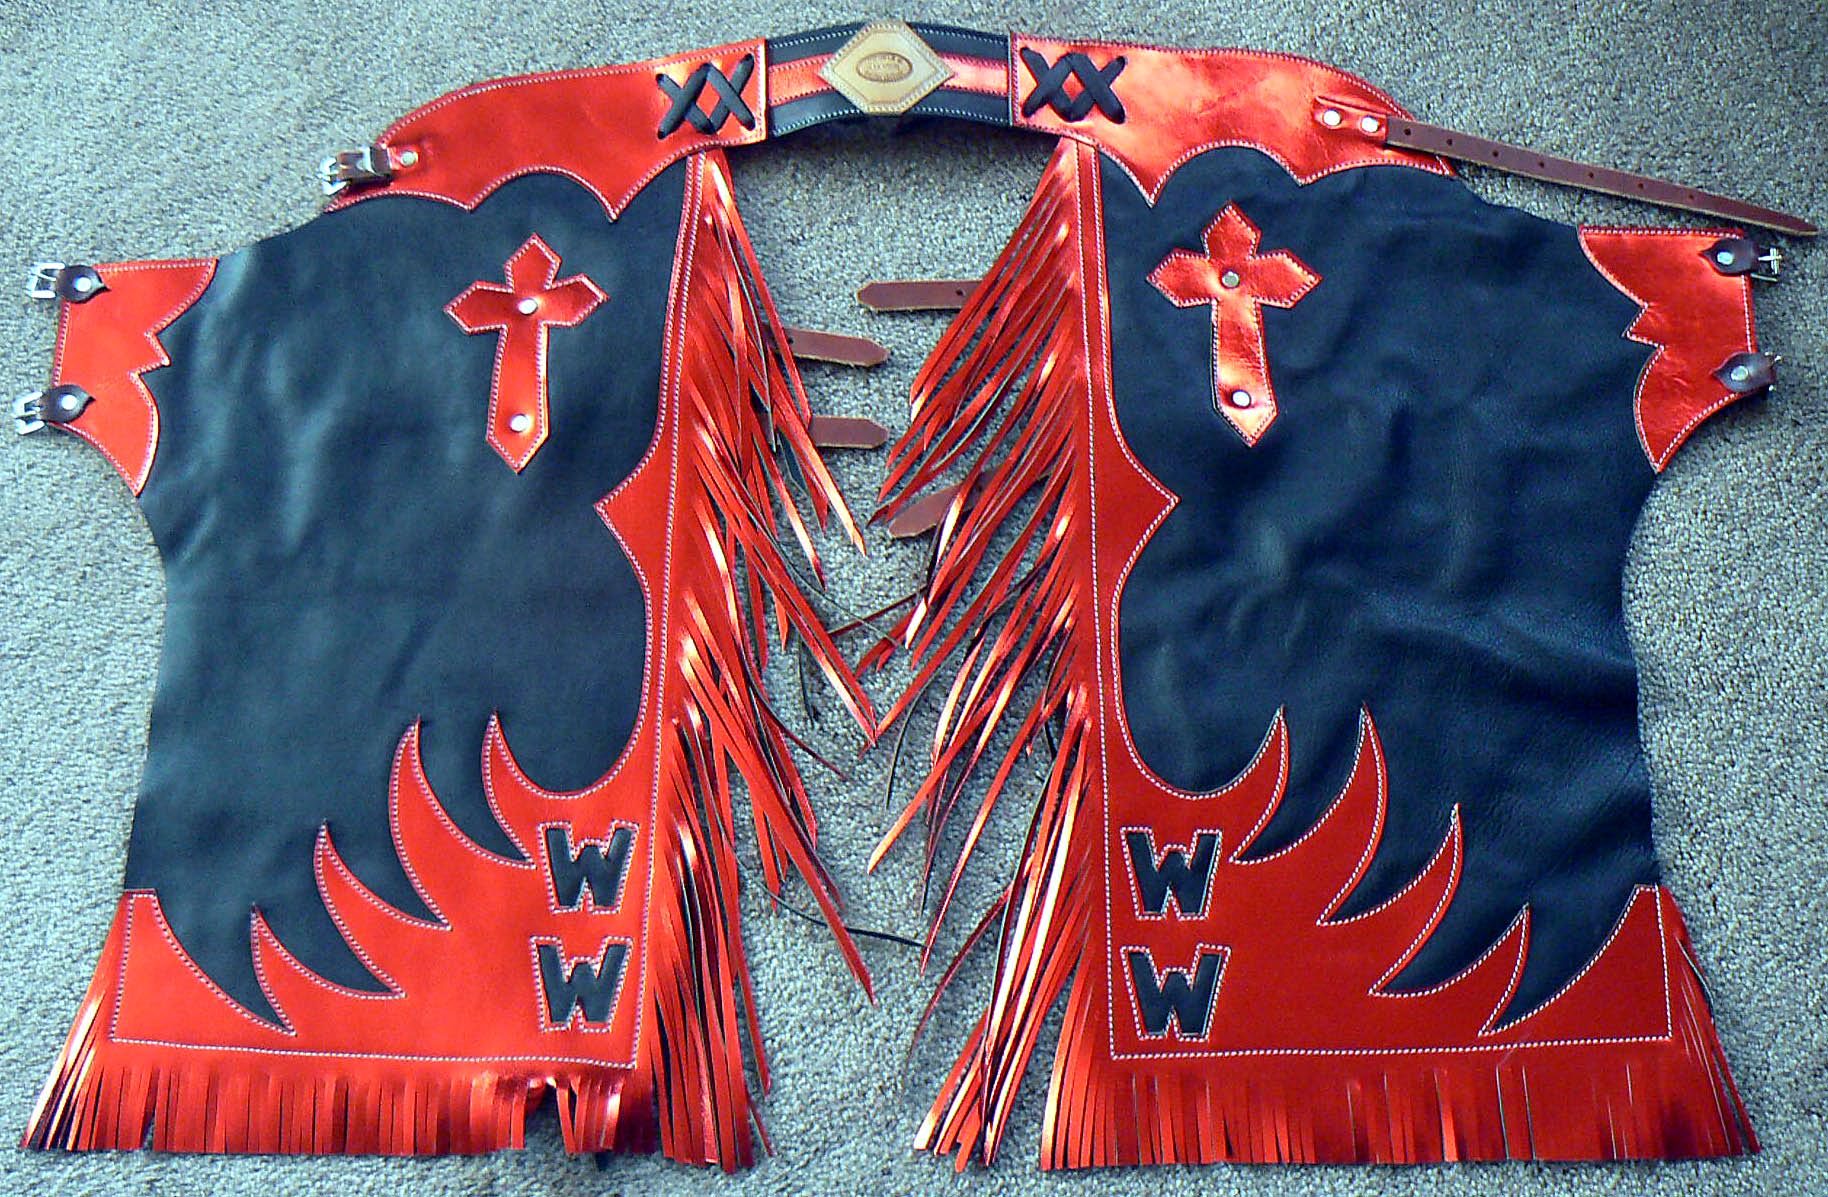
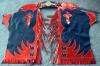
Mutton Bustin' Chaps
Double U Leather replied to Double U Leather's topic in Clothing, Jackets, Vests and Chaps
Well, I just delivered these last night. If the kid likes 'em as much as his dad did, he'll be a happy lil' camper! Thanks for the comments. Dirtclod...I agree that the rivets should/could have been hidden. Usually when I make chaps, there are conchos to cover the rivets. This pair however, was on a very tight budget. I couldn't justify spending any more time on them than I had too. Anyway, good constructive criticism. And, it is something I'm aware of. -
Here's a pair of mutton bustin' chaps I just finished for a 5 yr. old. The pictures don't show up real well. They're black with metallic red. The red in the pics looks just like regular ol' red. Anyway, let me know what you think. Thanks.
-
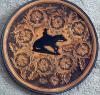
Here's the latest batch of pocket notebook holders I've done for Leachman Cattle of Colorado. This brings the total to 60 of these lil buggars. I sure do like these kinds of orders!! Nice profit.

-
Dang, I'm jealous too. Where did you find all of them?
-
Amen to what Hidepounder said about the book. When I first started trying to figure Sheridan style out, I about pulled my hair out. The book helped tremendously. I was also fortunate enough to have someone sit down and show me the "path" or flow of the vines. Once I had that figured out, it became easier. And, just like the man who showed me the flow said, I've been drawing circles and flowers ever since.....on napkins in restaurants, scrap paper, etc. Once the "light" comes on, it becomes very addicting!! If you'd like, you can send me an e-mail and I'll see if I can draw up a flow diagram or whatever and see if it makes it click. By the way, the gentleman who showed me is on here. I think he is CLH. His name is Clint Haverty, and he's a good man. Anyway, good luck and if I can help let me know. I will say however, I'm by no means an expert. Hidepounder is by far more accomlished than I am. As is Mr. Haverty and countless others.
-
OH DUH!!! I use templates for everything else I do, why wouldn't I do that on these things? I tried to square off an edge of the hide, then use a square for each piece. Geez, is it any wonder I'm still a "rookie"!
-
On my bigger notepad holders (8 1/2 x 11 or 5 x 8), I do the outside first, then the insides. Typically, those are tooled covers. However, I'm in the middle of an order of 40 pocket notebook holders (3 x 5), and I'm basically doing them all at the same time. I cut 40 outsides 3 1/2 x 11 1/4, then cut 80 inside pockets 3 1/2 x 5. I purposely cut the insides a tick bigger than 3 1/2 to make sure when I sewed them together I wasn't short on the inside. I'm now to the sewing step, and I've had to trim the tick off of the insides. It may have caused a bit more work, but it makes me more comfortable knowing I won't be having a few stitches sewing air. Anyway, I'll post some pics of them when I'm done. This is the second order from this company, so apparently the first time around they were pleased.
-
For cutting patterns, I use the cardboard that comes on pallets of feed. I've got a friend who runs a feedstore, and all of the pallets have square cardboard pieces that cover the top of the feed. The pieces are about 3 o4 foot square and they work slick.
-
Finished Headboard And Footboard
Double U Leather replied to Double U Leather's topic in Furniture: Inlays and Upholstery
Thanks for the compliments gang. The finished product turned out really nice. I know that while I was tooling the pieces, I wondered how it would all come together, but the lady who ordered them did a great job on mounting them. I wish I could actually see the bed in person. The only real bad part of the deal was my p*ss poor business skills. I didn't charge anywhere close to the right amount of money . Oh well....live and learn. -
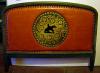
Finished Headboard And Footboard
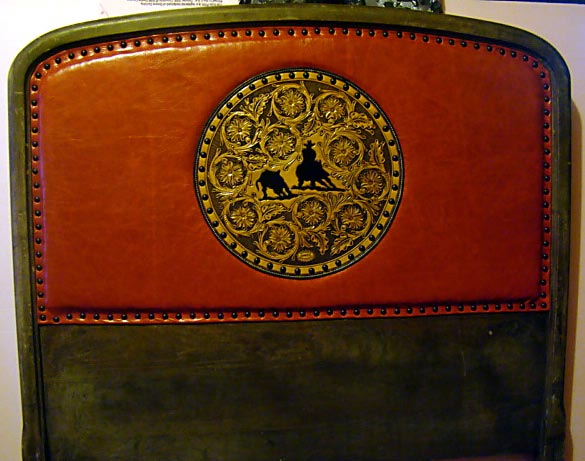
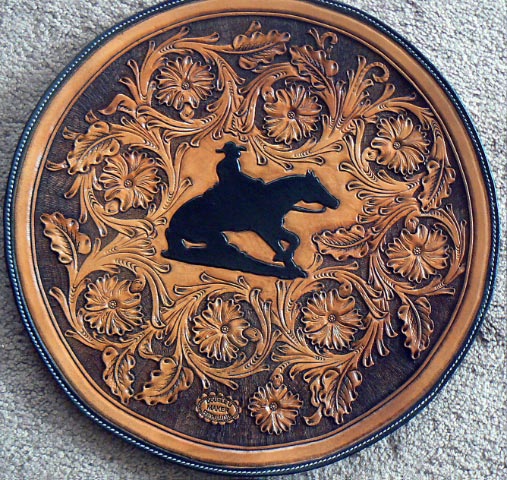
Double U Leather posted a topic in Furniture: Inlays and Upholstery
As promised, here are the completed pics of the headboard and footboard I was working on. For those who aren't sure what this is all about, I was commissioned to do the tooling i.e. cuttin horse and reiner, for a lady who then put them on a headboard and footboard for a day bed in her house. I told her part of the agreement was when she was finished mounting them, she had to share pics so I could live up to my end of posting the finished pics on here. I must say, she did a whale of a job on the upholstery part and made me work look pretty good! Anyway, take a look and let me know what you think. Thanks.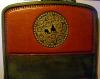
-
Really nice work. I've done a couple of Sheridan belts, and they sure didn't turn out that good. Good job.
-
Headboard Piece #2
Double U Leather replied to Double U Leather's topic in Furniture: Inlays and Upholstery
Update on the headboard/footboard pieces........the lady got 'em today and she is all giddy about 'em. I guess she didn't see the bobbles that I know are there....LOL. Anyway, I told her she had to send pics of the entire finished project so all of you could see it. I'll keep you posted. And, thanks again for the compliments. -
Headboard Piece #2
Double U Leather replied to Double U Leather's topic in Furniture: Inlays and Upholstery
Thanks Storm, but trust me...the nickname still fits. One day, I may move beyond "rookie" status, but not just yet. Thanks again for the compliment. -
Here's the second headboard/footboard piece. The other part has been moved to "Other Specialties---furniture". I hope the gal likes them. I like the other one better, but that's my opinion. This one didn't turn out too bad. Plenty of things I wish I'd have done differently, but for a "rookie" it'll hafta do. Let me know what you think.
-
Clock and Chinks
Double U Leather replied to clairmullin's topic in Clothing, Jackets, Vests and Chaps
Good work Claire as always. Don't you love when customers let you have artistic freedom instead of trying to micro manage a project? It always amazes me when people who have no clue about leather (or anything else for that matter) try to tell the professional how to do the job. Anyway, nicely done. -
Best glue for rope can cover ?
Double U Leather replied to Doug Mclean's topic in General Saddlery Discussion
Doug, I've made lots of rope cans, and Barge is all I've ever used. I've found that if I sand the top of the can some before I glue it, it seems to stick alot tighter. As for the conchos, I've never drilled them through the can lid. I've always used Chicago screw type conchos. The reason for that is that by drilling through the top, it makes the rope can not be air tight, and calf ropers are extra picky about air tight cans for their ropes. Hope this helps.