


BondoBobCustomSaddles
-
Posts
1,033 -
Joined
-
Last visited
Content Type
Profiles
Forums
Events
Blogs
Gallery
Store
Everything posted by BondoBobCustomSaddles
-
Nice job considering you did it without the "proper tools". That's akin to working on a car with a pair of pliers and a hammer! The book will make life a lot easier, and your product much more pleasing to your eyes. Call your store and ask for them to send you the book and put it on your charge. That is the real place to start. You will be glad you did. Bondo Bob
-
 I concur with most all that has been said here. If you do custom work, you are going to run into these issues. The best advice I can give is , first (uuhhh I hate to say the word!) but; document everything that is said and done. Next if it's custom work, at least get the cost of materials up front non refundable, that way you can always sell it later and recoup your work. Finally, you have the right by law to sell their guns or whatever it is that you have of theirs to recoup your loss, as long as you have met certain criteria. I believe it is something like this, first, you have to wait I believe it is 9 months (this may vary in your particular state) from original due date for payment, second, you have to document that you have tried to collect several times generally once a month for that nine months, third, document the responses from the owner, fourth, what ever you sell it for must be at least reasonably clost to value of item sold present documentation, fifth, after you recoupe your documented loss, you have to turn over the balance to the customer, with documentation. This type of case will end up usually in small caims court. The judges there will rule in your favor as long as you have documentation to prove your claim. Now then, this is by no means legal advice. If you need to get to this place, check with a lawyer first, and document . You can see what I mean by I hate to use the word document. This is a long drawn out process and a real pain, I have never gotten to this point, but; I have a friend that did and that is how he handled it. Actually I have only had 2 instances where I had a problem, in one I simply stopped making the saddle for this person once I reached the point where it was going to start costing me money out of my own pocket. That tree hangs in my shop as a reminder, and the other was a custom belt I made to order for a guy at the track who later decided he didn't want it, and I promptly sold it to someone else and just don't have anything to do with him anymore. In the mean time you are better off to find a way to resolve amicably. Hope that helps! Bondo Bob
 -
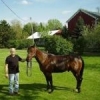
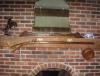
Ok, ya got me! Without beating a dead horse, I will try to keep it short. Back in the sixties, I was lucky enough to come onto the father of a sister-in-laws friend that made black power rifles, from scratch , the old fashioned way. While I was over at his home admiring the beauty of his work, he offered to help me do the same, at the time I was sporterizing old mauser 98 rifles, and black powder seemed to me to be the next logical step. Anyway, he told me that he would invest the time and effort to teach me, but; I had to agree to one rule of his. He said that he would show me how to make a piece and send me home to make it, and when I returned if it wasn't perfect, he would have me make it over, and I had to agree to do so without complaint, as many times as necessary to do it right. I agreed. The next time I came back with a piece he had sent me home to do, and he sent me home again to re-do it, I learned 2 things. 1) he wasn't joking! and 2) the value of doing it right the first time. Old Pete used to say that whatever it was you were making should look like it grew that way and all you did was reach up and pick it off of the tree. The valuable lessons I learned then have stuck with me through all the projects I have done since. When I look at a piece of leatherwork I look at it the same way. That is what I look for in a well finished piece. Attached is a pic of that rifle that I have been proud to use, and display on my mantle for over 40 years! Bondo Bob
-
Congrats Jason! I was surprized when I stopped by the old store the other day (track is now open for training) and keith told me where you were. For those that are into Celtic Stuff, Jason is you man. He looks a little "midevil" himself! Again Congrats! Bondo Bob
-
Hand Made versus Hand Crafted
BondoBobCustomSaddles replied to Denise's topic in Leatherwork Conversation
Hidepounder et al, I agree with you. On my cards and sign it says " Custom Saddles and Tack, All Handmade the Old-Fashioned Way", so I am not sure which catagory that puts me in. Bottom line, the quality will always determine where you fit. Bondo Bob -
Nick, First I must appologize, I did not realize that you did not have what you needed, (tools and so forth). There is a book that you can get from Tandy that is called "The Art of Hand Sewing" written by Al Stohlman. It is inexpensive and tells you everything you need to know about not just stitching, the use of an awl (which I do use), but; also types of stitches, how to's on tools, sharpening and much much more. I suggest you make it the first "tool" you get. I think it is around $9 or so. If you read it and follow the advice in it, it will make you a pro. Bondo Bob
-
Couple of words here. First, Bruce has given good advice. The way he does it is also how I do it. The only difference is that sometimes on a project that is very long, I will actually tie it off with a piece of thread at the "register hash marks" to keep it together and aligned while stitching, I don't pre punch my holes for the stiching, I simply put in my stiching groove, and mark it with a stitching wheel and then stitch. Second, I keep reading about impatience. Slow down, pay attention to the details. Patience is an art form, it takes a long time to get there and by the time you do, your are old! Bondo Bob
-
Eagle Ottawa was the supplier of the hides to Lear Corp. I think that has since changed. Last I knew the leather was coming up out of Mexico. It is the only top grain leather that Ford or for that matter any of the Big Three, (soon to be the big one) use for seating. All the other leather seating is done with splits that the grain is pressed on and covered with a urethane coating. I am a retired seating engineer from Lear, (the seating supplier to Ford) and before I left, I got a couple of hides, but; I have used them up making chaps. The leather is top grain, about 4-5oz. You can almost match it from tandy or Siegal. Actually, Siegal was one of the suppliers for the prototype seats when in developement. Hope that helps. Bondo Bob
-
Brent, I will be glad to add my two cents here. Often I see work that either is good working saddle work , or saddles that are works of art. To see them come together like yours has, is a pleasure, and is the reason that I follow this link. Back when I used build cars, and to go to the race track (cars), my buddy Bill used to call me "the lookin'est guy he ever saw", because I was always interested in seeing how others did it, and how it worked for them. I find that I am still a lookin kind of guy, and in this case the looking is good. Exceptional job! Bondo Bob
-
I started out making my ground seats all leather, and have never had anything but, satisfactory results. To my way of thinking, a strainer is just a short cut. I hate shortcuts, if you take one, you miss a lot of good stuff along the way. The folks that have my saddles, all comment on how comfortable they are. I attribute that to making the ground seat all leather and being able to mold and skive it so it fits the person's posterior. I have saddles out there that have thousands of hours use in them, and there has been no detrimental sinking, or what ever. Happy Trails, Bondo Bob
-
In skirt rigging on a roping saddle.
BondoBobCustomSaddles replied to hidepounder's topic in Saddle Construction
Bob, I agree with Bruce. It is more important to use good quality materials that will hold up with time. Once it is done right, well...it is done right. Also, I agree with Bruce on so called close contact saddles. Besides, when you are as bow-legged as I am, you need some material down there between your legs, just so you can achieve any contact! Hell, unless I am on a stout 1/4 horse, I can touch my spurs together without my legs touching the horse! Bondo Bob -
In skirt rigging on a roping saddle.
BondoBobCustomSaddles replied to hidepounder's topic in Saddle Construction
Hey Bob, I have done roping saddles in flat plate , inskirt, and what I call roper rigging. In all cases if done right, and reinforced correctly, including taking the rigging over the back of the bars and lacing them together behind the cantle, and attaching the reinforcements with screws to the tree, they are all strong enough for roping and ranch work. I personally have used all three styles for my own saddles, and have cattle sorted, penned, trail road over very hilly terrane, showed, cut, and while not personally roped, (just never got the bug) have had customers that both team roped and calf roped, ( one of my customers ropes out in Oregon in competition every week for years now) with out any of them coming back for rigging problems. I use the style and designs that Al Stohlman shows in his encyclopedias. Sometimes I change the design a little, but; I always adhere to the basic design he shows, and they have served me well for many years. As for 5/8, 3/4, 7/8 or full rigging placement, I set it the way it needs to be for each individual horse that I make a saddle for. General setting for most is 7/8, unless there is a compelling reason to vary. Again, it depends on the horse. As far as repairing saddles made by other, it seams that I either am reworking the area around the inskirt or flat plate rigged saddles in the actualy "D" area, or in conventional rigged saddles with that little strap they put between the front D and the back D. They never last. Hope that helps! Happy Trails! Bondo Bob -
Saddle Fitters
BondoBobCustomSaddles replied to Denise's topic in Choosing the Right Saddle for the horse(s)
JW, there was no offense taken. I guess I was just rambling on a little, war is one of those subjects I get a little nostalgic about. I always like to see yours and Keiths comments, as they seem to be along the same line as mine, with maybe a little twist once in a while. From what I have seen of your guy's work, you are putting out quality and astetically pleasing product, and that always deserves respect, a lot of people don't realize just how much work goes into making a good using saddle and making it look good at the same time. I always look forward to comments from all the makers out there. Like you said, a fella can always improve and learn, (even if he is older than dirt!) Bondo Bob -
Saddle Fitters
BondoBobCustomSaddles replied to Denise's topic in Choosing the Right Saddle for the horse(s)
Ok, I am not saying anybody's right or wrong! I will simply say this, the way I do it every time, has worked for me. I make templates of the horses back, send them along with the specs for the saddle tree, to the maker of choice. When the tree returns, before I start, I take it out and put it on the horse it is being made for and make sure that it fits. It is much easier to tell when it is the bare tree. So far I have been lucky, only once have I had to add any additional material to get it to fit correctly, (this horse was extremely odd in shape, a cross between an arab and a standard bred!) Once I know that the tree fits, the rest is elementary! JW and Keith, I have already been through a couple of wars, I am getting too old for that stuff. I'll just keep going along with what works for me. Bondo Bob -
Simply put, do it right or don't do it at all. Life is too short to get into legal scrapes trying to help some one out. If they pass on the repair, you came out ahead. Bondo Bob
-
Jockey and Exercise Saddle TREES
BondoBobCustomSaddles replied to LJS's topic in Saddle Supplies, Tools & Trees
I looked for the same trees, and seemed like nobody wanted to jump in and get me some information till a guy from the UK that is on this sight spoke up. He put me in touch with these guys and subsequently they set me up with an account. They handle all kinds of trees and specifically Aulton and Butler. I too am working on Bob Ross Style design with some improvements to make them more frendly to do repairs on. I service the guys at Pinnacle Race Course in Romulus Mi. Here is the sight: abbeysaddlery.co.uk Post some pics when you get going! Bondo Bob -
Ok, here goes! Keith I agree with you completely. I do it the same way with the same products. Pure Neatsfoot Oil, and Neat Lac hand rubbed in with a piece of sheep skin for new saddles. When I get in old saddles to be redone, I use Laquer thinner to clean off old finish. Then I use pure neatsfoot oil with some olive oil in it ( about 2 tbl spoons of olive oil to a pint of Neatsfoot) I then heat it to a boil and rub it in with a sheep skin, followed by a coat of neat lac. My customers have never been dissatisfied. As for the difference between toluene and xylene, xylene is slightly more aggressive and "quicker" than toluene, toluene is a little more oily to the feel and does not evaporate as quickly. The only draw back I see is that my wife hates the smell of Neat Lac so I have to use it out side! Of course I am not the difinitive last word on the subject, I am sure there are lots more opinions out there. Bottom line, use what works best for you. Happy Trails! Bondo Bob
-
Welcome to the forum. I am sure you will find what you need here. There are a lot of experienced folks here willing to help. We have quite a few from Mi. Always nice to have more. Bondo Bob
-
OK I will try to keep it short. A long time ago, I used to build race cars, engines,trans, chassis and stuff. I never got into doing the bodies so I contracted that out to a friend of mine who was really good at it. Well I finally got around to taking the time to build one for myself, but; when I went to Bill to do the body, he was loaded up with work, so he suggested that I bring the car over to his shop and do it my self with his tools and help. I watched him put the first coat of bondo on a quarter panel, it looked easy! Next it was my turn, 2 gallons of bondo later, most of which ended up on the floor, and I won't even tell you how much razzing, I finally got that quarter panel finished. Now then, Bill and I were old buddies and had been racing for many years (back in the 60s) and had a lot of friends at the track. We were known for having a really fun time and raising a lot of H___when we were there, (that was always Bills fault) anyway, when I pulled up to the line for my first run in my new 69 Camaro super gas car, there was a lot of comotion going on that of course I could only see, but; could not hear over the sound of the car. Come to find out that Bill had, unknown to me, gone to the owner of Milan Dragway and had them make a big todo about my new car and announce that at the wheel was "Bondo Bob"! That name has stuck with me through all of the racing we ever did, here in MI, in Ohio, and in Kentucky, so when I started making custom saddles it simply seemed like the logical name for my shop. Beside it gives me a chance to have a little fun and think about the old days every time I tell the story. Sorry if I bored you! Bondo Bob Custom Saddles
-
I agree with Bruce completely. My personal preference is not so much the maker but the age. I like to go to auctions and look for old servicable tools. I have a friend that found a box of "stuff" he got for $200 at an auction, (the box itself was cool and worth $200) and the first thing he picked up out of it was an old 8" skiver. From there on he was "pickin tall cotton". I took inventory with him and he had to have gotten consevatively, $6-$7000 worth of stuff. I haven't found one of those yet, but I am still lookin". Anyway, bottom line is like the guys have said it is what fits your budget. For me I think it will be good to learn how to sharpen all the various knives and edgers. They all work good when they are really sharp, and the old ones seem to hold an edge better. Happy Trails! Bondo Bob
-
I will add, that the way I do pricing is , first I look at the repair and estimate how long it will take. (like Mulefoot says cheap saddles can be a pain and you have to estimate accordingly) multiply what you feel your hourly rate is, (like $40/hr times 4 hrs = $160, then add cost for materials (don't hesitate to call out all materials since at some point you will have to replace them), Sheep skin Approx $70, Thread $2, New laces (I always just cut the old ones and put new ones on. It's better and faster) $10, finish $2, Glue $5, Glue brush $2, screws (I never replace staples, I use screws in the proper places, along with lugs) $3, gas ( you gotta go get supplies some time and you should add a piece of that to each job you do) $3, total= $257. That gives you an idea how to price, of course once you do enough of a certian kind repair you will have an idea and not need to go through the numbers every time. You can use the labor and material method for pricing most items and come out at least in good shape. Once you have done a lot you will get better and quicker, keep the price the same, as long as it is fair and the work is quality you will do ok. That's how I do it, and I have never had a complaint about my pricing, by the customer, or me. Hope that helps! Happy Trails! Bondo Bob
-
That's also how I do it. Tooling doesn't get "stretched" that way. Bondo Bob
-
Need help with my new (?) stitching horse
BondoBobCustomSaddles replied to ChaChi's topic in How Do I Do That?
ChaChi, I found mine as a kit that had some pieces missing, namely the ratchett plate and the tongue. I was in a hurry to get going so rather than stopping and making a new ratchett plate, I just screwed a 6" recip saw wood blade in the proper place on the leg of mine. It worked ok and I have always planned to go back and redo it when I had time. That was 20 years ago! Bondo bob -
Homemade drawdown stand
BondoBobCustomSaddles replied to Kevinjohnson's topic in General Saddlery Discussion
Hey Gord! I really like the way you used that ball as a mod to the "old George" design. I have used my original style so long I just didn't bother to explore any mods. I think I will update mine tough. One question, where do I put the Bondo? Bondo Bob -
I found that the problem I kept having was that initial cut into the string. I always seemed to go too far, mostly because you push, then push a little harder and all of a sudden you pushed too hard and zing, your slit is too long. Like Shelly I made a cutter that was the width of the string, then I added a simple step, first after pulling the strings tight, I use an awl to start the pierce, an awl will always be smaller than the slit you want to end up with. Then I use my cutter, cutting edge up (or away from the bottom string) and pull the bottom string through and pull tight, and repeat the process for the second slit and so on. When done, use a shoeing hammer to tap down flat. Hope that helps. Ever since I started using the awl first, I have not, had to "bleed"! Maybe that is why they call it a bleed knot. Happy Trails! Bondo Bob
