Frodo
-
Posts
2,706 -
Joined
-
Last visited
Content Type
Profiles
Forums
Events
Blogs
Gallery
Store
Everything posted by Frodo
-
A Black Douglas Never “gives it up” Jamais arriere
-
I think I will add a tank
-
Tried new finishing technique with Mop & Glo
Frodo replied to DeWayne Hayes's topic in Leatherwork Conversation
Lol. Yep, use the old hard pieces I hsve been trying to come up with a recipe for diy shoe polish, so far not found it yet -
Tried new finishing technique with Mop & Glo
Frodo replied to DeWayne Hayes's topic in Leatherwork Conversation
I am a fan of M&G try this black shoe polish on your edge ( burnish) and M&G as a sealer -
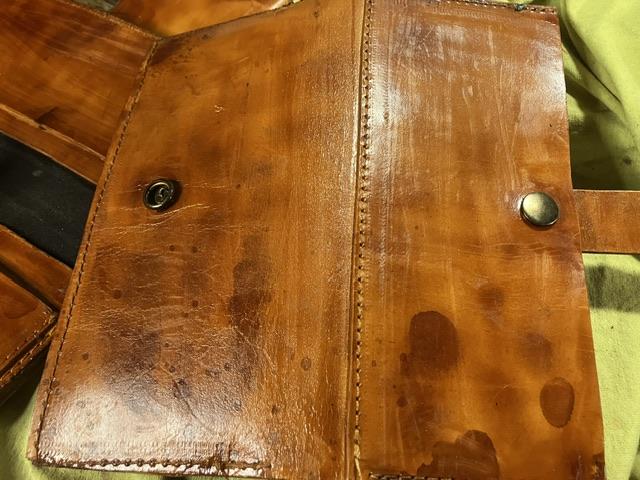
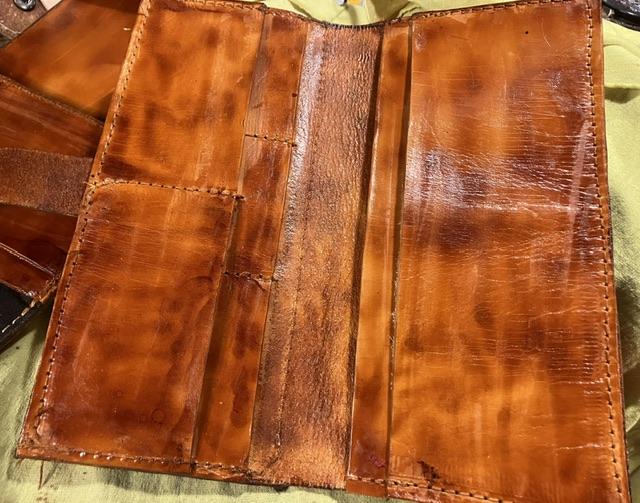
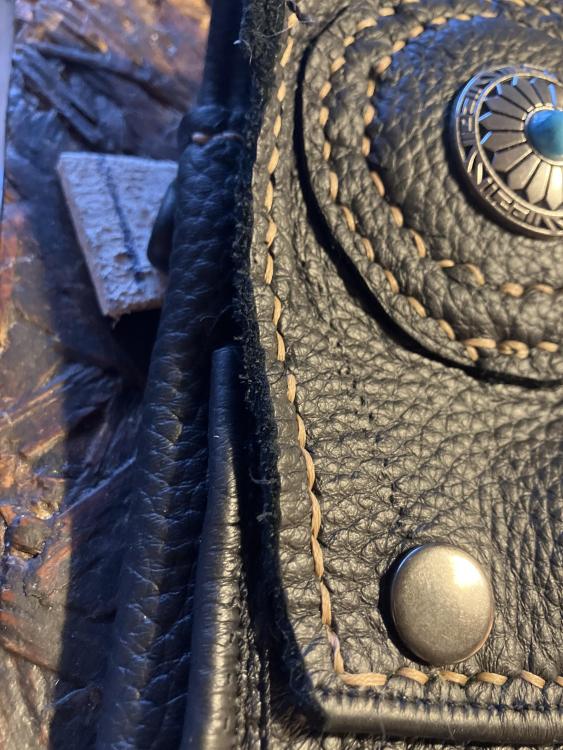
Here is a simple ladies wallet or a wallet for the confused material 4 oz vegtan 1- 8” x 8” 2- 3 1/2” x 8” 2- 3” x 8” 1- 2 1/4” x 8” 1-1” x 8” strap execution Credit card pockets place the 2 1/4 onto the 3” and sew a line center place the 3” with the 2 1/4 onto the 8x8 measure from edge toward center 2 3/4” sew the 3” onto the 8x8 Do this on both ends of the 3” piece d o not sew the edges yet this is your credit card pockets outter pocket and credit card edge take your strap measure 2” Fold over at that mark punch hole insert make end of a line 24 snap on the other end of the strap install another half of a snap Set aside sew the long side of the credit card pieces to the 8x8. As you sew, install the strap sew 1” from end place the 8x8 with credit card face down on table ( you are looking at the outside /finished side of the 8x8) place the 3 1/2 on the 8x8 locate the snap on the strap and punch a hole in the 3 1/2 set snsp sew the bottom stitch line and sides This side is done turn the 8x8 And stack the .3” on the 3 1/2” onto the 8” sew the edges Measure from edge to center strap 1 1/2” set snap when the wallet is closed you should have a gap of 1” this is going to look funny and you are going to want to make the gap less do not do that, when the wallet is loaded with what ever it will carry, it will become “fat”

-
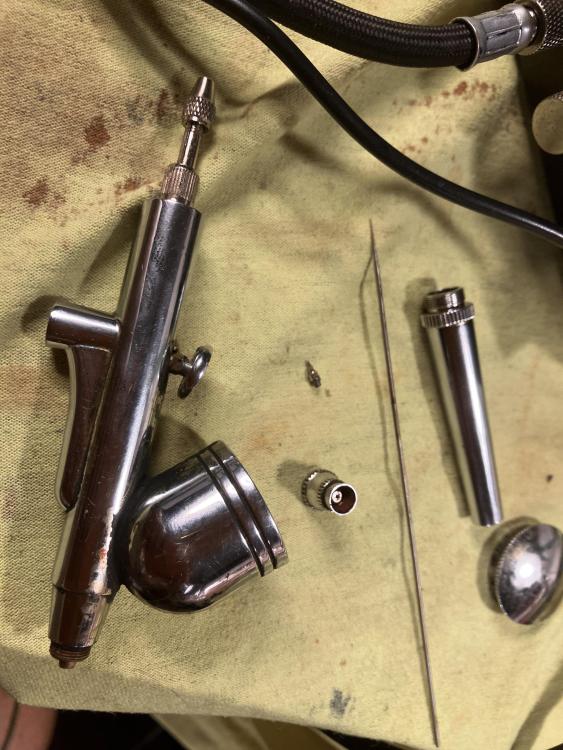
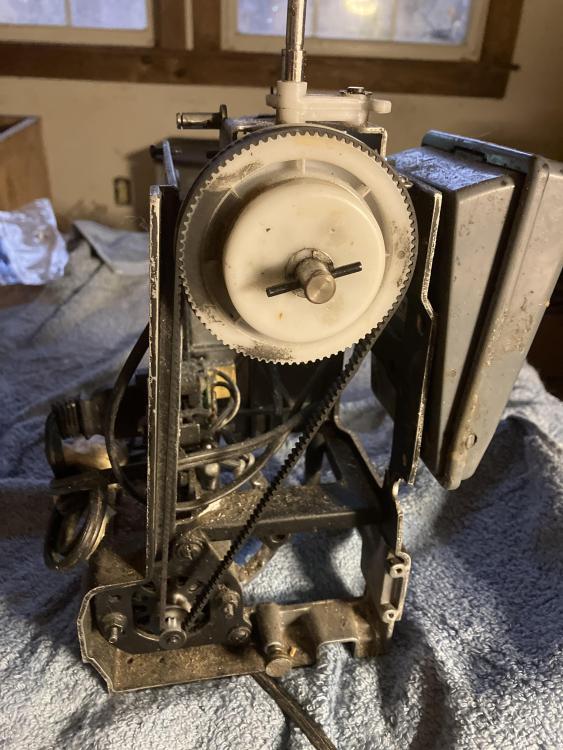
Here it is disassembled
-
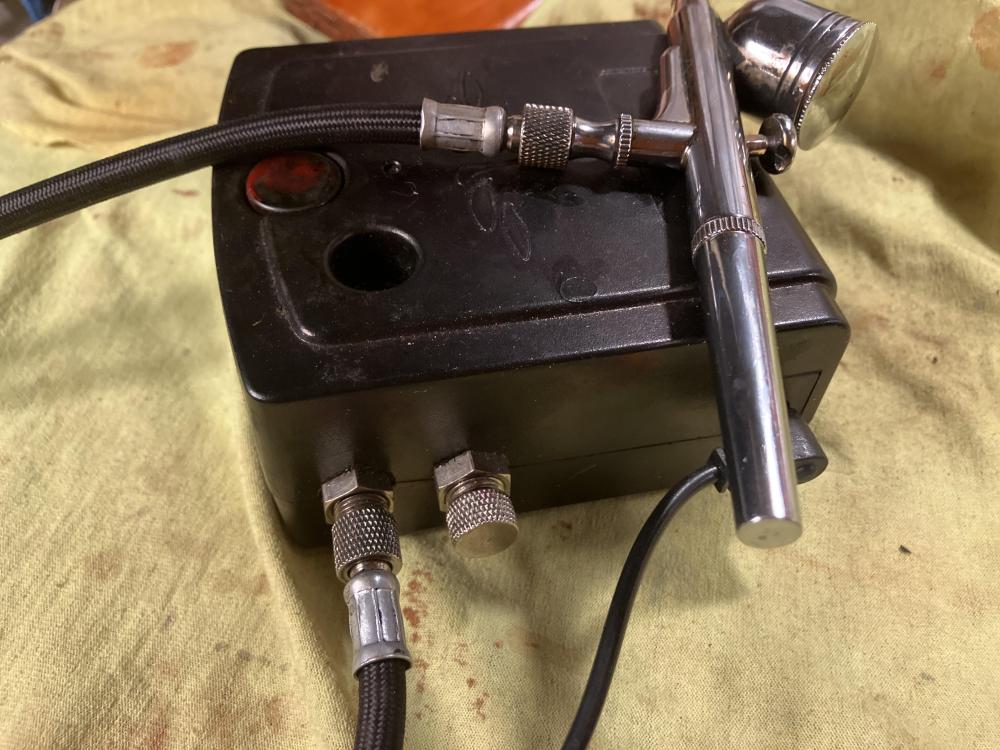
No I do not, here is the unit. It is very basic
-
you are prolly correct!!! the error was operator error but I am going to blame the equipment
-
Diesel tech. Yes I could submerge tbe the leather but the color would not be what I wanted what you see is a 50/50 mix of mahogany and light brown when used with a air brush it gives you a really nice tan The more you put on the more you see the mahogany
-
Not to buy a cheap airbrush I bought a 35 dollar airbrush rig and thought I had really done something!!! That’s what your leather looks after your cheap airbrush pukes in the middle of your project

-
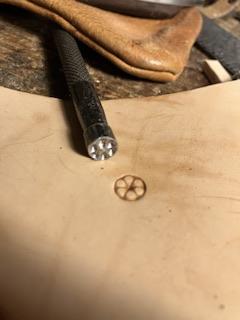
It is a tubular peening tool
-
No!!! Not you, Guy who wanted the handle backed out
-
He backed out a rivet setting tool for a stamp
-
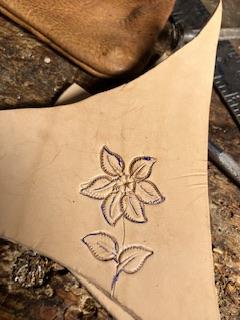
Well, switched gears. still need to final stain and seal and edge coat

-
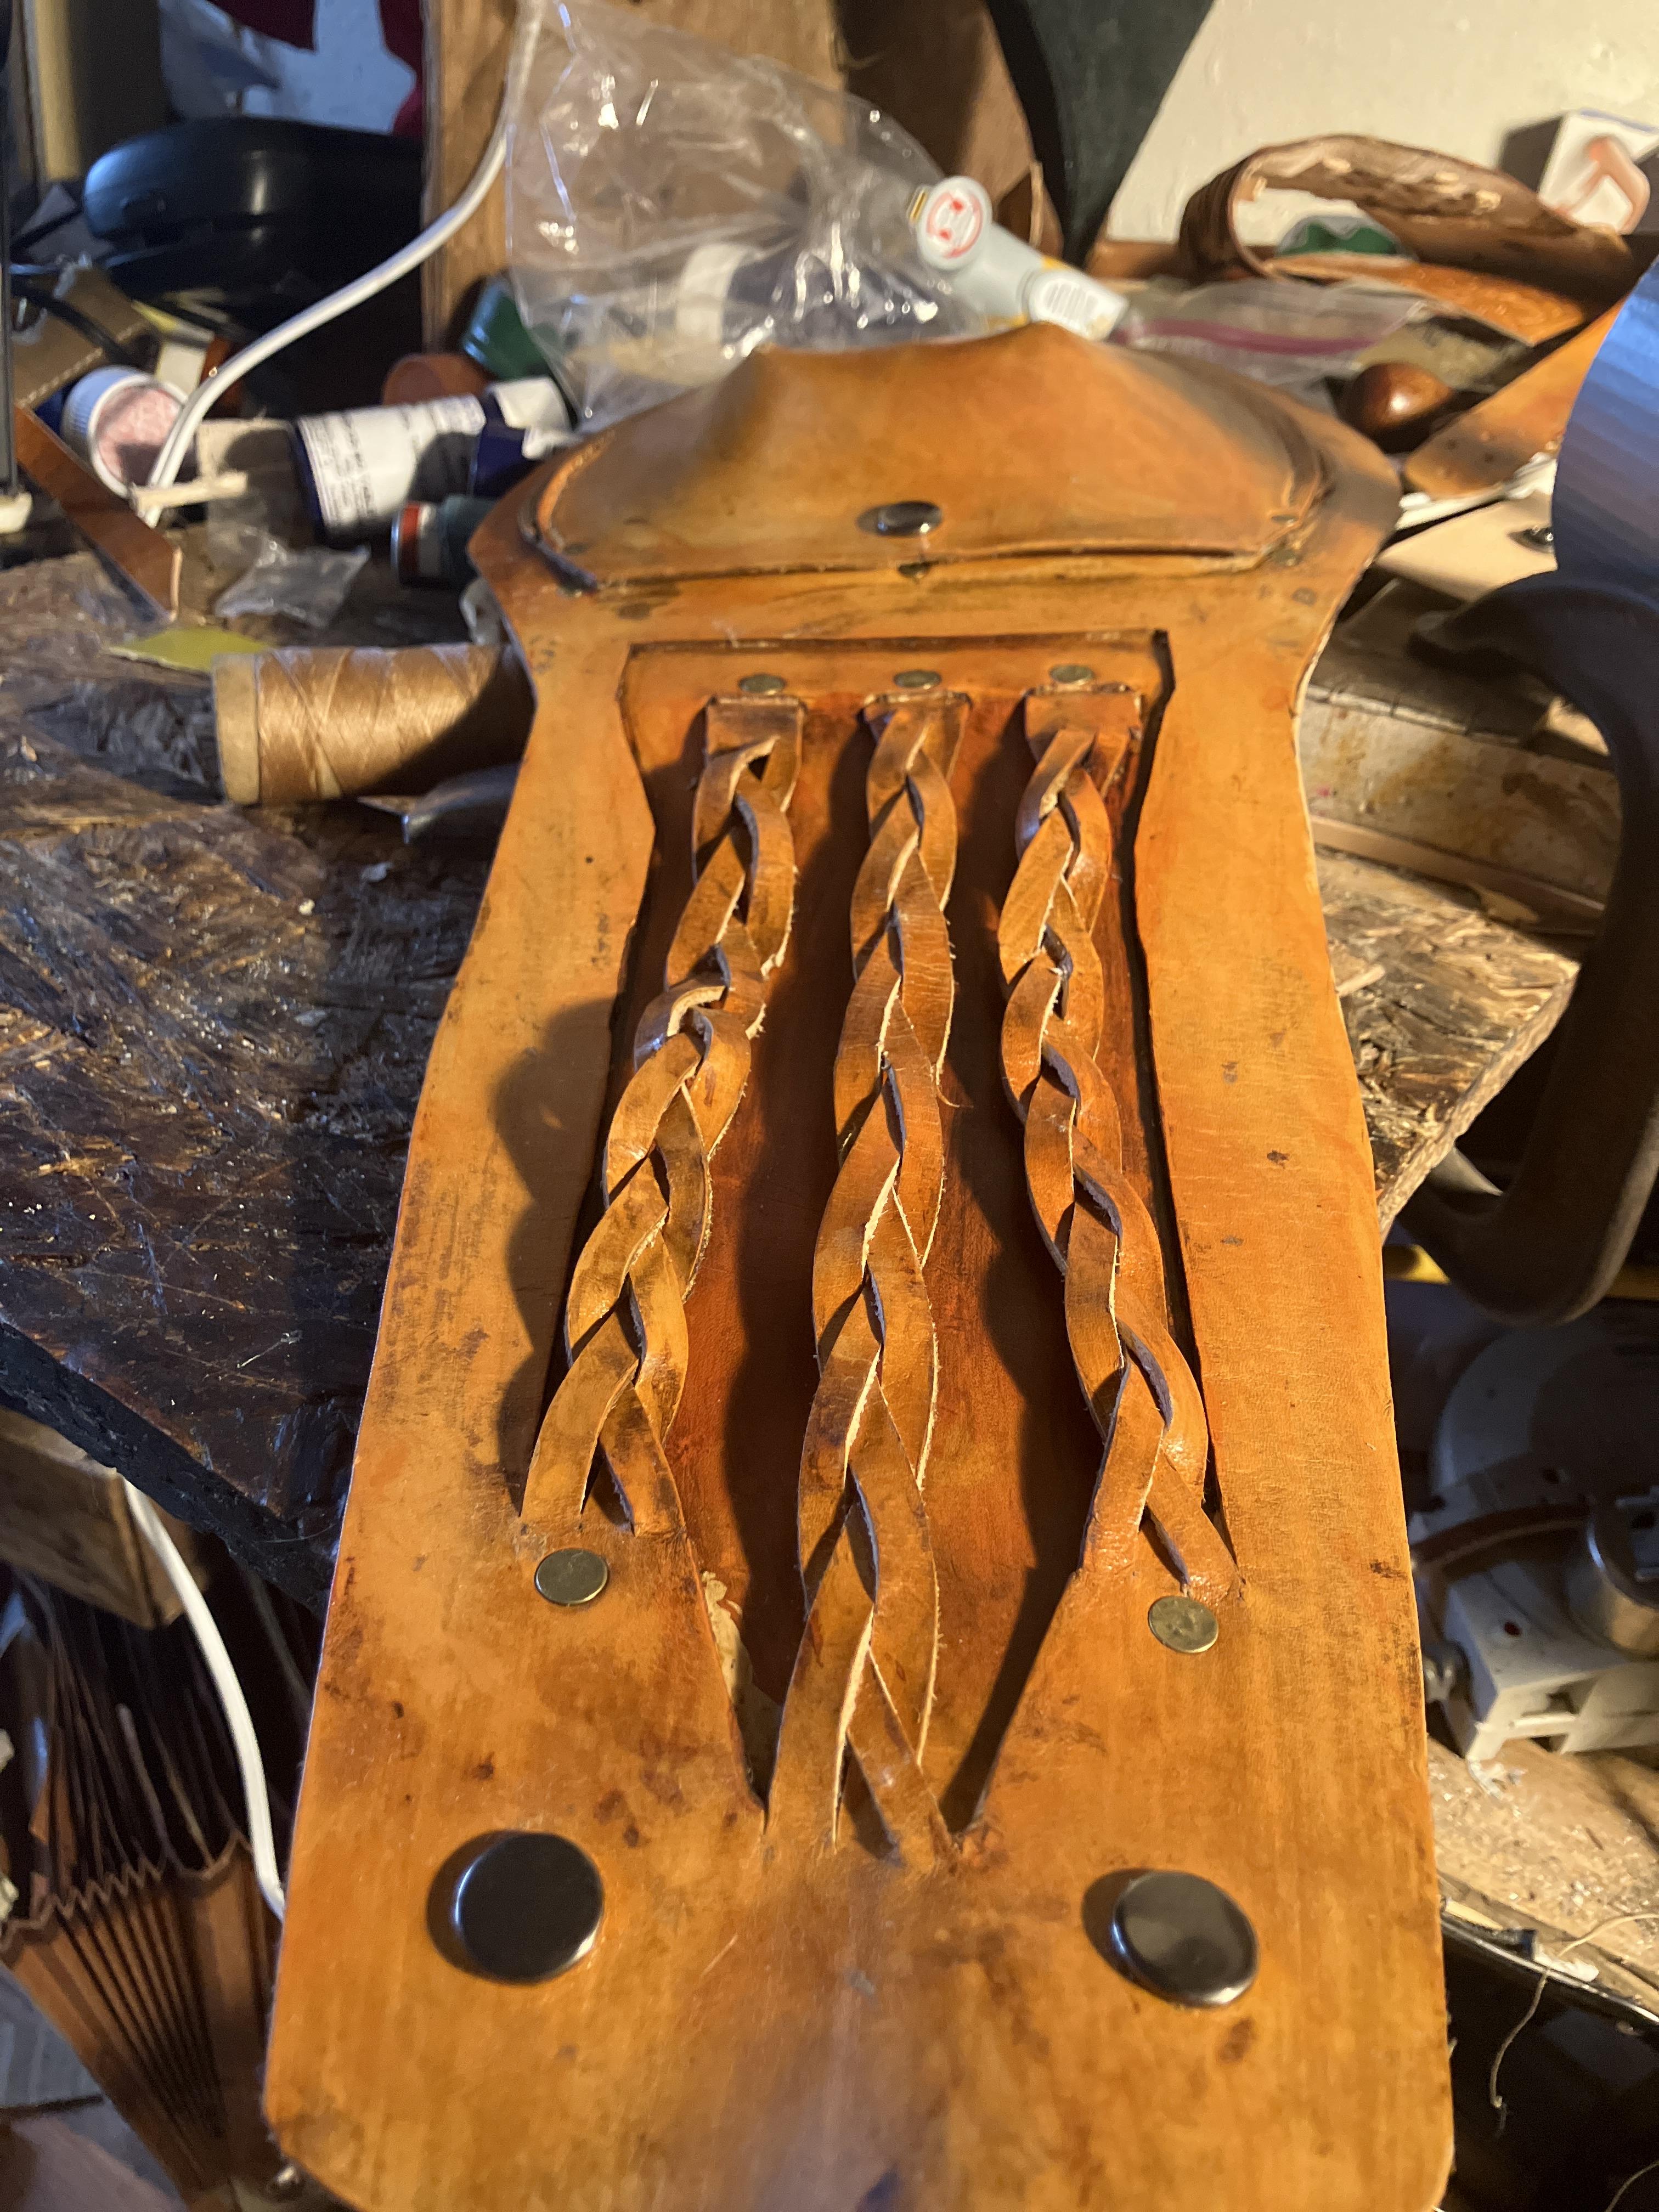
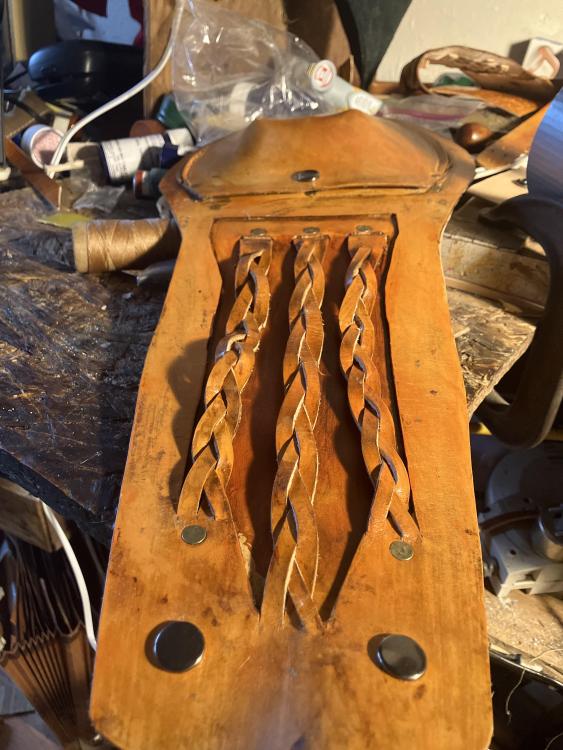
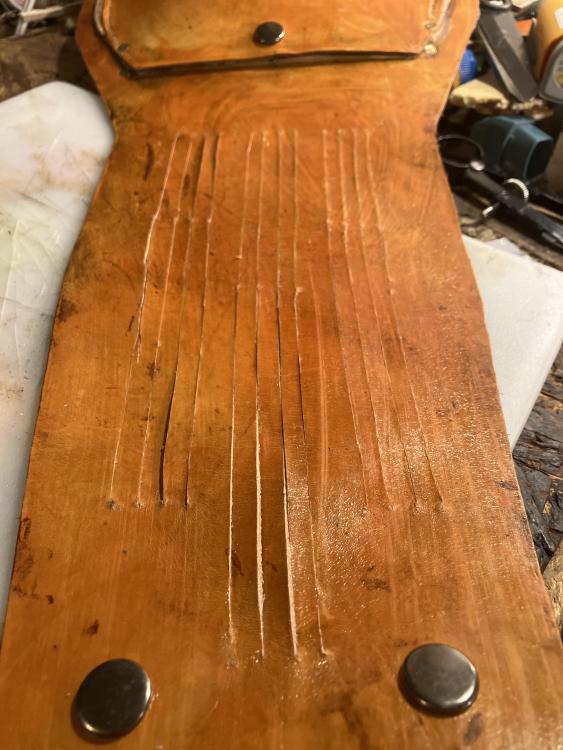
I think I am in over my head and could use a hand my idea sounded good, in my head this is the front flap of a purse my idea is 3- mystery weaves with a 1/2” between them. How am I going to flip the whole front pan between the 2nd and 3rd strand to
-
How do you do it? I folded under 95% of the project but the last 5% is needs to be burnished
-
-
It is to much like work. yes I can do it Chuck cut out the BS. And told it like it is It pays the bills
-
Seems my community is nudging me towards upholstery work, not really what I donor want to do but.. the library just gave me a contract for 30 seat backs while I was at the library I was approached by 2 guys who want car seats recupholstered I dunno guys, money looks good but it really is not want I want to do
-
I do the same thing, Bobbin winder made from an old sewing machine
-
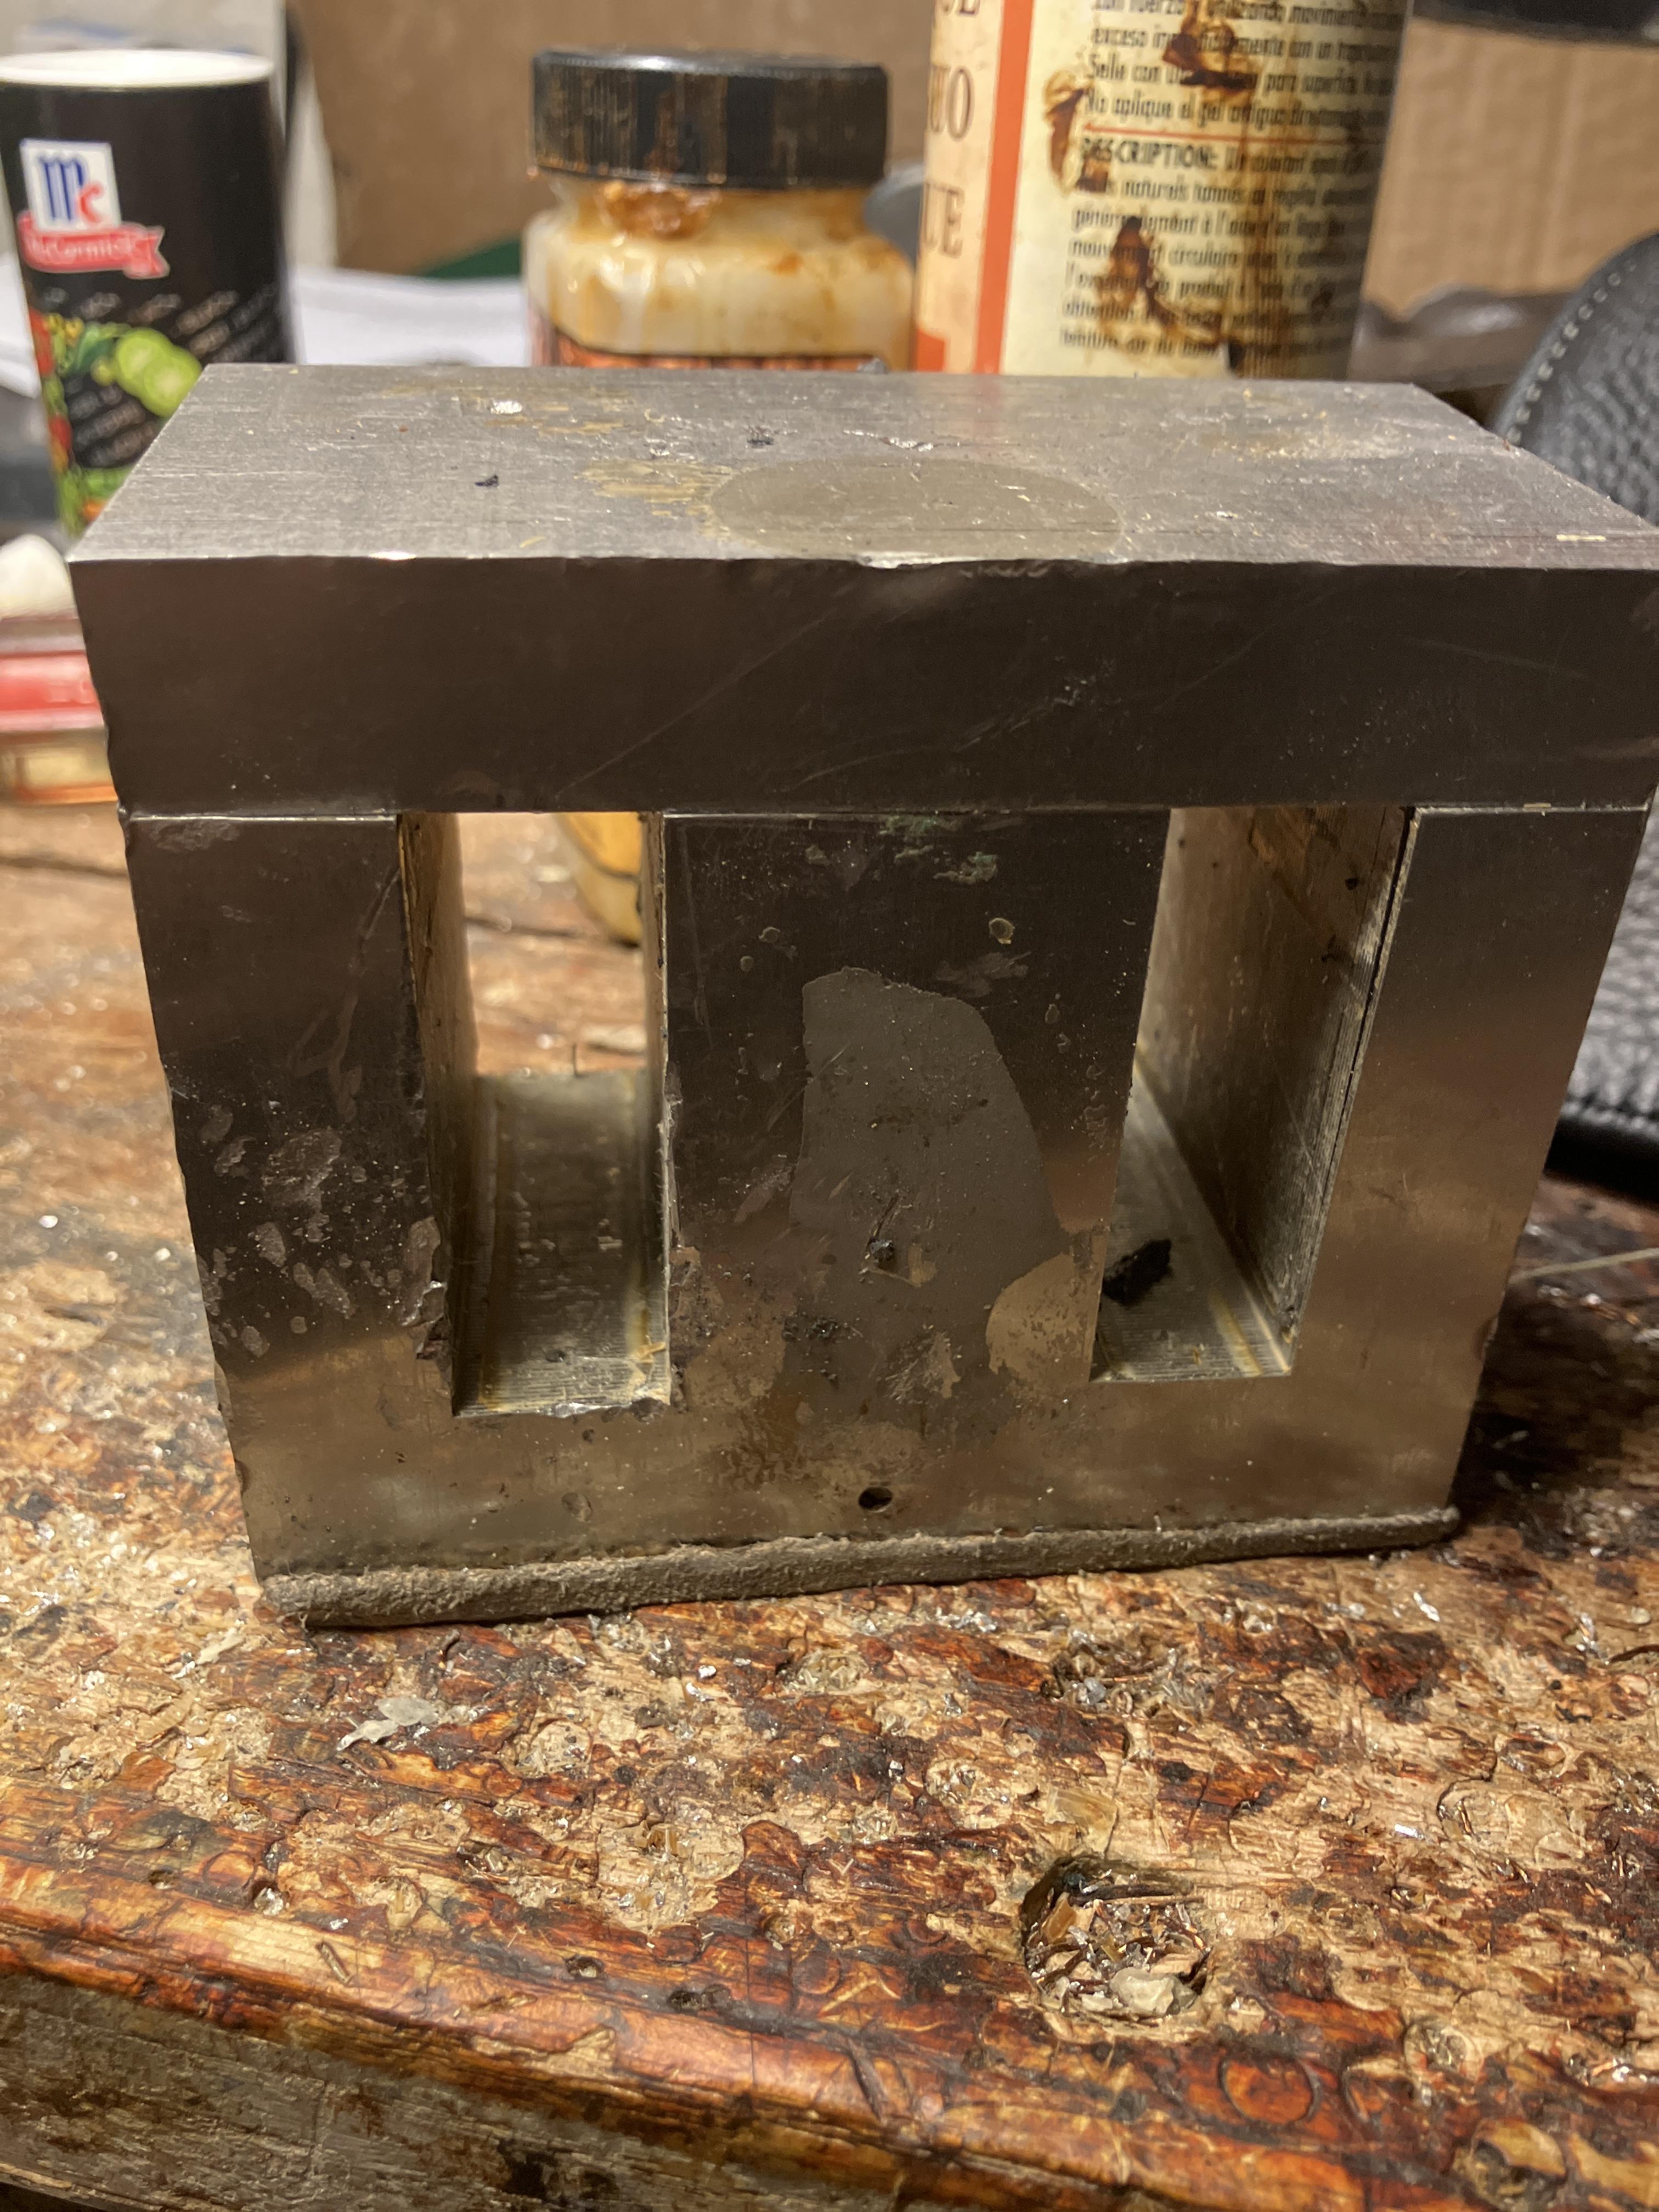
Lol. Title looks rather skits-O if you ran across a broken microwave man, do the world a solid and repurpose some of the junk Their is good stuff for a leather worker inside a microwave 2- big round magnets a transformer their is also a capaciator Stay away from the capacitor it will shock you. bad ju jul The transformers a big square hunk of steel with copper windings looping through it unplug the wires and harvest that thing Remove the copper windings , doing so is not an easy task butm it can be done Smash the trans, Into 2 pieces glue some leather on the bottom 2- weights, 2- anvils

-
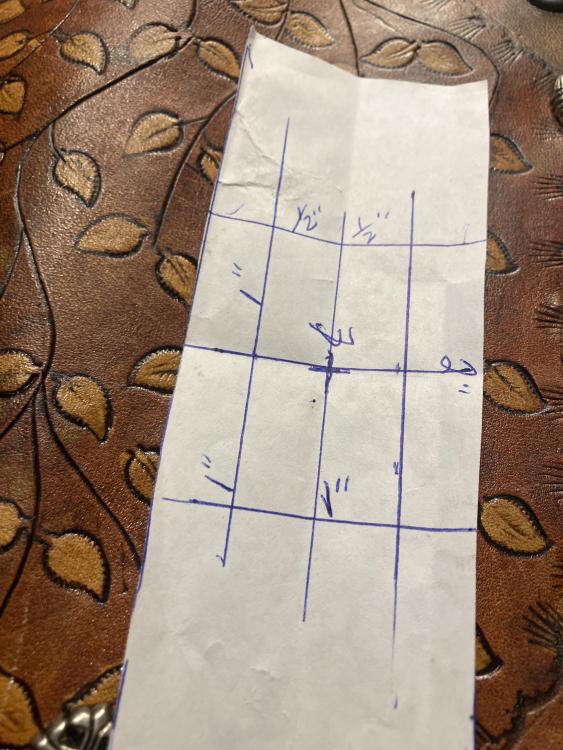
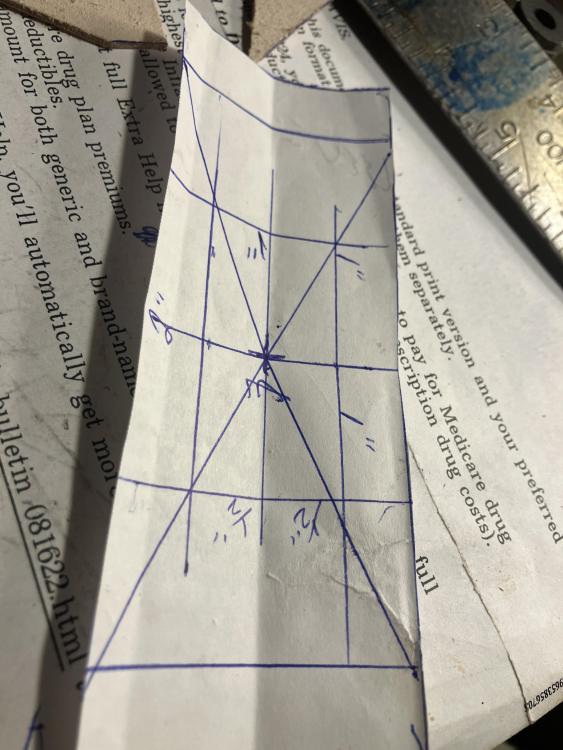
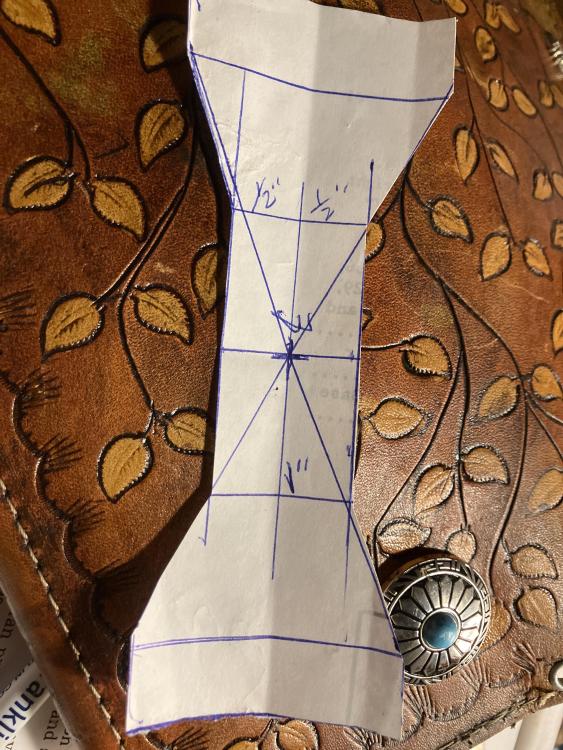
Cj Try this gran a sheet of paper, I’ll wait………… got a pen? A square? Ok let’s roll opps. Got sizzors? cut a 2” x 8” piece fold in half, mark center umfold, fold in half the other way mark center draw your center lines using the mark you made you have a big x on your paper on the 2” side of the paper, from center line measure up 1/2” make a mark draw a line parallel to the center line 1/2” on both sides of the center line go back to the center draw a line 1” both sides of center line you are looking at a rectangle Next from center line, draw a line 2” to the left and right of center from outside edge to outside edge of your rectangle. Draw a 45 degree line see my image and cut it out
-

-
My head would explode
-
I have tried using different size threads and I find it is a total pita sometimes you have to flip your work over and sew from the back to the front having different threads causes you to stop and switch bobbin and retread machiner