


Mulesaw
-
Posts
783 -
Joined
-
Last visited
Content Type
Profiles
Forums
Events
Blogs
Gallery
Store
Everything posted by Mulesaw
-
Ah, nothing like a redevelopment of a city.. Those redevelopments always seem to be planned according to some smart people who thinks that this or that looks great on paper, and when it is finally done in concrete and tarmac. Well it doesn't work as they had hoped anyway. All city planners in Denmark dream about making that southern Europe feeling with plazas and pedestrian streets that are crowded with people in the evening. The problem is the always forget that the reason why it works in Southern Europe is because they actually have a climate that makes it nice to stay outside for an evening. Even in the late summer. We on the other hand normally have cold summerdays with lots of rain and wind, and that doesn't go well with sitting outside and enjoying a cup of coffee or a glass of wine. Good idea with a cup of chocolate actually :-)
-
When I clean our saddles (European style), I normally use grated soap dissolved in luke warm water. I thin that saddle soap is more aimed for general maintenance cleaning, and not something that needs to be brought back from years of storage. I use a dish washing brush with soft bristles, and dip it into the soap water, then "scrub" the saddle in circular motions. I normally take a small area at a time say 6x6" or some natural defined small area. When I have gone over that I take a damp cloth and wipe the soap water and dirt away. The cloth is wringed to remove the dirty water. Then I dip it into a bucket of clean water and wring it again so that it is now "clean" an damp. It might be necessary to go over the entire saddle a couple of times depending on the amount of grime. When it is clean I let it dry and once dry I apply some neatsfoot oil or some other type of leather nourishing oil. The lambs fur underneath the saddle I would probably try to clean using a wet type vacuum cleaner. But for that I'd use either shampoo or wool washing detergent. Massage it into the fur with your hands and then remove it again with the vacuum cleaner (just like when you are cleaning a carpet with a wet vacuum cleaner)
-

Rifle Scabbard
Mulesaw replied to pmieras2000's topic in Gun Holsters, Rifle Slings and Knife Sheathes
Great job. I really like the detail with the closing strap that it forms like an "acorn" on the end. That really looks good. -
Prototype Manbag
Mulesaw replied to Silverd's topic in Purses, Wallets, Belts and Miscellaneous Pocket Items
Looking good. My only concern is the metal "feet" on the bag. A bag of this size will often be put on a table or a desk, and if it is a polished surface, chances are that those feet are going to leave some marks. I guess that if the feet were made out of leather, in theory some small grits of sand or stone could embed in them as well, if the bag was put on the ground. However this doesn't look like a bag that you'd put down at e.g. a bus stop, so that might not be a problem. Brgds Jonas -
I'd just like to say a huge thank you to all the moderators keeping this site up and running. I think you are doing a great job in keeping this forum neat, tidy and friendly. So thanks for all your moderating and help. It is highly appreciated. Brgds Jonas
-
Congratulations. And welcome to the forum :-) It looks like a mighty fine machine! Brgds Jonas
-
I am impressed that you wanted to make a test piece first, after all it is not a small fast project to make a bridle. Did you sew the brow band (or what it is called in America) on a machine? Those stitches look incredibly small and good.
-
Looks really good! Not much practice piece in my opinion. This would look good on any horse. Is the throat latch "sandwiched" between the neck piece and lining? (just out of curiosity) Brgds Jonas
-
I was thinking the following: Sailmaker (I don't know if it is a protected title in the USA?) Canvas and leather fabrication I find it easier to make a slogan, I know that wasn't really what you asked. But.. Here's a couple: Leather canvas or duck, I'll sew if for a buck Sewing leather is light as a feather. Sewing leather is hard, call Susan before you start. Leather goods that will last - Susan makes them accurate and fast.
-
@jrdunn I already sent an email to my daughter suggesting her to look at this thread, so I'm pretty sure that she'll have watched the videos before I get home. :-) I would love to make either working chaps or motorcycle chaps, but hardly anyone uses working chaps, and not many uses chaps for motorcycle riding either. there are some that use equestrian chaps that have some elastic leather on the back, but they fit more like pants. So I guess my best bet is to help my daughter make some and hope that some of her friends will want to buy a pair. Or I could try to approach the line dance community or the western riding community and see if anyone there are interested in having a set of chaps made. I have thought about bringing some yokes with me to sea, since I could tool them out here. And they don't take up much space in the bag when I travel to and from the ship. Brgds Jonas I have to say that that apron looks really neat. I guess that asking them if they needed a new apron couldn't hurt. :-)
-
Hi Dwight Well it sure is the prettiest ship that I have been working on so far :-) Right now we are doing a world circumnavigation, and I hate to admit it but Covid has made it a different experience as we had all expected. Normally we arrange "open ship" in all the ports we visit, so people can come on board free of charge and have a look at the ship but due to the pandemic we aren't allowed to do that. And likewise in some ports we aren't allowed to go ashore. It is a pity since most of the ports we visit will be a once in a lifetime visits. But we just have to get the best out of it as it is. At the moment we are en route from Rio de Janeiro in Brazil to Punta Arenas in Chile. From Punta Arenas the route is round Cape Horn to Ushuaia in Argentina. And then we change the crew so I get to go home for a well deserved holiday :-) Next trip for me will be from Valparaiso to Tahiti, which is also a trip that I am looking forward to. It is interesting that you mention the US Navy, at the moment we are sailing with cadets from the Norwegian Navy. they charter our ship for 3 months every year for the cadets to learn basic seamanship and leadership at the same time. A sailing ship is a perfect instrument for learning that no matter how tough you are - the Sea is still stronger, so you need to learn how to work with it, because you can't really beat it. And it is also a great place to learn to lead others and that cooperation is needed if you want to go anywhere. Brgds Jonas
-
@jrdunn Jim, I really appreciate all the help I can get, so all the explaining that you do is more than welcome! The odds of meeting someone wearing working chaps in Denmark are kind of like that chances of meeting a dotted zebra. So it is all new territory to me. Laura (our daughter) has expressed an interest in making a set of batwing chaps also, and they'll probably be with tassels/fringes, but I don't think that she'll go full rodeo style. Though they sure do catch your eye. We will definitely try to do the custom measurement next time, since that was actually not super well described in the Tandy pattern. And also we had to shorten the back belt up quite a bit to be able to fit the chaps on her. I would love to see the video, but I'm at work now and our Internet connection is really not very good. So watching a video is out of the question. Some days just accessing your email account is also a struggle. I work on a ship, so our connection depends on where in the world we are and how many people need to use the net. We all share the same net, so streaming or video watching messes it all up for everyone else. Here's a link to the company and the ship https://lehmkuhl.no/ It's a Norwegian tall ship, so we are not as well equipped with satellite discs and receivers as many modern ships. Brgds Jonas
-
Thanks I have actually thought about just that, but our farriers (husband and wife) already have aprons. But I guess I could ask them if they needed a new one :-)
-
Thanks, I have never tried to wear chaps, I am a bibbed overall type, and that works for me (no need to change something that works just fine) I love dogs too, there is just so much personality in them, and who am I to say that they can't lay down on the leather? Our youngest son said some really wise words a couple of years back when our old Newfoundland passed away, and we were getting a new puppy. I think he was maybe 10 or 11 at that time. He said something along the lines of that since we outlive our dogs we could choose which dogs we wanted to get. But a dog doesn't have that possibility, it only gets one chance of a family, so we are obliged to make sure that the dog has as good a family as possible, since it can't call quits and go to another family to see if it is any better. I have often thought that it was really deep for a kid that age, and true too. So I do my best to make sure that the dogs will have as good a life as possible.
-
@jrdunn Hi Jim Thanks for the good suggestions. I have to admit that besides it is the first pair of chaps I have made, it is also the first pair of chaps I have seen except on films, It seems as no one over here uses chaps for riding. So I just followed the Tandy pattern blindly. Turning the flesh side out on the yoke makes a lot of sense, it will stand out just a bit more without too much bling effect. It is actually one of the things I regret most about the chaps. Since the shape of the yoke is kind of dramatic with lots of curves and points etc. But no one gets to see it because it just blends in with the rest of the chaps. I also see what you mean about the inseam. I purchased the Tandy rodeo chap pack, so I'll try to see if they need to be made higher in the inseam too, or if it is just this free pattern that needs it. I never thought about orienting the pattern the other way. I was just trying get as little waste as possible. Which was kind of not needed as the leather was bought at a sale, and I think I paid like 15$ for the piece. I have to admit that I would much rather have had wrinkle free legs instead of saved 2$ worth of leather that I probably won't need anyway. This is further proof of how good this community is! Sound advice from all who chimes in. Brgds Jonas
-
@Dwight I can see that I shouldn't be afraid of adding a bit of ornamentation. But us Scandinavians are a bit afraid of things that stand out. That is also why Scandinavian furniture look so much like Shaker furniture. The good thing is that my daughter has received so many compliments from people when she has been wearing the chaps that she just might be willing to make a set with a bit more bling the next time. Your chaps look really good I think!
-
Two Brownings
Mulesaw replied to chuck123wapati's topic in Gun Holsters, Rifle Slings and Knife Sheathes
@chuck123wapati WOW, just plain WOW. That knife looks fantastic. Thanks for showing it. I really like that it is so well proportioned. and the antler steel and brass plays so well together. On the backside there are those grey streaks from the antler that looks like they concentrate towards the center of the handle and then gradually become the same tone of grey as the tang. Almost as if the steel grew with the antler. And the knife itself just seems to have the right size. -
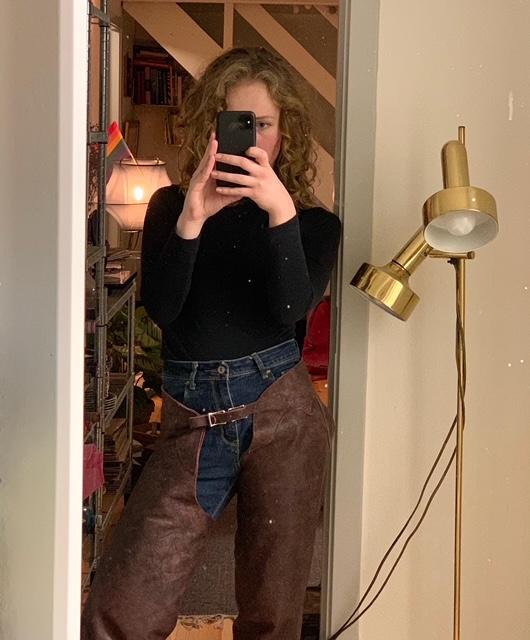
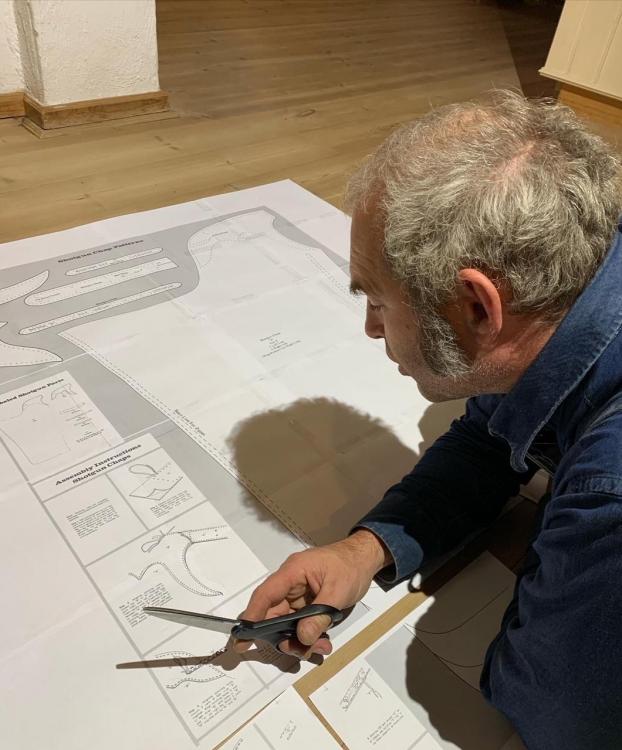
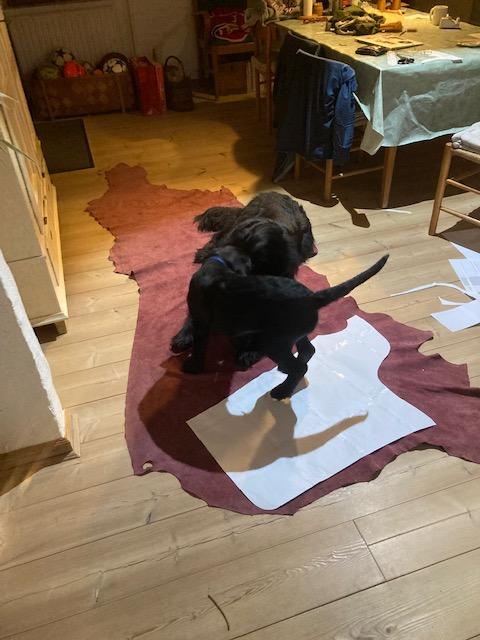
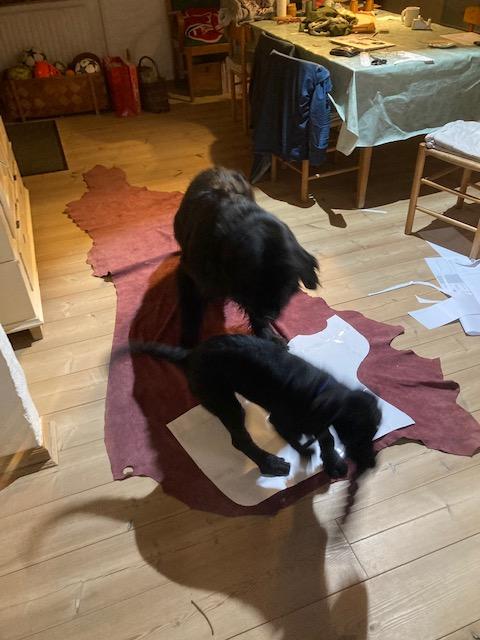
I helped my daughter make a set of chaps. We used the old Tandy free pattern to make a set of shotgun chaps. The leather was something I bought at a sale without a distinct use in mind. The patterns was pretty easy to follow, and she wears the chaps on a regular basis as a regular garment (fashion). We made the yokes out of the same leather ad the rest of the chaps, Laura liked that they matched, but I think that for the next pair of chaps I'll try to make the yokes stand out a bit more. All the sewing was done on my old patcher. Laura posing with her chaps. Me trying to figure out the plans. A temporary break caused by a newfoundland on the leather and a labradoodle puppy being provocative. As soon as the dogs left - the work could continue..
-
Two Brownings
Mulesaw replied to chuck123wapati's topic in Gun Holsters, Rifle Slings and Knife Sheathes
The holsters look good. BUT I can't even concentrate on looking at them with that beautiful awl and knife in the picture too! You have been so kind earlier to show a picture of the awl, so I was wondering if you'd be so kind as to show a couple of pictures of the knife too? That antler handle just looks perfect to me. Brgds Jonas -
-
I would be interested in a saddle as well, but I would really like to be able to see if it was a dressage or a jumping saddle, and perhaps the size. Meghan, does your group have a webpage where you perhaps could post some pictures of the saddles? Brgds Jonas
-
@Davm Here's a link to an old thread about doing it. I don't now if the rope will be too big for your holsters?
-
If the leather is from old saddles, I'd probably look into making some dog collars and maybe dog leashes from it. If the girth straps or stirrup leathers are still there, they could be used for making belts. Those would look worn from the start, but I suppose that somebody would like that look too. The leashes could be made by joining small pieces of leather, kind of like a figure 8 that is stretched a bit, You fold it on the middle and insert the ends through the loops of the next piece. My dad made a leash like that that held up for a couple of Newfoundlands, and I copied the design and helped my daughter make a leash for a horse (probably not the correct name).
-
Nice set of tracks, I think that you should suggest your nephew to install a sawmill of some sorts again, then maybe he can use the tracks as they are. :-)
-
First of all, beautiful work! Second: Since they look so good and in leather, I was wondering if you could substitute the lower reinforcement with some leather as well? I think it will hold up better, but it is just a guess. Kind of like that beautiful upper soft looking round cushion. For leather I would go with heavily oiled veg tan, I am not an expert by any means, but for horse gear I like to use something that can just get the same treatment as the rest of the gear I use. It is possible that you can also do it with chrome tanned, but again I am not that much into that science. Would you perhaps be so kind as to show a picture of the backside and the inside too? I would like to make a set of those for our son's jumping horse, and it looks like you have really nailed it with those (That is if you don't mind me trying to make a copy) Brgds Jonas (awestruck with those that you have made)
