-
Posts
789 -
Joined
-
Last visited
Content Type
Profiles
Forums
Events
Blogs
Gallery
Store
Everything posted by Mulesaw
-
Darn. elk tallow is just SO exotic for someone like me :-) I guess that if you lived in a really warm climate, you could change the ratio of tallow to NFO, but I like that I can easily apply the grease even if it is stored in the unheated workshop in the barn. I haven't tried it in super cold temperatures like freezing though, but I reckon it will still be soft enough to apply.
-
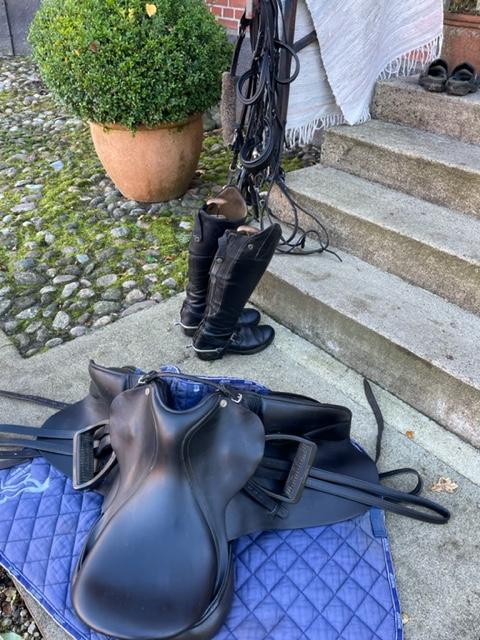
@TomE Thanks, the dogs definitely found it to be a rewarding experiment. The tallow was quite pricey like this. I think I paid DKK 50,- (around 7$) for 4 lbs of tallow scraps. After boiling etc. I think I ended up with just over one lb. (I have already forgot the exact number). And it took a while for boiling, but I think it is fun to try all the way from scratch. Since I moved up to production scale I have fund that the NFO is the most expensive in the recipe. I haven't found a wholesale supplier for that so far, but I think its OK despite of that. My production costs are roughly 2$ per jar, and a jar contains 250 mL. (slightly more than a US cup). That price includes the jar and the lid and I also ad a bit of pine needle oil just for a nice smell. But technically it isn't needed. Sheep tallow should be good I reckon, and I haven't heard of anyone using that for anything except old time lubricating of wooden planes soles. I have tried to make black grease by adding some lamp black, and that works like a charm, so I also tried to make some brown using burnt umbra .(I haven't tested that one yet coming to think of it) Both these are intended to be for boots since few people I know want to use anything with colouring on their saddles. Most competitions still require white riding pants, so no need to risk getting those more dirty. Here's a picture of one of my friends equipment after applying the grease. She bought a jar of the neutral coloured and a jar of black leather grease. She is not into regular competition riding, so it would be fair to say that her equipment isn't always super shiny. But the boots look like a million $ now, and she was very pleased with the product.
-
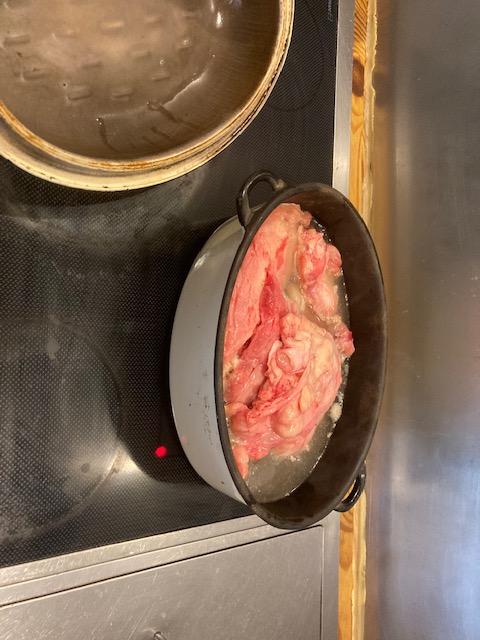
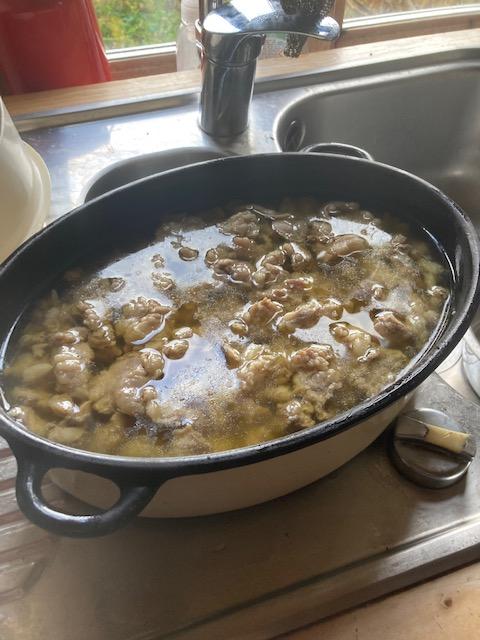
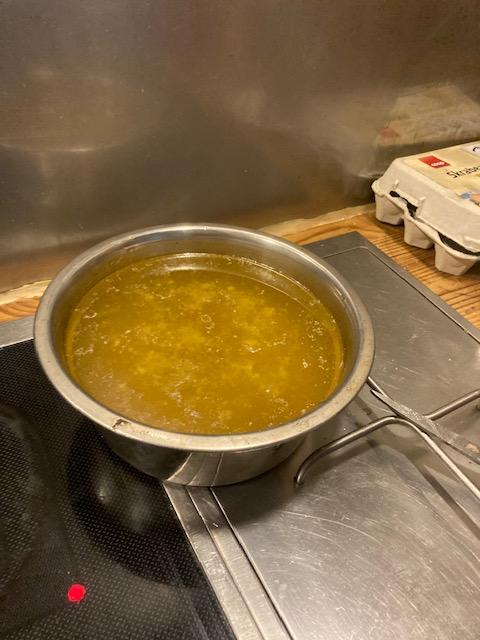
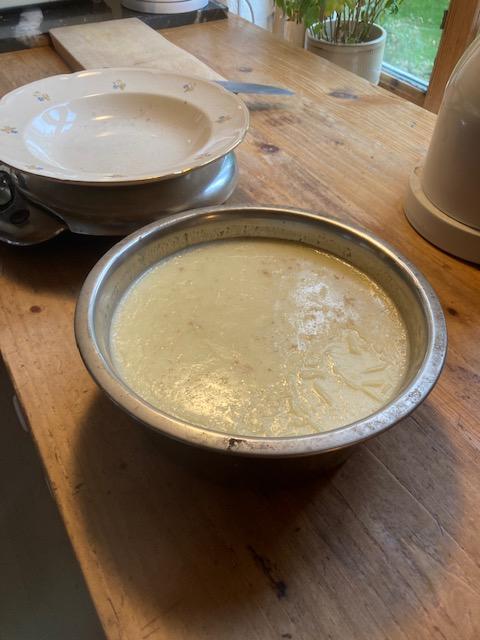
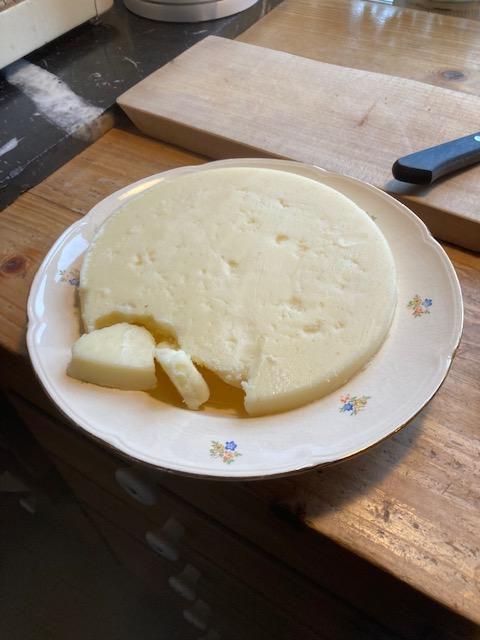
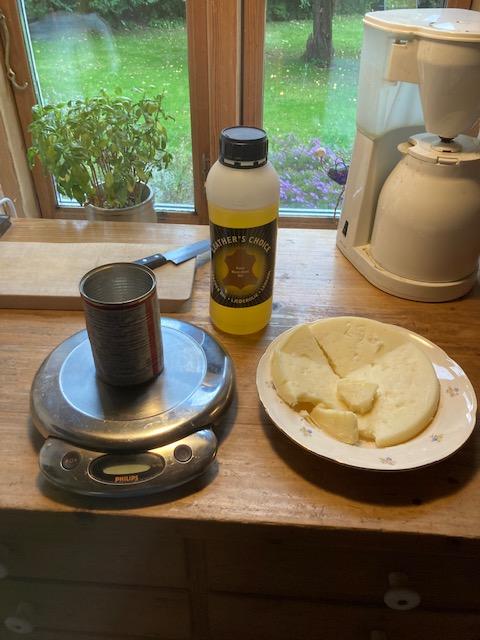
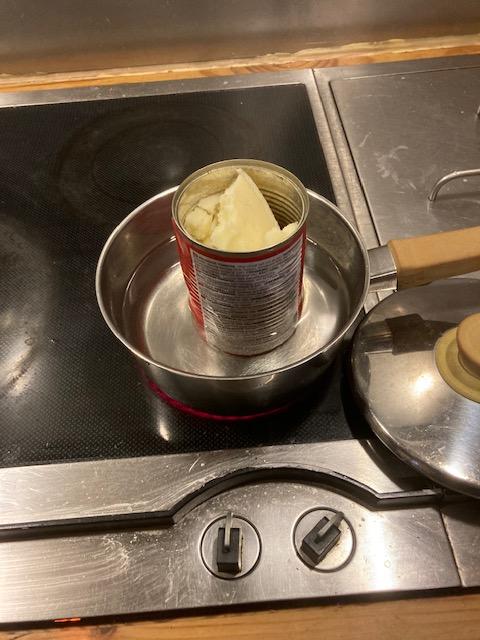
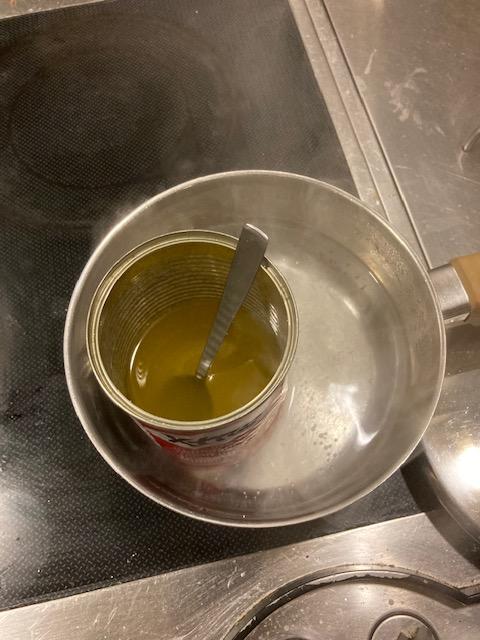
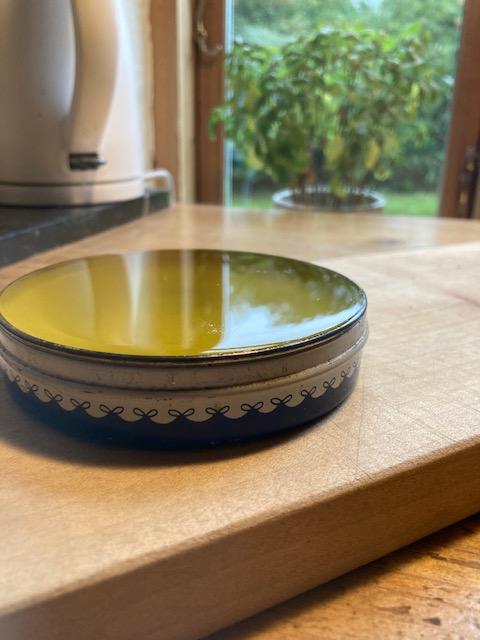
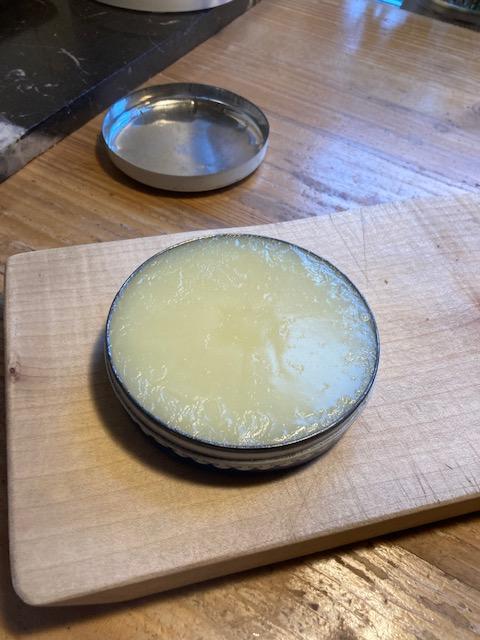
I found this recipe for harness oil in "The Harness makers illustrated manual". @Alexis1234 kindly referred to the book in a post about a fabulous goat driving harness that she made. The book can be found online, and in the end of the book there are a bunch of recipes. The easiest one was for harness oil that is actually more of a leather grease. I have made a production run of it, and so far I am very pleased. The grease is soft and absorbs easy into the leather. It doesn't leave a residue on the surface of the leather. My first test was made from absolute scratch, later on I have bought food grade tallow since it was a lot cheaper and easier compared to extract it myself. But then again, I am making a large production so I can sell some of the grease to other horse people. I like the idea of using animal based ingredients since I believe that it ought to be the most natural kind of grease for another animal product. The recipe calls for 3 lbs of beef tallow, and 1 lb of neatsfoot oil. the tallow is melted and the NFO is slowly poured into the melted tallow. all is stirred well until it is cold. The recipe also suggests adding a bit of lampblack to the mixture. I have only tried using beef tallow, but I guess that elk, moose, or deer tallow would be similar, so if you are a hunter or knows one then it could be an interesting experiment to try to use a wild source of tallow. The pictures show my process from the first experiment. No black was added to the mixture. 1 + 2) I bought some tallow scraps from the local butcher and these were boiled for a couple of hours in water. 3 + 4) The liquid tallow and water was transferred to a clean bowl and left to solidify in the cellar until next morning. The solid pieces of meat were given to the dogs (who seemed to like this experiment). 5) The solidified tallow was lifted onto a plate and the underside was rinsed under some water to remove any soup. The actual soup was also distributed to the dogs. 6) I used an old can to melt the tallow and NFO in. I weighed 240 gram of tallow and 80 gram of NFO. 7) I melted the tallow and NFO in a water bath, so I didn't have to clean up a pot when I was done. 8) All melted and stirred thoroughly. 9) Poured into an old tin. 10) After cooling and solidifying. the grease is ready to use.
-
Hi Scott It is a creamy paste, and that makes it easy to apply on saddles and headstalls as I see it. The two items are heated up and stirred, and if done correctly they don't separate (or at least that's what the recipe says). I haven't had any separation problems, but my experiment is only about a month or so old. In the Harness makers illustrated manual, the product is described as harness oil, but they say that it will be a smooth and soft grease which is also my experience. The author writes that you should heat up the tallow slowly and then stir the NFO thoroughly into the mixture until it is cooled. I ad both ingredients at the same time, and slowly heat it up to all the tallow has melted, stirring along the way. That has worked fine for me.
-
I found an old recipe in the Harness makers illustrated manual. 3 lbs of tallow (beef), 1 lb of neatsfoot oil. The recipe suggests adding a bit of lamp black to the mixture. I have made a large batch of it and I find it very easy to apply and it softens the leather as it is supposed to do. I mainly use it on saddles and horse gear. I got 40 lbs of food grade tallow. I also tested with adding a bit of brown (burnt umbra) to the mixture to make a brown leather grease. the idea being to use the black and the brown to boots and neautral coloured on the saddle and headstalls. (to avoid getting the white riding pants blackened by mistake). I don't want to put in beeswax in order to not increase the friction of the leather surface. If you ride a nervous horse, the squeeking sound of the boots rubbing against the saddle flaps can sometimes be enough to stress the horse. So far I haven't got enough experience with the product to see if it cancels all noise, but I am pretty optimistic though. Also I am thinking that since leather is mostly made from cows, beef tallow and NFO must be the most natural ingredients used to reapply grease to the leather.
-
Great find! I prefer my treadle version over the electric version, since I find it so much easier to sew really slow using foot power. But I also use the low "gear" pulleys all the time.
-
Advice on building a new shop/building as part of business
Mulesaw replied to desullivan's topic in Getting Started
If you ever do direct sale to customers like in that they come and visit your shop, then I'd make like a small part in the front that look "business like", with a counter or a table for wrapping up the stuff that they buy, and potentially for selling the odd can of leather grease/conditioner to their products. ' Maybe also a place where you can make a small display of standard things that you sell (I am only guessing here): belts, dog collars, wallets, dog leashes etc. Stuff that a lot of people could use either for themselves or as gifts. Also check with local regulations regarding if there can be a step into the shop or if it has to be wheelchair friendly. Good luck. Brgds Jonas -
@TomE That set look fantastic! The creasing looks perfect, and I really like the small detail with the thread going around the side for the first stitch near the bar of the buckle. It gives a really neat and tidy look in my opinion.
- 9 replies
-
- bridle leather
- equine tack
-
(and 1 more)
Tagged with:
-
Little sheath for my marlin spike knife
Mulesaw replied to Gezzer's topic in Gun Holsters, Rifle Slings and Knife Sheathes
@Gezzer It looks great now! The knot is easily recognisable and I really like the contrast of the stained strands on the light background. Is there a belt loop on the back of the sheath? I was just wondering, cause I once made a sheath for a thin pocket knife years ago where the idea was to just have something to keep pocket dust out of the mechanism of the knife. So the sheath just protected the knife from the harmful environment of my pocket. -
Little sheath for my marlin spike knife
Mulesaw replied to Gezzer's topic in Gun Holsters, Rifle Slings and Knife Sheathes
That makes sense to me, I couldn't quite recognize the knot. The good thing is that there are so many knots that would look good, so it is just to pick one that will look niec and isn't too difficult to recreate on leather (I think I'd stay away from a 5 strand Turkish knot :-) -
Little sheath for my marlin spike knife
Mulesaw replied to Gezzer's topic in Gun Holsters, Rifle Slings and Knife Sheathes
Great little project! The knife looks like a really nice tool. Being a sailor my only critique is the knot. It looks a bit like the upper end split in two. So it is kind of hard to follow which strand goes where. But on the other hand, it has kept me studying the sheath and the knot for quite a long time to see if it was me who got it wrong, ind of those optical illusions that capture your eye and you follow the lines around and still doubt your own eyes. -
I don't know how I managed to miss this post, but the harness is stunning! In Norse mythology, the thunder god Thor uses two male goats for pulling his wagon across the sky which makes the thunder and lightning. Thanks for the tip on the book as well
-
A set of suspenders would look great I think To me it looks kind of like the Y shape on a military basis carry system (probably another name in America).
-
Looking really good Thanks for taking the time to post clear pictures like this to show the progress and in what sequence the tooling is done. I alwyas get too carried away, so even with my best intentions, I rarely manage to take other than a start and a finsihed picture. I am anxious to se what the yokes will look like completed. Hope you manage to find out how to upload the remaining pictures.
-
@TomE I have done it on some tack as weeel as on a couple of belts. I like the look of it, and I think it can help in holding the piece together for the first couple of stitches so that it doesn't slide around. Not that it is a huge problem though. Apart from that: really nice work !
-
Thanks, I think I am just as proud as he is :-) The horse's name is Cajou https://www.longinestiming.com/equestrian/2022/ecco-fei-world-championships-herning/resultlist_S212.html Here's a link for the results of the 1st round of the medium tour, the one where he finished 1st :-) The lady from the stable where we bought Cajou, has been really helpful to Gustav and she has also invited him to come to an International competition with her, she has a horse truck, so Gustav can get Cajou transported at the same time.
-
I just checked the tutorial, it is great! I think I have to make a round throat latch when I get home. The idea about tacking a piece of leather underneath the exposed filler strip was the information I should have had last time I did a rolled strap. Gustav just participated in the VM in Herning last week, in the "Krafft Amateurs medium tour". Herning is just 55 miles away from us, and he had just gotten his international FEI license and the international passport for the horse. In the 3 rounds of the jumping tour he came 1st, 2nd and 6th, so it is fair to say that it was a success :-) Darn I would have loved to be there and seen all the action.
-
Really nice work. And a beautiful horse too. Are you able to sew the round throat latch on a machine too?
-
Leather Supply Companies - Good and Bad?
Mulesaw replied to Gulrok's topic in Leatherwork Conversation
The awl and needle combo looks good, but I think that the needle should be substituted with a bigger tool such as a half moon knife or a French skiver. there kind of lacks some "mass" of tools in the logo. I also think that it is a bit like naming your dog or children. Every name sounds a bit wrong until you have used them 5 times, from that point on it is clear that it was correct. So maybe we in here are helping you overcomplicate the whole thing. :-) I am pretty sure that whatever the name or logo, it'll be a great place to shop for leather products. Maybe it is a stupid question, but is there any reason why you want to make a new company instead of doing the Union Leather Supply under the Amopelle brand? That brand has a nice looking logo, a good name which includes the name leather. Nothing suggests that it is only finished leather products that you are selling, Tandy is also called Tandy Leahter, but everyone knows that they won't sell you a leather jacket, but they will happily sell you a pattern, some leather and tools for making one. Brgds Jonas -
Leather Supply Companies - Good and Bad?
Mulesaw replied to Gulrok's topic in Leatherwork Conversation
Very easy to understand. Bold letters that will be easy to read even from ten feet away when the parcel delivery has to look into their truck to find the correct package. (If you should use it on company tape to seal all your outgoing parcels). I am not sure about the hole in the neck of the hide though? -
Leather Supply Companies - Good and Bad?
Mulesaw replied to Gulrok's topic in Leatherwork Conversation
@Klara No it dont :-) (well maybe a bit) -
Leather Supply Companies - Good and Bad?
Mulesaw replied to Gulrok's topic in Leatherwork Conversation
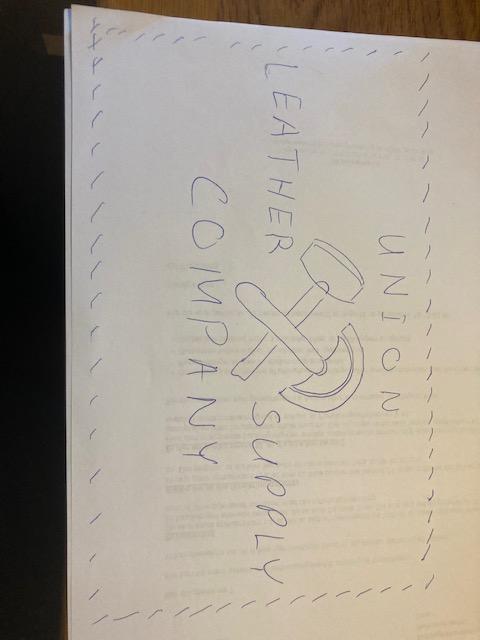
I really like the Amopelle logos! The Frontline Leather looks like a fireman's or a police officers badge which I guess is the idea, so that makes great sense for the first responder segment. Anyone who sees it will intuitively in their mind connect it with first responders of some sort, and especially if you are in that field of work it will trigger an interest. I would guess that your company will mainly try to sell to people who are already in one way or another interested in working with leather. So by using something easily recognizable you kind of make them feel like they are members of a "secret club" (I know it sounds corny) - and I think that would give them the interest to learn more and maybe even visit you store/webshop just after seeing your logo on someone's shopping bag whom they met in the bus. If you took the crossed halfmoon knife and mallet logo, remove the A, Union goes above the logo Leather goes on the left side of the logo Supply goes to the right side of the logo Company or Estbl 2022 goes below. If you want to make a border then make a rectangular border around that looks like a hand sewn leather stitching with slanted stitches. I have made a pitiful attempt of a sketch, the proportions are wrong and the stitching line is uneven :-) That would look good in my opinion both as stamped on a piece of leather or as a logo on a business card. -
Leather Supply Companies - Good and Bad?
Mulesaw replied to Gulrok's topic in Leatherwork Conversation
I think that RockyAussie has a good point in that the font needs to be easier to read. The logo itself reminds me of a logo that is on the burger buns that you can buy in Lidl, but if the service and the products are top notch, the logo is not important for me as a customer. I would probably go for a logo that would look good on a paper bag or on a shopping bag if that makes sense? given that if people comes into you shop and buy something, a logo that might attract a curious eye while the customer walks home with it would be a cheap way of making a bit of PR. Perhaps on a background shape of a half moon knife or something else that a person with interest in leatherworking can recognize. Or the background could be a silhouette of the USA, both of those would work without colour which to me often signifies professionalism. Brgds Jonas -
That looks amazing! It makes me want to put it on and go shoot some aliens! :-) Seriously great work. The colour and surface combination is perfect.
-
Leather Supply Companies - Good and Bad?
Mulesaw replied to Gulrok's topic in Leatherwork Conversation
Good things: Ease of communications, whether you call by phone or send an email. If a mistake is made e.g. wrong length of zippers sent to the customer, then it should be very easy for the customer to call and get it sorted out. My local supplier did it and I had expected a inquisition like questioning, but instead they said, oh, we are very sorry, we made a mistake, the correct ones should be with you tomorrow. I was dumbfounded and stuttered, well, don't you want the wrong ones back or see any proof etc. - but Nope, I could keep the wrong ones and they believed me without a doubt or without demanding evidence. Pictures of the actual stuff on the website and an accurate description. Calling you if they think you are buying the wrong thing unknowingly. My shop called me when I had ordered some double prong buckles for a 2" belt. They just wanted to let me know that if I wanted to make weight lifting belts, the particular model I had ordered was not strong enough. Just a friendly call and no trying to sell me other stuff, but the exact same sort of advice that you would be glad to get if you were in the physical shop. Offering a free printed catalogue to be sent along with your purchase. Bad things: Missing items from an order, even with ease of fix it is still better to get it all correct in the first place.


