-
Posts
789 -
Joined
-
Last visited
Content Type
Profiles
Forums
Events
Blogs
Gallery
Store
Everything posted by Mulesaw
-
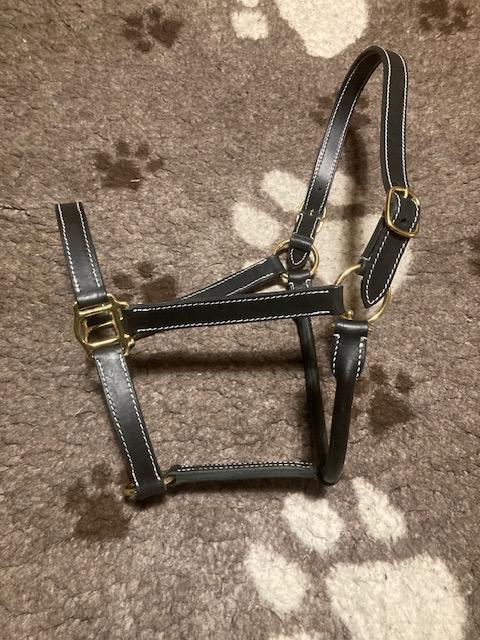
@DieselTech thanks for the kind words. Horse related stuff is usually well received by horse owners. So if you would like to make something like it, A halter is really a good place to start, since most horse owners use halters of some kind. It is a doable project, even by hand stitching, but it takes a bit of time. But then again - if you have made it correctly, the halter will last for the next 50 years or so. @TomE Thanks, I follow the instructions given by Gustav :-) And he likes that the stitches are visible. He got his journeyman's certificate as a carpenter this fall, but he has accepted a job as jumping rider at a stable called ESH sport Horses, I don't think the have a net page, but they are on IG. When I visited him he showed me that the head rider also had a triple stitched halter, something Gustav had never seen save for the first one that I made. I am planning on making a stallion halter based on a model that I borrowed from Katrinelund (the local large stallion station) I'll try to make some instructions for it to post here when I get it done. It is a heavy type halter with doubled leather all the way round The throatlatch and the noseband are both in one piece 5/4" wide. The cheek pieces are fastened through a slot in those. So the only hardware is a Ring in the bottom of the nose band. And 3 buckles. one for each cheek piece and one for the throatlatch/neck piece. According to the owner of Katrinelund it is an old model that he had an old saddlemaker make for them years ago. And I can see the idea in it. It isn't a particularly pretty halter but it does a specific job, and it is virtually impossible for the stallions to loose the halter or to tear it apart.
-
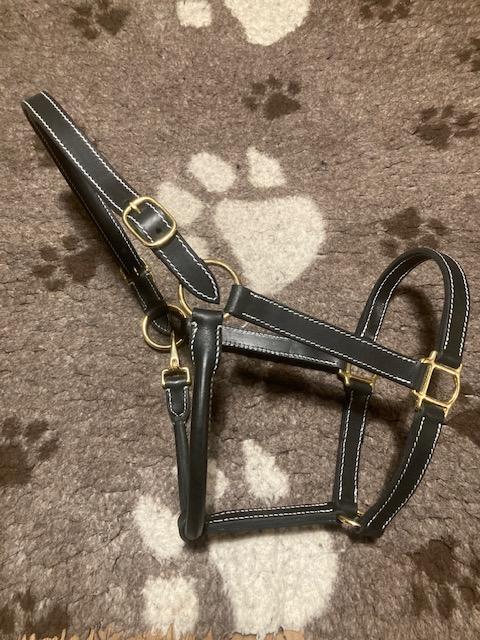
Using the fantastic instructions given by @TomE, I made another double stitched halter for Gustav's girlfriends new horse for Christmas. For some reason they prefer a double stitched halter to a triple stitched, so I give them what they want. This one I made the rolled throatlatch a bit thicker by adding a double filler. The last black one I made was a bit harder to do than the brown ones, It was like the leather was harder, so to overcome that I inserted a thicker filler, and it made it easier. I have also engraved a name tag for the halter, just like I did on the last halters that I have made. The name tag was sewn on after these pictures were taken. The horse's name is Ocean X
-
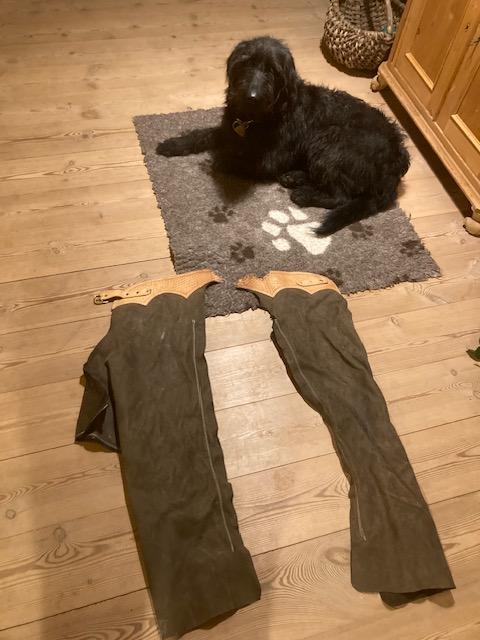
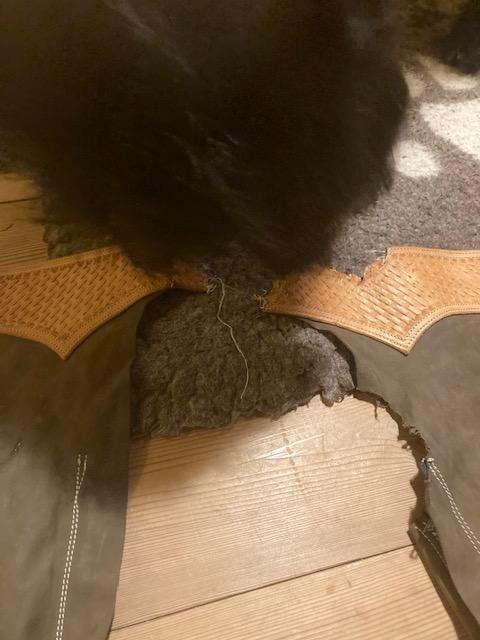
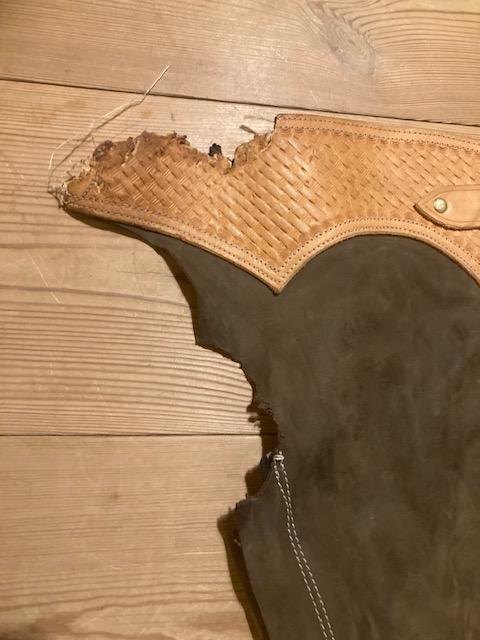
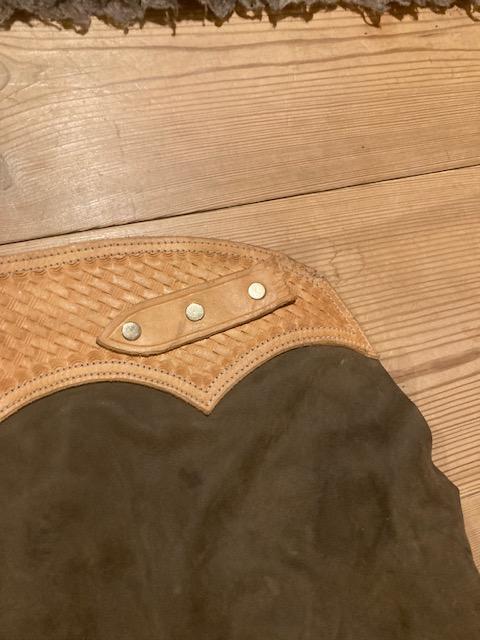
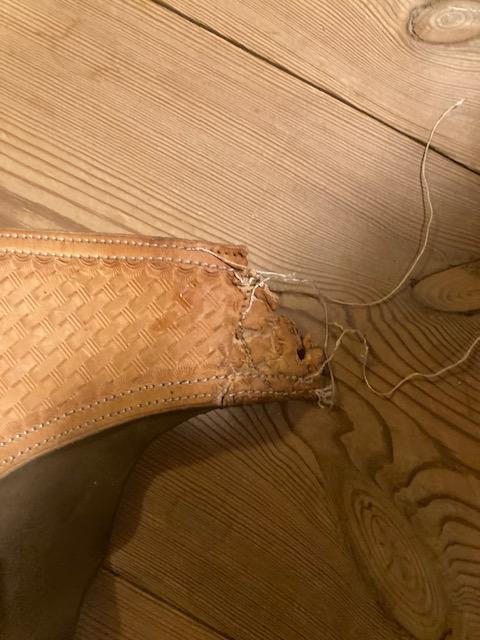
A year ago I made a set of nice shotgun chaps for our son. At some point this summer he had been clearing out a bit in the stable where his horses were, and some stuff came home - including the chaps. Most of this stuff (all of it I think) ended up in a pile in a box on the floor of our own stable. Our dogs have their kennel in connection with the stable, so they can stay inside when the weather is too hot or for whatever reason they might have. The labradoodle must have been bored at some point, because one day I discovered the chaps in a not quite mint condition.. He has been pretty efficient in chewing on the chaps. Both yokes were damaged, the back part of the belt was completely missing. The front belt was missing save the non buckle end. A bit of the softer leather had also taken a biting, but at least he had stayed from the zippers. So in order to get the chaps back in order I had to make new yokes, a new back belt, half a new front belt and then sew it all onto the legs. Hopefully they'll last more than a year this time. The culprit with his work :-) Examining if he did the job thoroughly.. Barely missed the zipper Shortened belt. There used to be a back belt here.
-
Pricing for Custom Saddle Tree Made by Kent Frecker
Mulesaw replied to Teddyi's topic in Leatherwork Conversation
Once in a while it really is a mystery as to why some people get a horse. Our neighbour has got a horse in our stable. Technically it is the daughters horse, but she is grown up and has long ago moved to another part of the country. The neighbour wife comes by once every day to muck out that box and measure up feed for the horse. Maybe once or twice per year, the horse is exercised on a line. That's all. I have never understood why they didn't part with the horse, given that they never get any of the "fun" by having a horse, To me just going in the stable in the morning and being greeted by a low hohohohohohoh is great, and we normally take our horse for a trip in the forest once per week. But having to pay for a horse without getting any of that in return is stragne to me, and I feel sorry for the horse since in my opinion, it would be better off somewhere else, perhaps where a young teenager could take care of the horse and give it the love and time investment that it deserves. I am just puzzled by it. -
@Ferg Thank you Ferg, it is deeply appreciated. I also felt completely blank when we got the diagnosis. We were sort of expecting it because Mette had felt a lump in her breast, but to the very end you just hope that it is something else. but then once it was diagnosed - it just seems so overwhelming. @Sheilajeanne I think that Mette has had something like 16 weeks of chemo therapy before the surgery. We started the first session on May the 1st, and there is still some time to go. But apparently there are different types of breast cancer. And this type should be treated like that. I have previously thought that all cancer was the same, only it attacked different parts of the body. But I learned something new (that I really didn't want to learn)
-
Very nice design. Is there a small piece of leather under that steel bracket that you made, to sort of keep it off the butt of the rifle? Also, the rear part looks great! Those creases are just the right amount of decoration for my taste on something as elegant as this. Did you sew the back part together at the extreme rear end ? Brgds Jonas
-
@Sheilajeanne That sounds like some aggressive medicine for sure, especially given that the side effects from chemo aren't super friendly either. Thought they seem to be more long term like dry eyes, dry and sore mucous membranes etc. For the radiation treatment Mette might stay at the hospital for a few days. They have a patient hotel where she can stay so she doesn't need to drive back and forth every day. We might try that for a few days if the weather is bad. We have a 2 hour drive to the hospital, so basically half a day is spent in transport. She'd then drive there herself, and I's stay at home and take care of the dogs and horses. The good thing this year is that the company have decided that there is no need for keeping a full crew on the ship for Christmas, so instead of going back to the ship on the 22nd of December, I get to stay home until the 27th meaning a regular Christmas at home :-)
-
Ouch, sorry to hear that. It is a monstrous disease. Mette had the cancer nodes surgically removed including the tow nodes in her lymph. The hospital as a precaution always take the neighbor lymph nodes and send those to closer examination. The answer was sadly that they also had signs of cancer in them, so two weeks later it was back to surgery and now all the lymph's in the right armpit have been removed. The hospital then suggested some more chemo therapy, so that is where we are now.. The next step is going to be radiation everyday for 3 weeks. Can't honestly say that 2023 so far has been a great year. But we are still going in the right direction which is good, and the hospital has asked if Mette would be interested in participating in some follow up program where they monitor her more closely for the next 10 years. She has of course said yes, because that'll mean that they will immediately discover if anything is acting up in the future.
-
Only put it on the smooth side of the leather. The rough side will absorb too greedily so it will be hard to control. Brgds Jonas
-
@DanishMan Hi Søren I could only find that brochure, but I would guess that an 204-64 is more or less the same weight (though I technically don't know) Christmas comes early this year :-) Please be careful with your back when you try to get it in and out of the car. Cheers Jonas
-
@DanishMan Congratulations :-) https://www.brinchristian.com/FR/documentation/2017120112035281.pdf 62 kg if the model is 204-102 69 kg if the model is204-370 Brgds Jonas
-
New pattern needed; Phrygian cap, aka a Smurf hat
Mulesaw replied to fredk's topic in Patterns and Templates
Either way (finding a pattern or making it yourself) it is going to be an epic cap! I have NEVER given thought to that the Smurfs wore a cap like that :-) After Googling a bit I wasn't able to find any patterns, but I did find out that the cap has a couple of other names, and I tried Googling for patterns of those as well. Jakobinermütze (German), Jakobinerhue (Danish), Jakobiner lue (Norwegian) etc. Good luck, brgds Jonas -
Pricing for Custom Saddle Tree Made by Kent Frecker
Mulesaw replied to Teddyi's topic in Leatherwork Conversation
I can see your point, but I tend to disagree a bit. If the horse is a good horse that needs a special saddle, then a custom saddle would still be used for lets say 15 years on that horse. And even though a saddle is expensive, spread out over 15 years it is OK I guess. Though I'd probably want a 50% deposit before starting the work. Brgds Jonas -
Pricing for Custom Saddle Tree Made by Kent Frecker
Mulesaw replied to Teddyi's topic in Leatherwork Conversation
Losing an animal is so incredibly hard. They occupy a special place in your heart. I would think that the price also depended a bit on the measurements of the tree. If the tree is fairly standard width and length and curvature, then I guess that the price should be probably 60 - 75% of new value. A special tree like extra short back or for an unusual curvature or angle (I don't know the proper names of those for American saddle trees) would be harder to sell, since the chances of finding a horse with the similar features coupled with an owner who would want to have a custom saddle built would be hard. So in that case it might be something like 40 - 50 % of new value. These are just my best guesses. A suggestion could be to contact a saddlemaker and ask him/her if they would be interested in buying the tree. They might have a prospect customer they could couple up with the tree and make a saddle. God luck Brgds Jonas -
@Constabulary I am looking more and more forward to getting my hands on the machine. :-) I will probably not use it very much, but I like old mechanical machines, and the price was so low (70 Euro) that I couldn't let it go. My friend who made the transaction said that the seller had 3 of them, so he bought one himself and we got a common one that we could use for spares. Mine was the only one that had a needle though. So getting more needles will help the both of us. Some more detail about the guy who reproduced needles would be fantastic. I have thought about getting some curved needles myself and then annealing them and bending them to the correct curve for the 1551 shape, and then use a small dremel to make the flat part on the shaft. Then I would have to harden the needle again without breaking it all. I have seen some pictures of the needles on the Net, and they seem to have a very distinct chisel like point. So it will probably take a few attempts to make one. I am hoping that I can use the machine for some repair operations on horse tack, some of the repairs I make can be a bit difficult on the Singer class 7, especially close to hardware. And the pictures of the sd28 looks like it could have an advantage in that respect.
-
Ouch yes. I think I'll be happy if I can just get a spare needle in the first place :-) If not I'll try to be creative and see if it is possible to alter one of the available curved needles. Though it probably won't be easy.
-
Looking great! I like the tooling on the top, it must have taken a lot of time to stamp all that background, and even more practice to be able to do it so evenly
-
Here's a manual and a parts list for your friends display if he wants it. It is the English manual for a Pedersen SD28. I guess they bought the manufacturing rights and produced them in Denmark for some years. It should be an identical machine as far as I have been able to establish from the Net. I like it when old well established companies have a "history" part of their homepage. And very often the older products look the best (at least in my opinion). SD 28 Junker & Ruh Outsole stitcher Parts list and manual.pdf
-
@Gunnarsson, Yes I guess that it'll take quite some time for the machine setup, it was just the sheer number of 10.000 needles that amazed me. When trying to google for the 1551 needle system, it seems as the only machines it was used for are those Junker & Ruh or the equivalent Pedersen sewing machine, and selling 9950 needles (I'd keep 50 myself) would most likely take some years.
-
Jeez that's a lot of needles. It is a couple of months since I tried to locate needles, and I couldn't remember which manufacturer it was, just that it was a German one I thought that maybe they'd make a series for 500 needles, but 10.000 that's not going to be easy to sell.
-
I checked on Schmetz' homepage (I think that was the one, though it could be another manufacturer) They could make a production run of the needles, I just don't know how many needles I would have to order, but I seriously consider to contact them and ask. There seem to be quite a lot of those machines out there, so it ought to be possible to sell the needles, but I guess only if they aren't too costly.
-
I have never seen them before. Actually I haven't even seen my own machine yet, since I got a friend to buy it for me, and he has given it to another friend who lives a bit closer to me, so I need to get to him to pick it up :-) From what I was able to scour from the Net, Wilhelm Pedersen in Denmark copied the machine so at least I can get a Danish manual for it.
-
Great projects! I got to think of this post by @Hags The scopes on your customers guns might be a bit different and also one gun is an automatic and not a revolver, but Hags did a fantastic job in my opinion, so perhaps it could be sort of inspirational.
-
Messy stitches on cobbler only when stitching to the right
Mulesaw replied to arich's topic in Leather Sewing Machines
I am pretty sure that it is just the way the patchers work. I get the same result with my Singer patchers, and also only when I point the foot to the right. It looks just like your test piece does where the thread sort of jumps from one side to the other for each other stitch. My best advice would be to try to plan your stitching so that sewing in that direction is done as little as possible, That is how I try to deal with the same issue. Brgds Jonas -
I think it would be OK to do it, but only if the tag could be put somewhere inconspicuous. If I make some work on a saddle, I make sure to find the serial number of the saddle and the model etc. and write that in the invoice I make. e.g. Passier Optimum II dressage saddle 17,5" saddle No 17534, replaced fwd girth straps and repaired defect stitching on lower left saddle flap. I have never done so extensive repairs that I felt I could justify to put on a rebuilt tag, but my idea about being thorough with the description is that in case the customer has got several saddles (fairly normal), and they suddenly get mixed up in their head that this saddle was just repaired and now it is broken again, then I can go back in my invoices and see if I actually worked on that particular saddle.


