Deanr
-
Posts
54 -
Joined
-
Last visited
Content Type
Profiles
Forums
Events
Blogs
Gallery
Store
Everything posted by Deanr
-
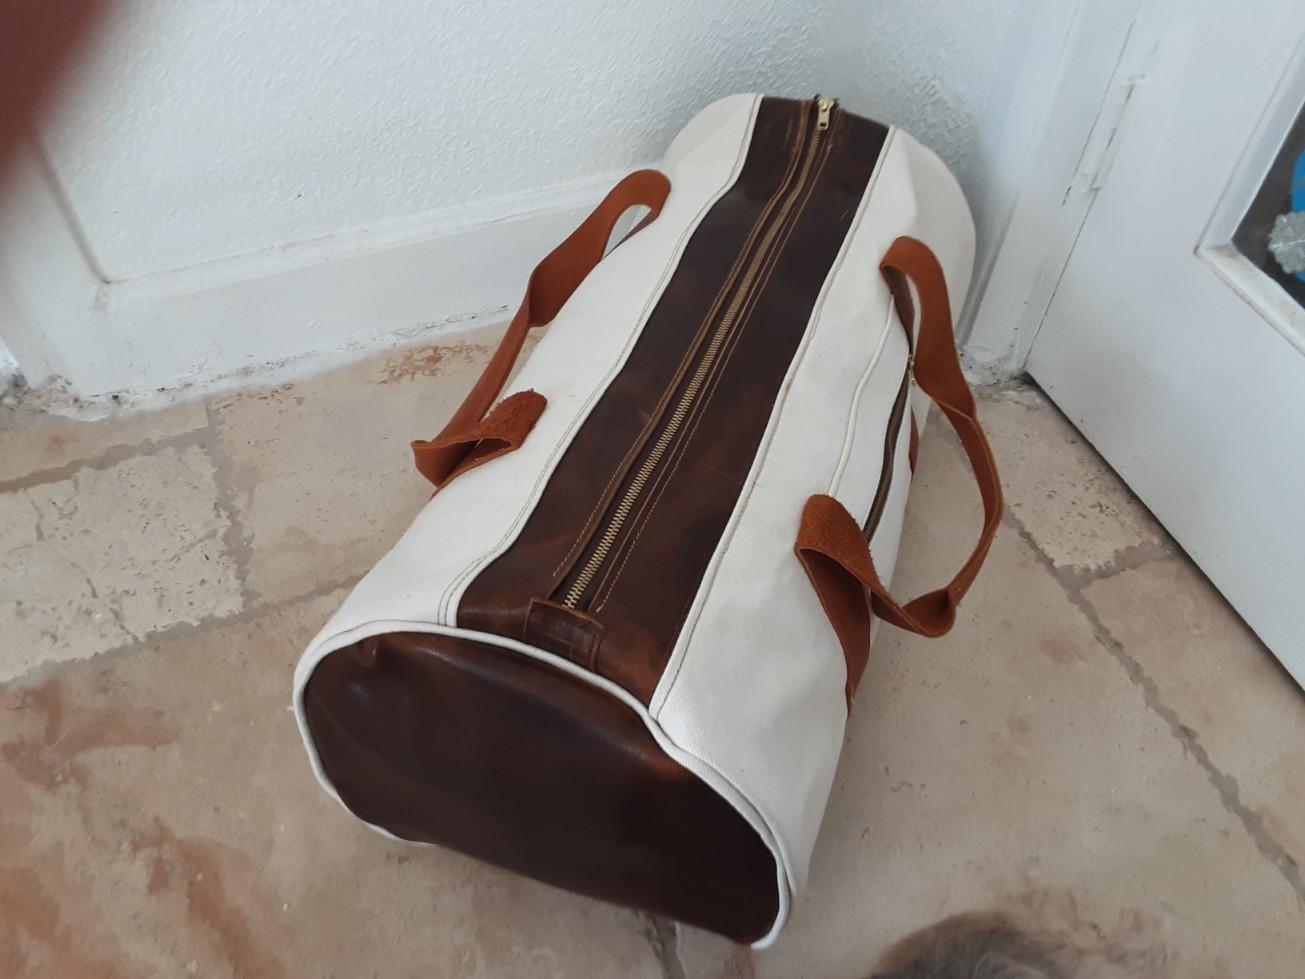
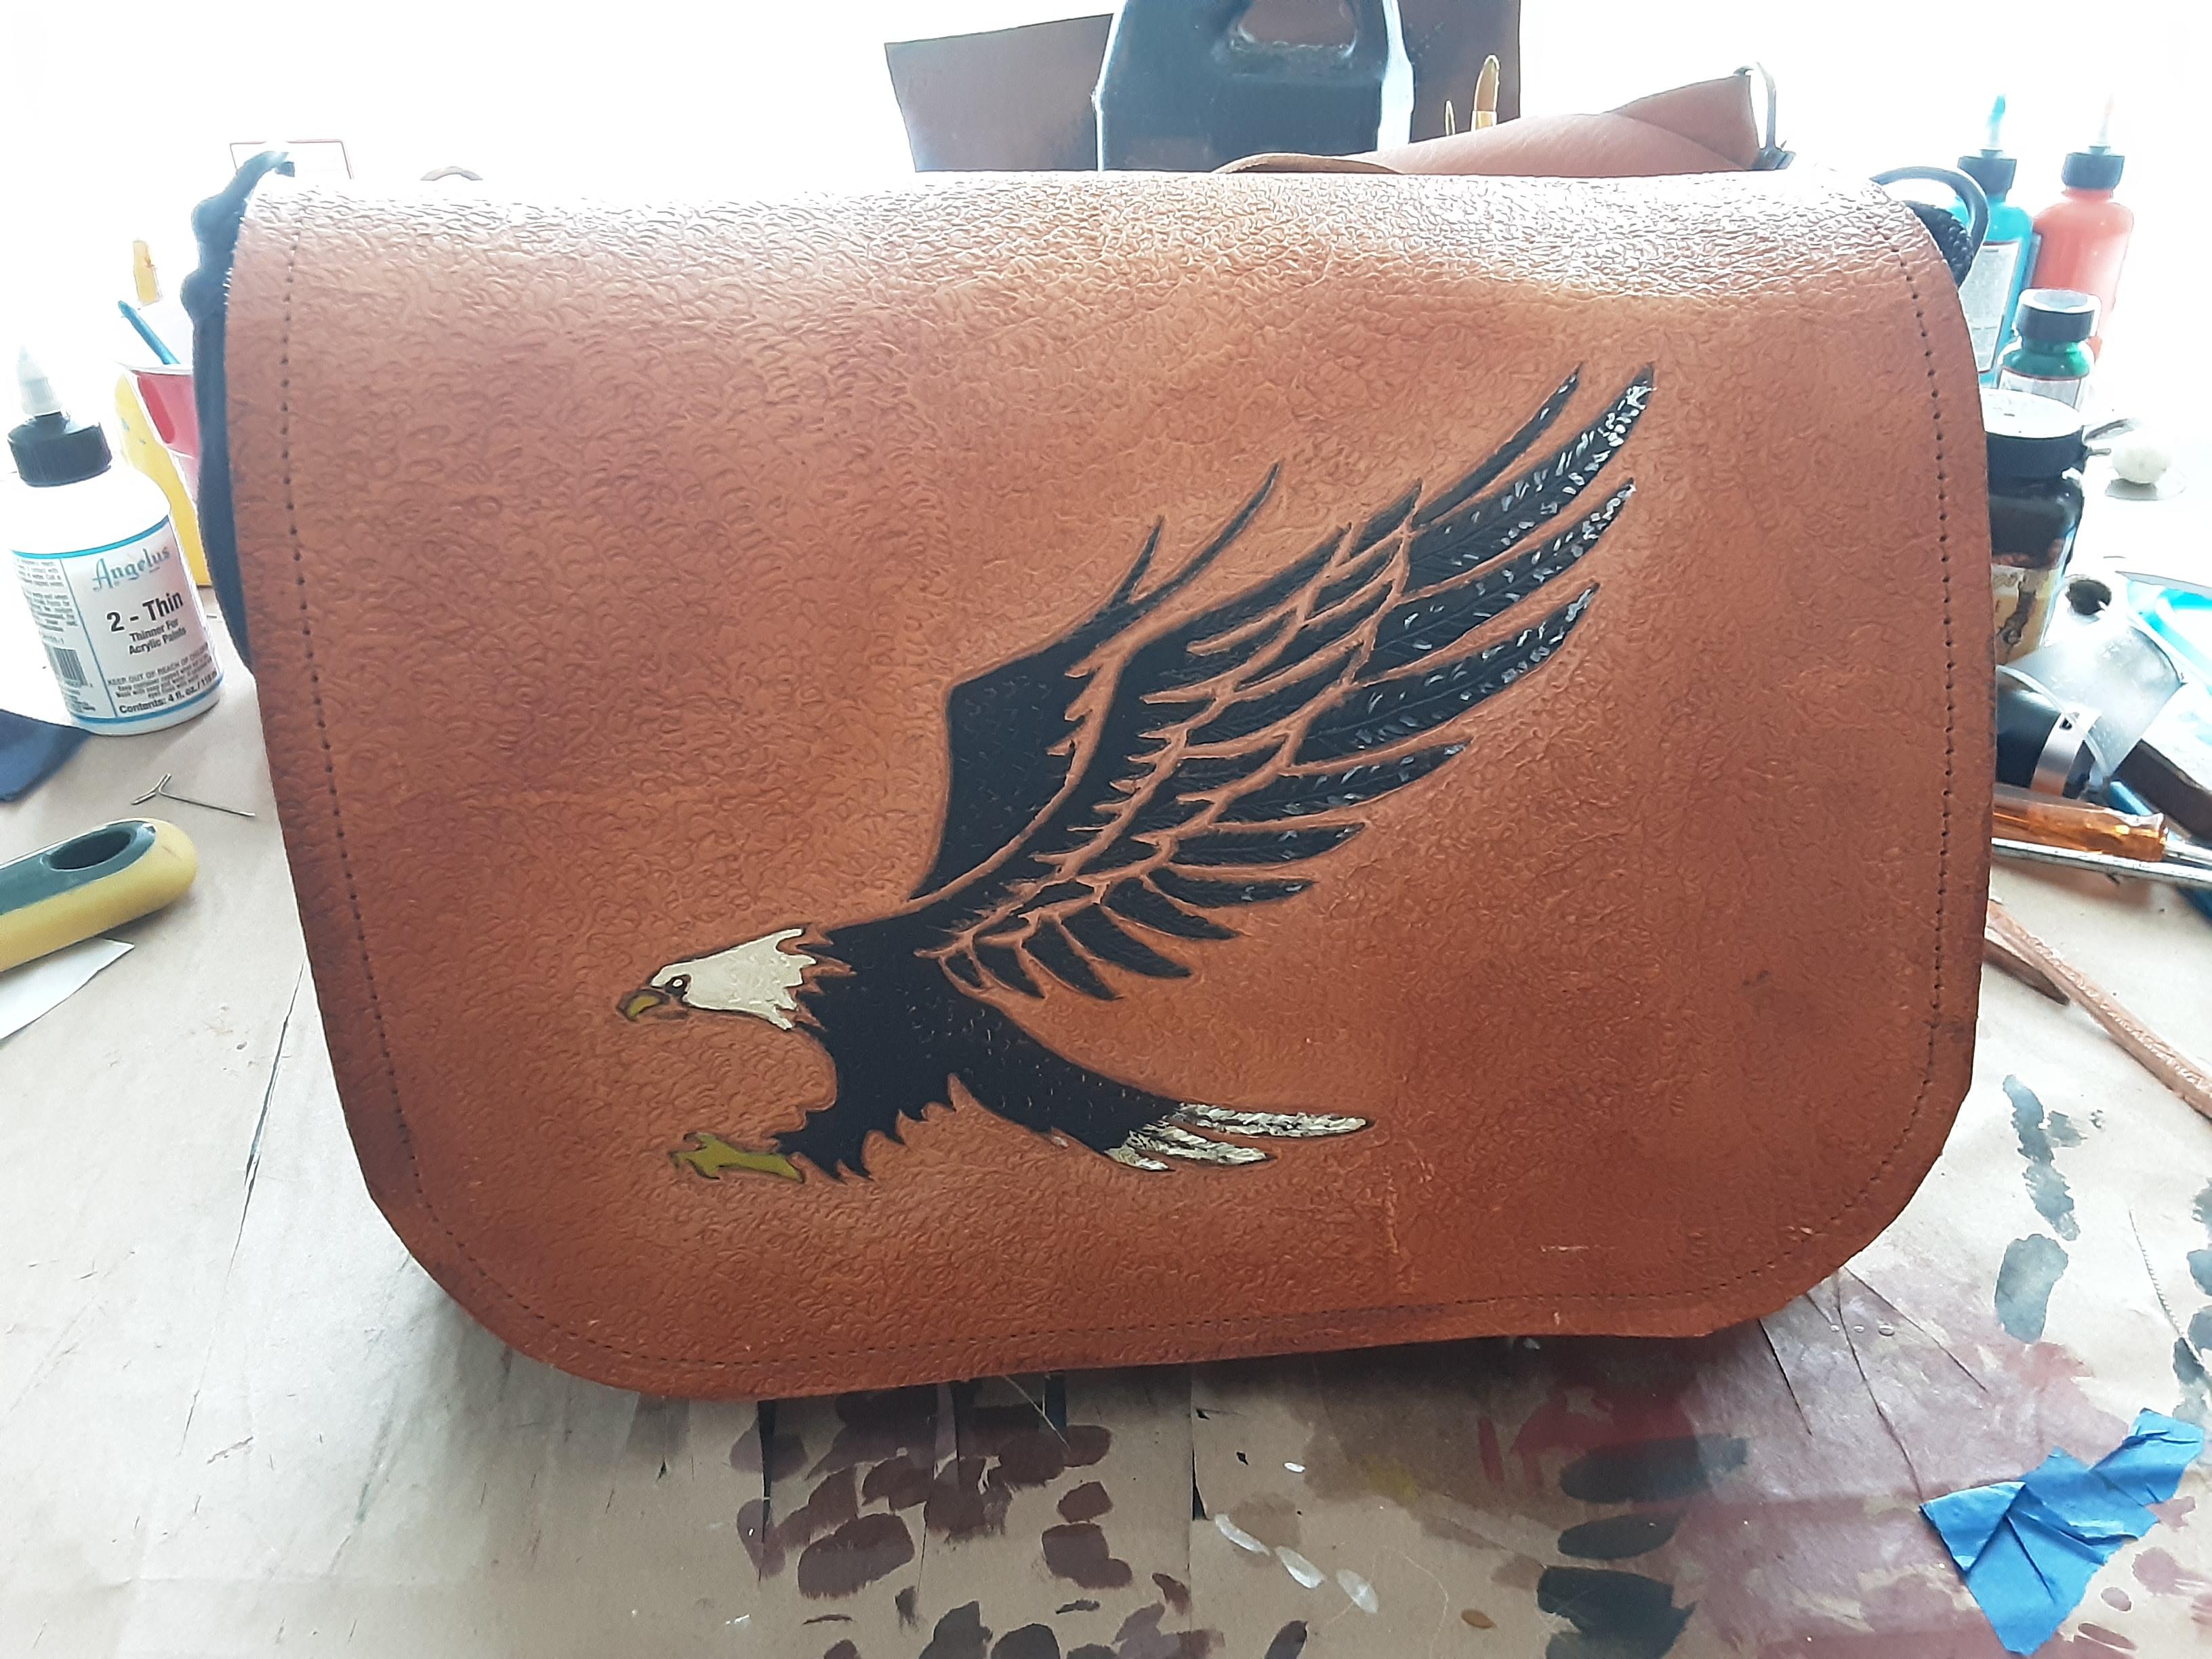
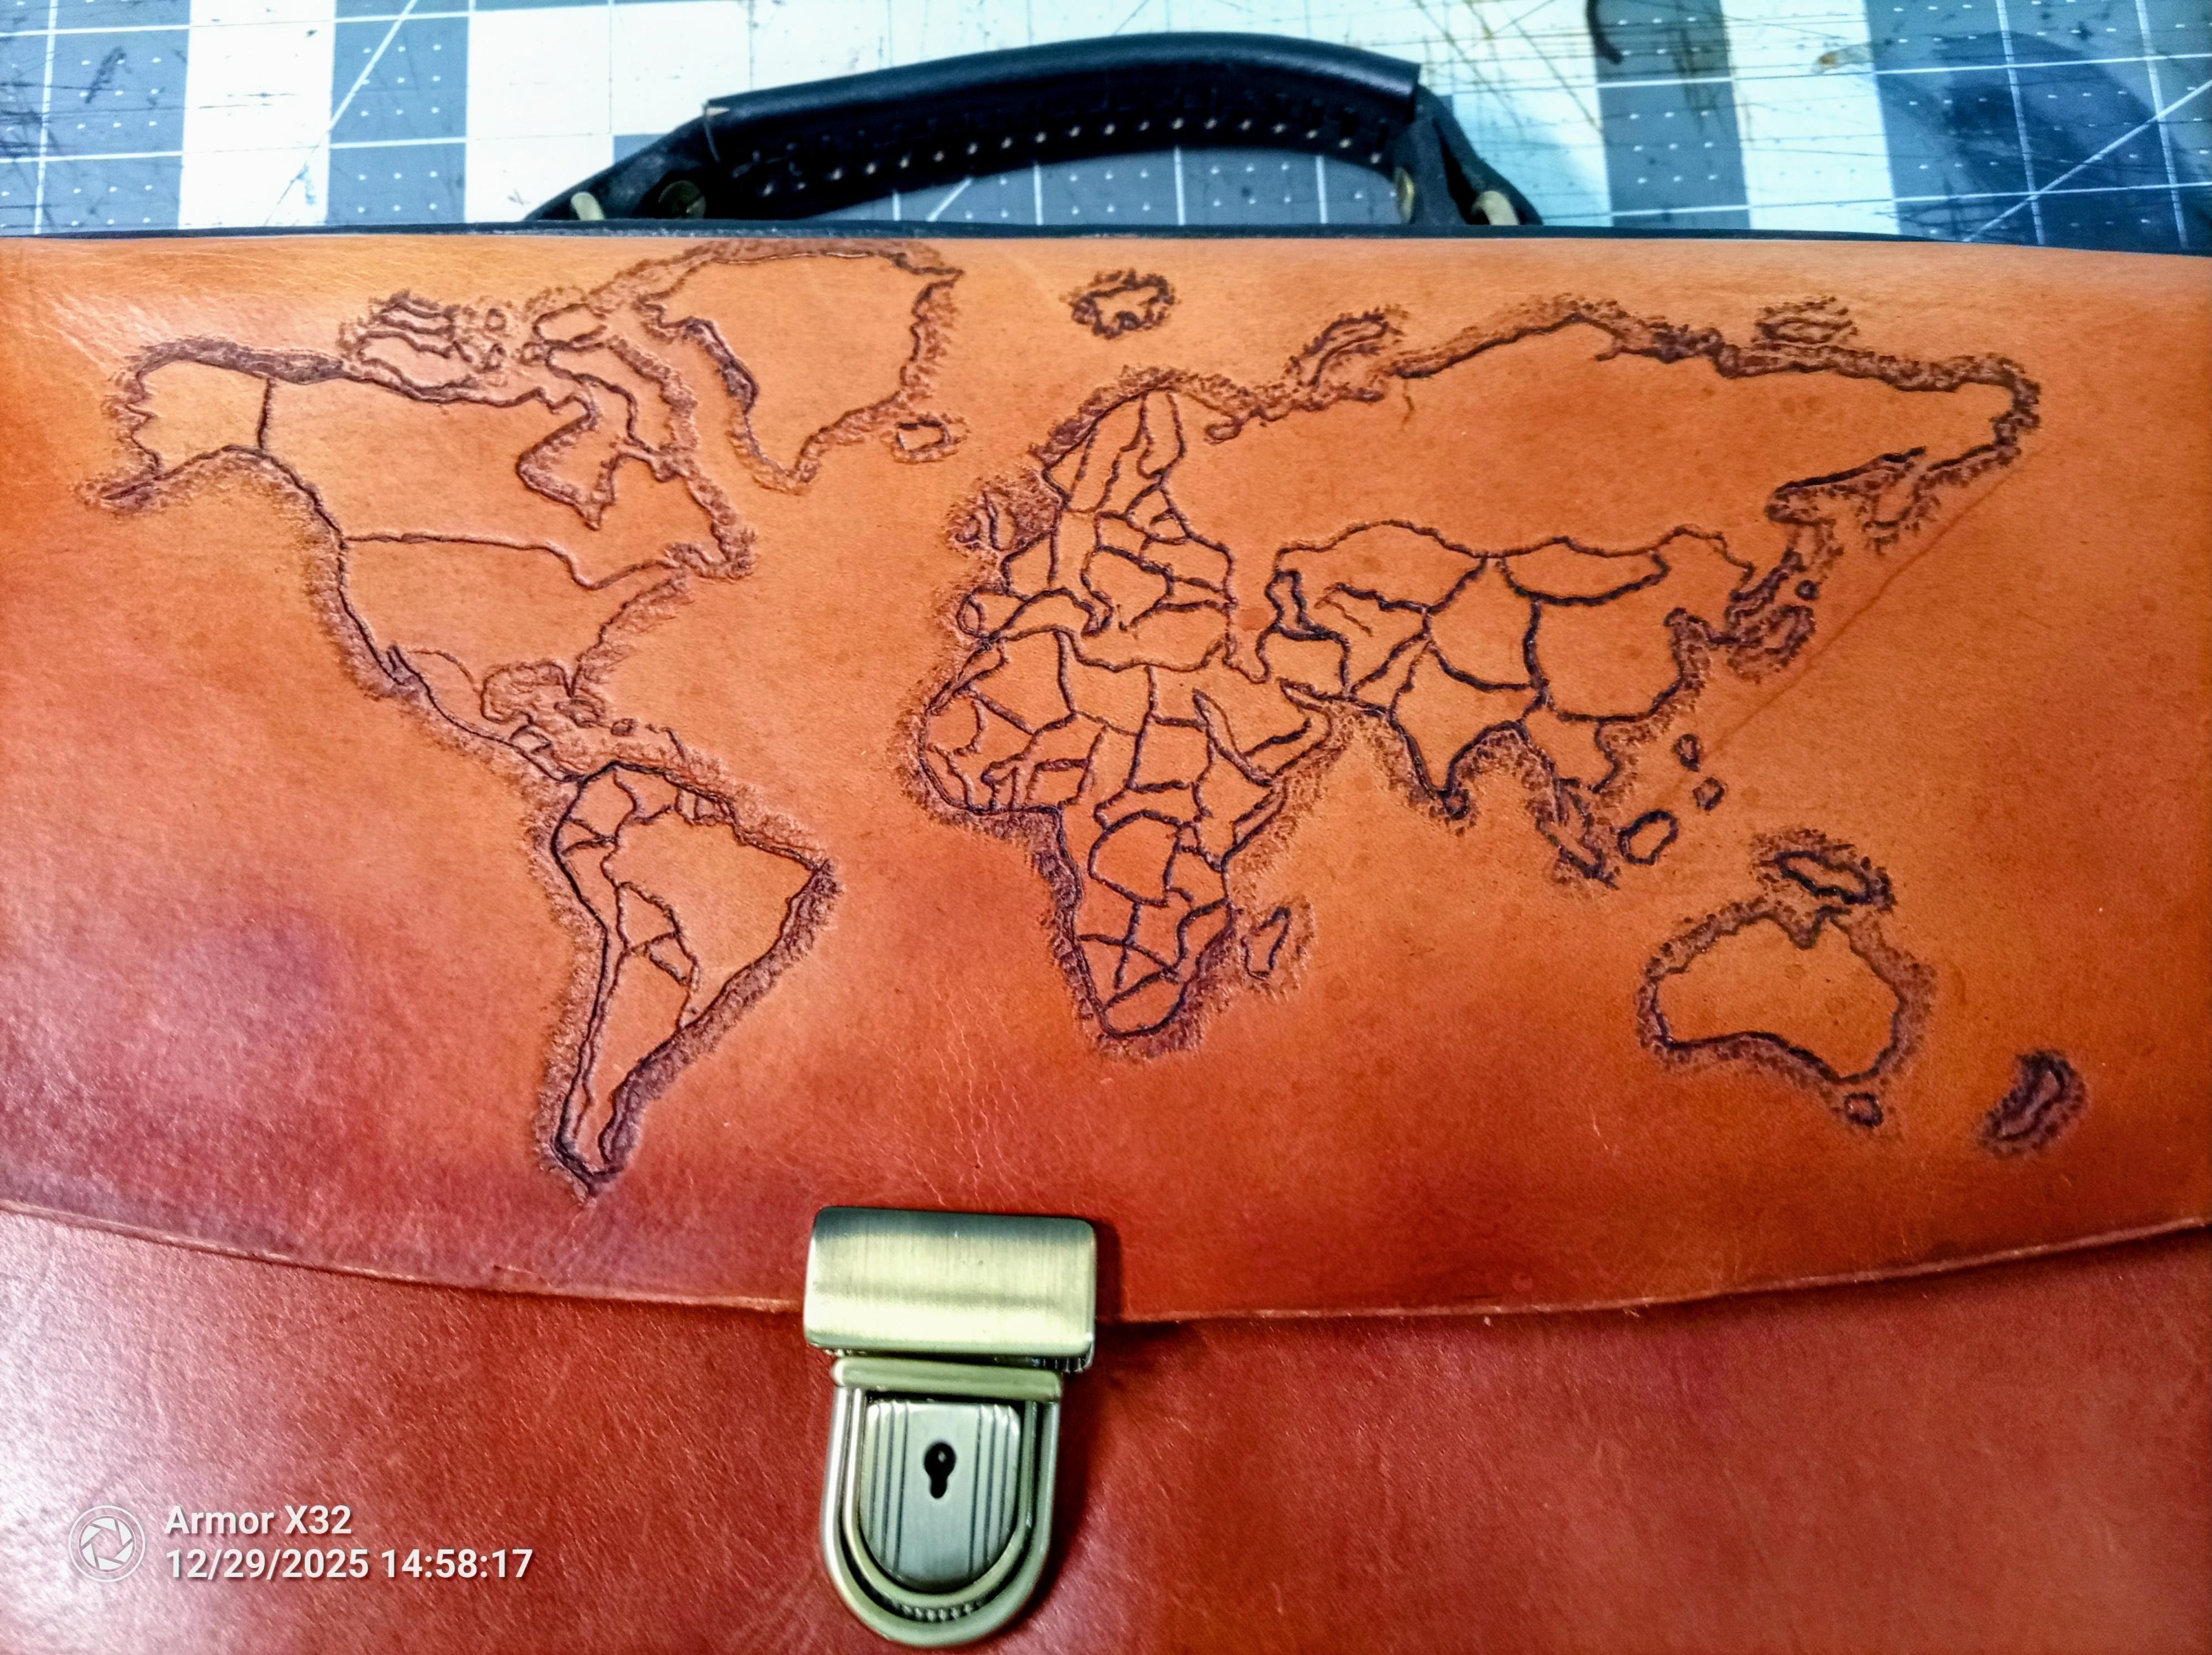
I have one and although I haven't used it alot I like it. Much of my work is with chrome tan so I don't get alot of opportunity to use it. Probably not for everyone. For those that have spent considerable time perfecting your tooling you might be underwhelmed. For those that want a tooling effect and haven't perfected the standard craft I think it can fill the need. Different type of results. I like to trace a picture and work from there. Attached are a couple pictures of bags I made using it. Both on veg tan.
-
Check if you have any chainsaw artists in your area. With your low level of detail required it may work financially.
-
Beautiful work. Any chance you have more pictures of that knife?
-
I would like to second toxo's post. It's so much easier with a pattern. Well worth the $10. In addition he has instructional videos to go with the pattern. With these patterns you need the minimum in tools. Use a 1.5 mm punch and get some tiger thread, some needles and go at it. The stitching is alot easier this way. I wish I had figured this out earlier, it would have saved alot of frustration.
-
Very nice. I've not seen using binder's board as a core on the insert. Did you tool around the edge before sewing?
-
I think your tooling is incredible. But I think your paint/dye work is equally impressive. Even when enlarged I don't see any overflow on adjacent areas. You obviously are very meticulous. Maybe you could share any tips/tricks. Very good work. Something to be proud of.
-
I use a utility knife and this gets me pretty good results. I sharpen mine with 1000 and 2000 grit and then strop. Draw your radius using an awl and something of the radius you want. Bottle top or coin work good. Do it in multiple cuts and concentrate on keeping the knife perpendicular I make the first cut light and focus on following the line. I like to slowly rotate the leather as I move along On straight cuts use a ruler You can touch it up with a little sandpaper if needed. This will help if it isn't perpendicular.
-
I had problems with my machine skipping stitches when sewing veg tan. I switched to a good quality poly thread and I haven't had problems since. Also make sure when you stop your needle to make sure it has started coming back up.
-
Kitchen Scale for Measuring Thread Tension
Deanr replied to friquant's topic in Leather Sewing Machines
Something I used to adjust my trigger pulls looks like it can easily be adapted. Take a plastic cup, make two holes near the rim, opposite from each other and put a wire through the holes. Now you have what looks like a miniture paint can. Tie your bobbin thread to the wire. Lift the cup up while holding the bobbin. Slowly pour water into the cup until the bobbin releases the thread. Weigh your cup with water on a kitchen scale. Once you have a desired weight, put your empty cup on the scale and fill it to your target. Hang it from the thread and adjust your bobbin until the thread releases -
Very nice work. Are you stitching the bag right side out with your hands inside the bag? If yes then very very nice work. If not please enlighten me. Also I would like to see a picture of the lining and one of how you attach the flap. Thanks.
-
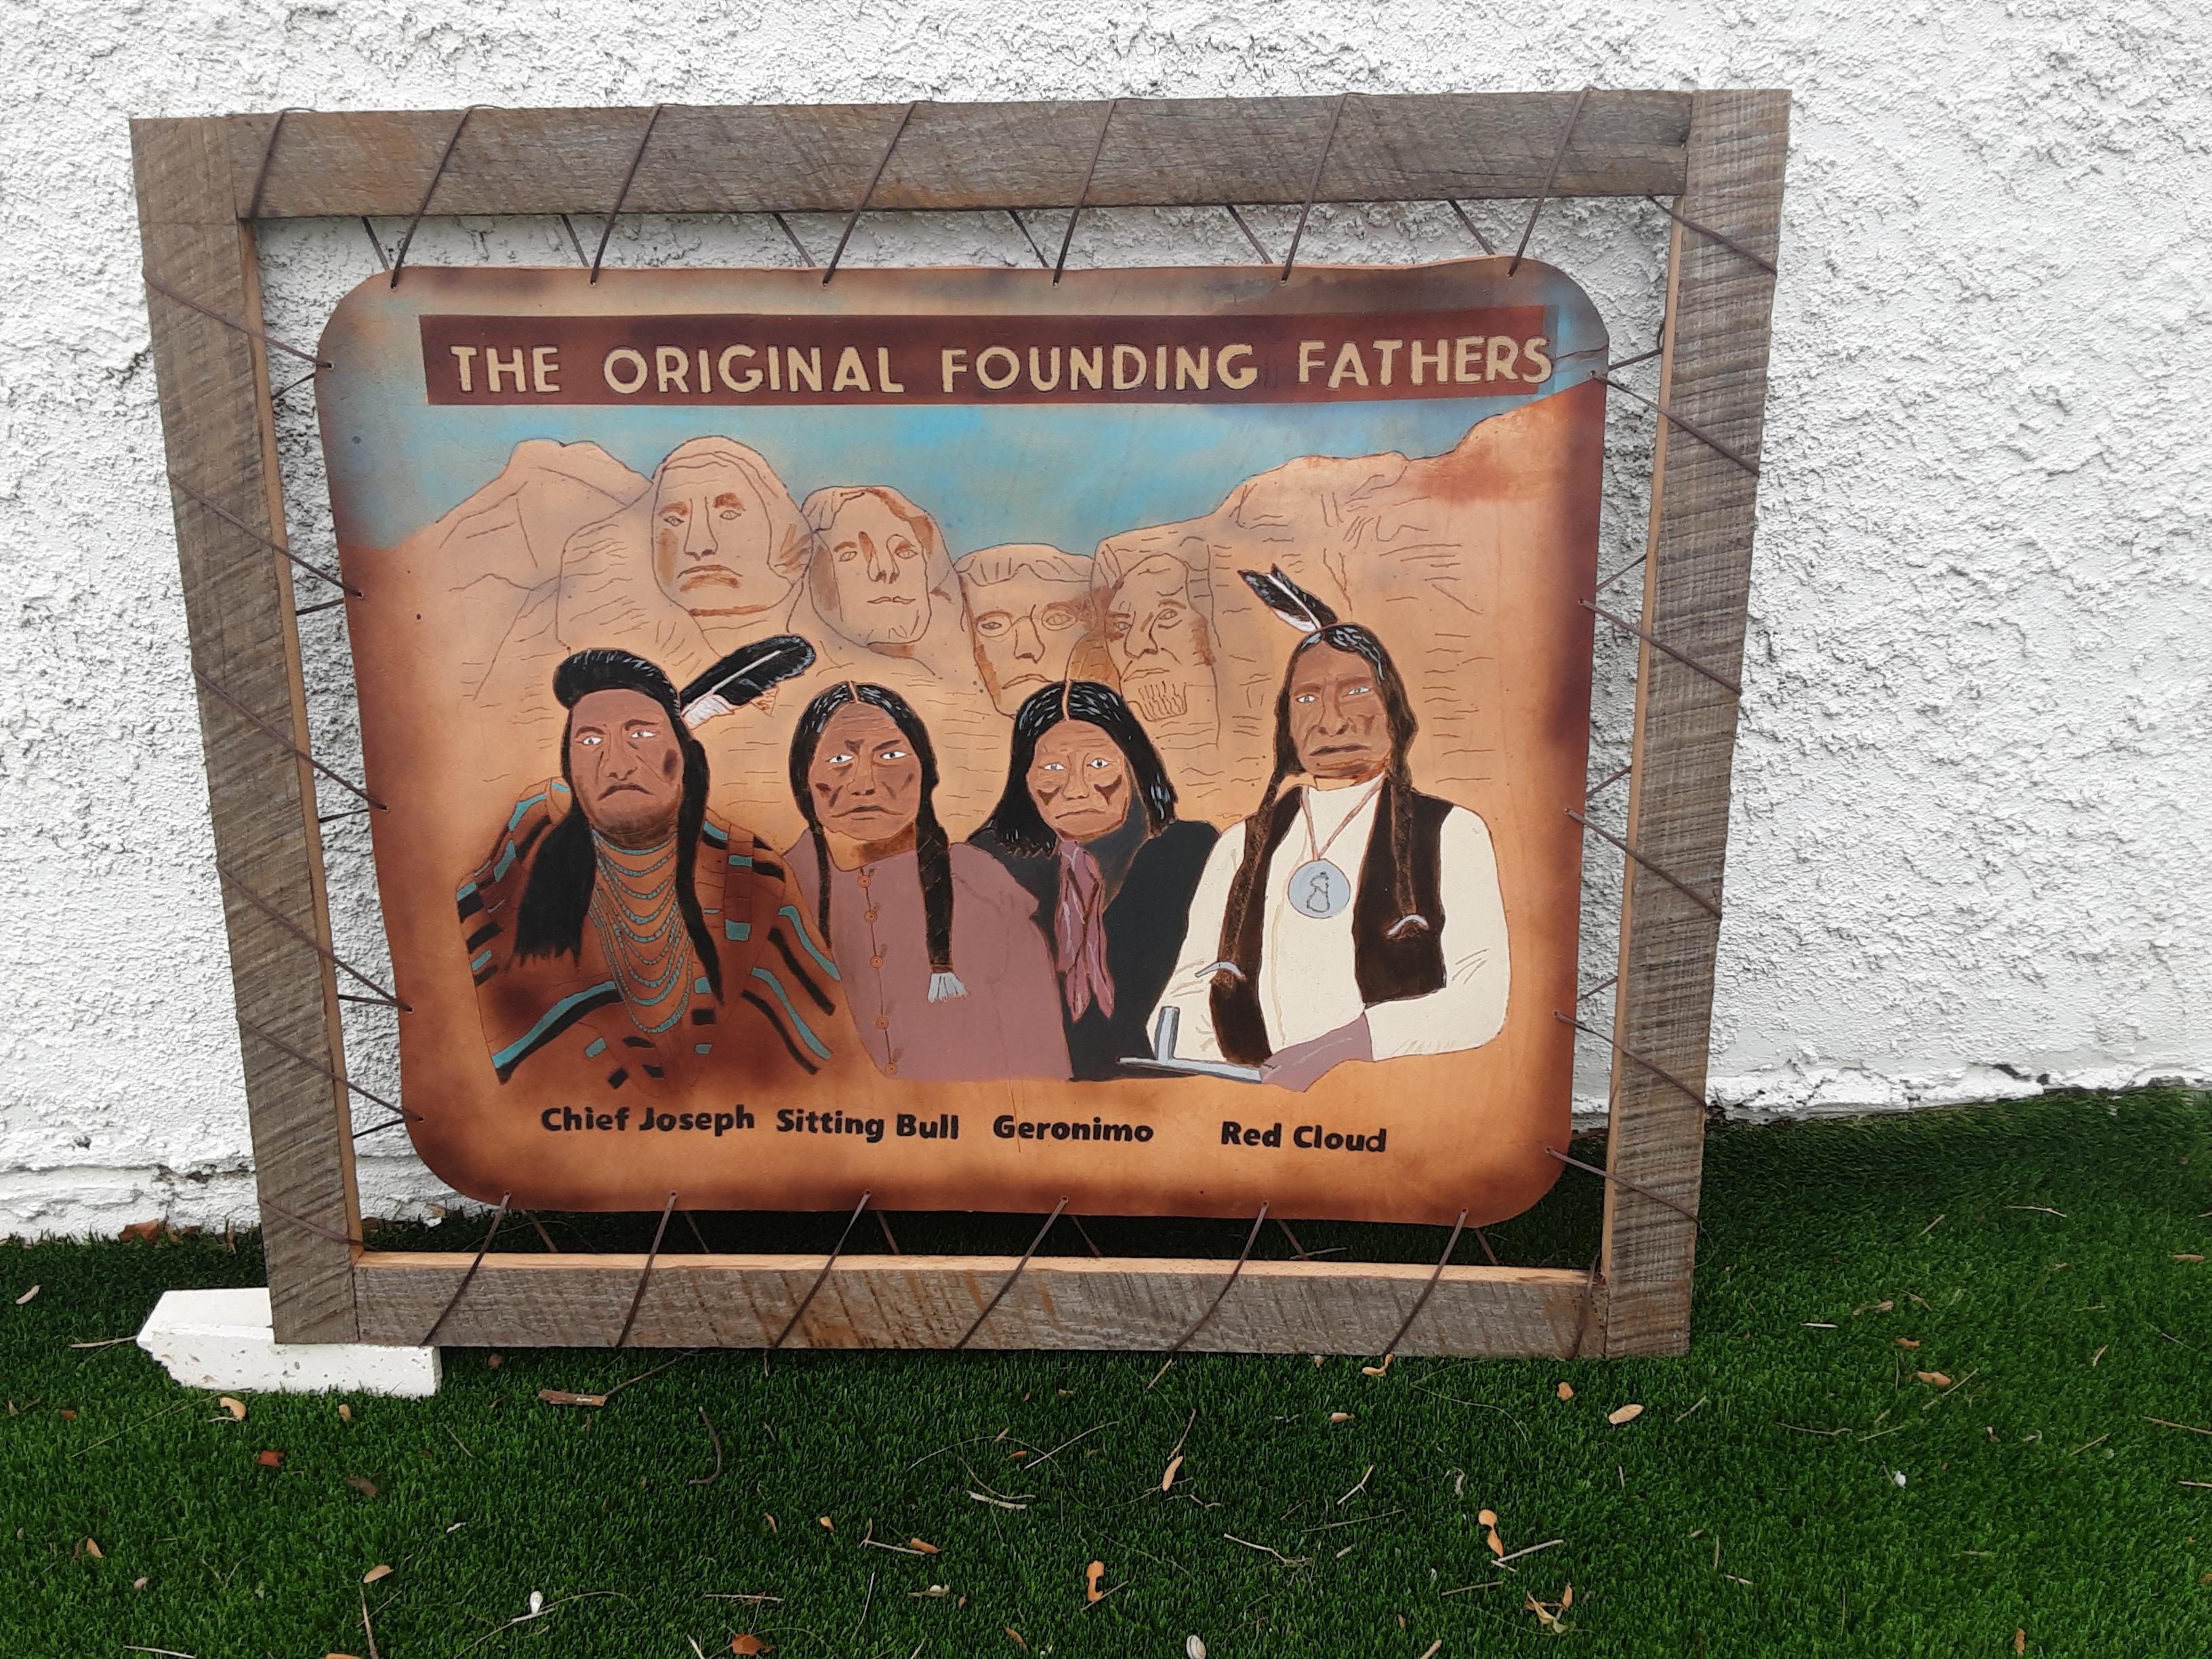
After my first and only attempt, which I primarily used pyrography, I really appreciate your work. I struggled with the texture. It was all trial and error with the intention for a bit rustic. I made this for my friend who is native american.
-
RLTW
-
Thanks for the explanation, how about pictures of any current messanger bags.
-
I really like the sewing detail on your bag. Excellent work. What does the zipper on the flap access? Just the flap or is that how you open the bag? I assume it was done with a machine, what type? How do you do the seam on that center panel? I would also like to see more pictures.
-
Bottom stitch is loose - Sailrite Ultrafeed LS
Deanr replied to CarrieReneHall's topic in Leather Sewing Machines
I use a lsz ultrafeed and I make bags. I don't think it is the glue. I use seamstick tape as it is not as messy and allaround easier. My experience is it is usually the tension. I have mine pretty much cranked down all the way and back off about 1/2 turn. You didn't say what type of leather. I have much better luck with Chrome tan. Also try putting in a new needle and remove your bobbin and make sure there are no pieces of thread down there. -
Very good work. On the flap, on the final stitching, do you punch from the outside? If yes, how do you keep the the binding so tight?
-
I usually buy chrome tan that is on sale. Lately I get it from tandy. Yes I try for 5 oz/2 mm
-
https://youtu.be/iSSkCZGyR64 There is the imbedded video which I don't know how to delete so there is also the link. The video shows sewing the long panels flat. One bottom and two side and the narrower zipper panel. Then turn it into a cylinder and sew the last seam. The last seam is a side panel to the zipper panel. Prior to sewing the last seam all four panels measure 35.5. The circle ends are 12 in diameter. The round ends will pucker if the cylinder isn't just right. I add 1/2 in for seam allowance. Springfield sells the pattern which I purchased but maybe not required. The zipper panel follows the curve of the end pieces just like the rest of the bag. I use a sailrite ls1 machine which I had before I started leatherwork. Maybe not the best but works good for this application. When I try to sew two pieces of veg tan I have trouble with skipped stitches so I just hand sew those. They make a leatherworker machine that would probably work better. Hope this isn't too confusing
-
I do similar bags which I use a combo of leather and canvas. I use a machine. I think alot of your problems will be rectified if you use a machine. The lumpy ends could be fixed by adjusting the width of the sides as the bag lays flat prior to sewing it in a cylinder. Sometimes a small adjustment can make a difference. My ends are 12 inch and prior sewing the cylinder I try for 35 1/2. I use 5 oz chrome tan and have never skived. I do not line mine. My machine is a flat bed and my biggest problem was sewing the seam when it goes from flat to cylinder. I sew that outside out and the turn it inside out to sew the ends on. Springfield leather has a good instructional video. I also run my straps all the way across the bottom.
-
I like that construction for the bottom. Is the rest of the purse veg tan? Where did you get it?
-
I like it alot from the handles to the liner to the zipper. Really good work. What is on the bottom inside? Is that piping on the bottom?
-
Overwhelmed - Which industrial for leather bag making
Deanr replied to Novalee's topic in Leather Sewing Machines
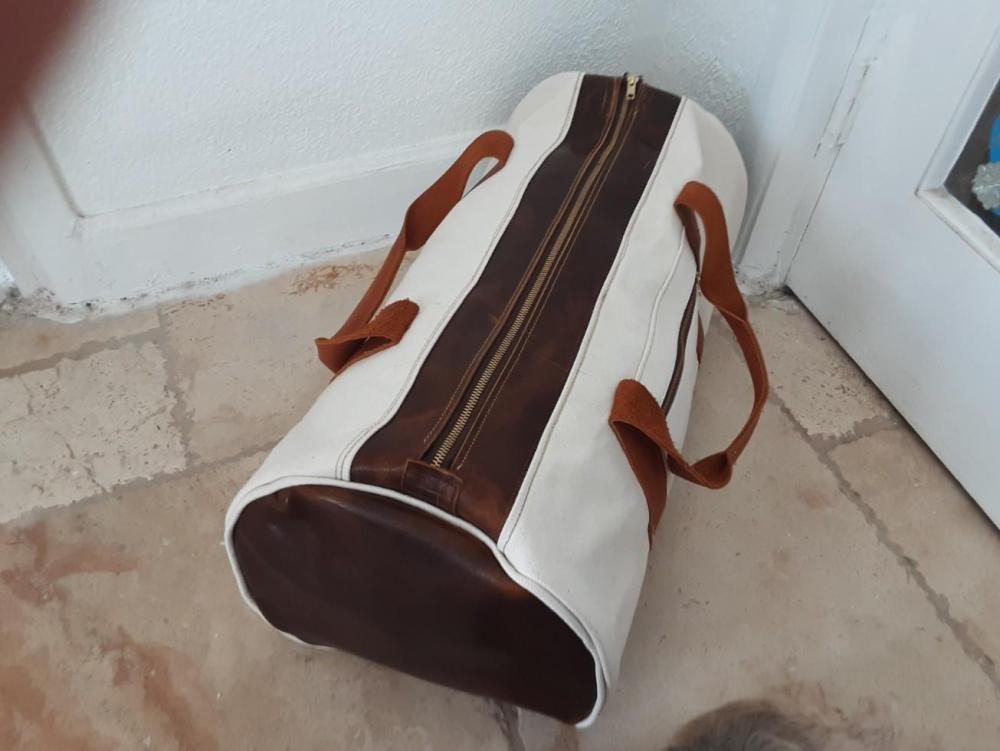
Thanks. Just wanted to add that the one in the picture is not waxed canvas. Sometimes the lighter color wax canvas has a dirty look. Less appealing, more functional. Biggest challenge is sewing that panel with the zipper on my flatbed. Basically sewing it from a flat panel into a cylinder. -
Overwhelmed - Which industrial for leather bag making
Deanr replied to Novalee's topic in Leather Sewing Machines
I've been making duffle bags from a combination of chrome tan and canvas. Sometimes I use waxed canvas which I make myself. The waxed canvas is pretty easy and not too expensive. I get factory seconds from big duck canvas. I do not line them so I use 92 thread for everything. I have a sailrite lsz which does good as long as I don't use veg tan. Maybe not the best machine but works good for this application.
-
John Deere Green
Deanr replied to HondoMan's topic in Dyes, Antiques, Stains, Glues, Waxes, Finishes and Conditioners.
I have been doing some painting of leather and I like to use acrylic paint that has been thinned alot. I like the angelus for consistency. I thin to the point it is almost like water, or dye. I like the 4 oz bottles and put on the twist top so I can count the number of drops. I also use the angelus 2- thin. Use 1 part paint and 1 part thinner and as many as 5 parts water. Think of water color paints as a kid. At this point it can take a couple coats but I feel it absorbs like dye rather than laying on top like paint. When mixing for a new color i have to look it up. Google says 1 part yellow to one part blue. Then to lighten add one part yellow. One drop at a time. To darken 1 drop red at a time. I use a brush mostly but if thinned enough I can use my little battery powered airbrush. You can get some handy accessories zat dollar tree for painting. -
I make duffle bags using a combination of canvas and leather. For a stiffener in the bottom I have used bontex stiffener which is made for this purpose. It's a pressed material, not plastic. I sandwhich between canvas and I have no problems sewing through it with my sailrite lz1 using 92 thread. I got the bontex from Springfield leather. It comes in a sheet about 3' x 4'. I also see a material pitex which comes in different thickness. I have never used it.