

All Activity
- Past hour
-
Looking for quality 12 to 14 oz belt blanks e.g. Herman Oak or similar from U.S. supplier. Minimum length of 55", Nick
- Today
-
 I would attach the medallion to a round or square "patch" and sew the patch to the outside of the holster. Prongs will be between the patch and the holster body. You could make the patch and thread from contrasting colors or whatever e.g. a blue patch and gold thread.
 -
 A friend asked me to make him a right hand cross draw holster for his 4 5/8 inch Ruger Vaquero. I showed him this left hand cross draw holster I made for myself and he liked it. He wants it a less extreme cant (this one is probably 30 degrees), right hand, 2 inches shorter, in brown. I was going to use English Bridle dye. The fun part is the Civil War medallion. A long dead relative of his bought a mule right after the Civil War with this bridle. It had these US medallions om the blinders of the bridle. He got one, his brother the other side. The relative worked the mule for 30 years after the war. He wants this medallion on the front of the holster, and it will be his daily carry. The medallion has 3 prongs to easily cut in and bend over. However, I need to protect the gun. I have used pigskin for linings and it may be too thin to hold up to the wear with these prongs underneath. The gun is stainless so wear is less noticeable than a blued revolver. Also the pigskin seems to lock the gun like velcro and makes it really hard to draw. Could use some thin leather and double wall the holster but I am limited on thickness my sewing machine will sew. Ideas please on handling the medallion deal.


-
 MHodge joined the community
 -
see attachment for different leather needles with different cutting points and how their seam appearance is schmetz_db_schneidspitzen_6s_20190510_en(1).pdf
-

8-plait round braid christmas tree garland help
bland replied to LizzyH's topic in How Do I Do That?
I'm not really a braider. I have done some small stuff for myself on occasion, 100 feet of 8 plait rope sounds like quite an undertaking. For a garland you could splice in strands as you go and keep it looking good. I don't know about doing small sections and piecing them together as a whole would work out well I think it would be noticable. You could use decorative knots to cover where the pieces come together. Or you braided in metal (brass, stainless steel) rings every 4 feet or so it would look like it was on purpose and add to the decorative look. Just a thought. I have used small sisal rope as a garland for years so I think the braided rope is a cool idea. There are quite a few leather braiders online making reatas or Romal reins where you might get some ideas. Happy Braiding! - Yesterday
-
I moved your post to leather sewing machines. The type of needle makes various stitch lines. Take a look through the attached fileGroz-Beckert Needle Chart.pdf
-
Hello All, I just bought simplex sole stitcher,I am having some trouble with it when I stitcher a leather after 3 stitcher it start fraying thread i have checked the threading it looks fine,I am also using 1mm wax thread please help me if someone have trouble shooting manual for this machine or idea to solve this problem. Thanks
-
Looks ok to me, it depends on the type of needle you're using. Some give a slanted stitch, some give a straight stitch.
-
I am selling each one for $1,200. They both have speed reducers, come with a removable tables, have drop down guides, and are mounted to sewing machine stand with rollers. If you are interested please send me a text. Local pick up only. Ernie Contreras, Bull Sheath Leather, Mansfield TX, 817-673-0602.
.jpg.d91f8ed6db2764c0f56183b9fc12b5ae.jpg)
.jpg.b6473f1c38590270d9d38e4b659a03be.jpg)
.jpg.536be8301f386b6533717ff3beb4c838.jpg)
.jpg.c745fb0dc7524e9be4aac1378b968f6f.jpg)
-
 I purchased three brand new Adler 669 sewing machines in November 24. The machines are great but will need to be dialed into what ever leather you are using. I already have three other sewing machines so I purchased these as back-ups. I am selling each one for $2,500. All three have speed reducers, come with a removable tables, have drop down guides, and are mounted to sewing machine desk with rollers. If you are interested please send me a text. Local pick up only. Ernie Contreras, Bull Sheath Leather, Mansfield TX, 817-673-0602.


-
Want to get started on this craft
wizard of tragacanth replied to revilop's topic in Getting Started
Your top resources for learning leather craft are, this forum, YouTube and your local leather supplies store (such as Tandy). To give valid advice it is important to know what you want to make, other than a Batman mask. Will you be making other masks or wearable accessories like wrist cuffs or other costume stuff, like armor, etc? When I decided that I wanted to make holsters but was starting from zero, I assumed that I would need a swivel knife and a stitching pony. Fifteen or so years have passed without me owning either one. I don't do any tooling and a pony only makes sense if one is primarily stitching straight lines, as in a wallet and such. I bought a large 12x1`2 marble slab but later found a 6x6 was all I needed and much cheaper, lighter and more convenient. I bought a 12x12 Poundo board to go on top of the slab and later cut it down to four 6x6 pieces. Kits have many pros and cons. Often, the tools are lower quality. You've heard the buy once, cry once motto, right? You end up not using half of them and having to buy tools that were not included. A kit will get you started but I would recommend avoiding it. However, getting a kit may be the solution for some people. The old advice or buying what you need when you need it, is golden. There are several givens. Hopefully there is a leather shop near you where you can see and feel the leather. Leather choice is very important. You will need a way to cut the leather and most people have a generic utility knife that will work but if you are buying one, I recommend one that has multiple snap off blades, like an Olfa. If it starts getting dull, snap off a blade to get a new one. I use a new blade on every project now. It's nice to have a couple of sizes of knives, one for larger cuts and a smaller one for more maneuverability and cutting details. Some people use heavy duty scissors for some things. You need cutting tools. You will need a cutting surface. I use a Tandy Poundo Board. It's like a thick heavy "self-healing" black rubber. If you are making small, delicate work, there are the thin, green, cutting mats for sewing needs, sold at Walmart, Amazon and sewing shops. You will want a steel ruler for cutting, maybe a clear plastic ruler for other things, I have a special "centering" ruler that can be very useful. Also for measuring, spacing and marking, you need a pair of wing dividers e.g. Tandy Craftool $15... very useful. Now hear this... Harbor Freight has these same dividers in a set of 6 measuring tools for $10. OMG, what a deal. https://www.harborfreight.com/6-piece-technical-measuring-set-94447.html Need to know what you are creating to make any more suggestions for glue, thread, needles, hammer, etc. One of the kits that I saw on Amazon had maybe six type of needles. I have only used one type of needle since learning what I actually needed. This is an example of the waste in kits. Sometimes they include a rotary punch made of flimsy stamped steel. That was what I bought the first time. It was a joke. Lasted maybe three holes and the jaw went off-center. Paid around $15, totally useless. Must pay $50 to get decent ones. Expensive, but worth it. Still learning, I finally realized that my $50 rotary punch has a limited throat. I could punch to the center of a 1.5" belt but what if I want a hole in the middle of a 4" square? I could have bought, and did, both a Tandy mini and maxi punch set for a total of $30. Point is, you will buy some tools that you wind up losing money on. It is inevitable, but try to keep that to a minimum! I'm sure that I left out some important stuff but, I will leave that to the others of the forum! Nick -
I can't offer much because my 341 came fully built with a speed reducer which of course improves the torque. Also when I asked for confirmation of anything like does it go in the same hole in reverse for instance, it was my actual machine that they videoed
-

Seeking highly skilled leather worker for boxing gloves
NerdyLeather replied to OnslaughtSports's topic in Help Wanted
Boxing gloves are a whole different beast compared to normal leather projects. The patterning, the curved seams, the padding placement, and the break in feel all take a lot of trial and error. Even experienced makers get intimidated by them. You might have better luck finding someone who has worked on motorcycle gloves or heavy sports gear. Those folks already understand layered padding and tight curves, so the jump isn’t as huge. With clear patterns and a training period like you mentioned, it’s doable, just not something most casual leatherworkers will touch. -
This looks like a solid project for someone who’s already comfortable with structured builds. Having the salpa mockup and full tech pack ready will make the prototype stage a lot smoother since the big decisions are already mapped out. If you haven’t yet, you might get good responses from small independent studios too. Plenty of makers who usually take on bag commissions enjoy doing one off prototypes, especially when the specs are clear and the communication is organized.
-
These 246 clones can be surprisingly decent once you clean out the shipping oil and sort the timing. The casting looks pretty normal for this tier. I still lean toward lighter new models because they hold their settings better and you don’t end up fighting worn parts or mystery fixes from previous owners. When I wanted a clear reference point for how the originals are built, I bought from Lords Sewing and their Brother lineup made it a lot easier to understand what a proper spec should look like and what a clone needs to match.
-
Some batches of pure neatsfoot can smell pretty rough, especially if it’s closer to the old style stuff that isn’t overly filtered. Cloudiness and thickening in cooler temps can happen too, since real neatsfoot isn’t always perfectly clear or stable like the more refined brands. That said, what you’re describing sounds stronger than normal. Most leatherworkers avoid anything with a heavy rancid odor because it usually means oxidation or mixed fats. I wouldn’t put it on good leather either. You probably didn’t get scammed on purpose, but it might be a low grade or poorly stored product. I’d stick with the brands you’ve had good results with and keep this one away from your projects.
-
Help Wanted: Leather Tooling Artist
NerdyLeather replied to BaroqueLeatherGal's topic in Help Wanted
This sounds like a solid opportunity for someone who already does detailed tooling. The mix of fantasy and western styles is a fun range and having materials provided takes a lot of stress out of the setup. Shipping the pieces also makes it workable for people who aren’t anywhere near California. If you post a few examples of past projects here, you’ll probably get some interest. Leatherworkers like seeing the style expectations before reaching out. -
is this the normal stitch on a pfaff its not straight , its a 13 , 14 oz leather , 92 tex string , 20/25 190
-
You might have luck checking with small upholstery shops or independent leatherworkers around Tacoma and Seattle. A lot of them have industrial machines and are used to patterning off existing items. Even if they can’t take on the full teaching part, many are open to doing the pattern and a sample build. Local makerspaces can also be a good lead. People there often know someone who does leather full time and is open to commission work plus walkthroughs.
-
Maybe you can explain what you mean. How thick is the material overall and what needle and thread size are you using and what do you think is "not normal"?
-
-
There are a number of ways to make this but like Bland said it depends on the current design. You can make one that has elastic bands on the bottom, a slip cover style, I replaced mine by taking the old one off and using it as a template for a new one.
-

showoff Sharing one of our favorite recent projects.
BlackDragon replied to Teddy Patches's topic in Show Off!!
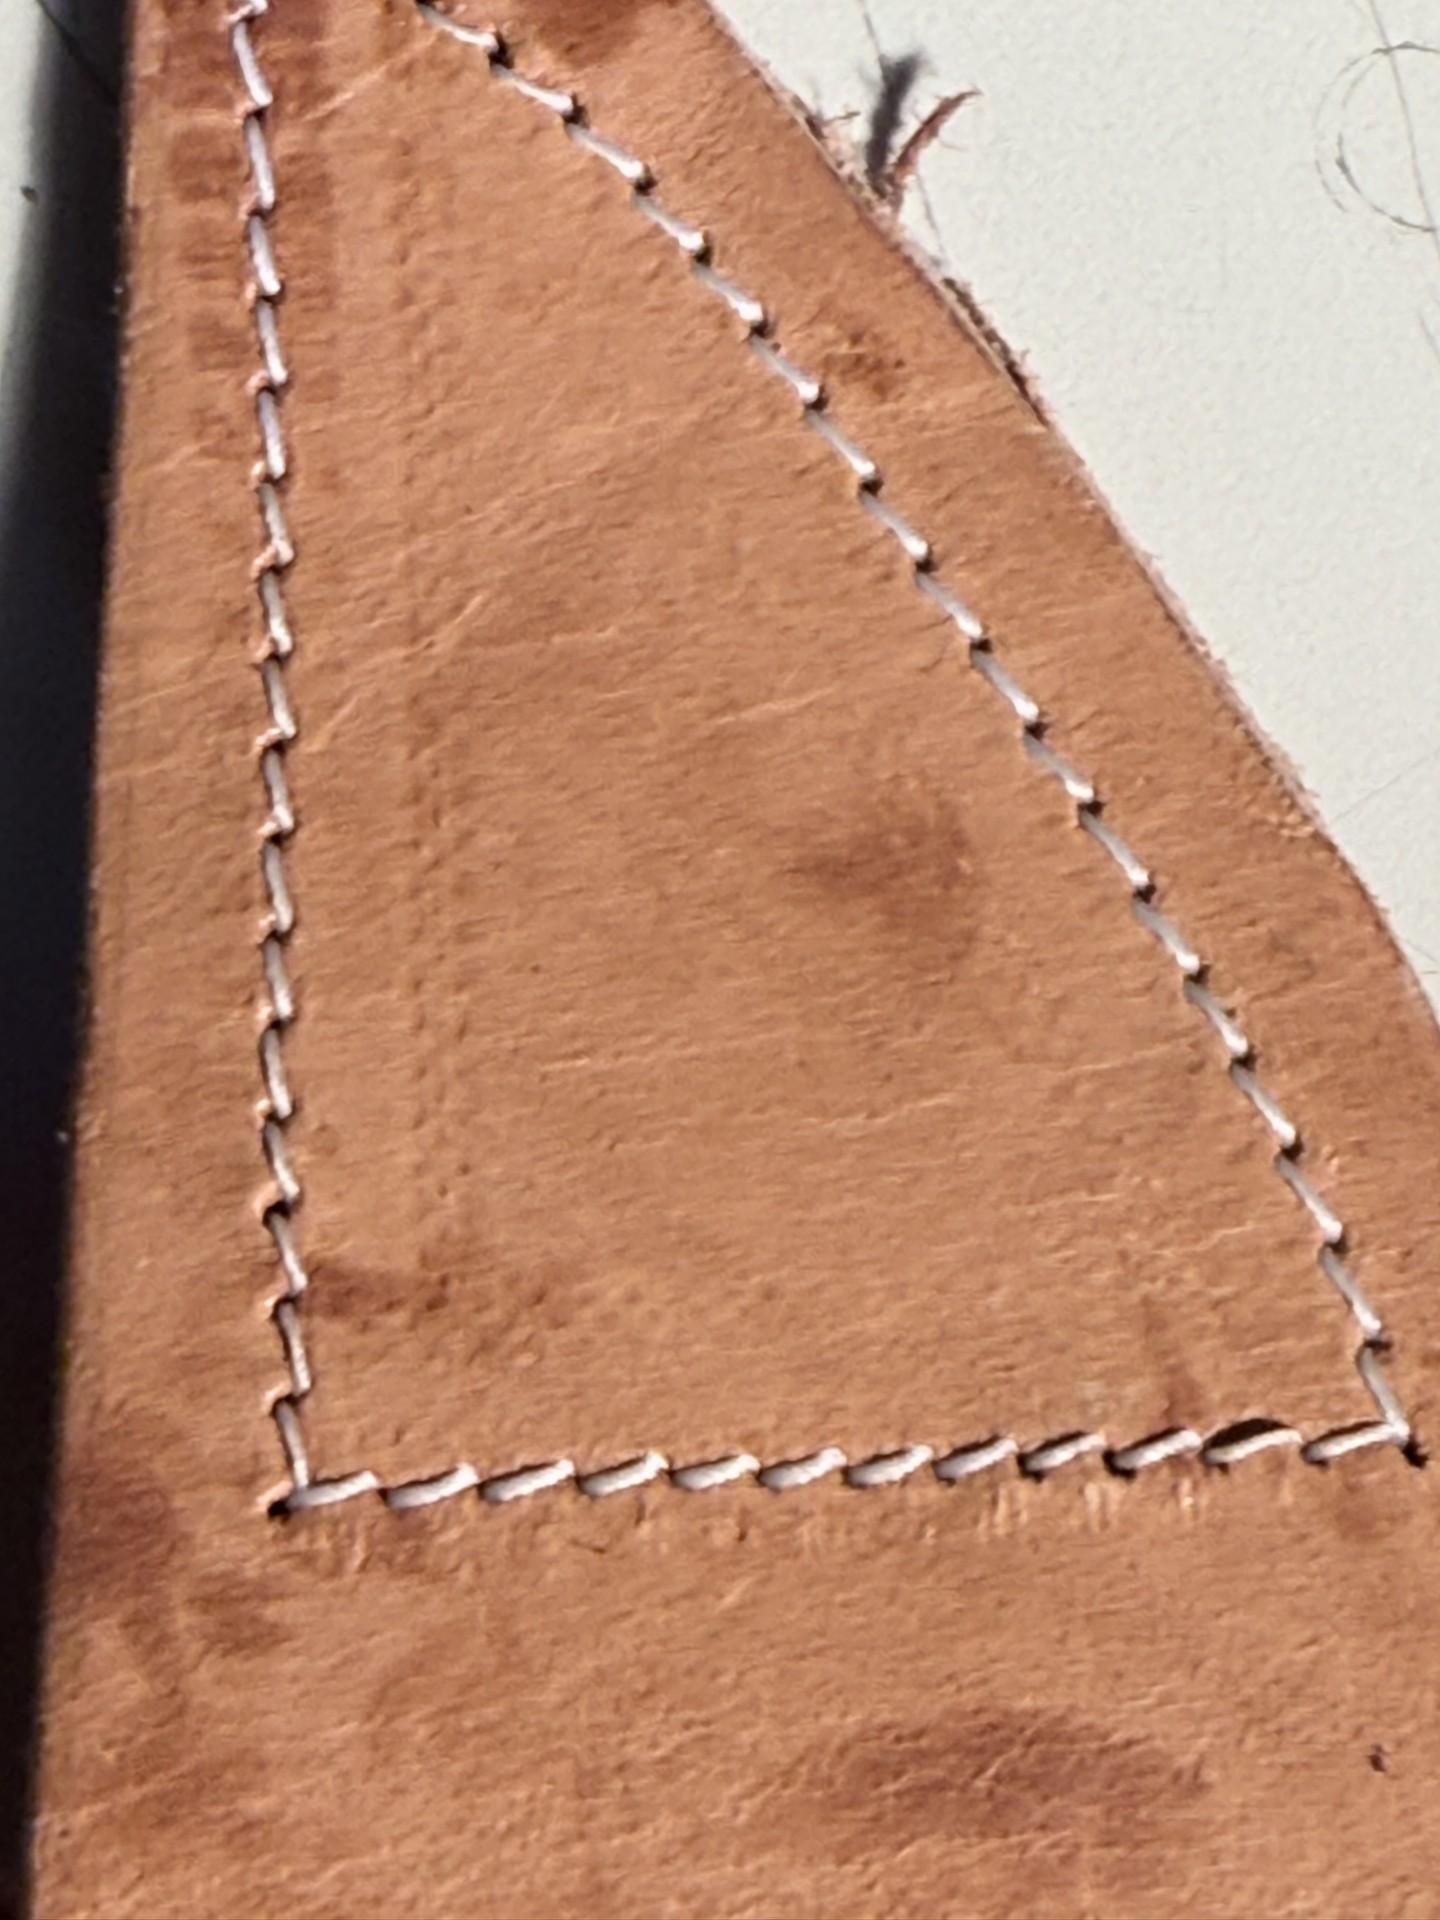
I going to throw out a guess and say there is a backing, like what you see on the inside of a ball cap after it's been embroidered, and since this is just a patch it's not really going to have much strain put on it. It look pretty cool I would like to see it in white against the black leather. It would really pop and give it a heavy metal vibe. -

showoff Sharing one of our favorite recent projects.
Digit replied to Teddy Patches's topic in Show Off!!
How do you do precision embroidery? Leather is not like woven textile where embroidery thread goes through the natural spaces between weft and warp. With leather you actually pierce and weaken the material with each hole you make, so if you make your embrodery stitches too close together you're essentially making perforation lines where the leather can rip apart. -
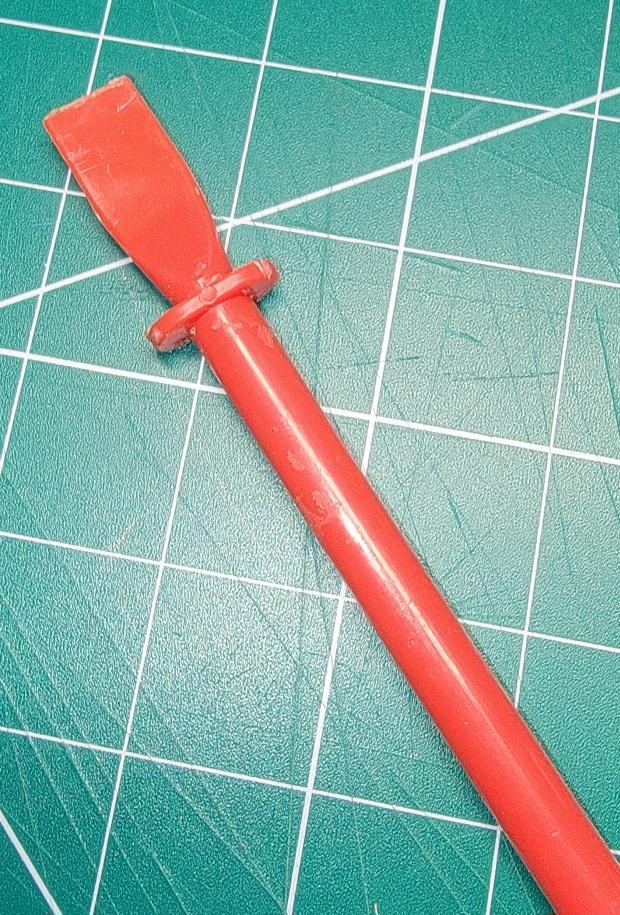
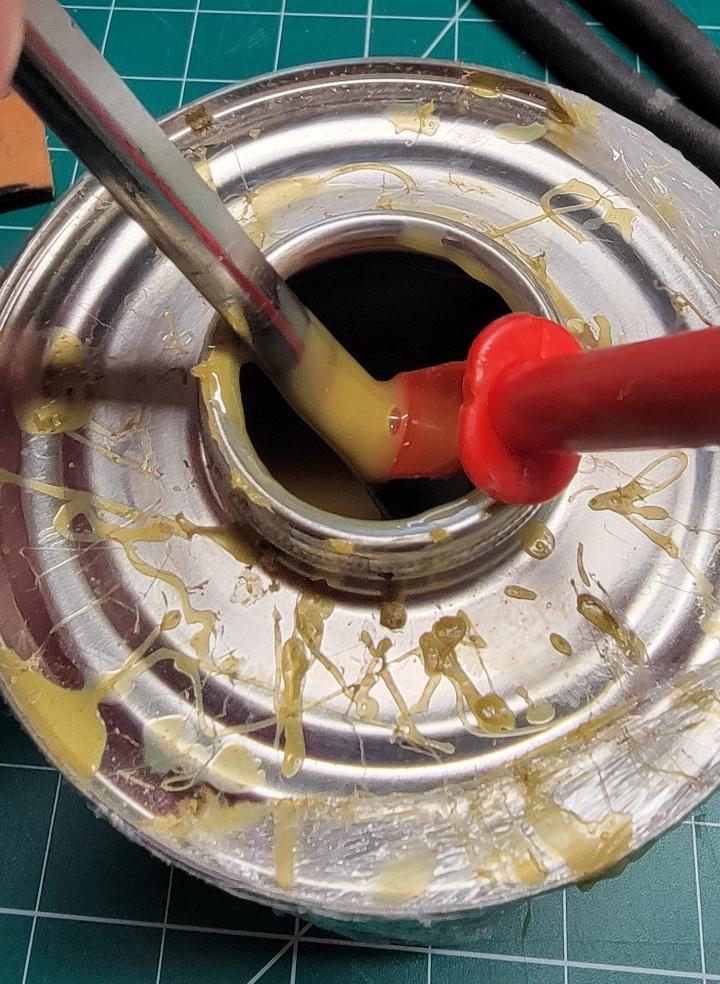
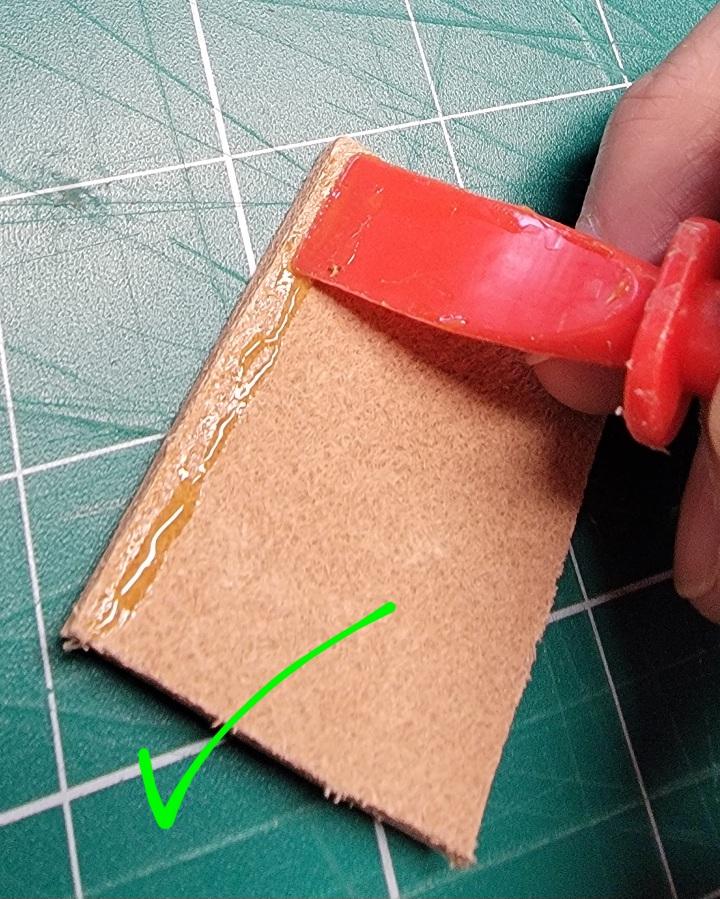
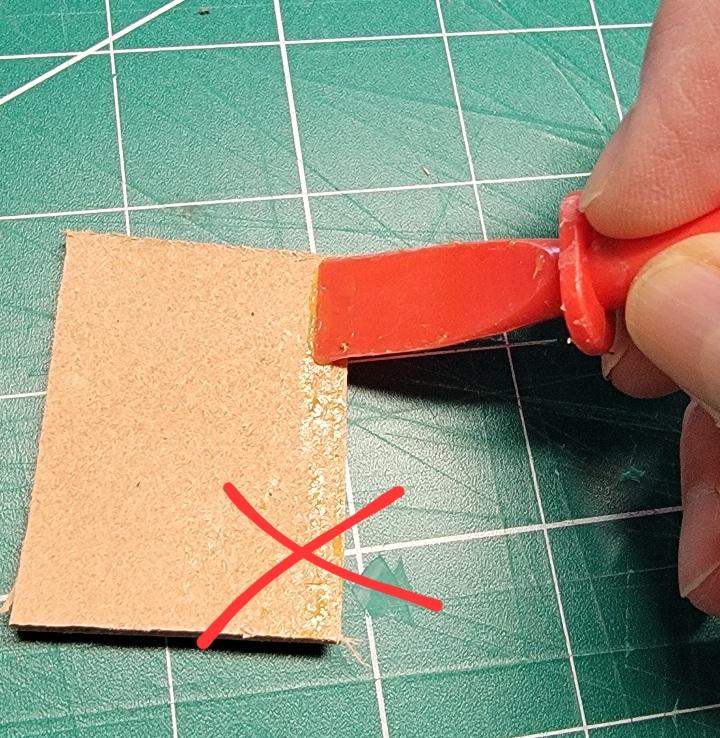
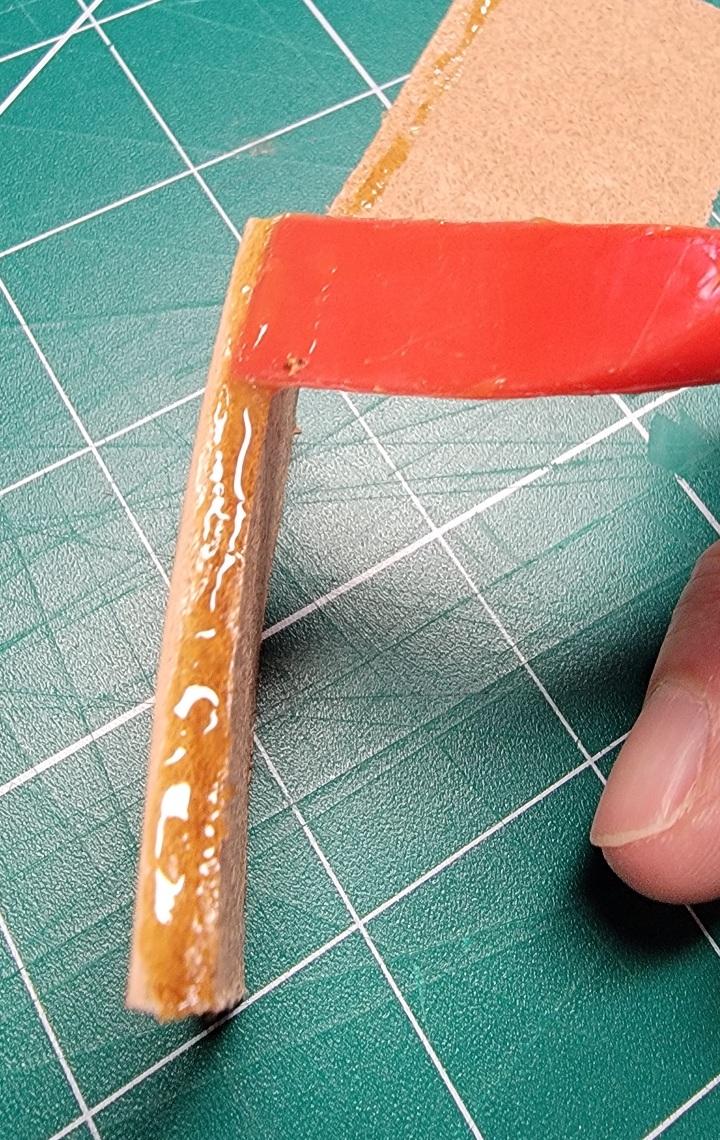
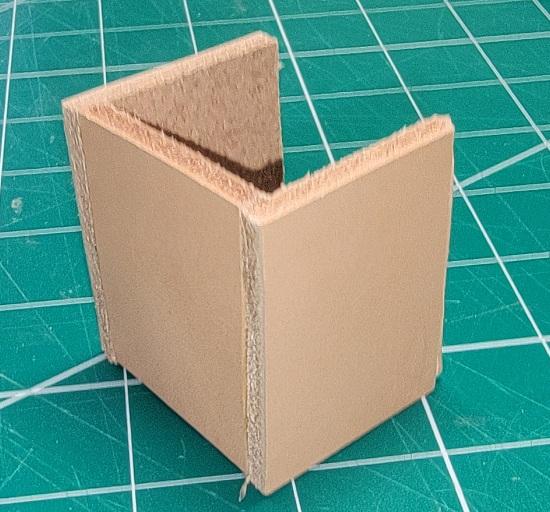
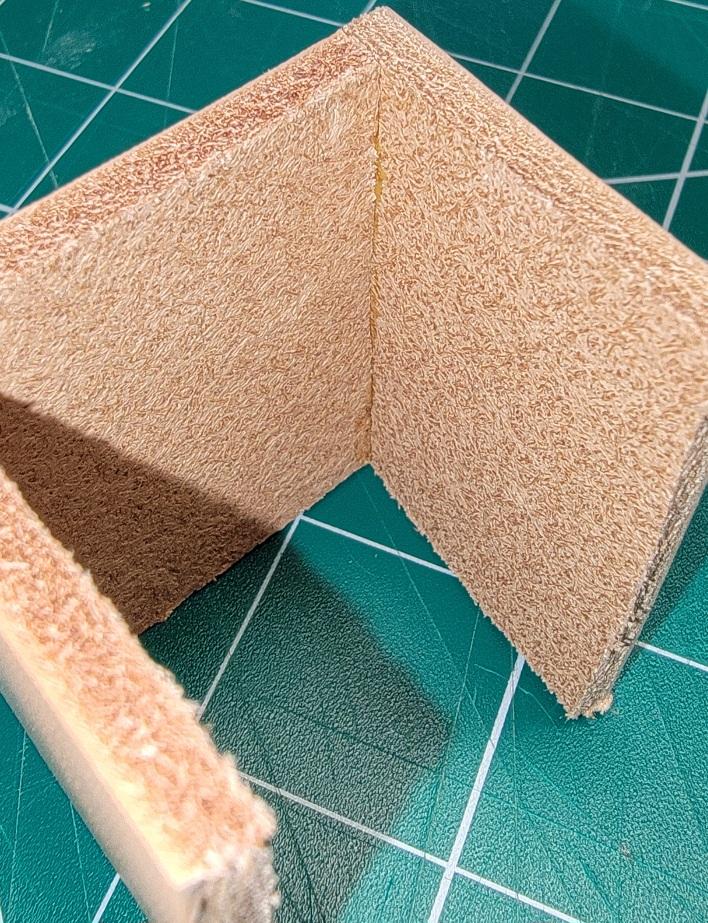
I use Barge cement and I don't use the cement as a fastening agent. It's more to hold in place until I stitch it together type of thing. When I glue up larger projects I use the can brush. When I want to do more refined work on small projects I use a plastic spreader. They're made of plastic and easy to clean. Even if the contact cement has been on there a few days I can use a rubber eraser and it comes right off. When gluing I pull the brush from the can and use the spreader to pick up some glue. I then spread the glue by pulling towards the inside, away from the visible edge. If you pull towards the visible edge there's a good chance it'll be seen when finished. When starting out you can draw a line where to stop pulling your glue. After a while you'll get the hang of it. Let it set until it's tacky (about 10min) then put the two together. This is kind of a one shot deal. Once the two pieces touch it's going to be tough to get them apart cleanly. After putting them together I let the cement finish setting. How long it actually takes I'm not sure. I go to another project and work on that then come back. So maybe a couple hours. This would be a box stitch and if I was actually doing this I would have punched my holes and finished the visible edge before gluing.

.thumb.jpg.6e903dd66163ad5672f00f144058c571.jpg)


