

All Activity
- Past hour
-
That seat looks super comfortable. Nice work!
-

Hello from near Nairobi, Kenya – New Member Intro
OdinUK replied to Origibelts's topic in Member Gallery
Hi John, That looks like quality buckle you made. Im interest in casting too. I bought a small propane furnace and just lined it. All set to try melting some of the scrap Aluminum I have to get some practice sand casting. Regards Paul (in Germany) -
Hello from Germany - New Member Introduction
OdinUK replied to Tove09Tilda's topic in Member Gallery
Welcome from Southern Germany. Good luck with your leather pursuits. Paul - Today
-
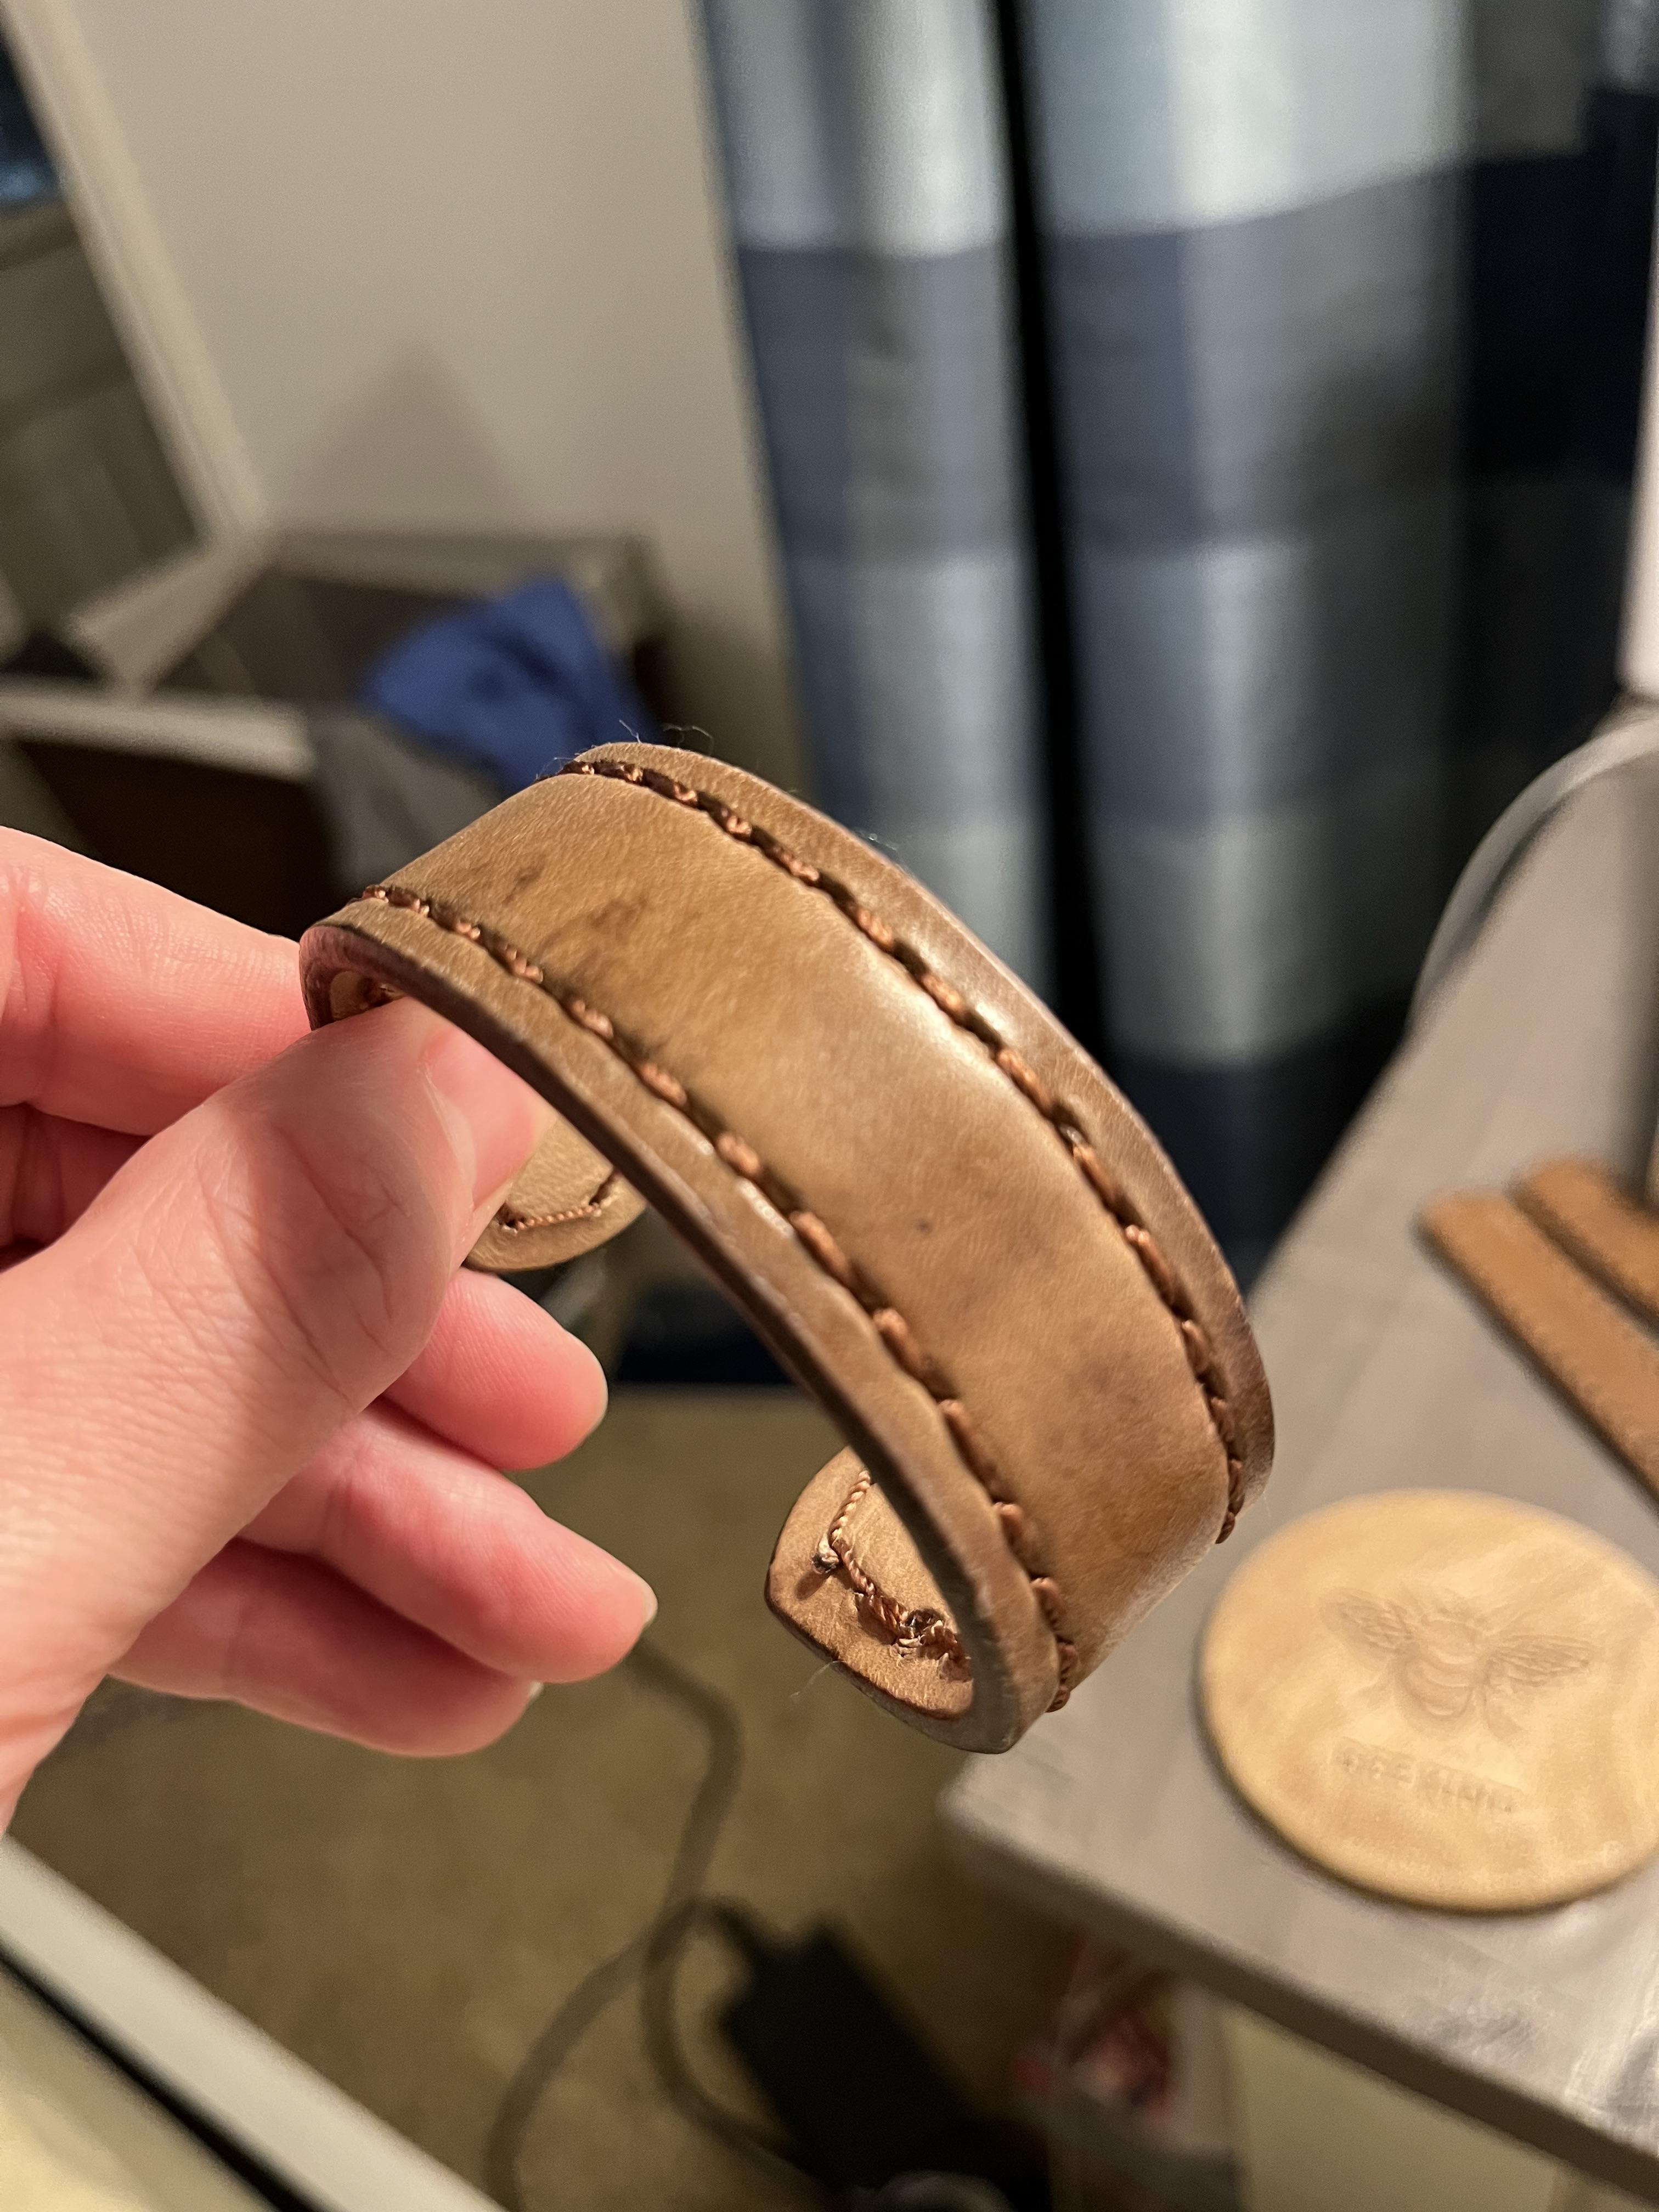
Smaller stitching holes, these keep the thread tighter. Pull each stitch real tight Have you tried the pierced-thread way of putting your needle on?
-
Yes. I have a large block of wax that I can push the whole die into, at the start and about every 4 or 5 cuts
-
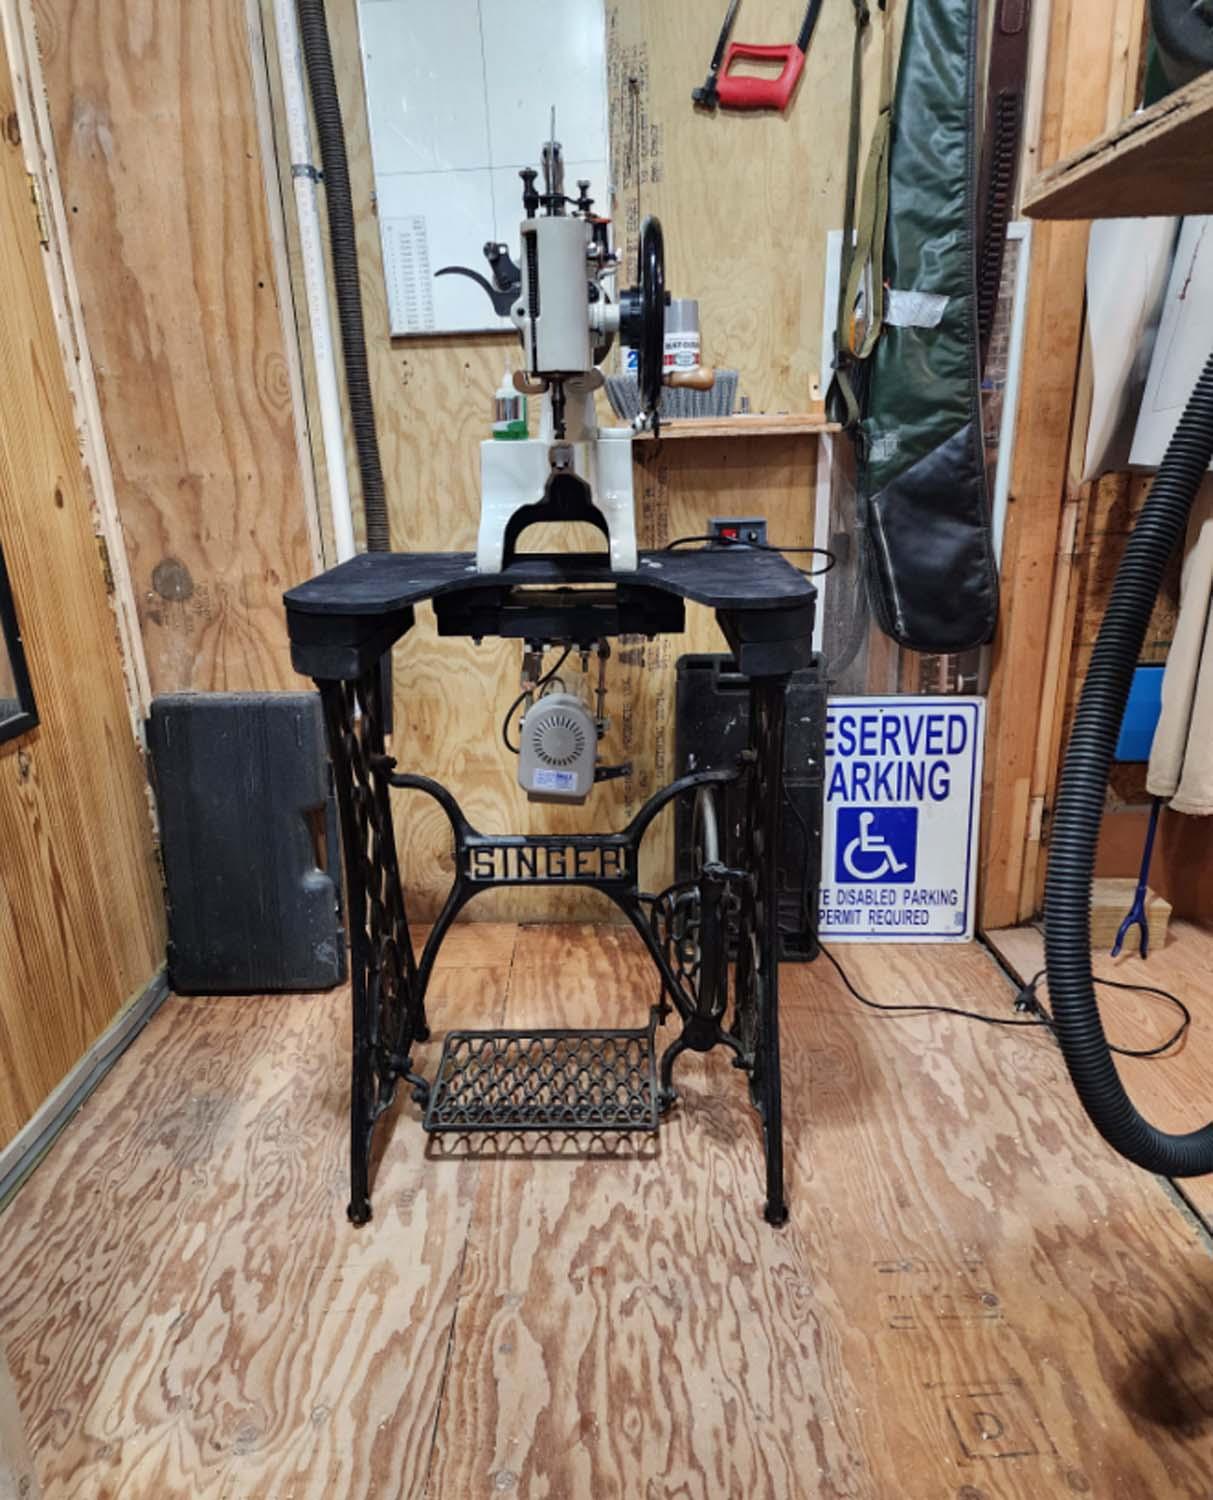
Who makes that one? I see the Singer table but where do you stand to use it???
-
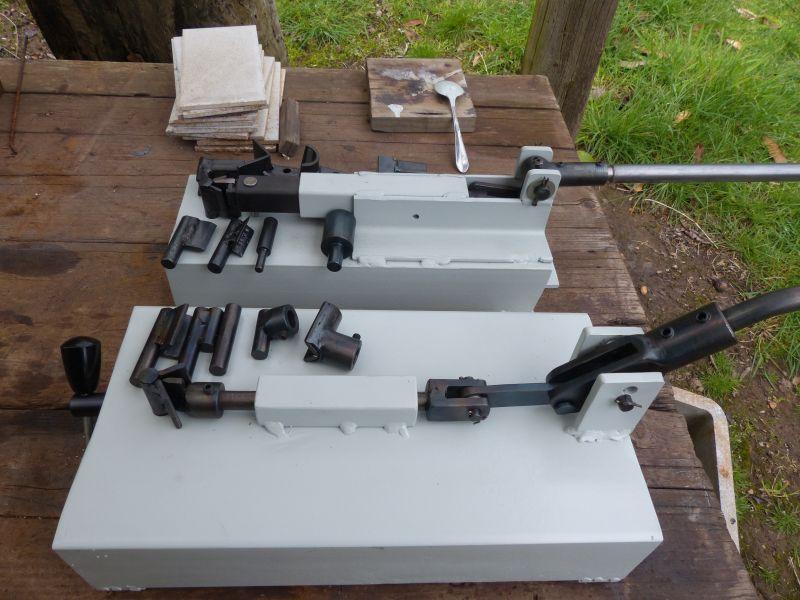
Yep, I didn't have any more of the smaller channel iron, this one was about the same length (so I didn't have to cut it) but is considerably heavier (it's been sitting in my forge for years!). I sat down for some time staring at the handle/pivot area and came to the conclusion that the design isn't very efficient when it comes to applying force and transferring it to the slide. So I'm redoing it similar to the original, shouldn't be too difficult, just some more cutting/drilling/welding. Hey kgg, don't you ever sleep?
-
The only purpose of a roller foot is to reduce the drag on the top layer of a stack of material that's being pulled on the bottom by feed dogs with teeth. If the material is grabby, a flat presser foot will fight against the feeding and cause uneven stitches. They are often used on machines that are going to sew patterns on shoes and boots, or on machines that sew hats. The roller is adjustable to the left and right. The usual practice is to position the bottom inside edge so it just clears the needle on the up and down stroke. This closeness ensures that the material doesn't lift with the ascending, threaded needle, which would cause skipped stitches. A roller foot gives 100% visibility of the needle in three dimensions. As KGG already mentioned, they are not used on walking foot machines, which have not two, but three bars extending down. They are meant for bottom feed machines that only have one presser foot bar. Walking foot machines already solve the problem of drag with their motion sequence.
-
Hello! Previously I'd only hand-stitched stuff with waxed thread but decided to try bonded nylon. I like how this project turned out aesthetically, but I have two questions. 1) How do I keep the thread tight? I stitched the bracelet but when I bent it (copper core), the bottom thread appeared loose. Do I just need to try to sew with a lot more tension? Thicker thread, smaller stitch holes? (The thread I used is 277.) 2) Any suggestions for keeping the thread knot from unraveling from the needle? Because the thread is so slippery, it doesn't hold a knot very well, and I constantly have to re-tighten the knot.

-
I got my patcher . . . set up . . . and working . . . am very happy with it. May God bless, Dwight

-
Nicely done. I do like the rod drive verses the square tube drive. I am going to assume you made the base larger on the new one as you had the metal hanging around. kgg
-
Presser for wheels are generally used on bottom feed machines like post bed machines. An example would be the Techsew 810. They will not work on a walking foot or a compound feed machine, the Techsew 5100. kgg
-
I made another die bending jig. I had the idea to make one with a simpler linkage so just had to do it. Unfortunately while the linkage looks simpler it took a bit of messing around to get it to work, and the angle of the handle is too high which meant I had to put a hefty downward bend in it to get it to a comfortable height. I might re-make the handle linkage as my original idea seems to work better. The other difference is the push slide, the original square tube sliding in a square tube has a bit of slop in it, the rod version is quite a snug fit, but it meant attaching the fittings to it was more complicated. I now know how to make an even better one - but I won't as it will require too much machining and there's nothing to be gained.
-
.thumb.jpg.6e903dd66163ad5672f00f144058c571.jpg)
Birch tar based leatherconditioner and wax
Northmount replied to Birchee's topic in Miscellaneous/Other
You need to provide the following information. How much is shipping to various locations? Who do you use for national and international couriers? -
Hi! Anyone know why you’d want a presser wheel vs a foot…and if you can get them for a Techsew 5100?
-
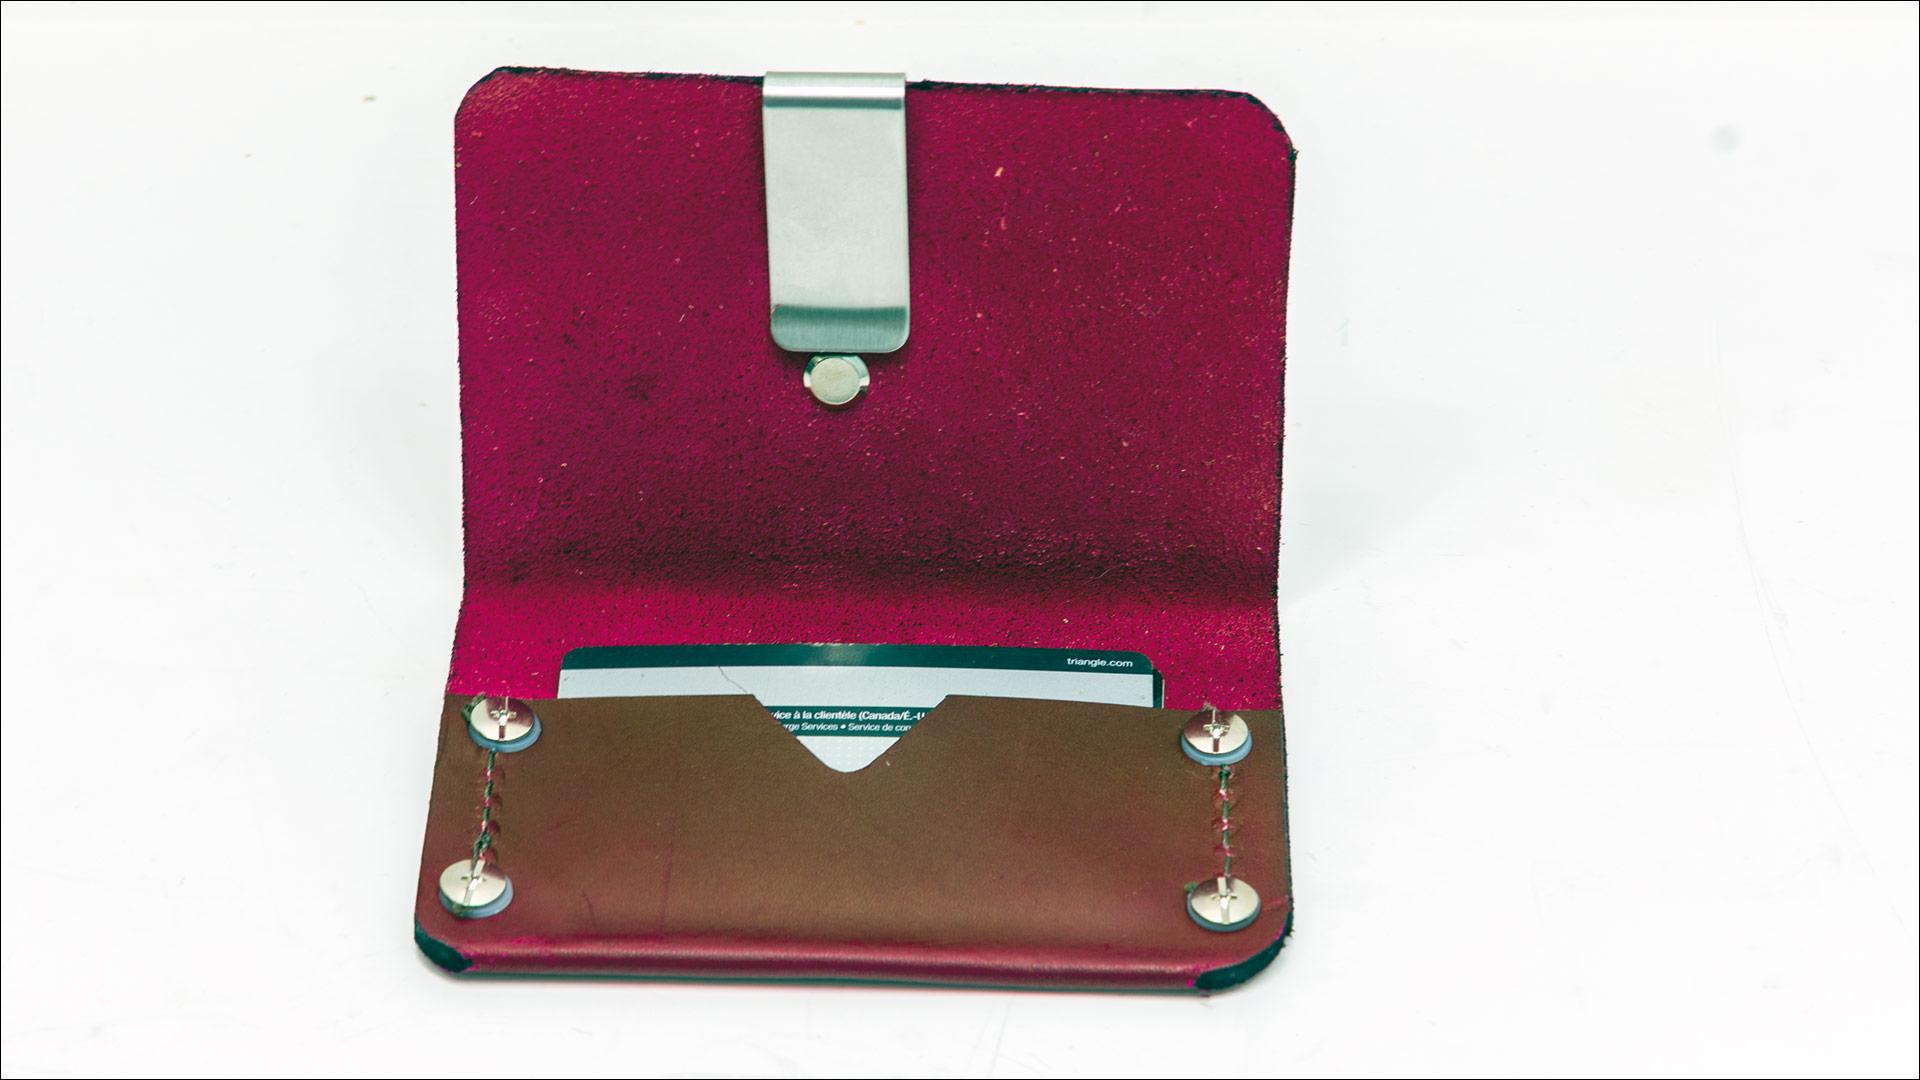
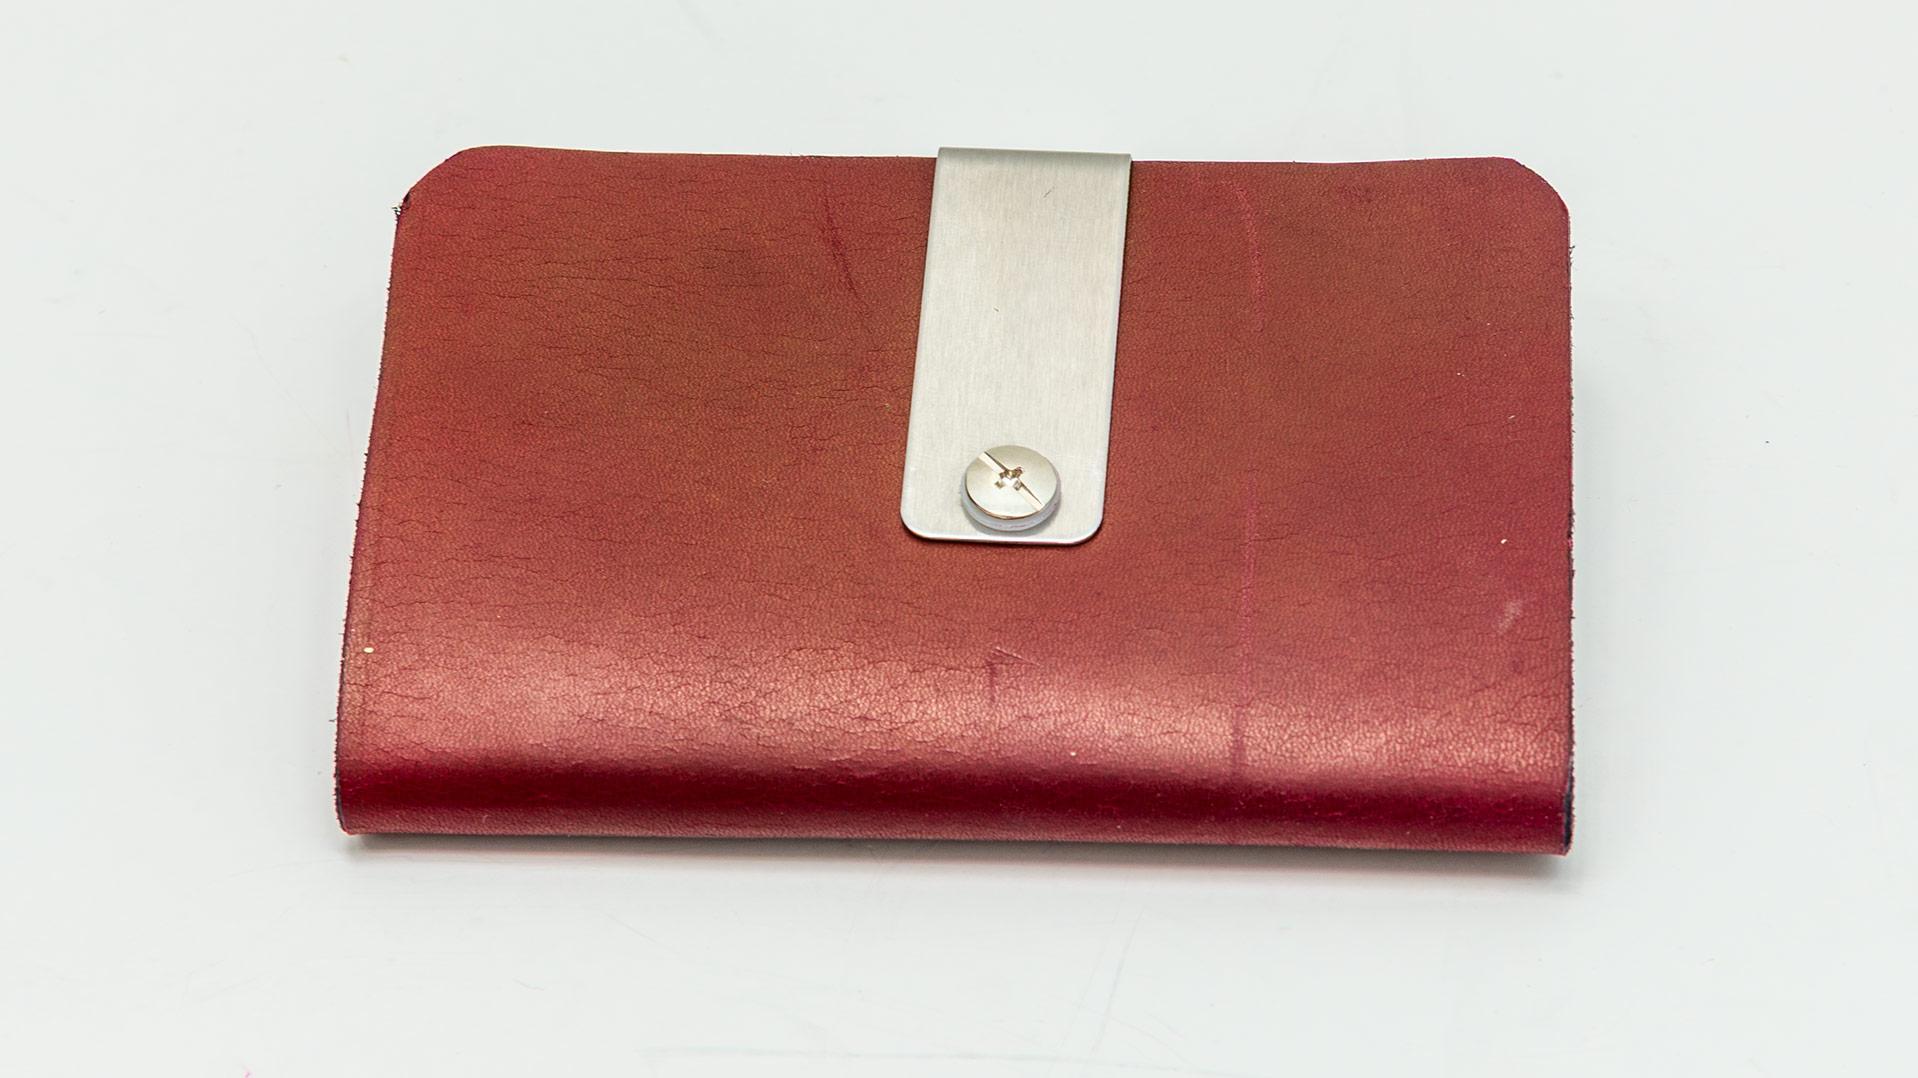
I decided to replace my current veg tan fold-over wallet. Not because it failed but didn't like how the copper rivets held up over the last 4 years. This was done over the last few days and will be my daily wallet which lives in my front pants pocket. I keep my wallet pretty basic, drivers licence, credit card, health card, dental card and cash. How I done it: i) Leather used was 4/5 oz natural veg tan. ii) The raw veg tan leather was airbrushed with 100% pure organic JOJOBA oil with no dilution at 34 psi on the exterior first and sat for 24 hours. iii) The oiled veg tan leather was airbrushed with OX Blood at a 50/50 dilution of dye at 34psi iv) The wallet pattern was cut, the cutout for the credit card was cutout and the fold over glued using LePages Heavy Duty Contact Cement. Let it sit for 24 hours under clamp compression. v) The wallet was cut to final dimensions, Chicago screws and corners were punched. vii) The interior was airbrushed with JoJoba oil let to sit for about an hour. viii) The interior was airbrushed with OX Blood at a 50/50 dilution of dye and sat for 24 hous. ix) The stitching in the credit card section was done with V138 bonded nylon using a Juki LS-341 clone with a 3D printed table top attachment x) The Chicago screws were installed in the credit card and the money clip. xi) The raw edges dyed I got to touch up a couple parts on the corners and add another coat of oil to exterior.

-

Help! Singer 111w155 stripped / stuck screw
DoogMeister replied to matthew123's topic in Leather Sewing Machines
Impact drivers are great, but there is considerable risk of bending in the machine if you hit it hard enough to dislodge the screw. A good soaking with penetrating oil followed by heat with a propane torch combined with an appropriate sized slot and good-fitting screwdriver should work. You may end up removing everything but the threads of the stuck screw with your Dremel tool. Go slowly, and have good light and magnification. Then pick out the threads with a scribe or similar pointed instrument. Run a thread tap through the hole to clean it out, and replace the screw. much easier said than done. -
I was watching a YT video and noticed the guy put something on his clicker die real quick and throw it back in the tray. It looked like a bar of beeswax. So I tried it on some leather that I couldn’t cut with my 1 ton arbor press and it cut it slicker than butter. My question is does anyone else do this?
- Yesterday
-

Tips/advice for 1st craft market tent?
bruce johnson replied to ThisIsMyFirstRodeo's topic in Marketing and Advertising
A craft show is a little different than a "theme show" like a leather show, auto swap meet, or Renn fair. The attendees at the theme shows have an interest in most everything offered. They are a slower pace, I'm gonna take my time and not miss a treasure event. They are there for the vibe and will be there as long as it takes. They have time to chat, might ask what else you have. Pick your brain and you pick theirs kind of affairs. Attendees at a craft show or artisan's fair are generally not as deliberate. If they don't have a specific interest, they keep walking. That is where you either get their attention with signs or a spiel. A quick glance tells them a bit about about what they need to know. With three kind of unrelated sections, you need to let them know what you've got and you only have the time it takes for them to walk past to do it. There is an art to displaying stuff and no rules. In my case at shows I have to break some recommendations. I have a double space - 5 to 6 tables. Tools are laid out by type and sorted into trays by sizes. we fill these tables. We never know what is going to sell and take a representative amount of most tools. Some tools I still haven't got the best way to display yet, but we evolve. We lay it all out at the start. It is too hard and we are busy enough usually that we can't lay out a few and restock as some things sell out. I liken craft fairs to antique malls almost. I go to an antique mall and I have tools and KaBar pocket knives on my radar screen. A quick glance as I walk and I can size up most booths. I don't need to stop for stacks of linens, plates, and curio cabinet of figurines. A bucket with hammer handles sticking up and a glass cabinet of knives and I'm drawn in. If I see a really busy display with stuff piled up or mostly touching each other - I usually keep walking. I want to see it spread out a least a little. At a craft show - I probably am not stopping for anything that hangs up - our walls are covered. Jewelry is in my wheelhouse because my wife is well-loved. Handmade knives - I'll stop and chat it up. Not everyone will have an interest in your wares. Some of these booths that don't have much of a sign and I can't see due to people in there or whatever, I appreciate it when someone stands outside and tells me what they have. I can say thank you and go on or go in. The round spool displays sound good in theory. The problem will be space. Limited space on top for displaying. People need to get all the way around them and not interfere with the flow around the booth with other displays. It would spend on booth size. -
 KayGee joined the community
 -
Hi I am trying to match leather chairs purchased from opposite ends of the world and in different decades…. My original chair is faded vintage and has reddish tan colours. Miraculously I found another one but it seems more walnut and I prefer the reddish tan tone. No experience with leather whatsoever. Any advice on how to best match the colours (I know won’t be perfect but a little closer would be great) would be much appreciated. Any particular products that you would recommend? I’m happy to change the original chair slightly if I need to. thanks very much kind regards katrina
-
 Bruce Miller joined the community
 -
In a nut shell don't walk away, run away from the portable walking foot machines. This is a poor cousin clone of the Sailrite LS. There has been a lot of discussion and their pitfalls on this style of walking foot machines. IMHO the three biggest cons are: i) it will sew approximately 1/8" thick material, ii) as the thickness of what is being sewn the stitch length will decrease iii) max thread size is V92 and the list go's on and on. kgg
-
 You folks get to own some cool firearms, which gives you an excuse to make some equally cool holsters.
 -
Help! Singer 111w155 stripped / stuck screw
dikman replied to matthew123's topic in Leather Sewing Machines
I'm not sure about using an impact driver but the idea of tapping the screw with a hammer is good, sometimes it can loosen a screw just enough to start it moving a bit, then work it back and forth. As for heat if you're using a small pin-point butane torch I doubt if you're going to get it hot enough to affect the hardness. -

Help! Singer 111w155 stripped / stuck screw
friquant replied to matthew123's topic in Leather Sewing Machines
Agree this seems weird. How much lift do you have now? -
 Sorry to be a problem, I would love to help people I've been doing this for 50 years but I'm a tech invalid, this is the first thing I have actually replied to and it's took me 10 minutes to do this, thank you


