All Activity
- Past hour
-

Hello from Germany - New Member Introduction
Mulesaw replied to Tove09Tilda's topic in Member Gallery
Hi Tove Welcome from the north-western part of Denmark. I am looking forward to seeing some of your creations here. Brgds Jonas - Today
-
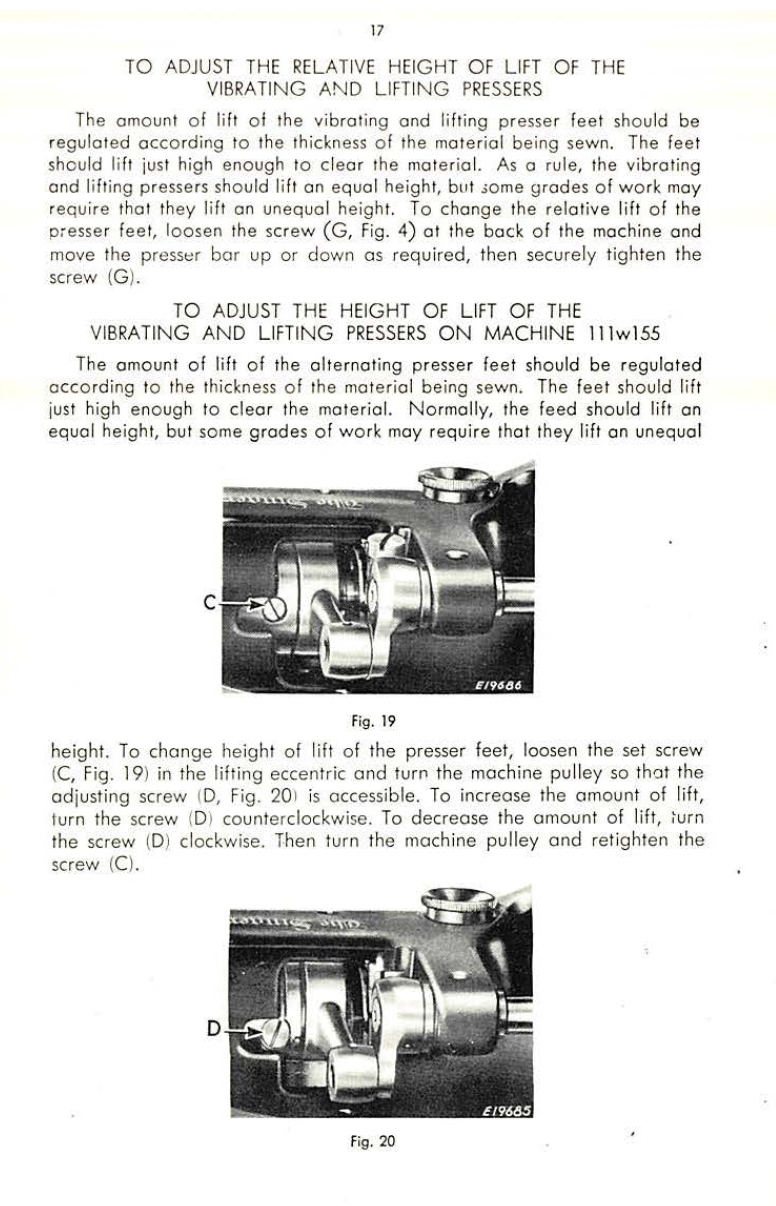
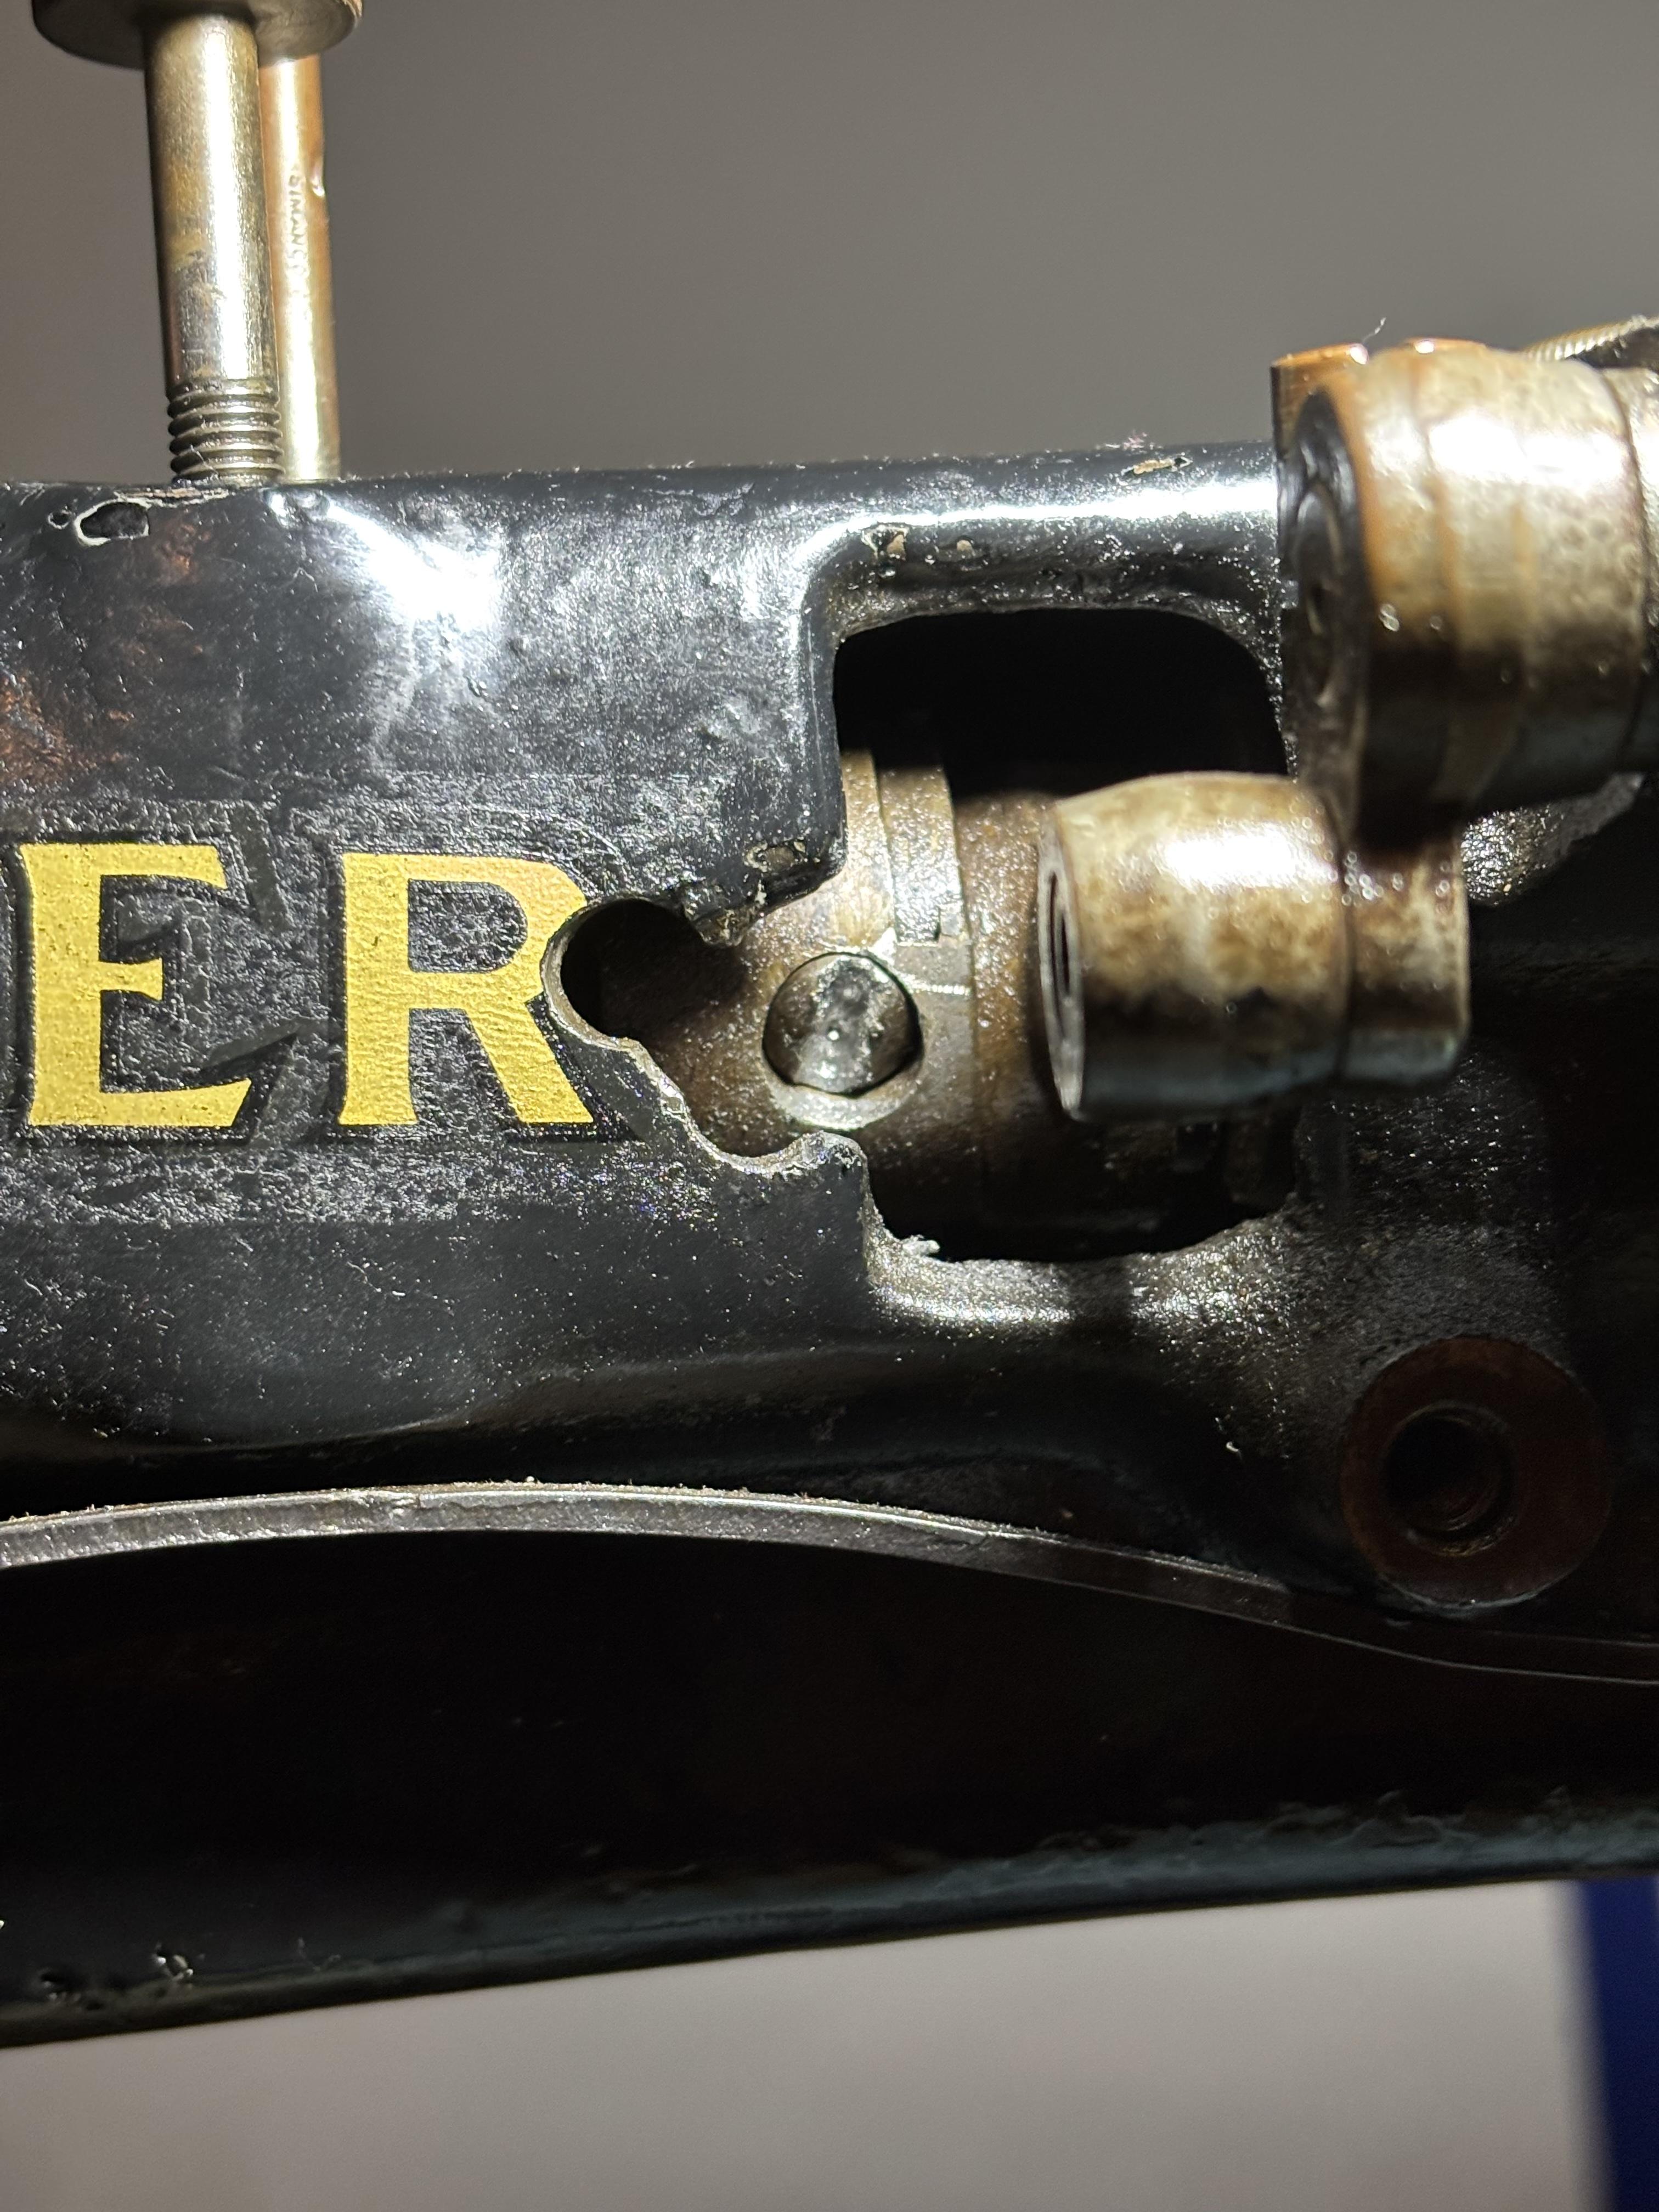
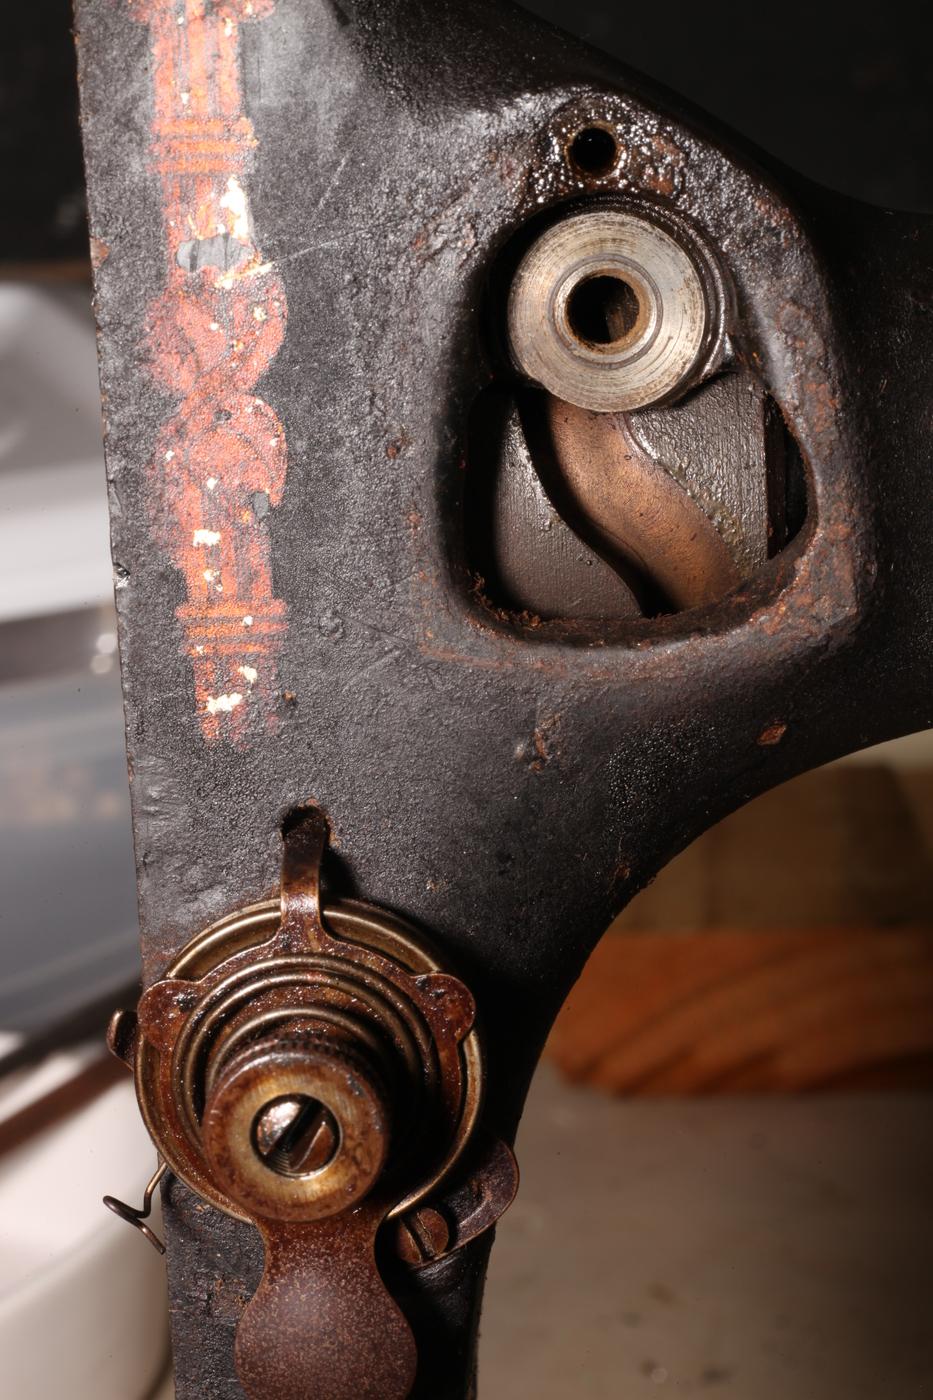
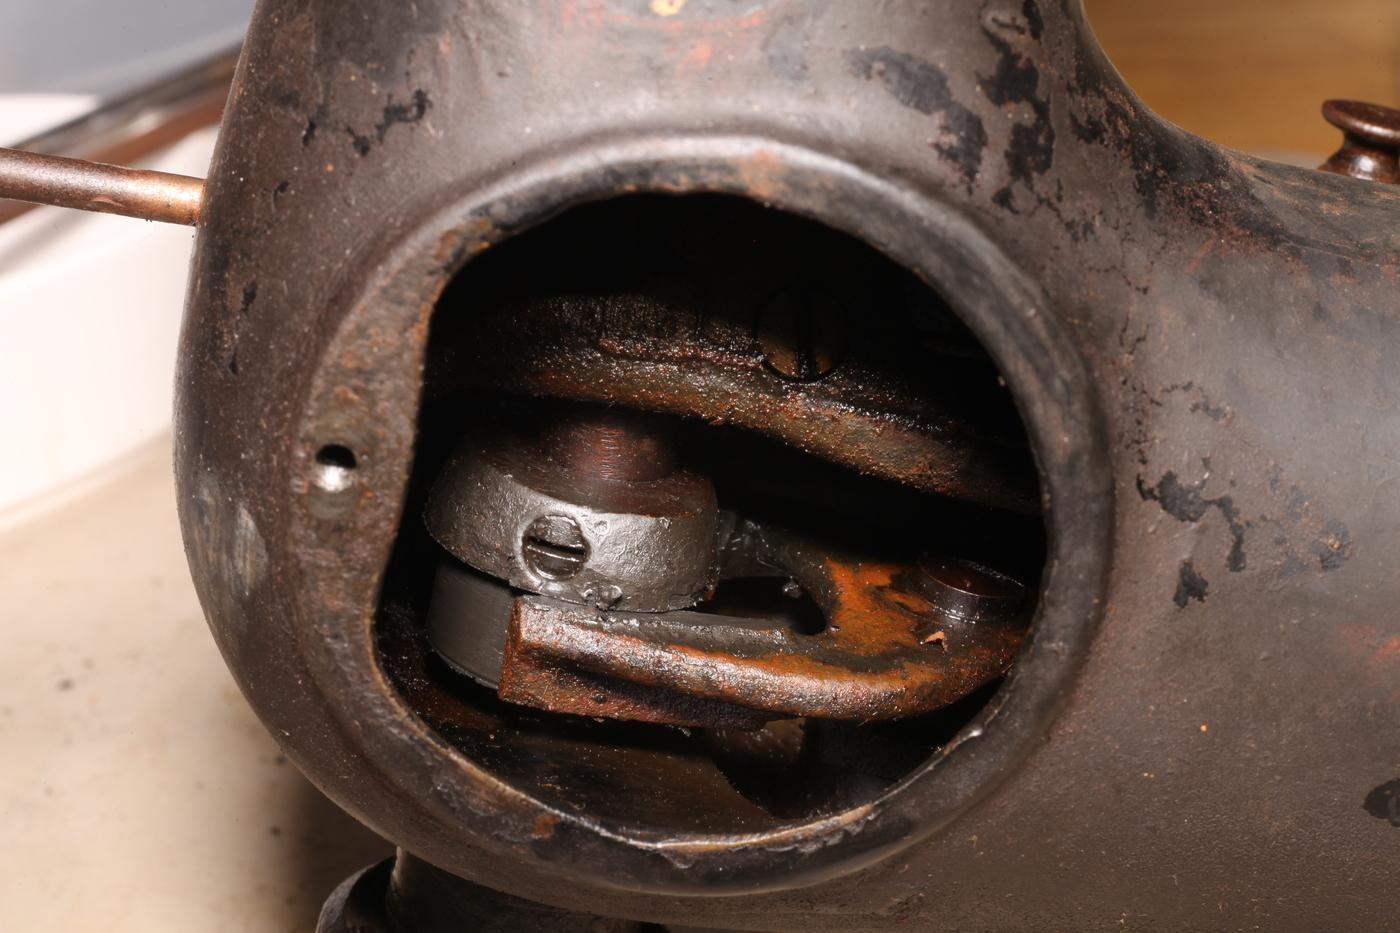
Hi All! First I just want to say how grateful I am for this forum. I've learned so much from you all. Thank you for sharing your knowledge and expertise! I just picked up my first compound feed machine, a Singer 111w155. It sews OK, but the outer presser feet don't lift up enough to accommodate thick material. Based on the manual (see pic attached), it seems that to adjust the relative height of the outer foot with respect to the inner (needle) foot, one has to use the lifting eccentric. However the set screw is stripped and very stuck. See the pic attached. I believe the stripped screw is "C" in the manual screenshot. I also noticed that screw "D" (which I think is the one people call the worm screw) spins freely, which seems weird. It appears someone may have ground away part of the machine casing to get better access to this screw in the past...can anyone confirm from the pic? So far I have tried: spraying the screw with PB blaster nightly for a few nights using a Dremel with a small pineapple burr to deepen the flathead groove gently tapping the screw with a screwdriver and hammer heating it lightly with a mini butane torch I got the screwdriver to bite better when I drilled out the groove, but when I applied force, it again started widening the screw groove again and eating away at the screw head. Can anyone offer other suggestions? I am considering taking it to a local machine shop to see if they can rescue me. I am hesitant to try a left hand drill bit and screw extractor, because the option of deepening the flathead groove further with the dremel seems like a good one and I don't want to burn that bridge. Help!! Am I missing something? Thanks! Matt
-
if it is not necessary to remove the shaft better leave it where it is. such actions sometime cause more damage on parts that most likely are no longer available. My 2 cents.
-
Looking a photo 1 again I see what appears to be a pin on the left, notice the circular dissimilar coloration on the shaft.
-
-
Plate 467, part# 15152 singer 27-1, 2, 3. 4 parts.pdf
-
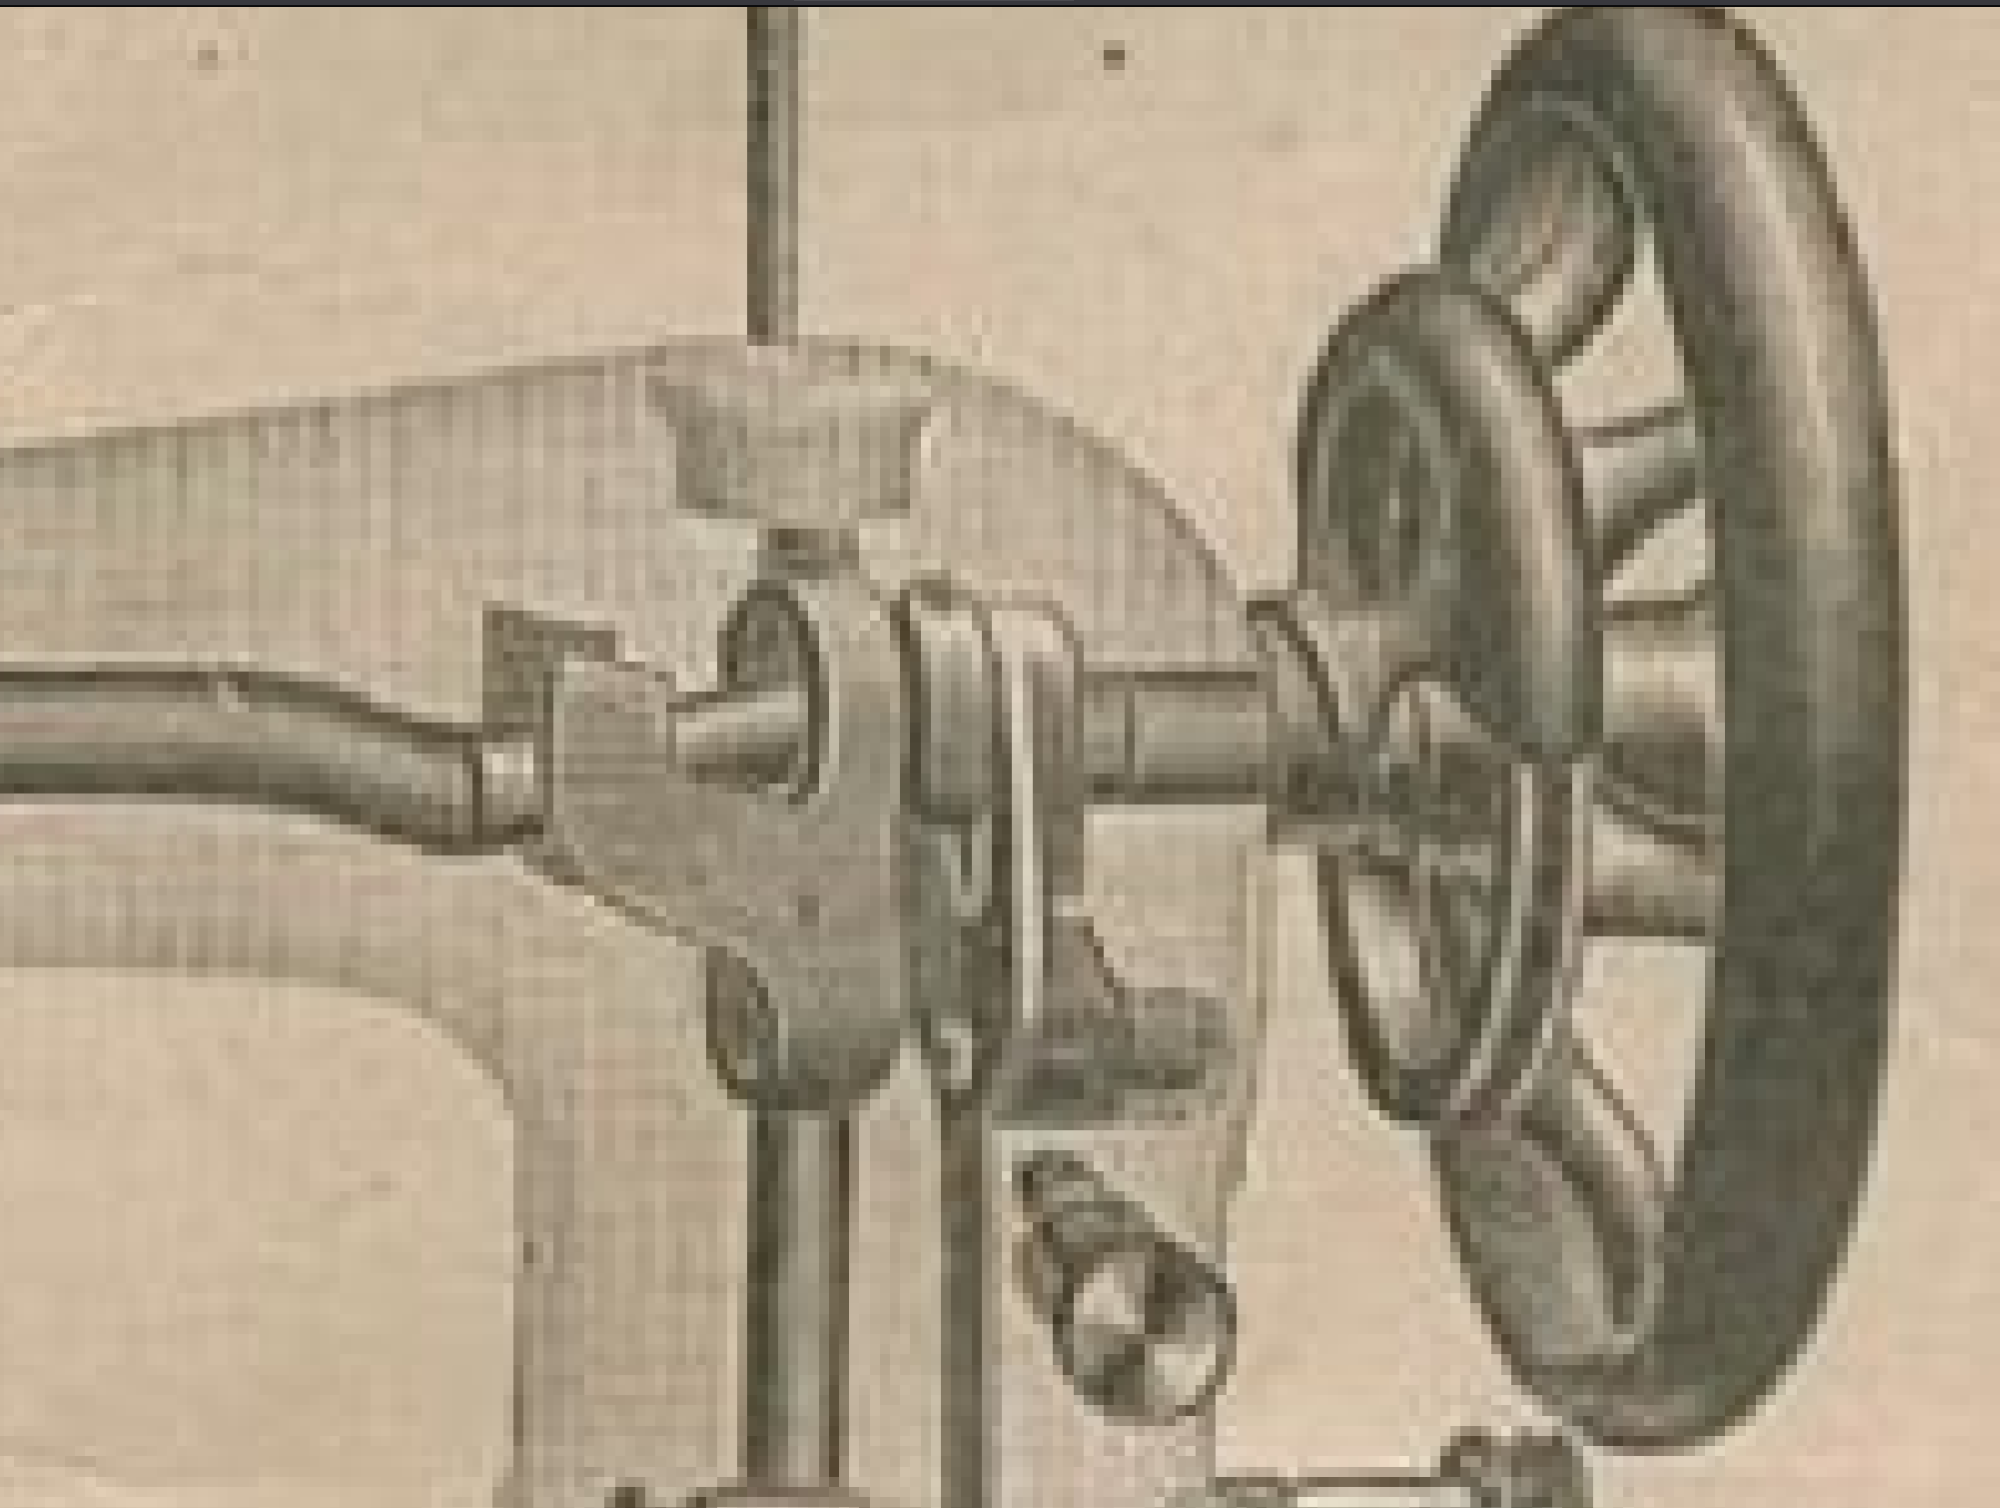
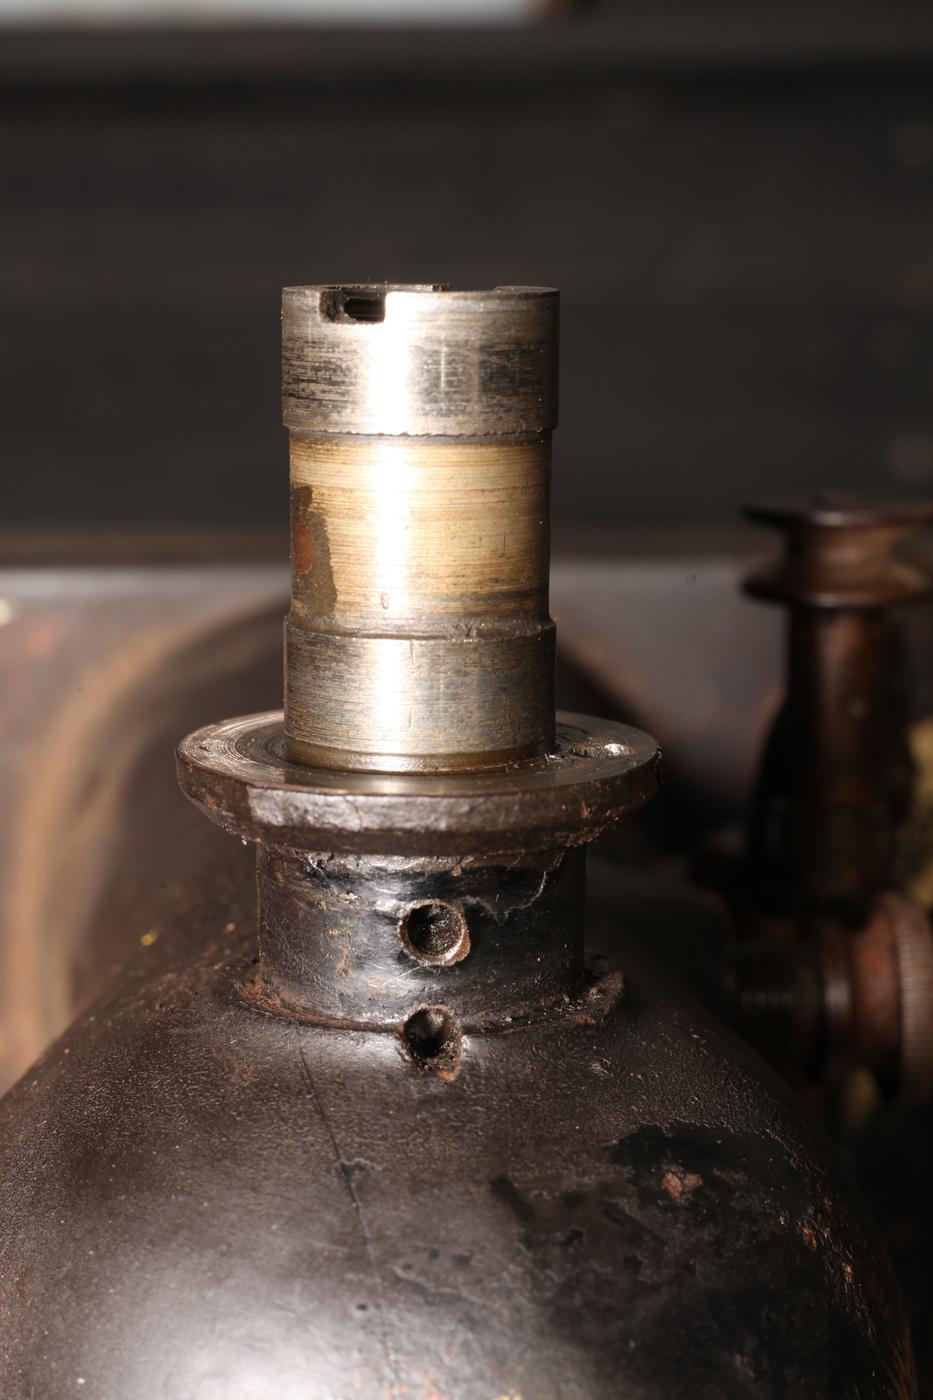
I would have expected something like this, or a tapered pin in the same place.
-
It does look that way in the photo, but I've checked and those holes go all the way to the shaft. (A bit of lint in the bottom of the holes casting shadows). Are there parts manuals for these old machines? All I've seen is the user manual: https://ismacs.net/singer_sewing_machine_company/manuals/singer-model-27-number-2-vibrating-shuttle-sewing-machine-manual.pdf which does have somewhat of a drawing
-
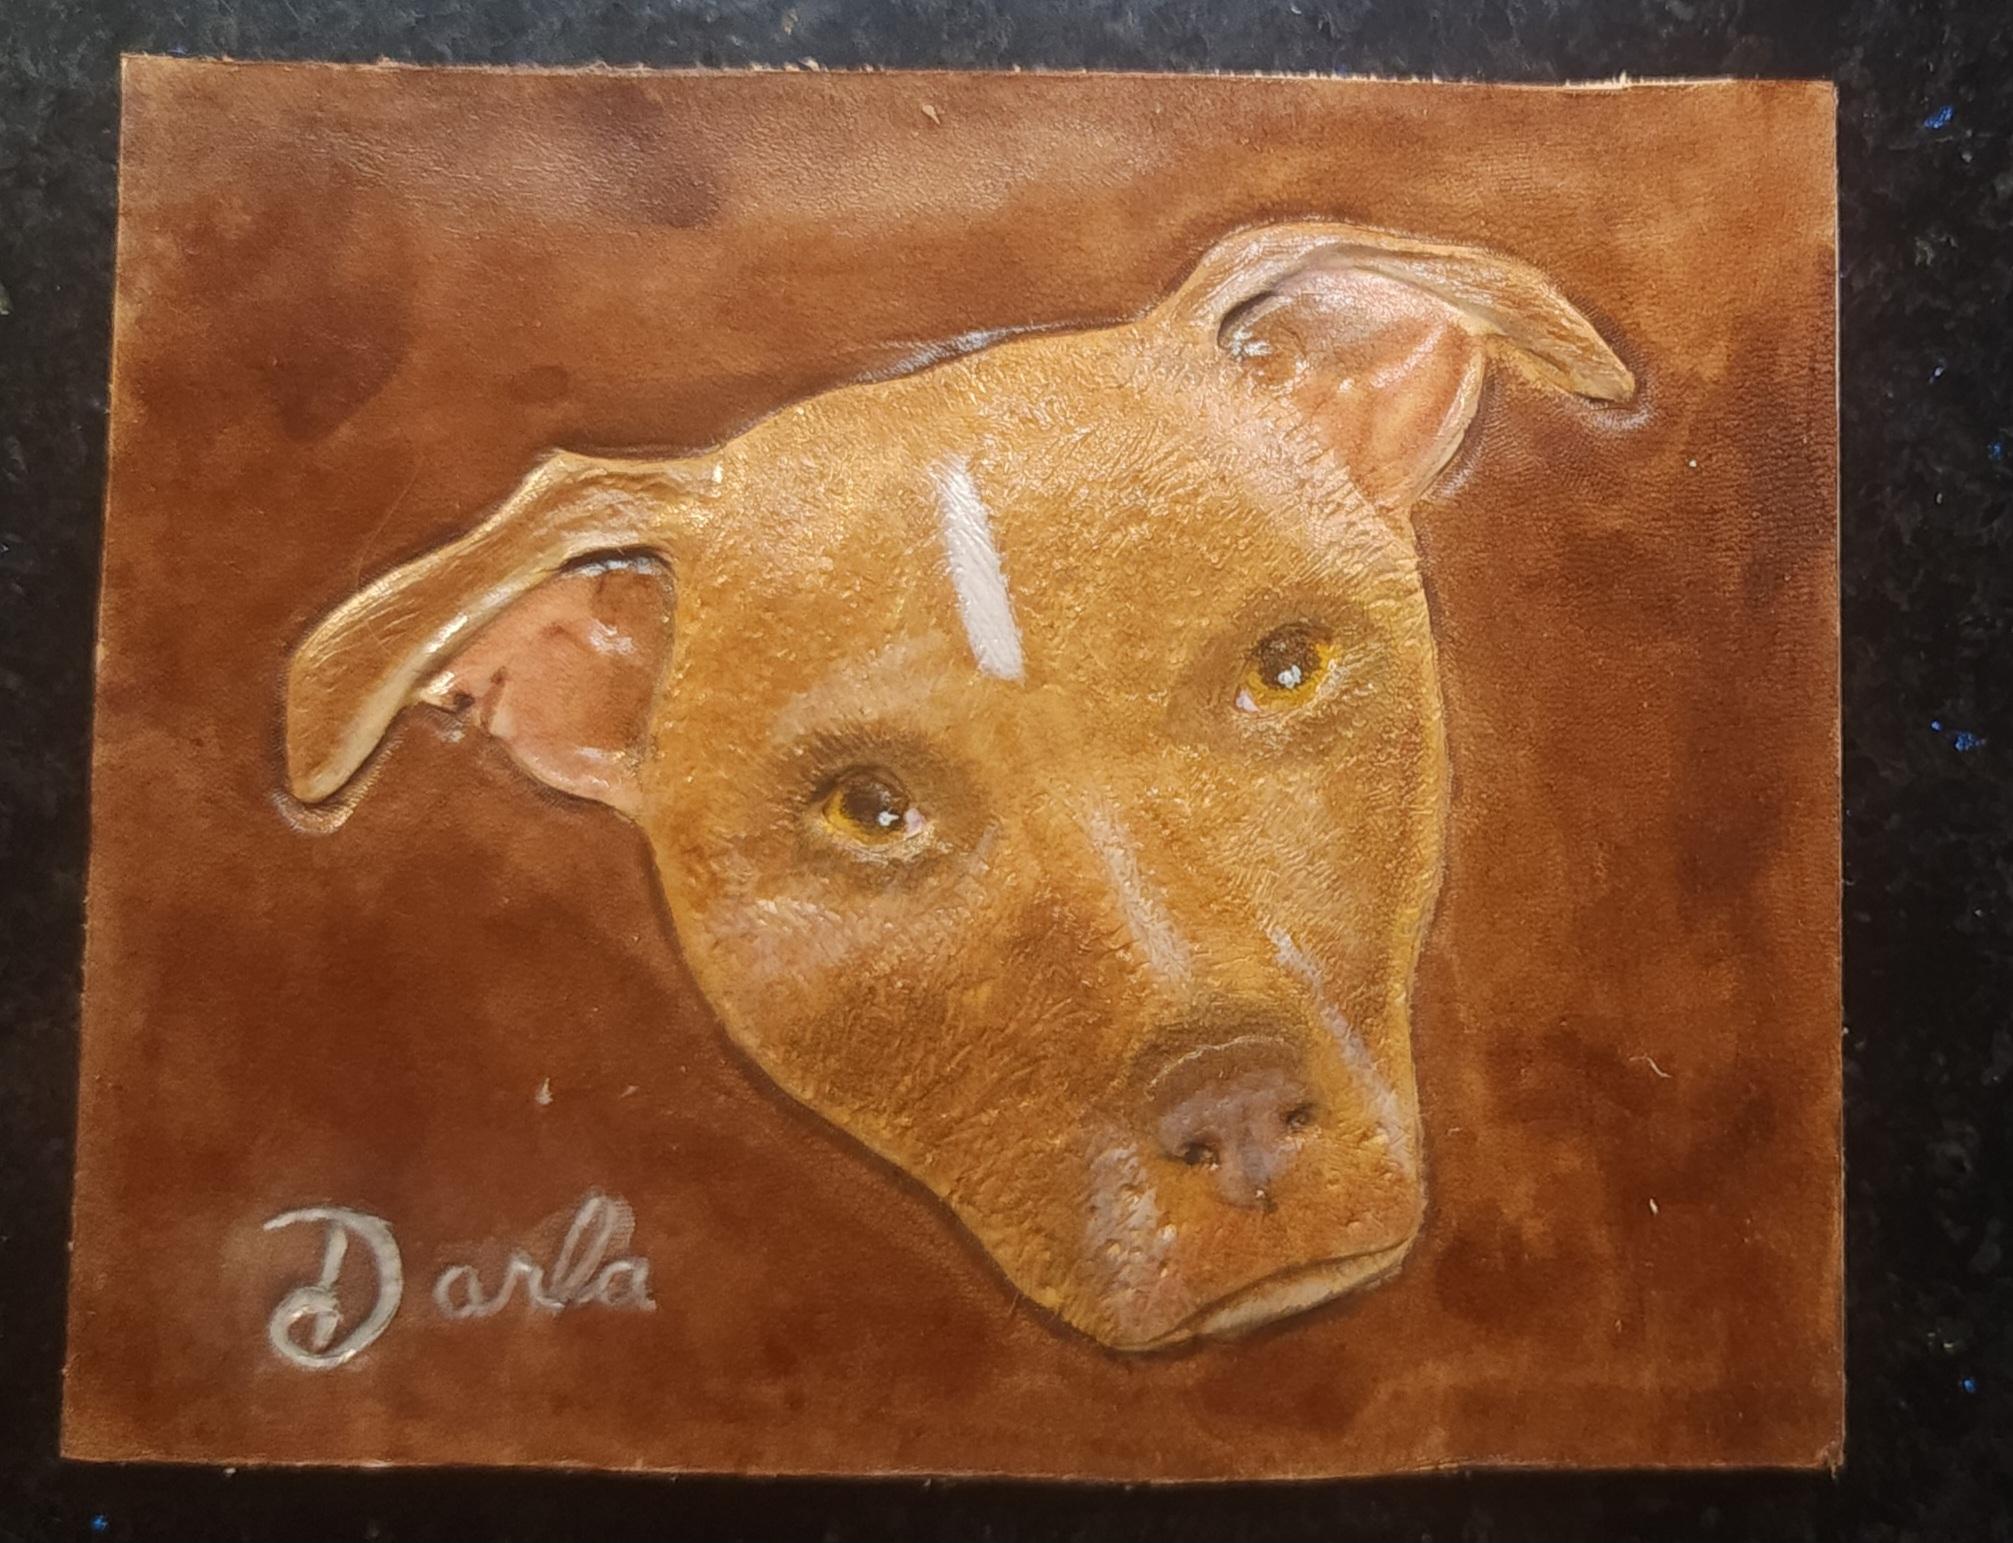
Yeah, she was only 18 months old. Was fine one day and the next she was real lethargic and not herself. Ended up being kidney failure and they had no warning or signs there was a problem. It was only 3 days from noticing she wasn't well to having to put her down.
-
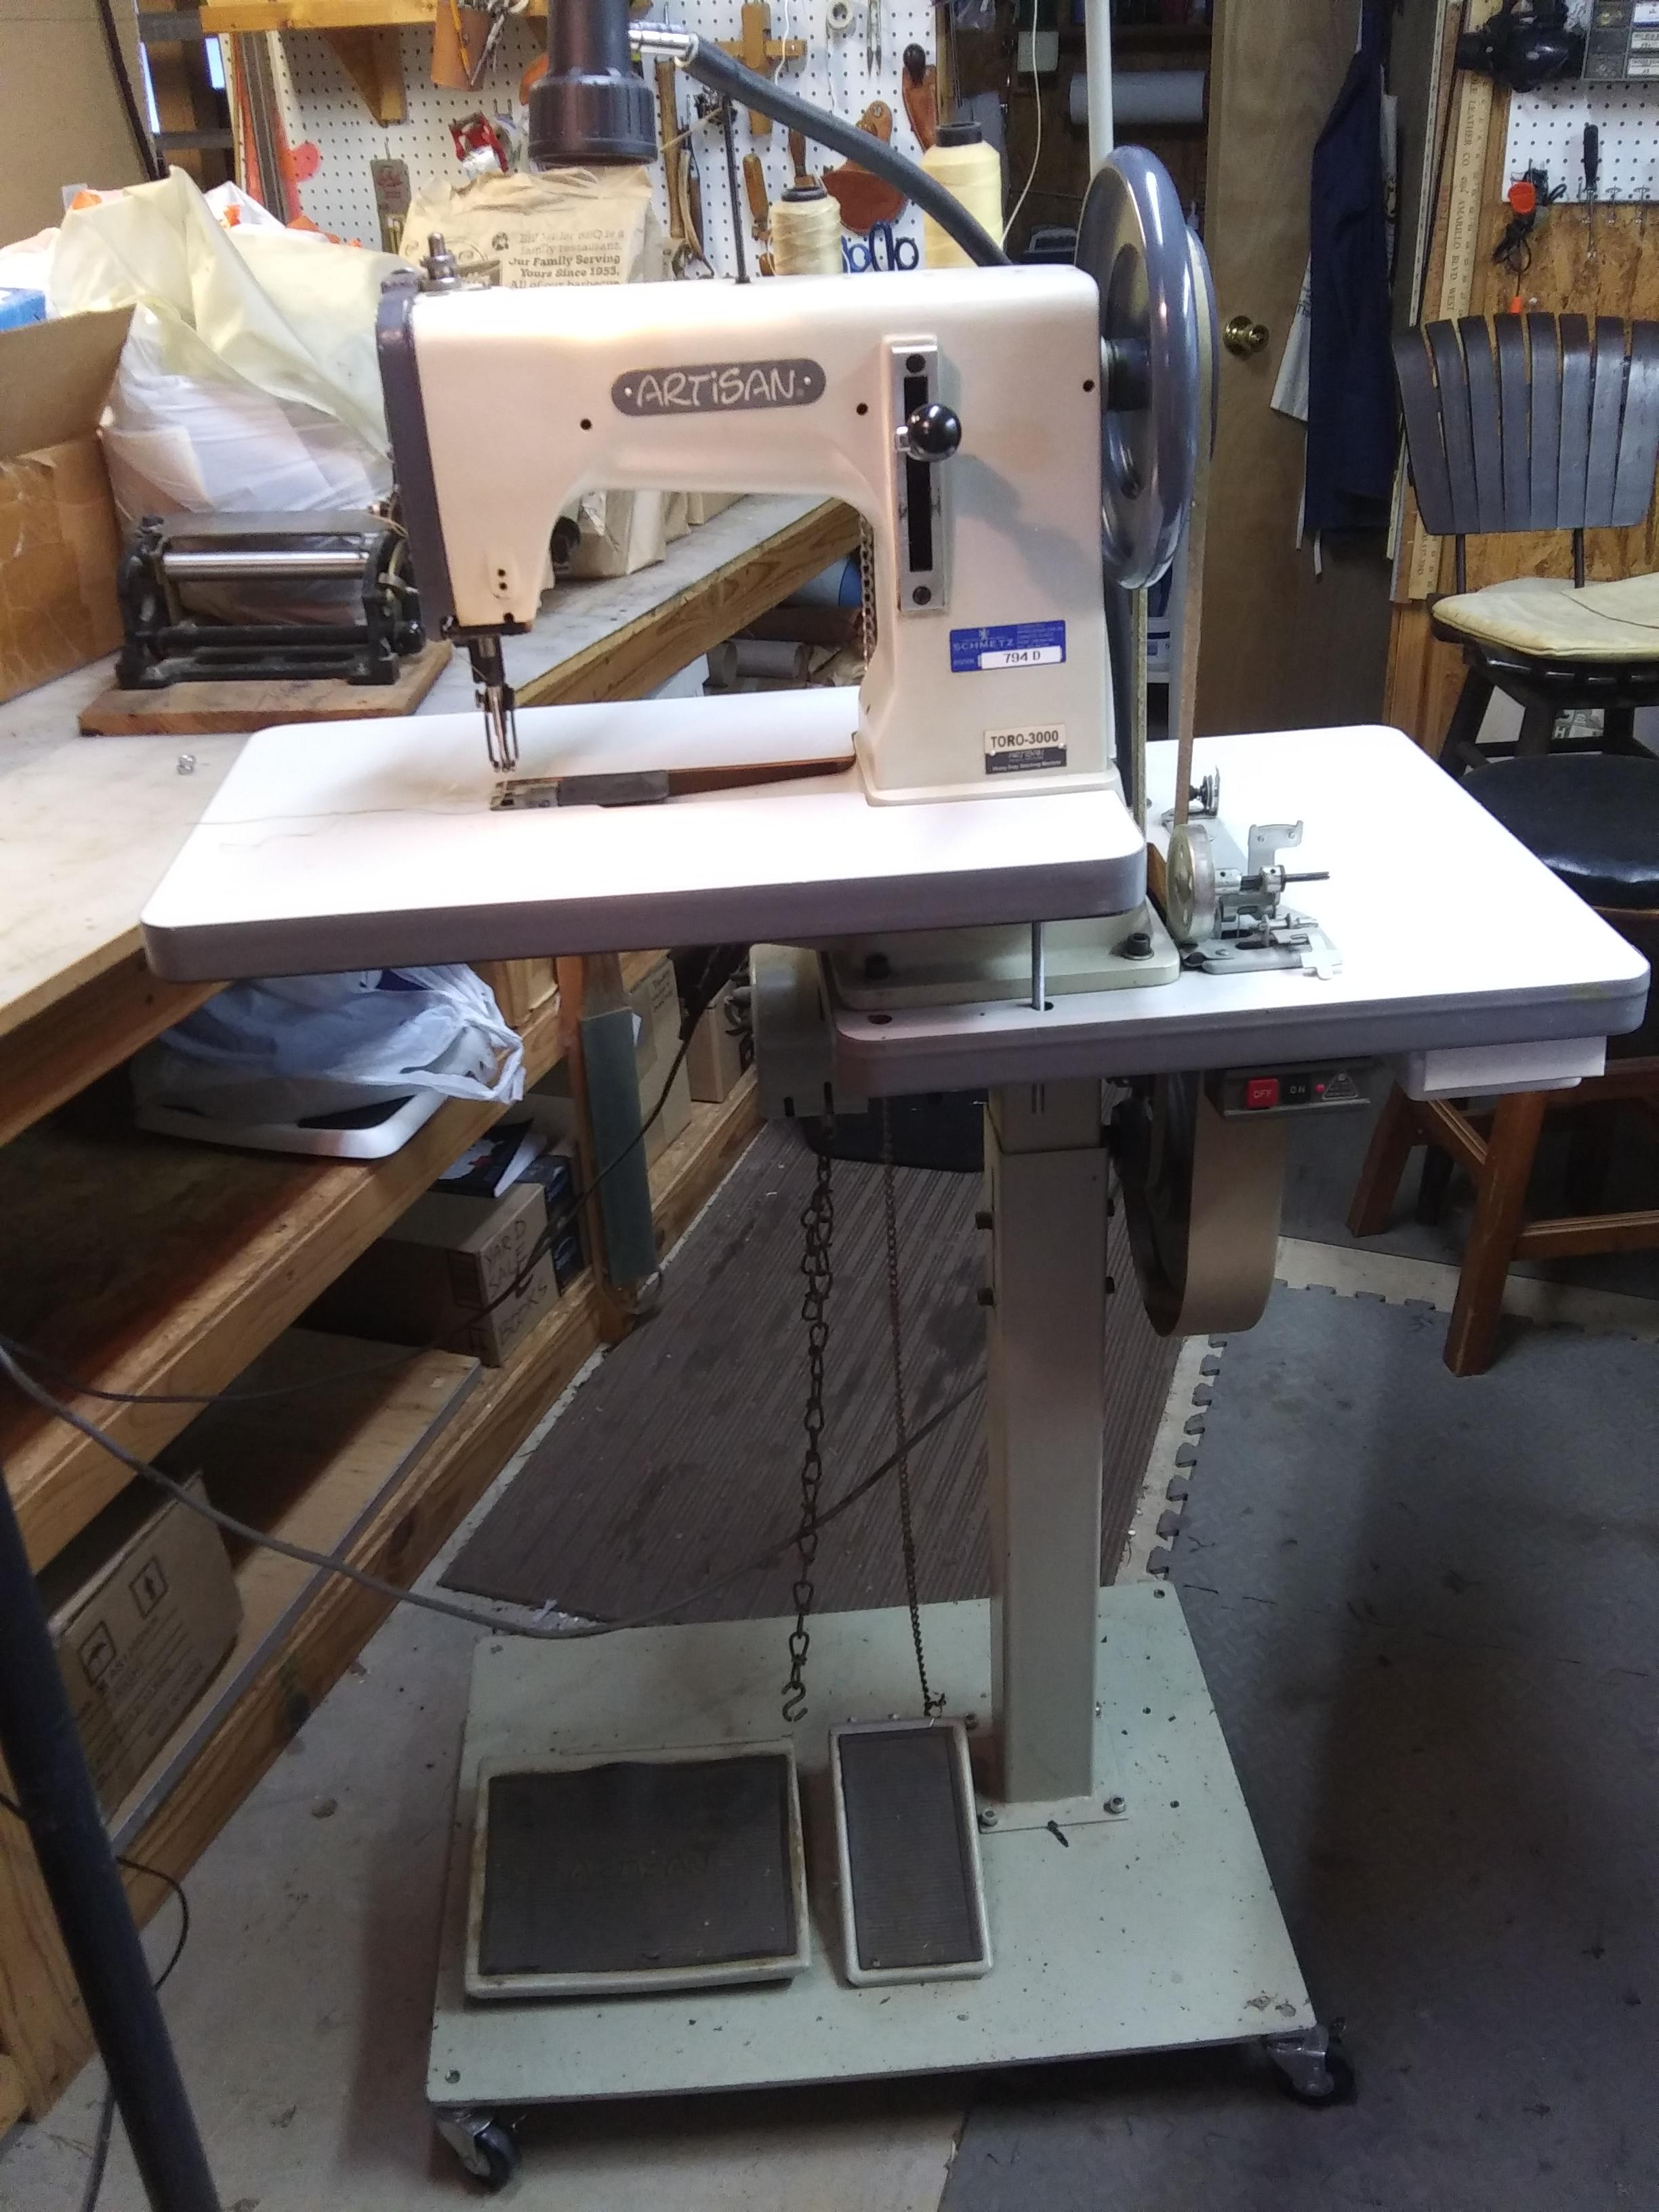
Practically everything is. Real EU made parts are EXPENSIVE. Chinese made parts are priced better. You get what you pay for though. Used price? 3500 and up.
- Yesterday
-
Nicely done and a nice gesture !! Putting them is a hard thing .
-
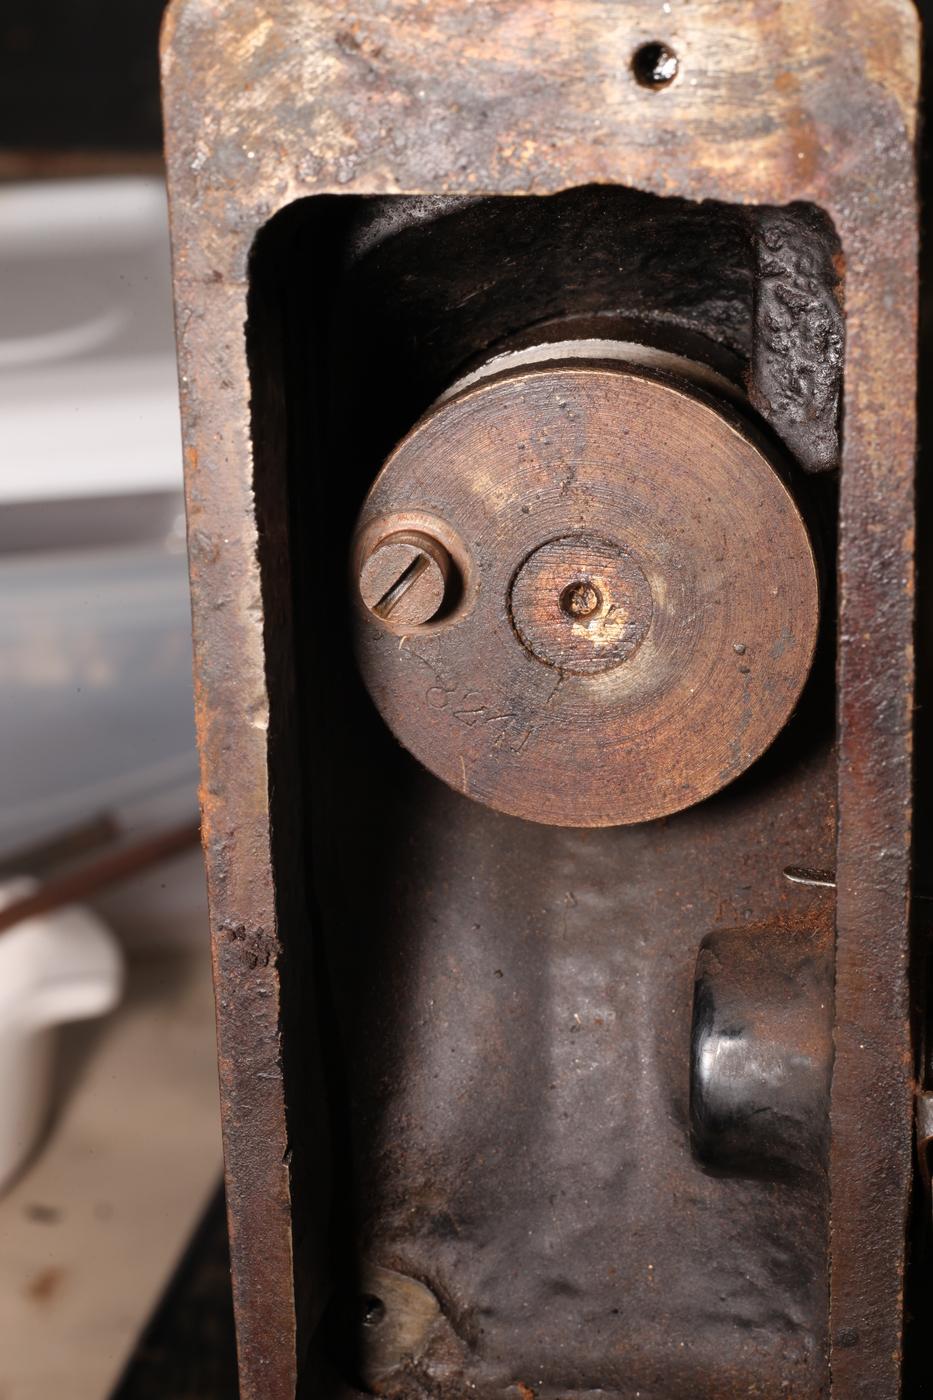
@friquant In the first picture there appears to be screw slots inside the holes, maybe screws in there?
-
Thank You
-
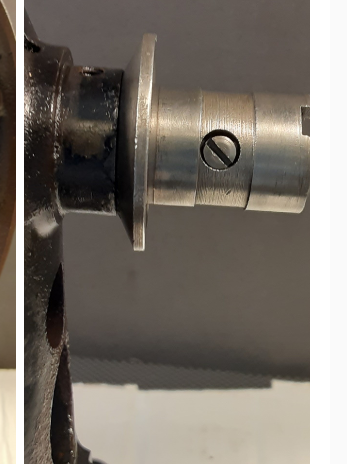
How to remove the arm shaft from a Singer 27 ? Normally, I repair machines leaving them mostly assembled. To step outside of my comfort zone I decided to take one apart. I'm already dreaming of how clean I'll be able to get all the pieces ✨ But it's not clear to me how this arm shaft comes off. In the picture on the left, those two holes go all the way to the shaft. (Oil holes, I presume) 27-arm-shaft.mp4 There are few things inside that have to come loose also, but I'd like to get the arm shaft on its way out first: I think the arm shaft comes out the front of the machine. I removed the set screw just to the left of center in this photo: Inside the nose, with needle bar and presser bar removed: A couple interesting things about this machine, is it has a cam for the takeup lever, and a shuttle for the bobbin:


-
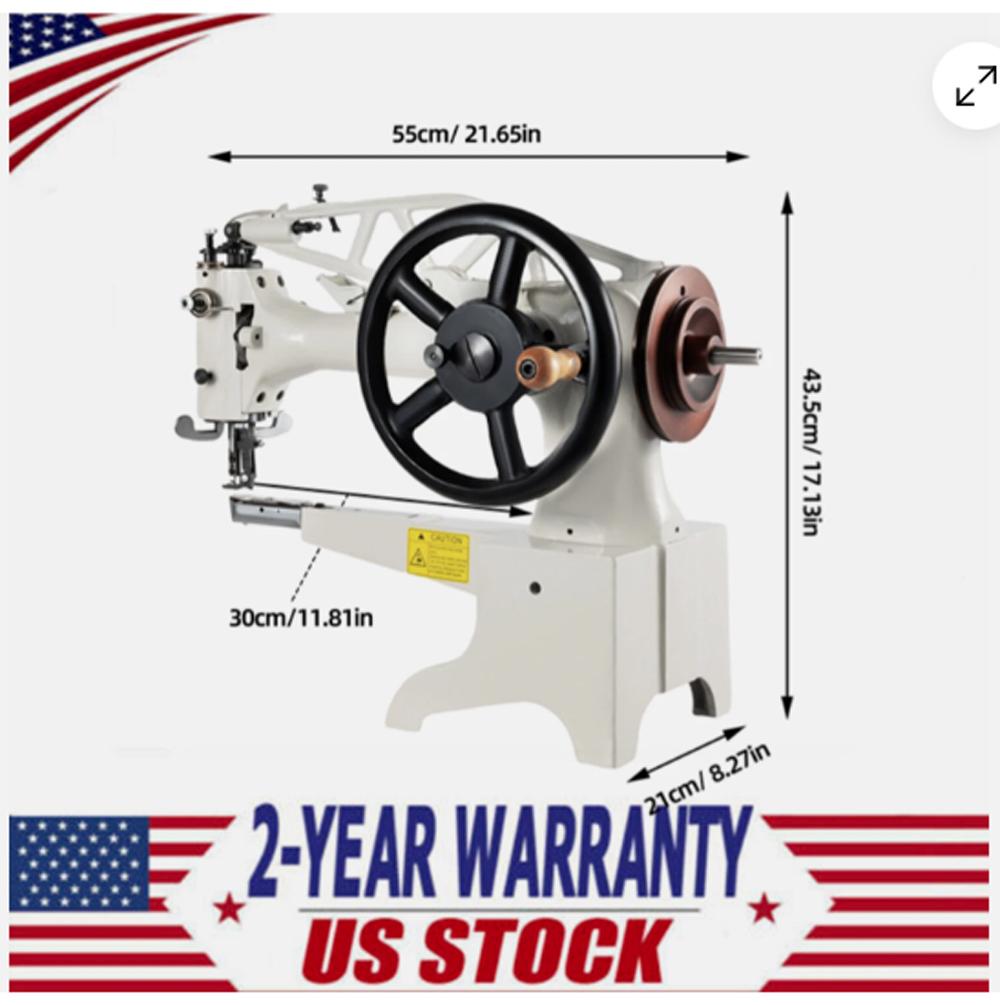
Artisan Toro 3000 heavy duty stitcher, 9" long cylinder bed, compound needle feed, walking foot, lockstitch sewing machine, complete with ArtisanESM-4002 Electronic DC Servo Motor, Sr-2 speed controller, EP adjustable pedestal, Lamp. extra needles, bobbins, bobbin winder, screw drivers, wrenches, oil and manual and work plate. Runs as good as the day I bought it.. Has been kept clean and oiled. Purchased new in 2005. Weighs 150 lbs, so it must be picked up. Located in Floresville, Texas. Price: $950.00 CASH
-
@KloverI found the thread where this was discussed. This link should take you to the page where the hammers are shown:
-
Thank you for the input! I'll definitely check out those images/videos. And thank you for mentioning the thread slippage. I hadn't even thought about that, but I will keep it in mind!
-
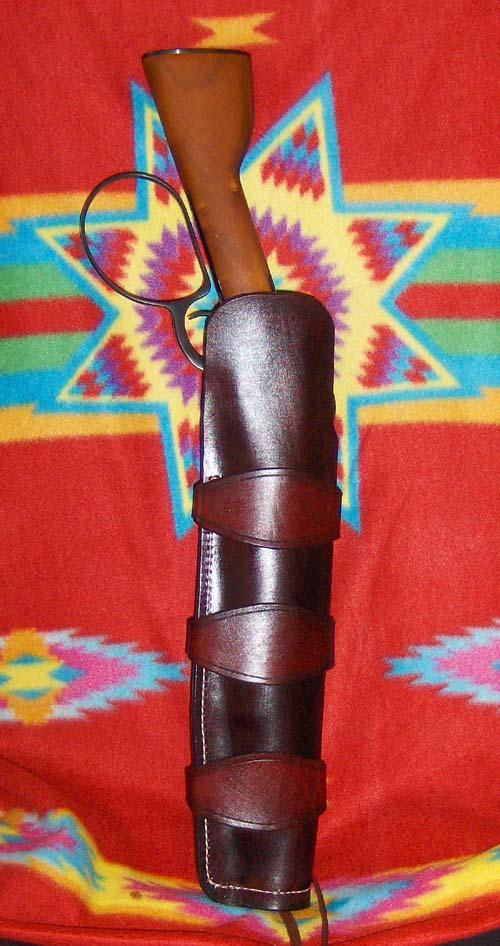
 I made one a couple years back . . . he wanted the hammer and trigger fairly well covered He also wanted to wear it around his waist May God bless, Dwight
-
 @Rick JorgensonThat is a nice rig, well done!
 -
A single point sling has several advantages . . . the biggest of which allows you to pass the caretaking of the firearm to either arm effortlessly and quickly. Makes for entering or leaving a doorway very easy . . . as well as meandering thru bushes . . . or trails where overgrowth can get in the way. Allows one to reach down and pick up something on the ground or a table . . . without the possibility of stubbing the muzzle in the mud. I put a ring on the left side of my M1A just below the rear sight . . . and I love my single point sling when I'm carrying the rifle . . . the weight around the neck does not bother me as much as trying to carry it on a shoulder. it is also MUCH MUCH quicker to put into action than any other sling I've ever tried to use. May God bless, Dwight
-
Those are quite heavy duty, nice work!
-
@RockyAussie << @Klovermade some tests and posted images/video where he tested the tension for both the top and bottom thread when his machine was in balance. I seem to recall that the bottom was 1lb and the top 3lb. That being said, the thread path plays an important role as well. My preference, based on my experience, is to make sure that the top thread is wound 1 1/2 to 2 1/2 times around the tensioner on the left side of the machine. Thread slippage needs to be minimal here, wheel needs to rotate, or I get inconsistent stitch tension. There is no standard or correct one side fits all on these machines. Thread types and thickness change how you set up as well. Good luck with your new machine.
-
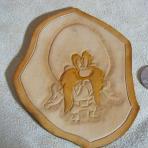
My friend had to put his dog down so I made this as a little memento, figure carving and coloring are 2 areas i feel i need work in, so at least its good practice.
-
These are awesome!!
-
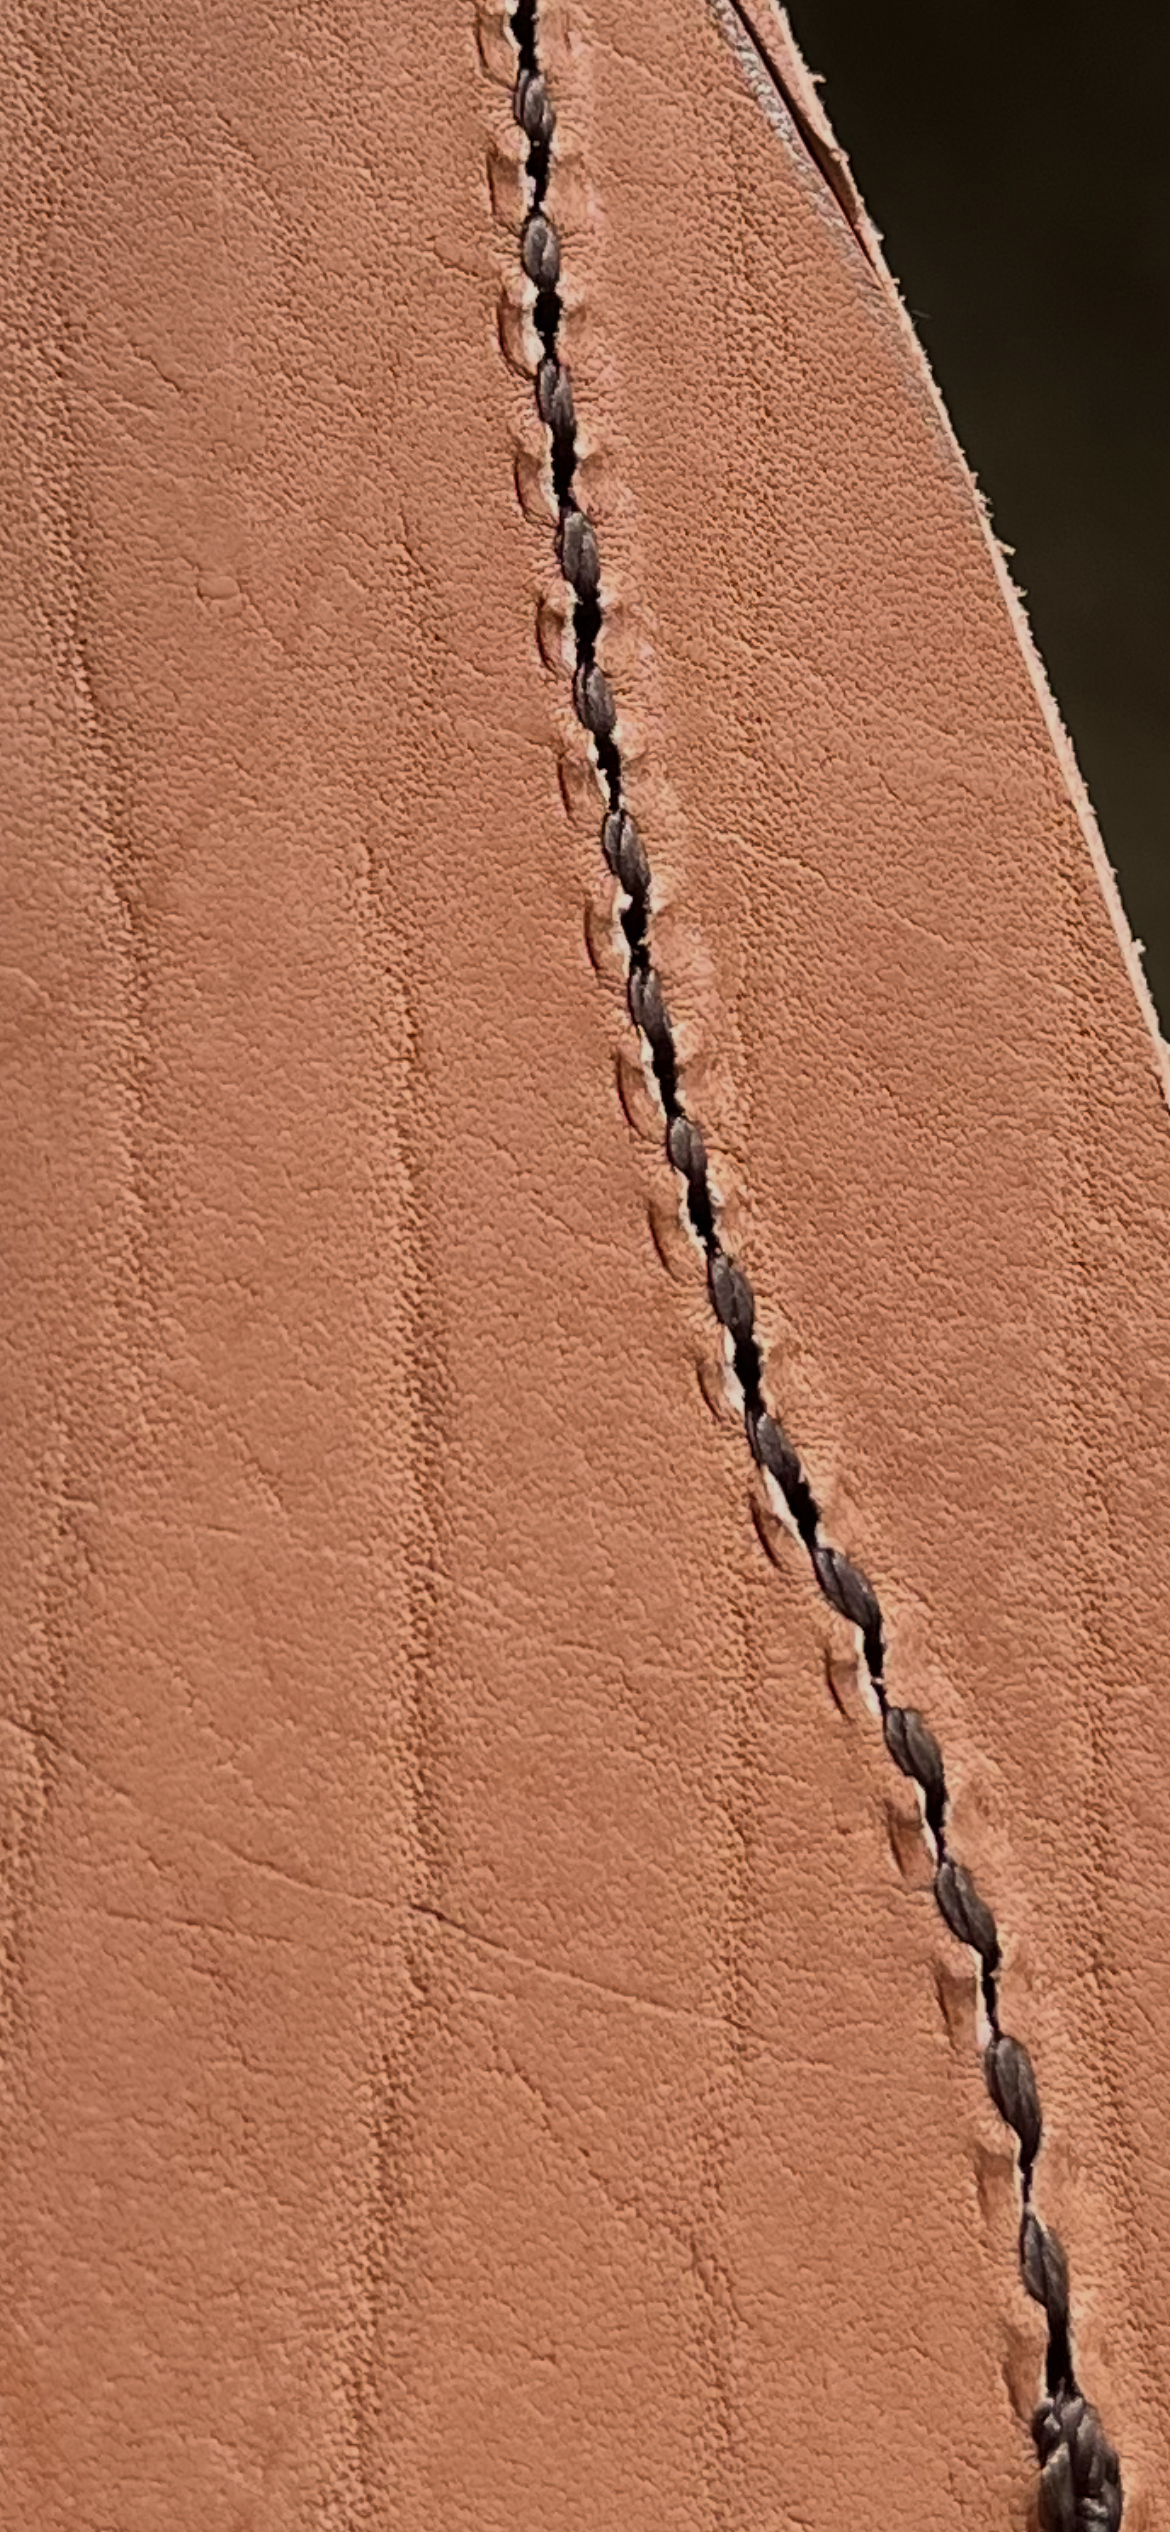
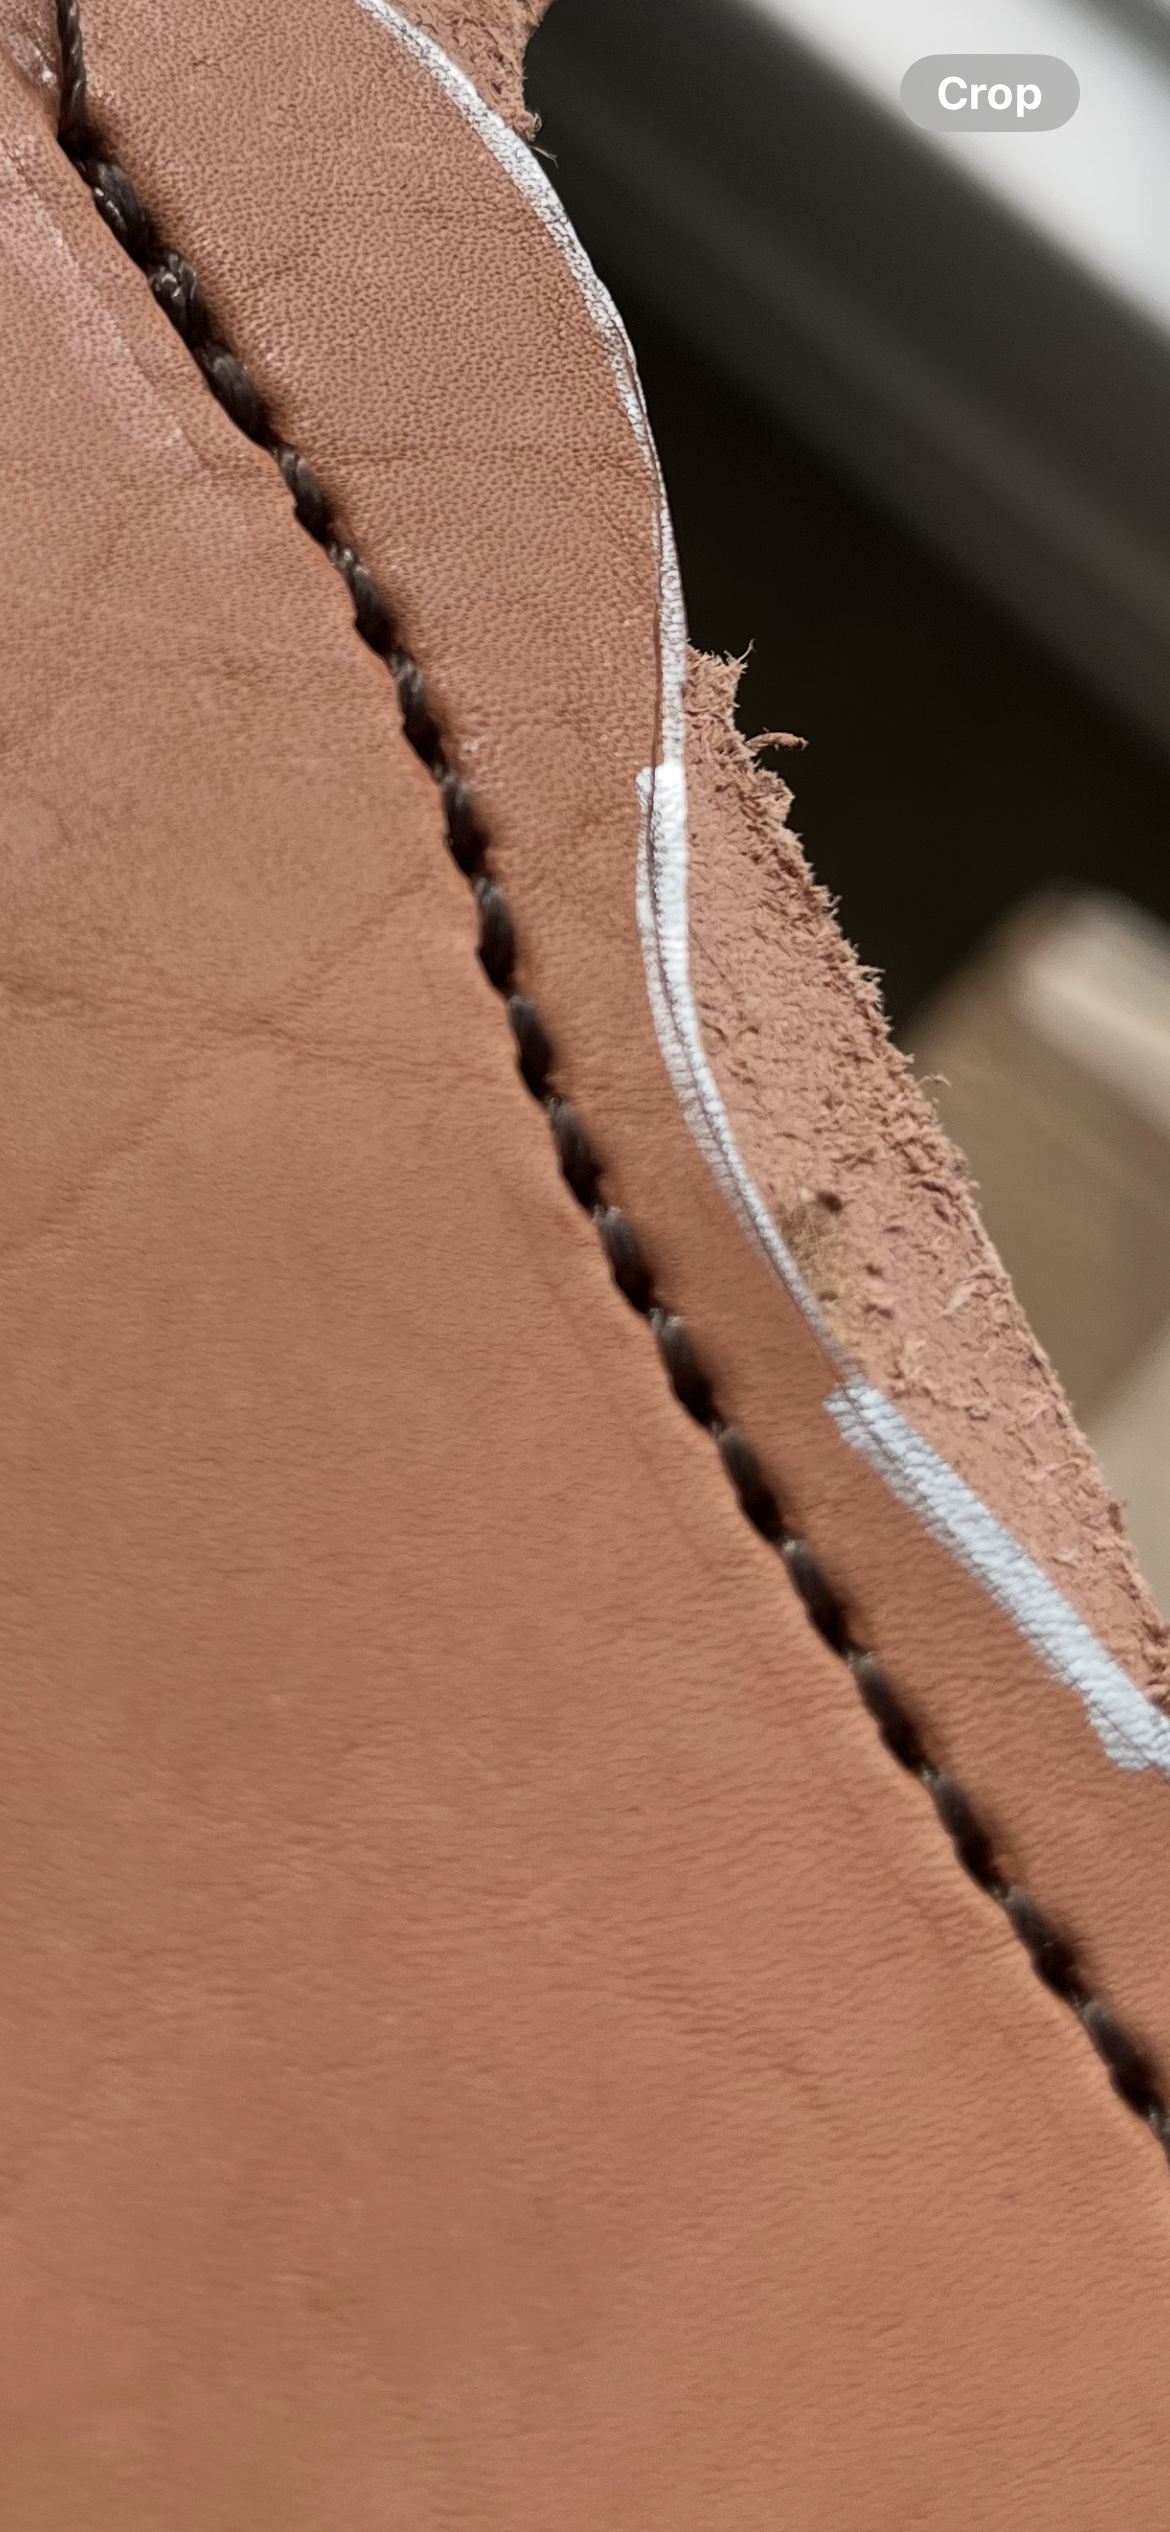
Hello! My Cobra Class 4 just arrived. First machine, and I'm trying to get the tension right. Will usually be sewing 5-6 oz - 10-12 oz, so I'm hoping to hit the right tension that can be used for most of my projects so that I don't have to mess with it too much. Will probably stick to 277 bonded nylon thread. The top stitch looks okay for the moemnt, but the bottom stitch looks whacky. Should I loosen the bobbin/bottom tension a little bit? All I've done so far is loosen the top tension about 1 full turn (achieved through small increments). I turned both top tension knobs.