All Activity
- Past hour
-
If you've worked with a hot foil stamping machine, you know how satisfying it is to see those metallic designs shining on your products. But when it comes to using it on different materials, there’s a bit of science involved—especially when choosing the right temperature for each. Using the wrong heat level can lead to damaged materials, poor transfer quality, or faded designs. Here’s a guide to mastering hot foil stamping temperatures across four popular materials: paper, plastic, leather, and fabric. 1. Paper Ideal Temperature Range: 90°C - 120°C Why It Works: Paper is delicate and needs a lower temperature to avoid warping or burning. Keeping it around 90°C to 120°C ensures a crisp, clear design without any scorch marks. Use Cases: Ideal for stamping on cards, labels, or gift boxes. Dwell Time: 1 - 2 seconds—anything longer may damage the paper. Pressure: Light pressure is best here. Paper doesn’t need much force, and too much pressure can leave indentations. 2. Plastic (PVC, PET) Ideal Temperature Range: 120°C - 150°C Why It Works: Plastic can handle higher heat but too much can lead to warping or even melting. This range allows the foil to adhere properly without affecting the surface. Use Cases: Perfect for plastic cards, gift packaging, and other non-flexible items. Dwell Time: 2 - 3 seconds—this is enough time to make sure the foil sticks well without damaging the plastic. Pressure: Use a bit more pressure here than with paper, but be careful not to press so hard that you indent the surface. 3. Leather Ideal Temperature Range: 100°C - 140°C Why It Works: Leather is a resilient material but requires the right balance of heat. The higher end of this range is suitable for thicker leather, while lighter leather does better at the lower end. Use Cases: Perfect for stamping logos or custom designs on wallets, bags, and leather tags. Dwell Time: 2 - 4 seconds, depending on thickness. Thicker leather may need a longer time to ensure a solid imprint. Pressure: Moderate pressure is key here, especially for thicker leather, which benefits from a bit of force for a clear impression. For thin leather, lighter pressure avoids permanent dents. 4. Fabrics (Textiles) Ideal Temperature Range: 120°C - 160°C Why It Works: Fabrics vary in heat tolerance, but textiles generally work well in this range, which is hot enough to bond the foil to the fabric without damaging it. Use Cases: Great for adding unique designs to T-shirts, hats, or canvas bags. Dwell Time: 3 - 5 seconds to ensure the foil adheres completely. Pressure: Light to moderate pressure works best, depending on the fabric’s thickness and texture. Pro Tip: A Universal Temperature Setting (Because Who Has Time to Constantly Adjust?) If you’re tired of tweaking the temperature for every material, consider setting your machine to 120°C. This “lazy” temperature works quite well for most paper, plastic, leather, and fabric projects without requiring constant adjustments. It’s a safe middle ground that’s hot enough for most materials but won’t leave burn marks or cause warping. References “Heat Transfer Basics.” Printwear Magazine, 2022, link. “The Science of Foil Stamping.” Stamping & Embossing World, 2023, link.
-
Pfaff 545 H4 Mechanics Manual
Jeff Claridy replied to Jeff Claridy's topic in Leather Sewing Machines
Yes I have that one. Here’s the exact problem I’m having, not having the measurement of the standard needle bar height for the 545 and trying to use the 1245 manual which says 15mm for the standard position before fine tuning. But I can’t find the measurement in my 545 instruction manual or my 145 instruction manual. But my manual on a Consew 226 says the height mine is set at when timed with the hook 22.3mm so I’m guessing it’s right but I’m still having thread cutting and jamming with thread issues and I’m just hand cranking when checking it. I also have a Juki 1508 that also is 22.3mm but it uses the 35 needle system or size. I’m a novice sewer and learning how to work on them as I go. But using 4 different manuals to setup one machine is insane. Any help would be greatly appreciated. Thanks for your response. - Today
-
I use 4/5 oz for my outsides. 8 will make a thick wallet like has been said. Just got to be easy with carving tooling so you don't blow right through. I use 2/3oz veg tan for my inside pockets.
-

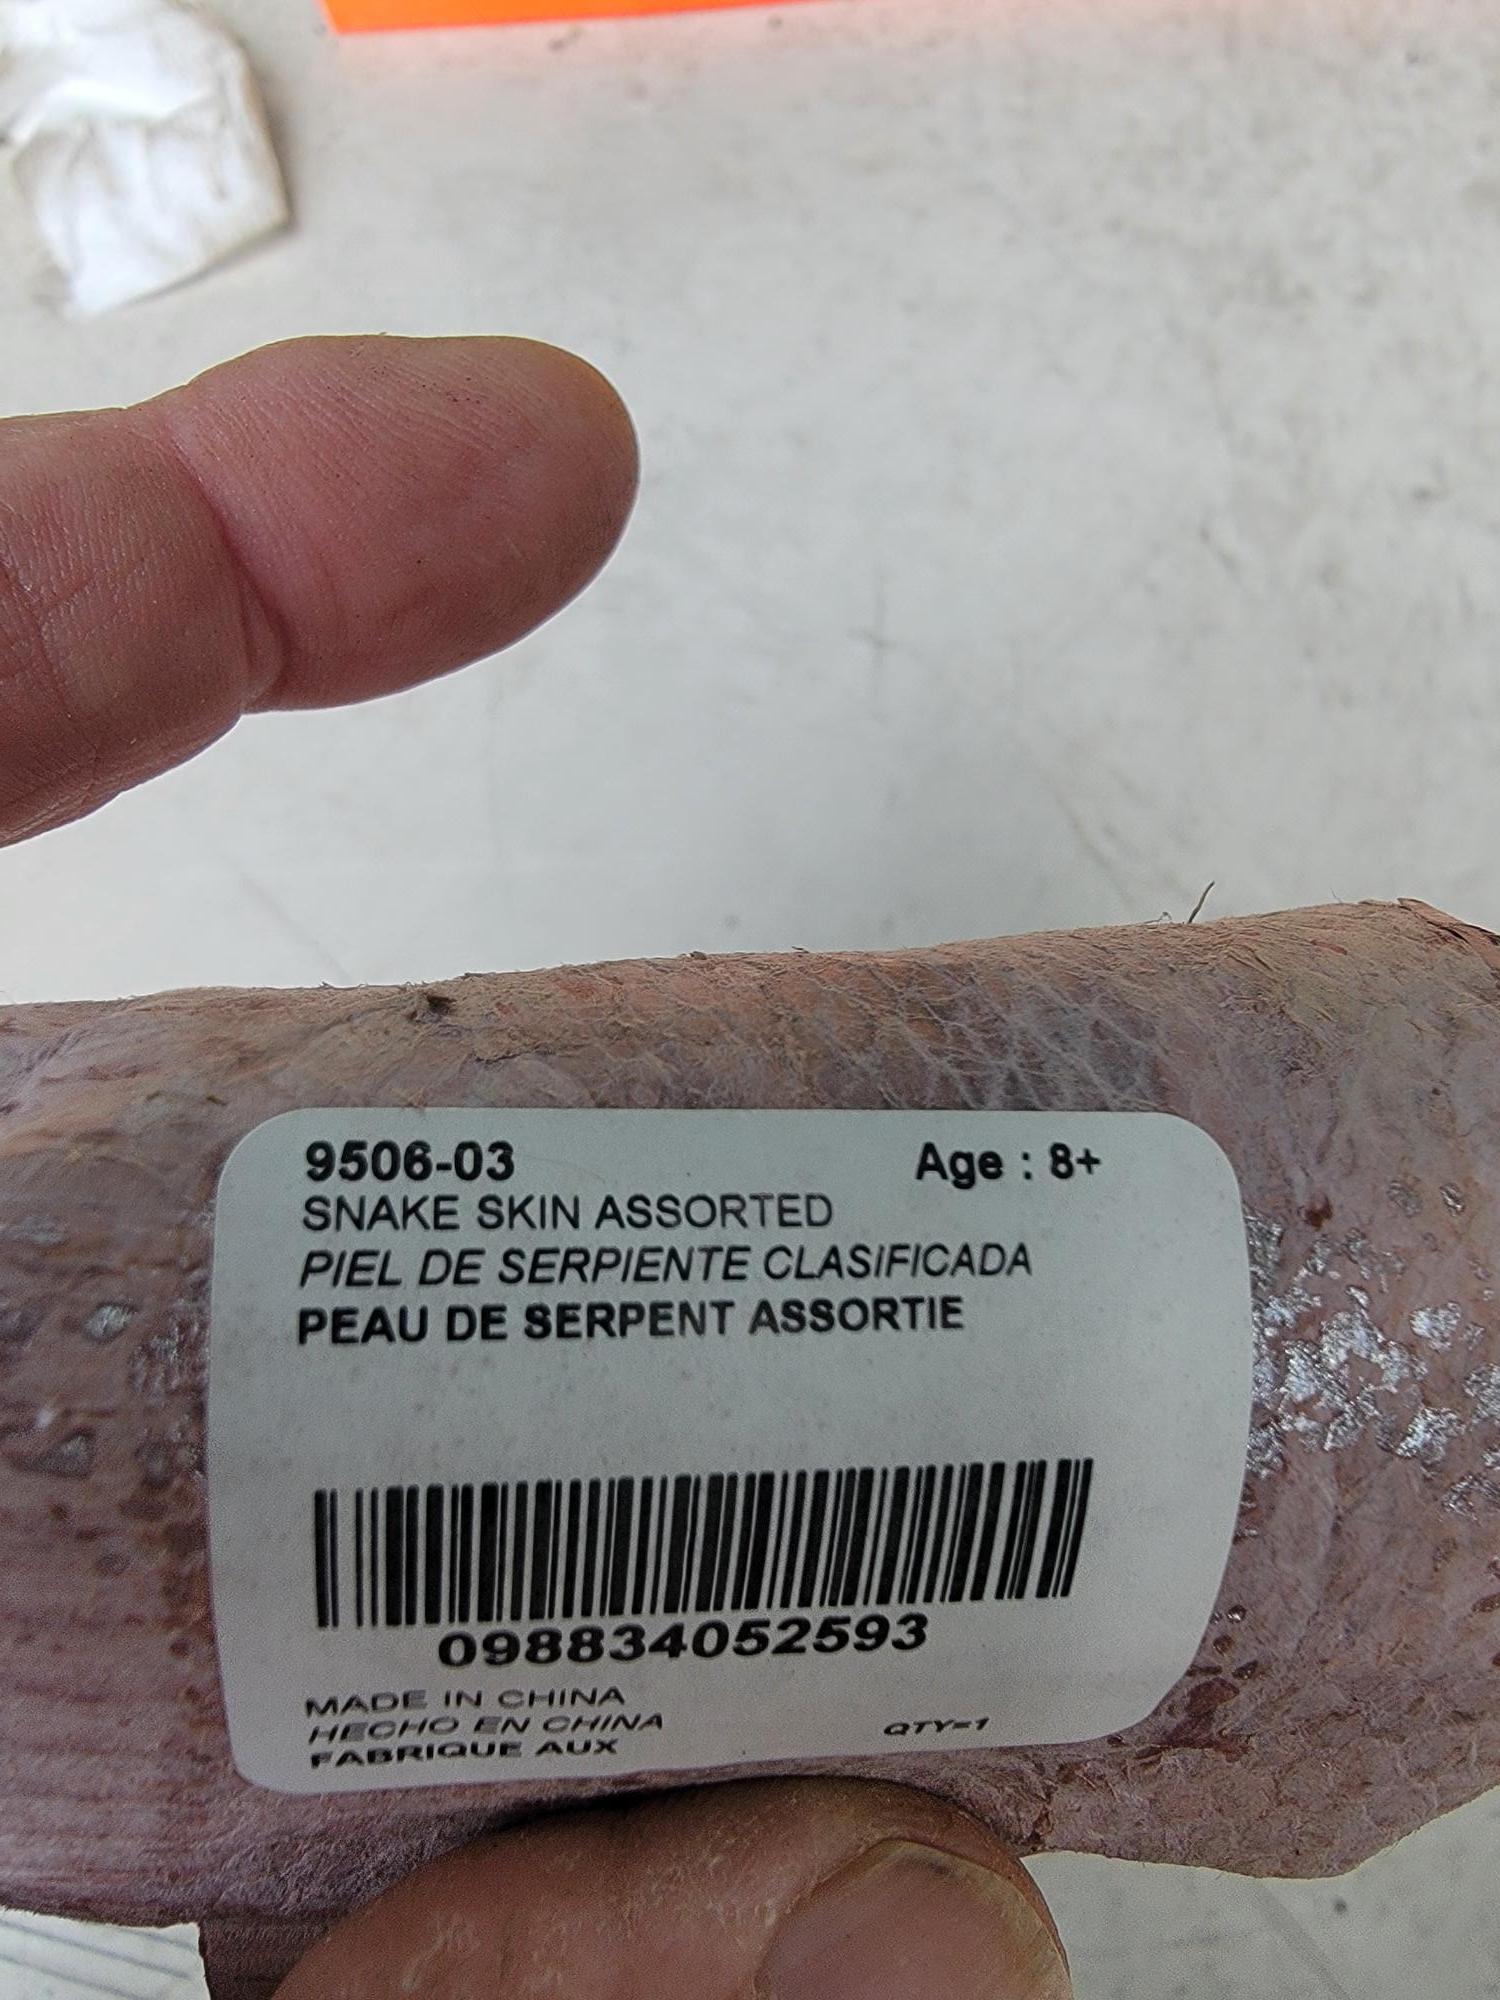
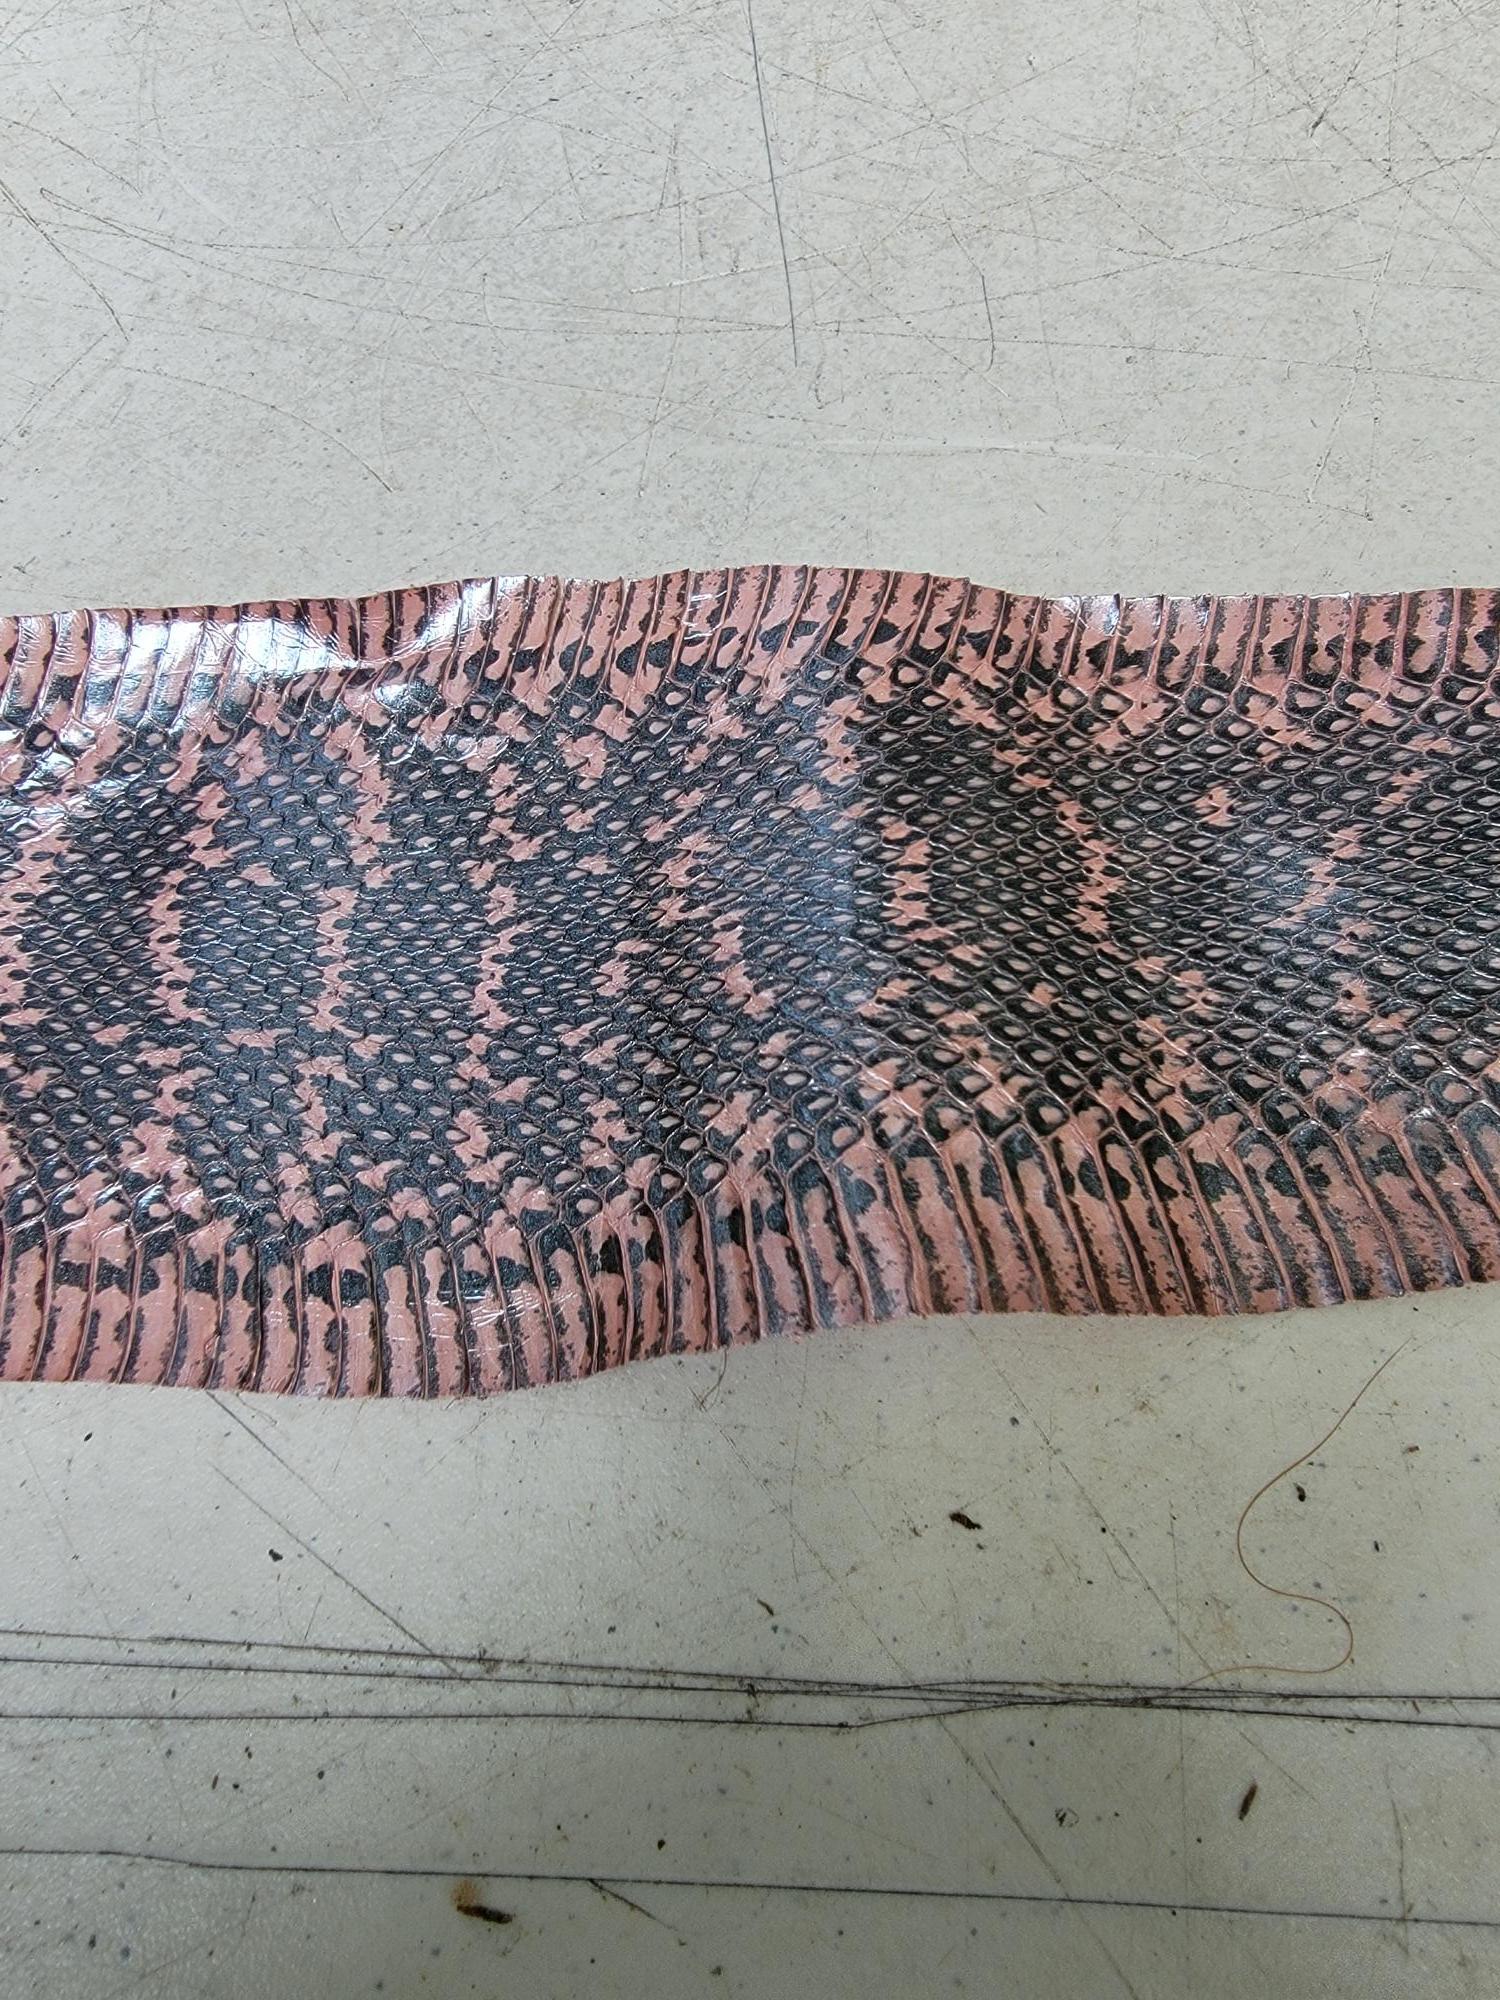
Need help ID'ing what I have.
BlackDragon replied to TomG's topic in Exotics, Reptiles, Furs and others
I've seen prices range $160 and up. Buckle guy sells python for $220 -
Any idea of the value? I have done a little checking on some website, but the pricing seems to be all over the place. I'm sure it's just me not knowing which to look at.
-
Have you tried this manual, which has a supplement at the end? https://leatherworker.net/forum/applications/core/interface/file/attachment.php?id=172342 Anything in particular you are looking for?
-

Pfaff 346-H2 won't pick up bobbin thread.
friquant replied to GPD's topic in Leather Sewing Machines
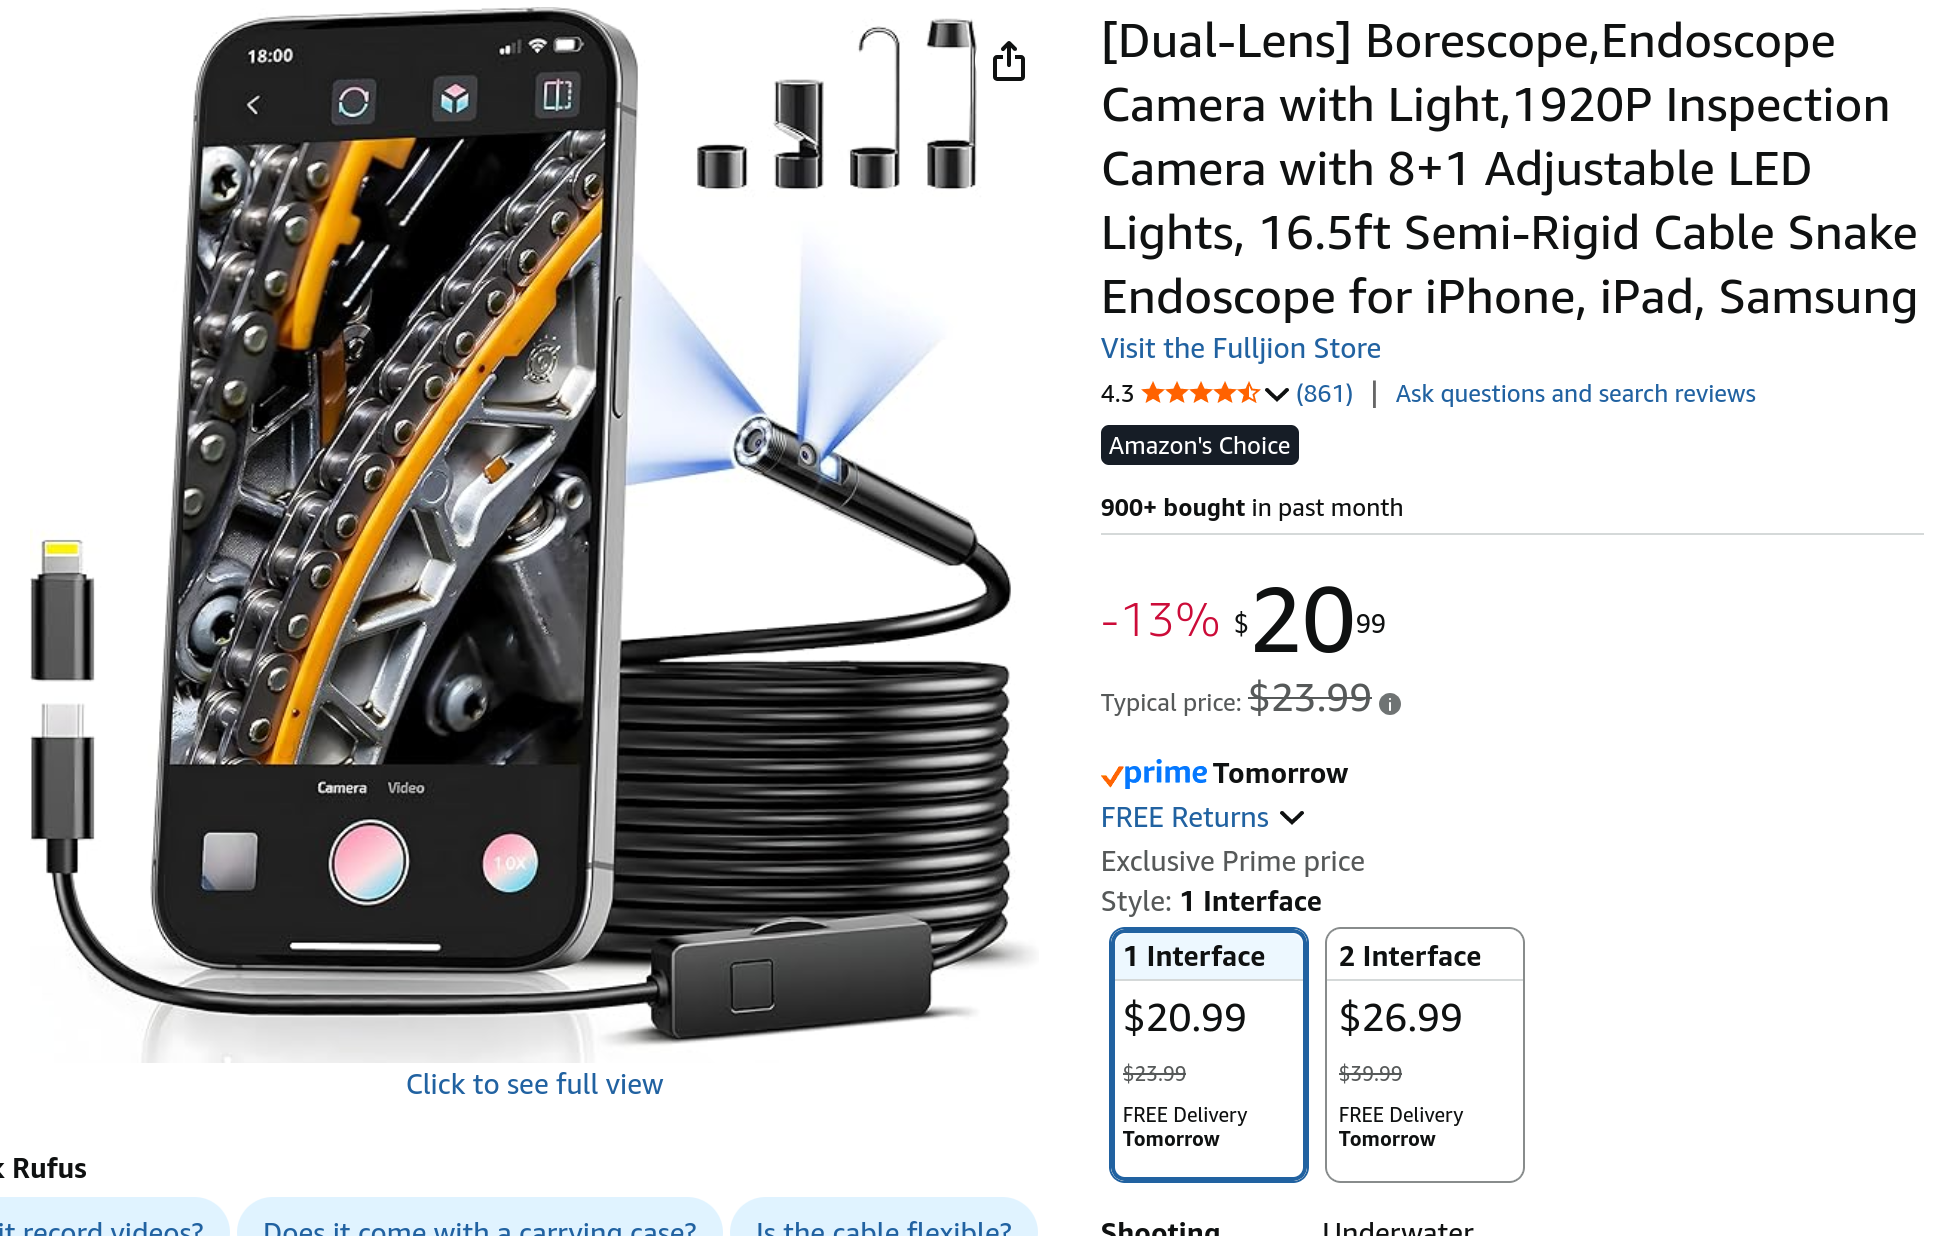
Double needle...nice! You can pull the cover off the backside near the hook, and put one of these endoscopes down there and see what's happening: https://www.amazon.com/dp/B0CKQH4VZY Then with a brand new needle in the machine (scarf on the hook side), and the machine threaded, put a piece of fabric or leather under the foot and turn the machine over slowly with the handwheel while you watch the (cell-phone screen of the) boroscope. Ideally, the needle goes down and stops. Then it starts to come up and forms a loop. And the hook comes by at about the middle of the scarf and grabs the loop and takes it around the bobbin. Watching it zoomed in like that will show you what's happening. . It may also help to draw a black mark at about the middle of the scarf as a reference point for where the hook will come by. Maybe the hook is arriving at the wrong time. Maybe the hook is too far away from the needle. Maybe no loop is being formed. Maybe the hook point is very dull If the hook bushings are worn, you may need to adjust the hook closer to the needle to make sure it all but contacts the needle when you actually sew. If the hook point is worn to where it is no longer sharp, you can inspect this and possibly re-sharpen if it's not too bad. -

Need help ID'ing what I have.
BlackDragon replied to TomG's topic in Exotics, Reptiles, Furs and others
I believe the white one is python. -
I’m looking for a mechanic’s manual for my Pfaff 545 H4. I’ve downloaded and bought different manuals but they all fall short usually users manual. I’ve tried the 1245 mechanic’s manual but I can’t get the numbers to line up with the 190 needle system. Please advise
- Yesterday
-
Couple of questions: i) How wide are the belts?? On this side of the pond the typical width is 1 1/2" (38mm) for say jeans while 1 1/4" ( 32mm) is more for dress pants. ii) How thick is the leather, 8 / 9 oz?? iii) Did you glue, staple, sew or rivet the belt loop? kgg
-
2 oz. calfskin is a decent choice for interiors as well. Also not as cheap as regular cowhide, but it's cheaper than kangaroo.
-

Latest Holster for single action 22
dikman replied to Hildebrand's topic in Gun Holsters, Rifle Slings and Knife Sheathes
Looks good to me. -
Always good to hear ideas from others. I thought of the angle grinder/cut-off wheel but because I've welded this one up I didn't want to take the chance of slipping and buggering it up! I'm still pondering the best way of mounting the die itself. Wood "block" to screw it to, cut the shape in wood with an engraver and rebate it into the wood, cut a slightly oversize shape from sheet metal and tack weld the die to it, a few options there. I've noticed that a lot of the die makers only use one set of basic bending tools, tape a pattern to the steel rule and then bend bit by bit until they get the angle/shape needed. I may be overthinking this (not unusual for me!).
-
Now that makes sense, almost idjit-proof to use!
-
Functional, should do to keep your pants up while you make yourself some fancier ones.
-

Veg tan tooling with chrome tan projects
dikman replied to Blitz Thunderlungs's topic in How Do I Do That?
I would think using either contrasting or complementary colours would be best, trying to match stained veg with pre-coloured is always going to be iffy - plus you're going to end up with a large collection of stains! -
Same here, I'd like to try the water-based stuff but for the money they're asking they can keep it, the solvent-based stuff has always worked well for me (plus as a bonus there are the fumes.....).
-
I once made a couple of notebook covers for members of our police force (SAPOL), they have their own logo of course but it is very detailed and finicky. There's no way I could have manually copied that logo but the little laser I had was perfect for that job. But yeah, it does make it easy for anyone to copy almost anything.
- 20 replies
-
lonsdaleleather I did check out the Makers which lead me down the contact cement cost rabbit hole. The cost for i) Makers is $23 USD ($31 CAD) for 16 oz, water based ii) Aquilim 315 for 16 oz is $45 ($62 CAD), water based iii) Weldwood for 16 oz is about $23 USD ($31 CAD), solvent based That said in Canada we can get i) Lepage heavy duty contact cement is $29 ($40 CAD) for 32oz, solvent based ii) L.L. ( Lonsdale) contact cement is $26 ($36 CAD) for 32oz, solvent based which is advertised as using the same "recipe" as Barge. iii) Zelikovitz 1882 contact cement is $39 ($54 CAD) for 32oz, water based My conclusion is the water based contact cements on either side of the border are a fair bit more expensive. Contact cement (water or solvent based) are cheaper in Canada. kgg
-
Where can I order thread for a Landis 12K to be shipped to me?
-
Me too! Lol I just don't make enough holsters or sheaths to warrant the price. It would be different if I made them to sell on a regular basis.
-
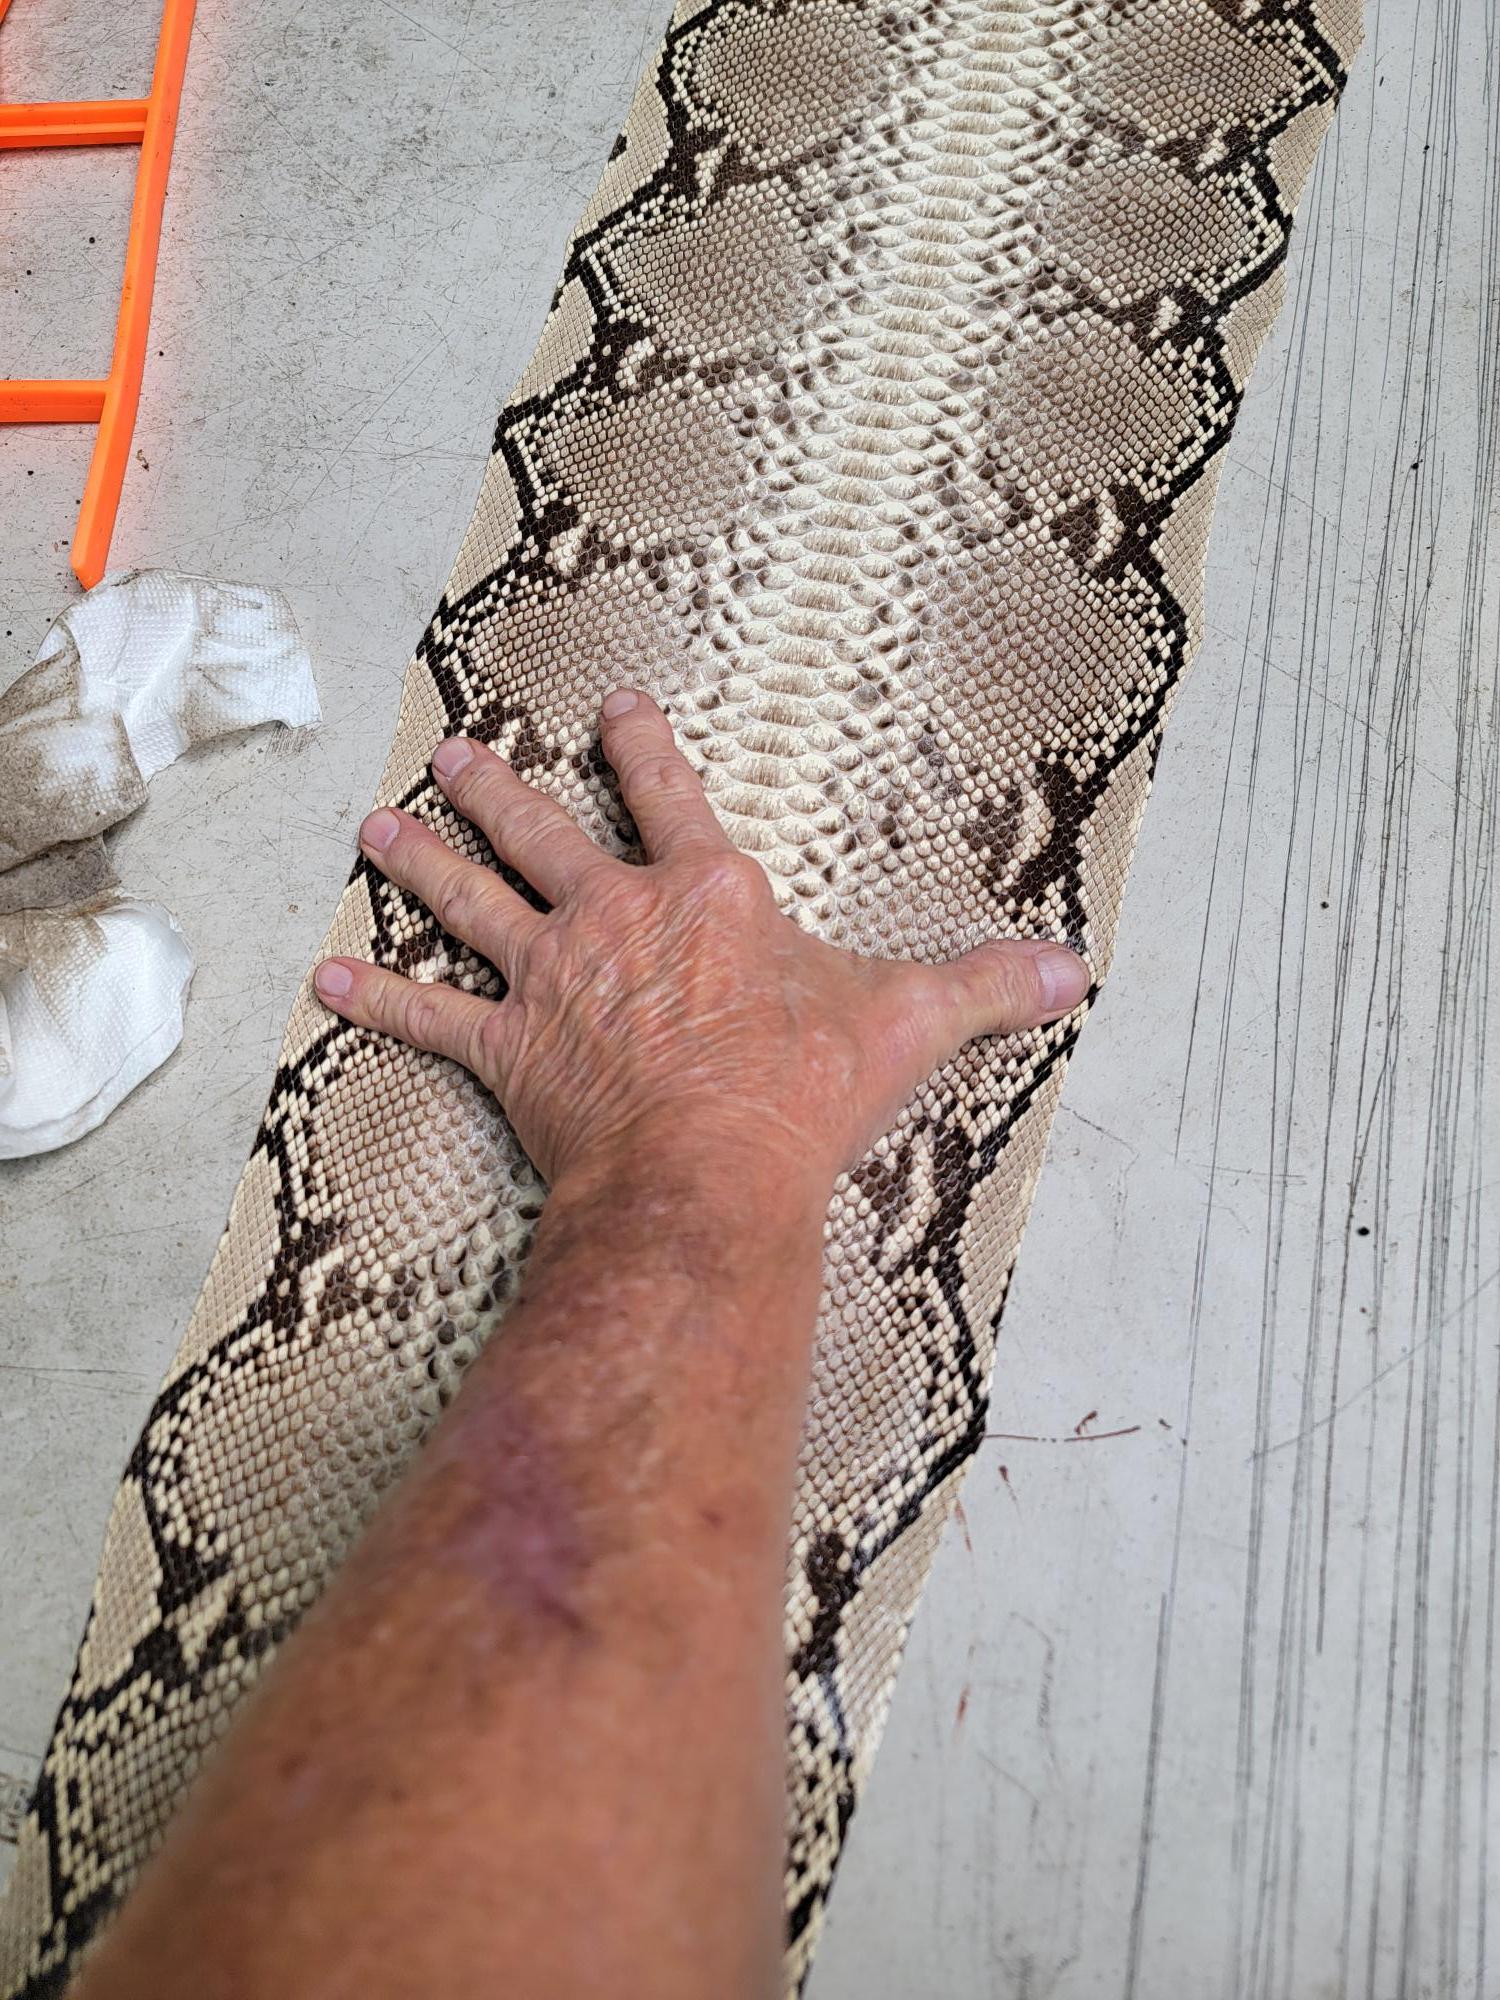
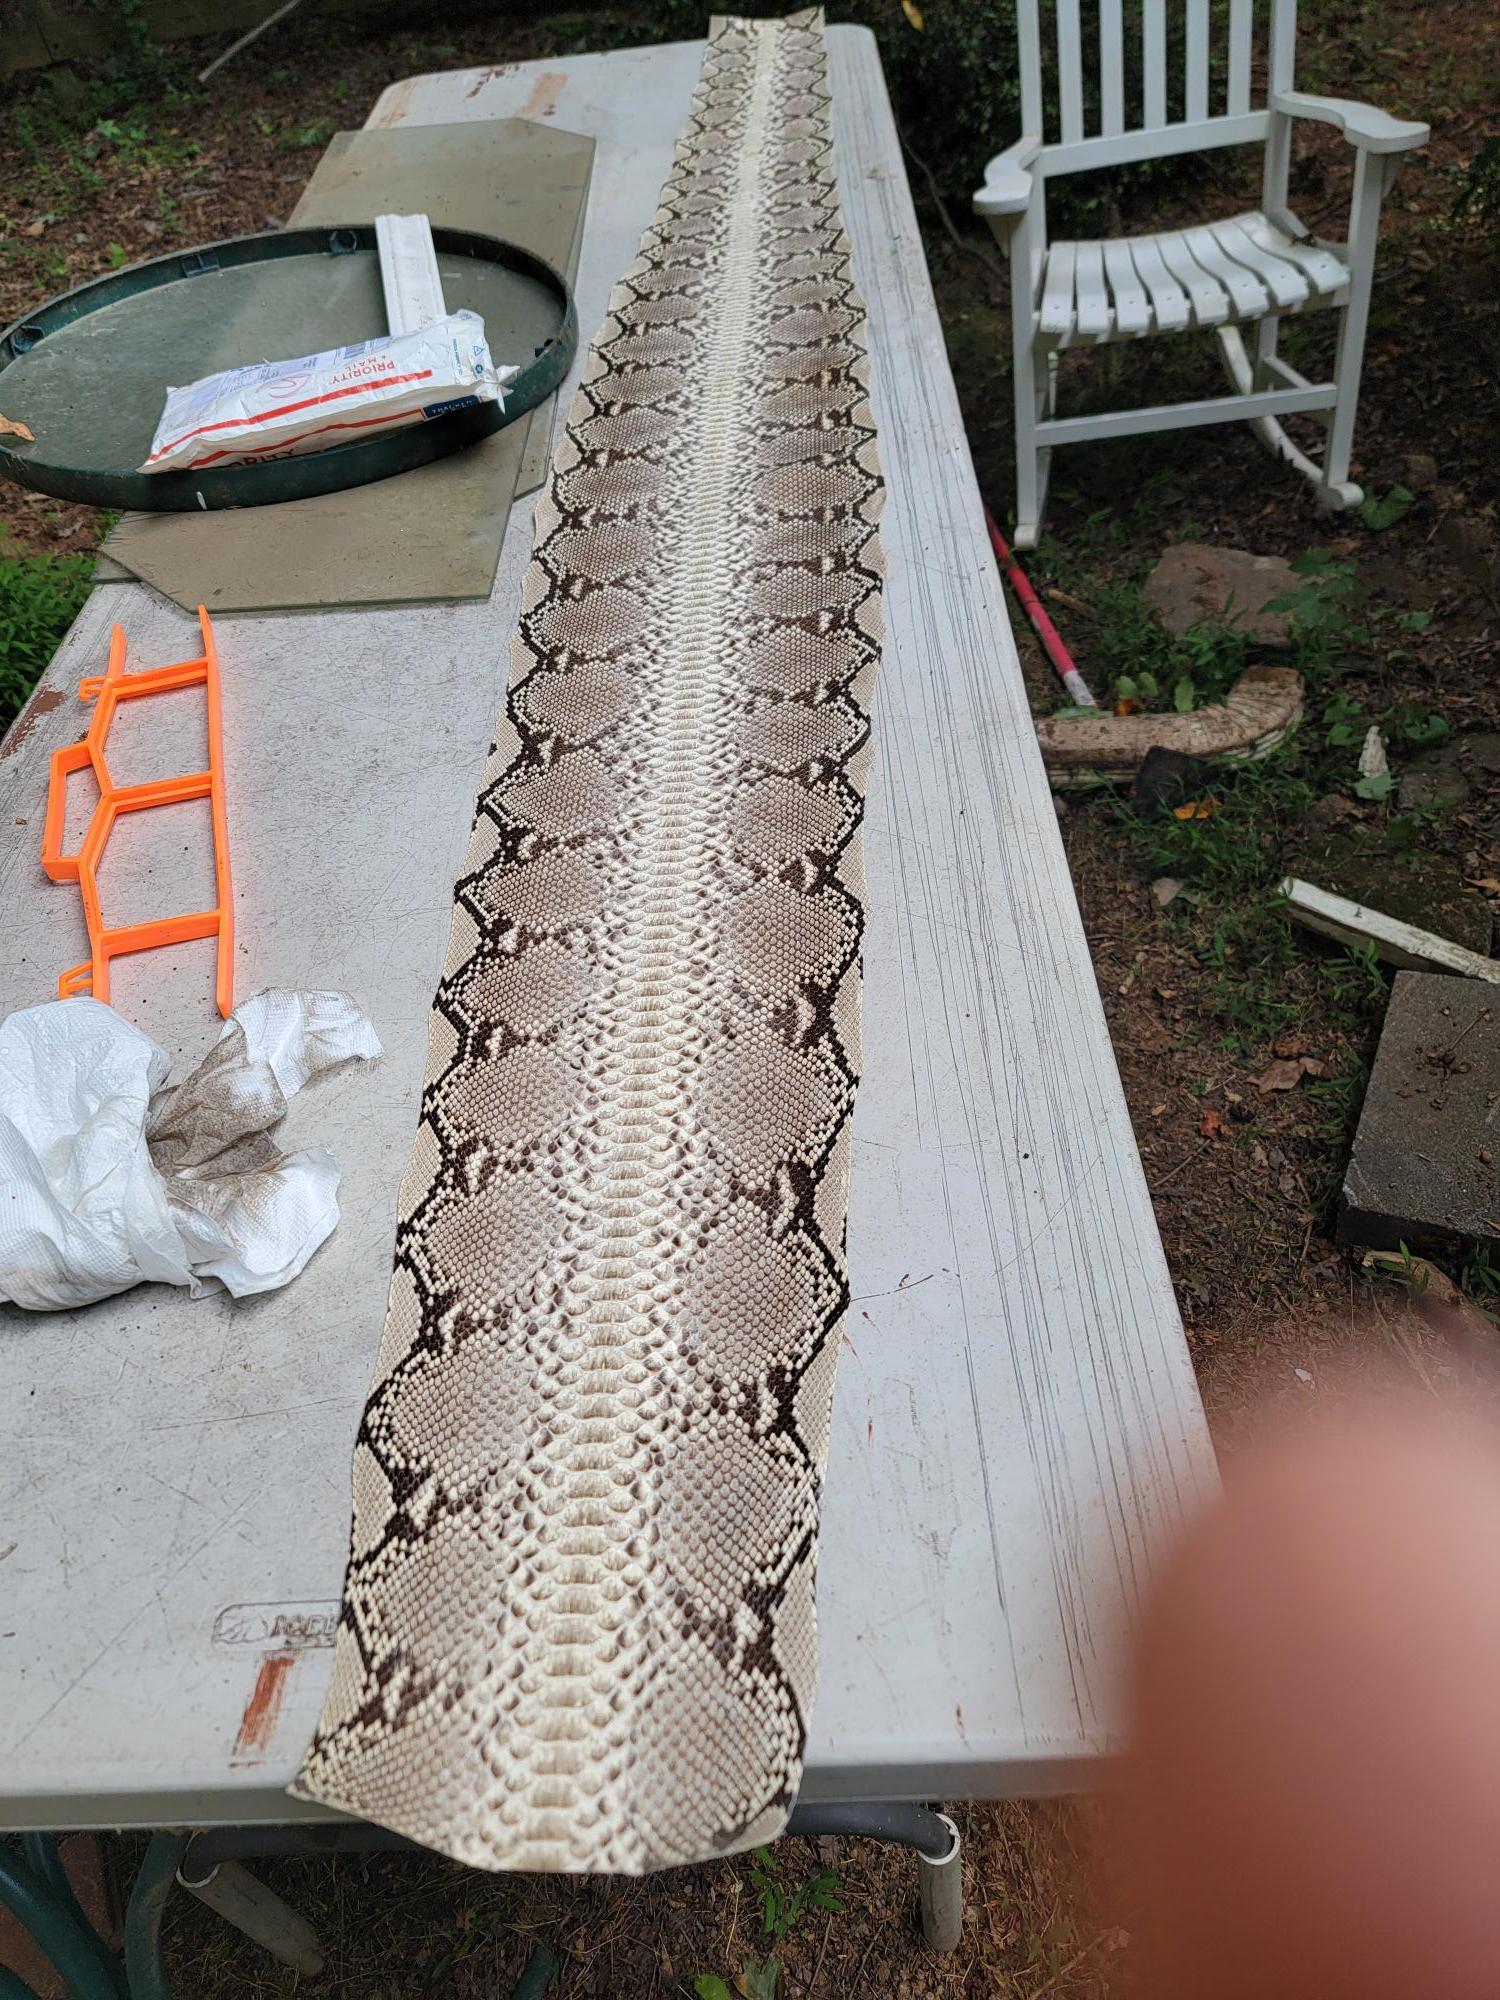
I bought these many years ago and don't even remember what kind of skins they are. The large one is 8 feet long and 9.5 inches wide at mt hand span. The smaller Tandy skin is probably 2 feet or so. The product number is no longer listed in Tandy's ever-changing catalog. In the near future, I am going to be selling off stock that I no longer need. Can anyone tell me what I have and the possible value?
-
Mephistopheloid joined the community
-
Nif joined the community
-
One issue I have had with the Aquillim 315 is it is difficult to get good smooth edges. It's like it leaves a rubber cement type of substance on the edge when you are trying to sand it. I have not been able to get rid of it. Which is too bad because and odorless contact cement would be awesome especially in the winter since I have to go out to the shop to use the regular stuff due to the fumes. Todd
-

Veg tan tooling with chrome tan projects
BlackDragon replied to Blitz Thunderlungs's topic in How Do I Do That?
Antique is used as a top layer after the leather is dyed. The leather is tooled, then dyed to a color of your choice, then you add a coat of clear finish like Resist or Resolene, then add antique and wipe it down. This will leave the antique in the crevices. Then add another coat of your clear finish to lock in the antique. Trying to match dissimilar leathers is going to be really, really tough. If you're going to use chrome tan pick a color then try to match the vegtan the best you can. Using a contrasting vegtan can work perfectly as well. Take a dark brown chrome tan then add a light tan or natural vegtan, it will work well together. I found this on pintrest;


