All Activity
- Past hour
-

Leather Painting and protecting projects
fredk replied to BareBonesRescue's topic in How Do I Do That?
As chuck says, dye the piece black first. Some like to dye it dark blue then black to give a deep black. I don't use Angelus paints. I use hobby paints meant for plastic models. There's a greater range and they work dead on as well as being cheaper. Johnston's Mop and Glo or whatever its called now, is a water-thin acrylic varnish. A couple of coats of that should give good protection This was a knife sheath I made and painted, it received no over-coating protective layer. It was painted with afore mentioned model paints after several years of use, about 10, it was returned to me for re-painting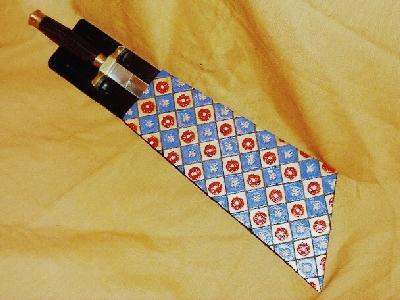
-
Choosing durable dog collar thread... linen, Nylex etc...?
Tove09Tilda replied to LakeOtter's topic in Sewing Leather
Hey, I only do dog collars at the moment and use polyester thread. The reason behind that - at least in my book - is that dog collars are not much cared for per usual, so a natural threat is not necessarily the best option. I would also as @TomE already did recommend waxing the threat. Also keep in mind your stitch length, leather thickness and the size of your needle, when deciding for a thread. For beginners in Handsawing cable thread is often recommended, but I find flat woven thread a bit nicer. That is basically a lot of trial and error to find your favourite. I work mostly with a picking iron with 7SPI on 3.5 to 4mm thick leather and a number 1 needle of 1.1 mm thickness, sometimes I also use a Number 3 with 0.9 mm. Depends on what I'm sewing. For that I use 0.7 mm in German "Forellenfaden" or 1 mm cable thread as that is what I can most comfortably buy here in Germany as hobbyist. If I would have the option I would rather obt for 0.69mm, but 0.7 is fine. That 0.01mm doesn't make the cake fatter, as we germans say. xD Personally, I would not groove the stitch, but that is something even old saddlers still fight over. The most logic argument I ever heard from a german saddler was, that if you groove the leather, you weaken the grain side, which is also the side, that is holding the strength of your leather. So if you have things that have to withstand a lot of pressure you don't groove, but rather invest into a good therad like Riza Tigerthread (I just know the old name, it's now owned by a danish company and had a slight rebrand and name change). Another saddler said to that, that he only grooves when the stitches are threatened to break by for example buckles rubbing over them. His logic was that stitches within a groove last longer as they don't get any rubbing force to them. So everyone seems to have a different opinion. I just personally run with what I know from all the English bridles I took apart so far and restitched/repaired and there no stitch groove was made, unless the stitches needed to be hidden. But that might be european/english rider (leatherworker) bias. My dog collars do great without a stitch groove and no matter what rubbish my rather wild young fellas are pulling off, they do their job, hold quality and that's basically all I'm asking for. Do with that information whatever you want, just wanted to add that, as someone wrote above that he would recommend you to groove. (That actually got me thinking, when the last time was, that I used a stitch groove). Best Tove -

Railed sig 1911 bbq rig
Stetson912 replied to Stetson912's topic in Gun Holsters, Rifle Slings and Knife Sheathes
Looks good -
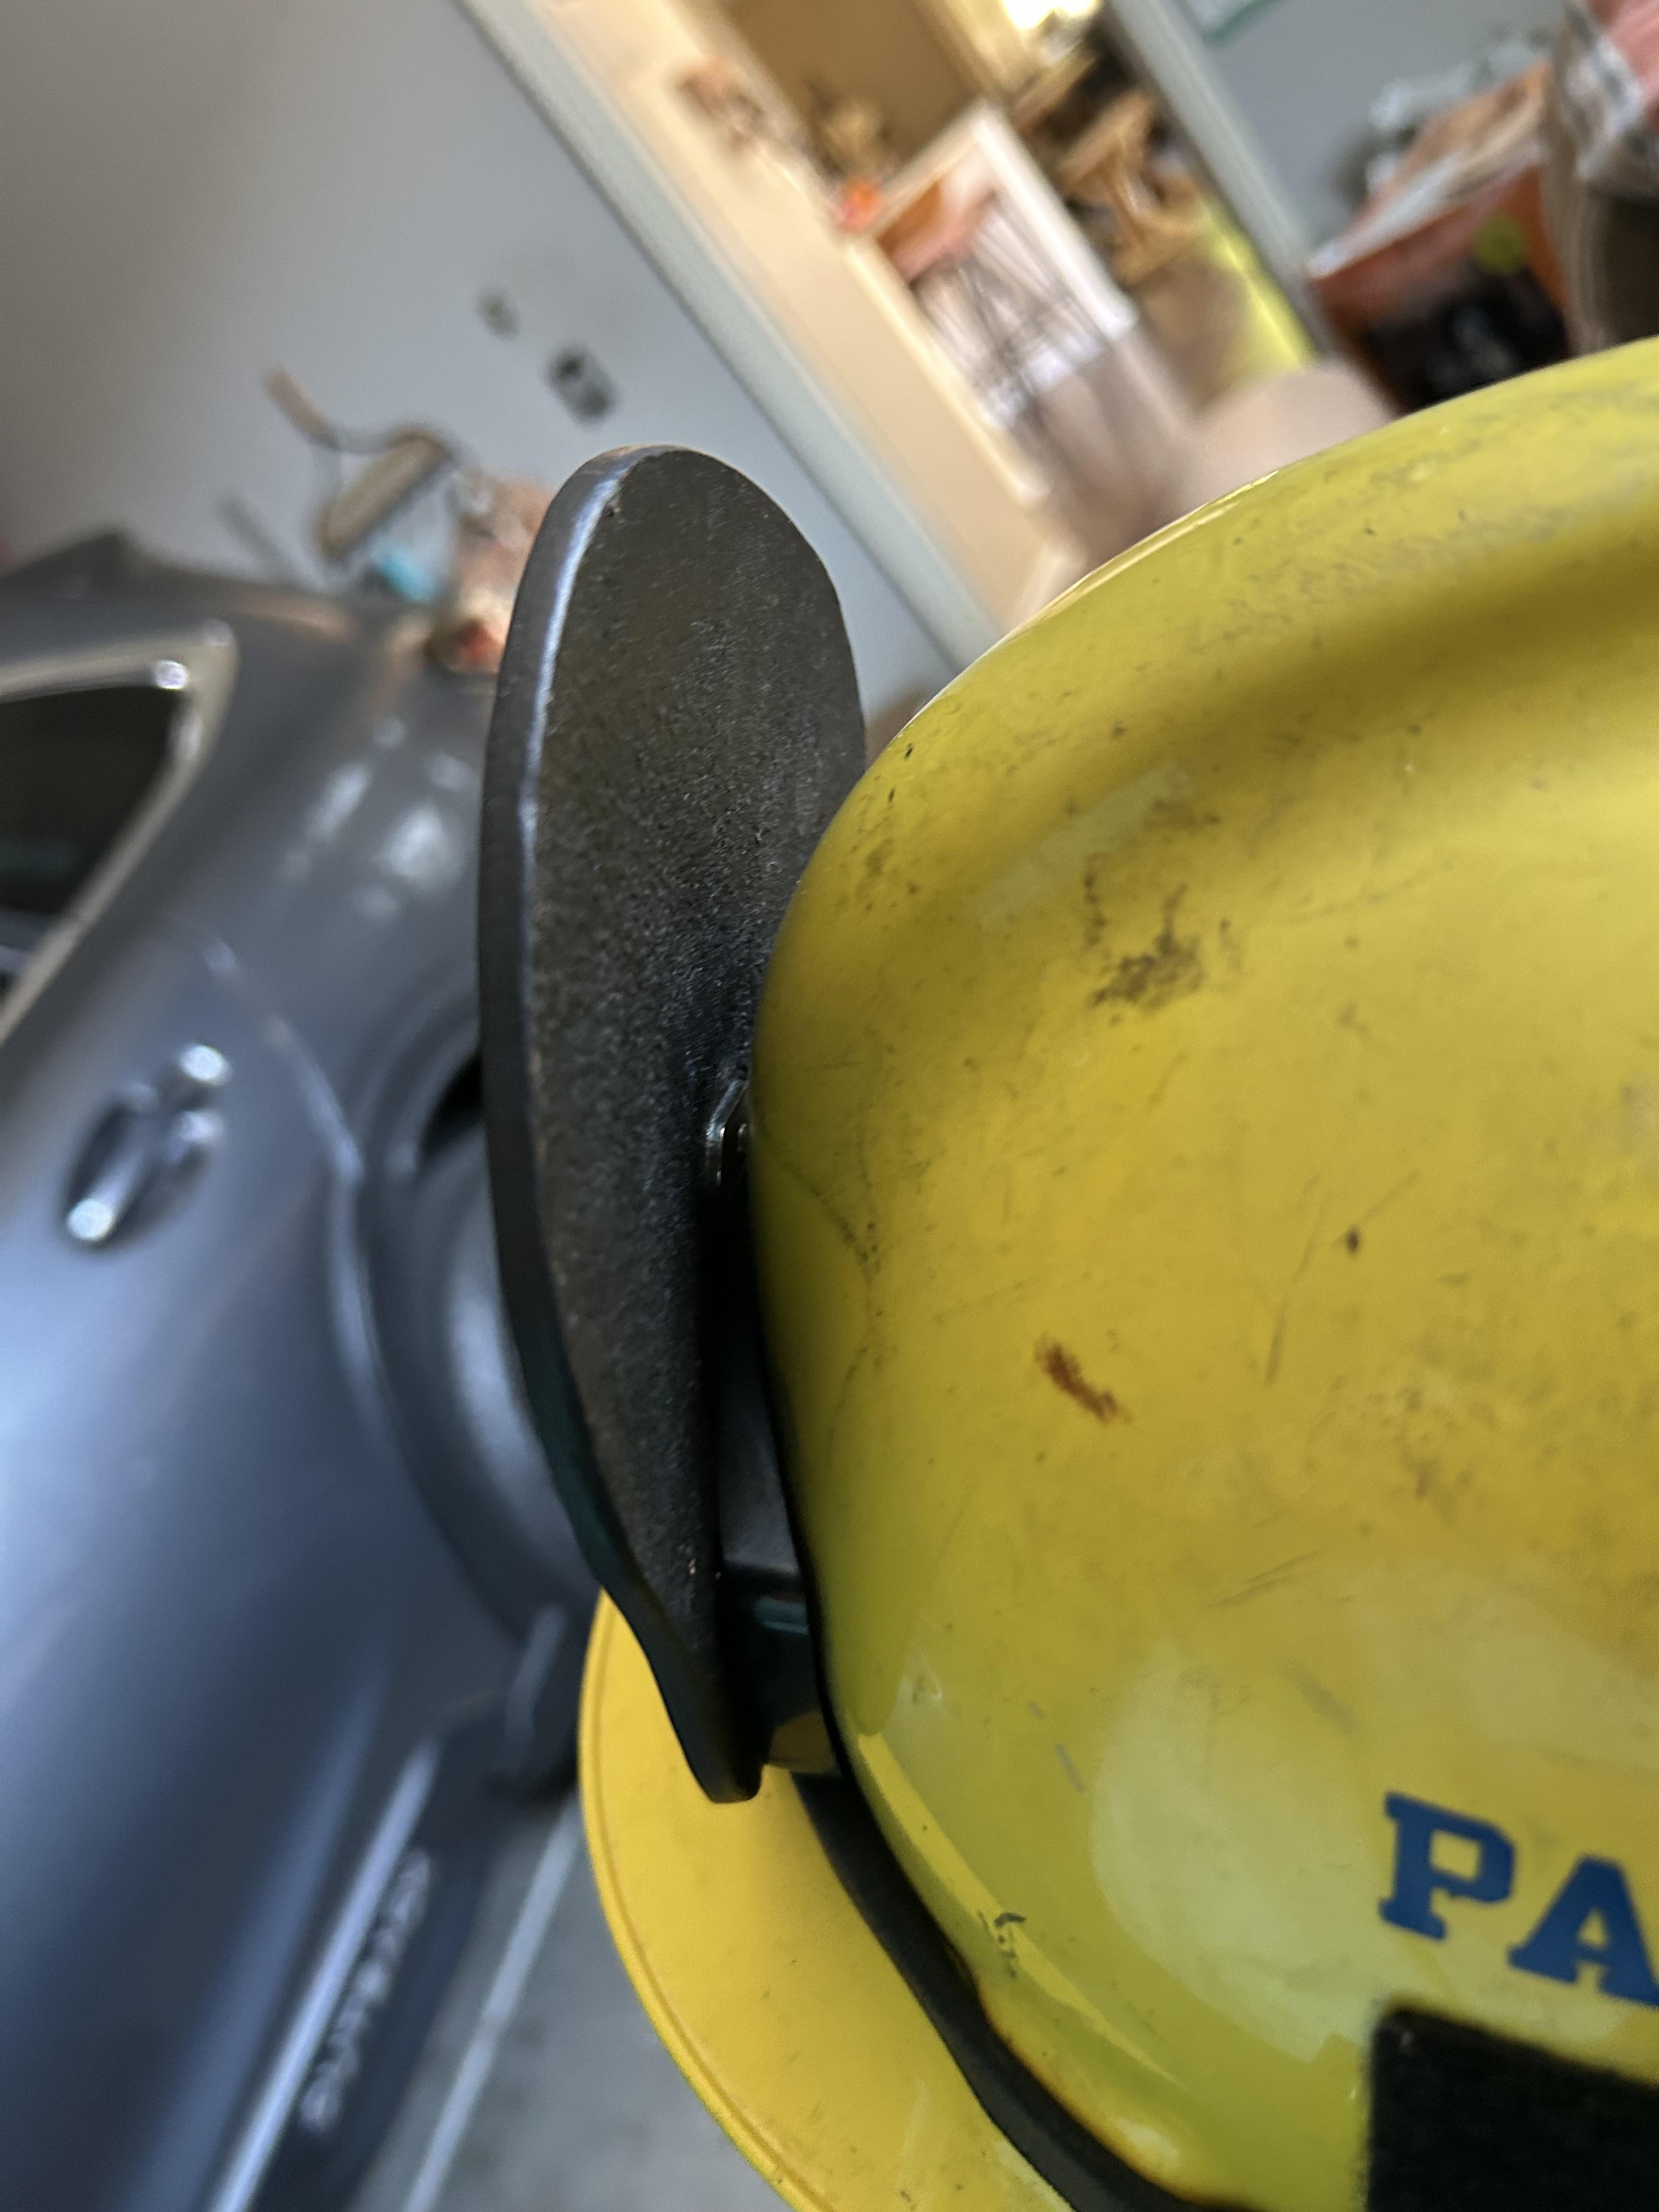
Looks awesome! I had been wondering what one of these would look like laser engraved! I'm going to start hitting up my firefighter friends now to see if they'll let me make them one haha. I agree with Bob. I would either start with black leather or use dye instead of paint for the reasons he mentioned. Thanks for the inspiration!
-

Leather Painting and protecting projects
chuck123wapati replied to BareBonesRescue's topic in How Do I Do That?
You did great man That is a good first start. I would try dip dyeing the leather black to start out; it won't scratch off, so half the battle is won. Have you searched the forum for these? I know I have seen a couple of threads on the subject. - Today
-
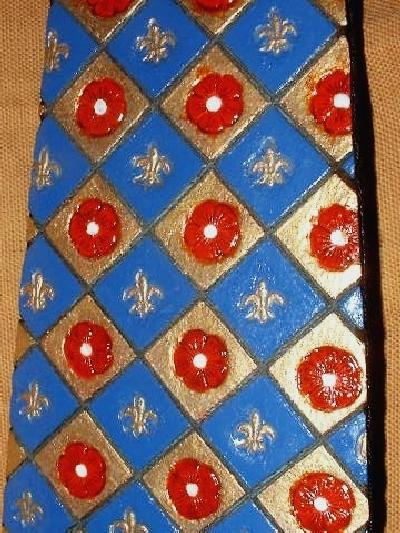
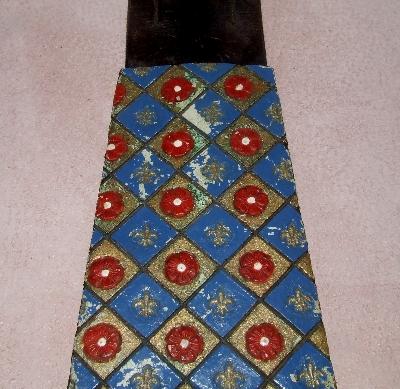
I am new to leather crafting and have slowly started to learn tips and tricks for painting my projects. I recently made my own Fire Fighter Shield, and this time I used Angelus Leather paint with an airbrush to do the Black top coat and needle and bottle to fill the banners and letters. After that, I then sealed with Acrylic Resoline 50/50 with water with multiple light coats using my airbrush for protection. I am wondering, with making shields or leather projects in general, how do you protect the paint or projects from wear and tear? With my fire shield example, due to the job and hazardous environments we work in, it will take some heat and abrasions during use, but are there any ways to better prep or protect the final product? I know it was recommended for my Black Shield to use pro dye instead of painting for better durability, but if I were to make a shield that needs to be White, what would be the best way to protect the paint due to no White leather dyes existing to my knowledge? I really enjoyed making and designing my fire shield and would like to be able to make shileds for other co-workers, like my captain, whose shield would need to be white, and my Engineers, who would need to be red. Eventually, I want to add some texture to my shields and tool in some of the background/ deadspace, but I am still super new to tooling and would have trouble knowing where to start with that. Any help or advice would be greatly appreciated. Looking forward to learning and growing my leatherworking skills and abilities.

-
aaaah I´m toooo much "singerized" I guess... 🤪 its a bit different on the 243 as it seem but you can move the feed dog holder sideways.... but its a bit more difficult as it seems. Looks like you have to loosen the 2 screws #25 but an actual picture of the underside of your machine may give us a better idea....
-
You can move the feed dog holder a bit sideways.The feed dog holder is attached to the feeding rod with 2 pointed screws (one on either side). When I look at this picture I think the feed dog seems to be misaligned. What I would do first is loosen the 2 feed dog screws and try to align the feed dog. Then I would try to move the feed dog holder to the left. It should be the same as on Singer or 45K or Adler 104 flat bed machines. I´ll take pictures tomorrow...
-
lol thanks yes, it's a tool above all made for a purpose, keeping the blade clean and dry and keeping my body parts in order. On that note, and to those making outdoor gear that may read this. One coat of whatever you use for conditioning or waterproofing may not be enough. Give it a day or two to soak in well, then, if it has gotten stiff and dry again, give it some more. This thing was bone dry again this morning, so I gave it another coat.
-
Pardon my ignorant behavior; I've not commented on the leatherwork Tis a nice bit of functional leather work.
-
In the UK; illegal to carry openly without a good reason, concealed is generally alright, but it needs to be secured
-
Next they'll be outlawing chain saws. Lol
-
Is it illegal to carry a hatchet or ax? Curious minds want to know… But Chuck, both pieces look really nice! —AZR
-
Chuck, returning to your question, I use warm water and dawn dish soap beforehand. I figure if it’ll get crude oil off of a duck, then it’ll get whatever oils that come to the surface without damaging the hide, then rinsed as many times with warm water as needed, and once more for good measure. Because it’s usually fully-saturated by then, I let it air dry for several hours (AZ, it’s a dry heat, etc.) And I do have logic regarding dawn, albeit it may be flawed logic… It pulls the oils out, leaving it thirsty, which then will pull the oils from the dye deeper into the hide (almost exclusively use Fiebing’s Pro). But again, my logic could very well be flawed. With finished leather, then I use saddle soap. Only exception I can think of is my couch. Then I use dawn if I absolutely have to, followed by saddle soap. So far, it’s worked well for me, but if you have a different process, then I’m all ears. — AZR
-
I'll bet those gangsters will just go down and turn 'em right in when you do.
-

-
Not totally banned in UK yet. In the UK its the weapon of choice for gangs. To be killing other gangs or often innocents (yes, real innocent people). We don't have any real wild areas where a machete is needed but a few groundsmen and gardeners have them in their tool boxes
-
I'll do that tomorrow, the day is over on this side of the Atlantic and I am no longer at the workshop
-
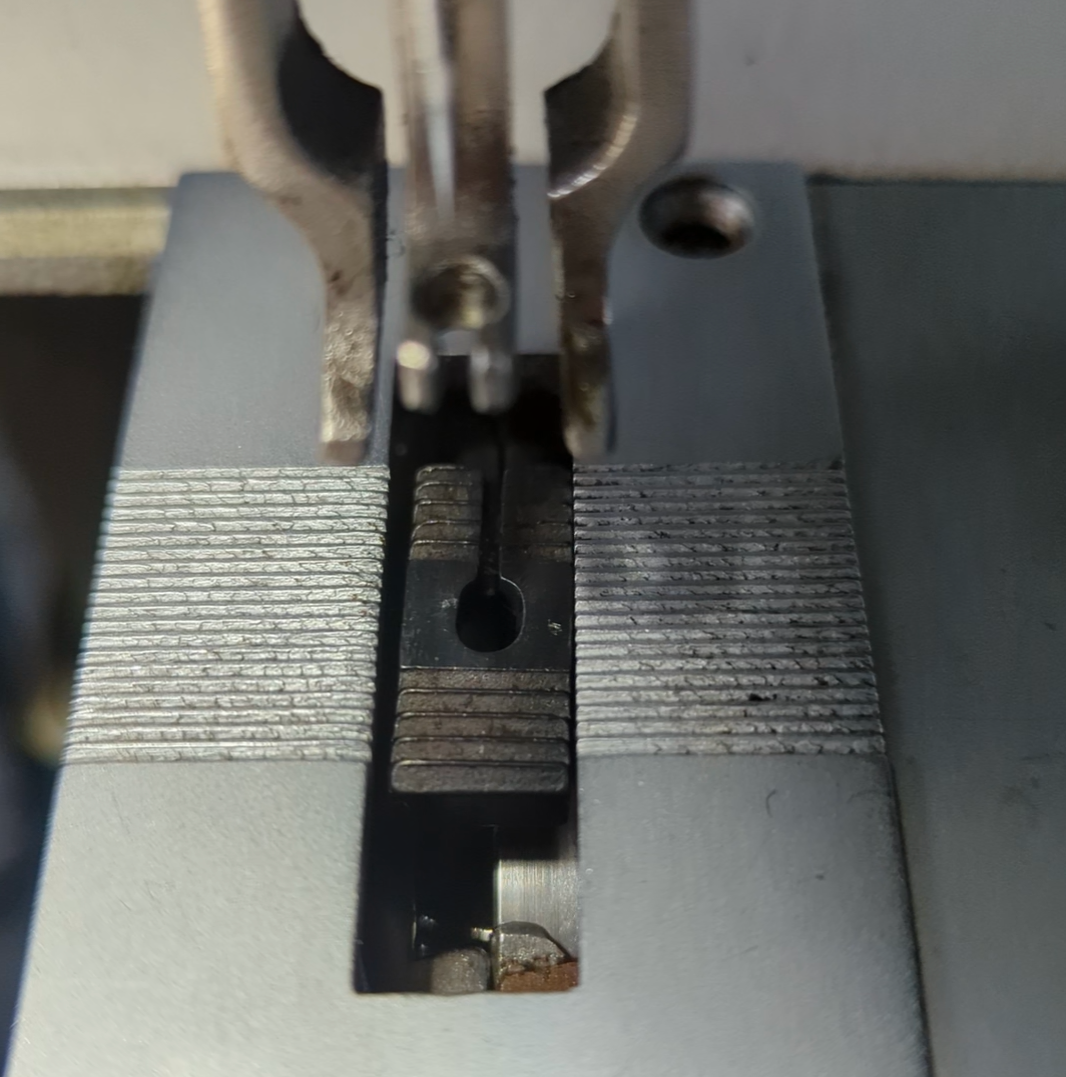
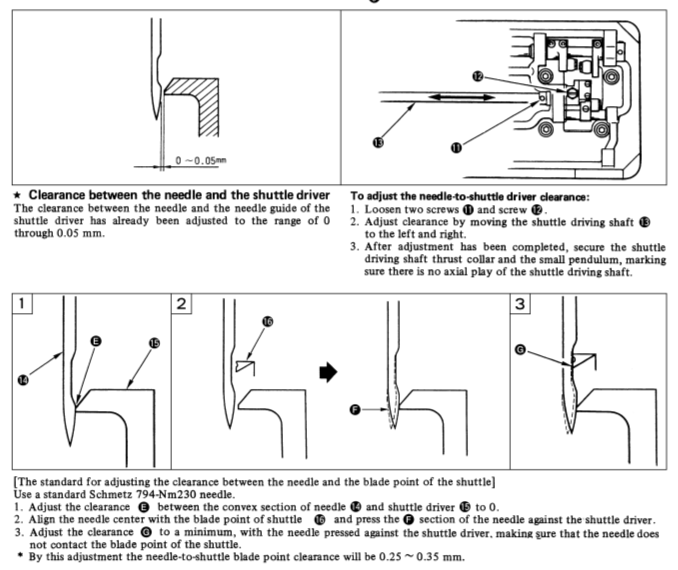
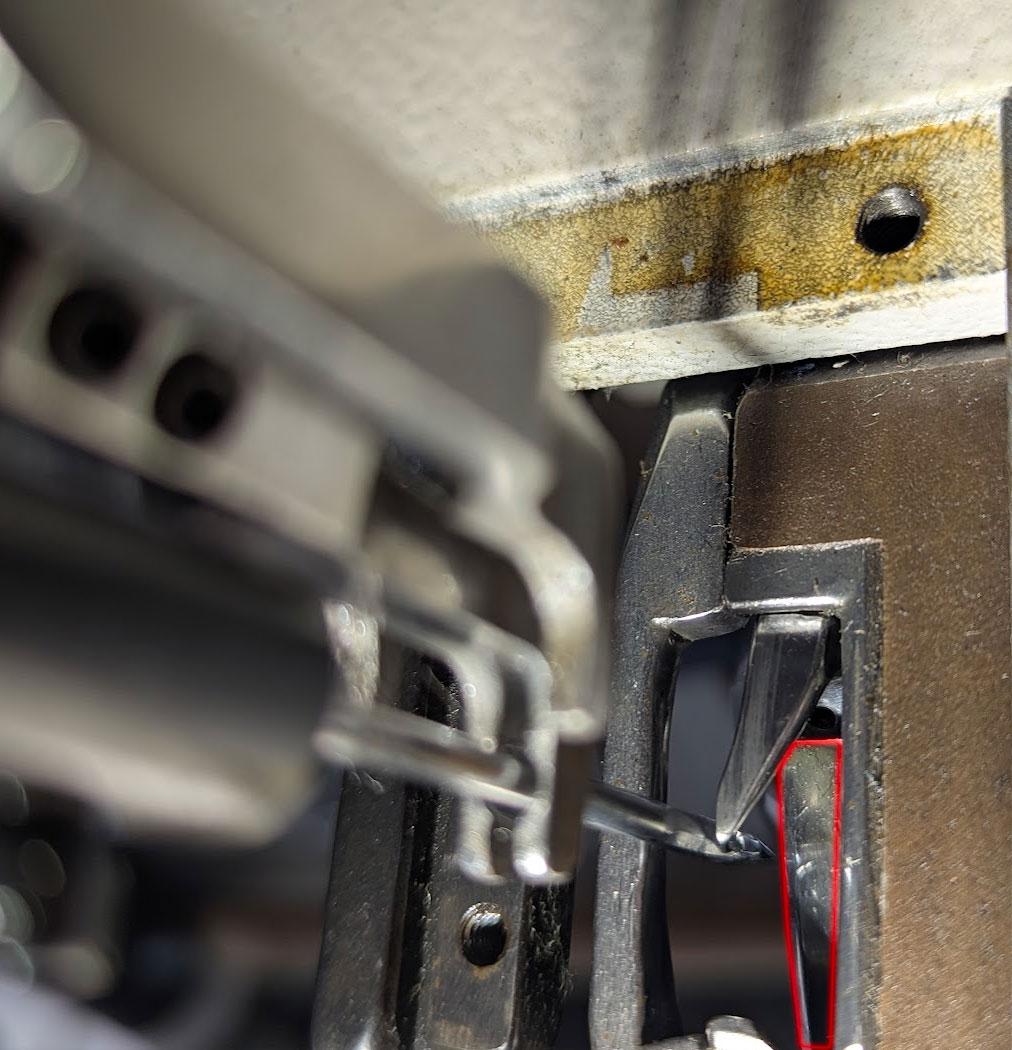
@AlZilla It's in the post below the one you mention that I am wondering if it's bent or not (post is still visible on previous page). I cheched it and can not decide if it's bent or not... It's hard to tell when you have nothing to compare to so I ordered a new one but won't get it before two weeks Meanwhile, I put a 230/26 needle in the machine (I normally use 160/23), as asked in engineer's manual and needle was rubbing on the shuttle point so I set "needle to shuttle clearance" accordingly, it's not rubbing anymore I am now trying to set up "needle to shuttle driver clearance" but I am confused trying to understand what I have to look at. Is it the part of the shuttle circled in red in my pic ?
-
I use a contact adhesive all the time For small areas or seams I use a tube glue called UHU. For larger areas I use a brand none of youse would have heard of. I work straight from the 1 litre tin. Sometimes I pour in a wee bit of Evostick adhesive cleaner which acts as a thinner too and it stops the glue going 'off' I rarely wait for the glue to go tacky. One generous coat of glue on one of the item parts then I stick the items together and clamp up. After a couple of hours I remove the clamps and tap down with a small rubber-head mallet Never had a problem doing it this way and 99.9999% of the time I get a good glue bond
-

Choosing durable dog collar thread... linen, Nylex etc...?
TomE replied to LakeOtter's topic in Sewing Leather
Tapering the end of the thread works for heavy linen thread, but not for synthetics. For linen I wax the thread, ends and all, after making the tapered ends. The wax will help keep the thread from slipping through the eye of the needle. However, most of my hand sewing is done with bonded nylon thread from my sewing machine. For hand sewing I wax the nylon thread and rub the wax with heavy wrapping paper to smooth it out. I use waxed polyester thread (0.04" = 1 mm) from the Maine Thread Co for some heavier jobs like sewing billets on a saddle. For that task I double the thread, tie a knot in the end, and use a single needle backstitch instead of a saddle stitch. -
I refill a Barge quart can from a gallon can, adding Barge thinner as needed. Made a funnel from a 16 oz plastic bottle. What is everyone's favorite glue pot?
-
yea, i have a smaller glass weldwood bottle with a brush that I transfer to. You can also replenish the acetone as needed if it starts drying up. i usually put a bit in the can after opening it or transferring.
-
I replace the lid after I finish gluing an item. I also tap the lid around the edges with a mallet. Used to do a lot of plastic laminate work. Bought the contact cement in five gallon buckets. Also: I used latex contact cement on laminate, only use solvent based on leather.
-
OK? So are you guys popping the lid on wildwood glue each time you use it or are you transferring the glue to a different container and using a different type of applicator? I've been using barge quart cans with the applicator and a pair of channel lock pliers to get it open every time I need it. Is their a different more convenient method?