


JDFred
-
Posts
164 -
Joined
-
Last visited
Content Type
Profiles
Forums
Events
Blogs
Gallery
Store
Everything posted by JDFred
-
Blevins buckle oxidation
JDFred replied to BlackDragon's topic in Saddle Identification, Restoration & Repair
I’ve never seen aluminum Blevins buckles. All the ones on my saddles are stainless. That is something to look for in buying a used saddle. Blevins buckles are used to adjust stirrup length. -
I agree her use of tools was horrible. Her stitching was equally so, not only was it just a plain running stitch but it was a fairly loose one at that. So even if this would be an acceptable repair the stitching would make it not so. It really just shows her lack of knowledge in horsemanship. Setting a rider up for potential equipment failure not puts the rider in danger but also sets the horse up for failure weather through loss of confidence or through an injury. I’ve was in a horse wreck dragging calves to the fire and had the rope get under my horse which led to equipment failure, my fault for thinking it the reins were ok, I ended up pretty cut up over the deal. I can’t imagine what it could have been if my latigo of off billet had failed.
-
Beautiful work as always. Don’t let the keyboard warriors get you down the bridle is just a tool like any other, in the wrong or inexperienced hands it can cause problems. As you and Jonas already pointed out it is the riders responsibility to ensure proper tack and gear fitment. Keep up the good work.
-
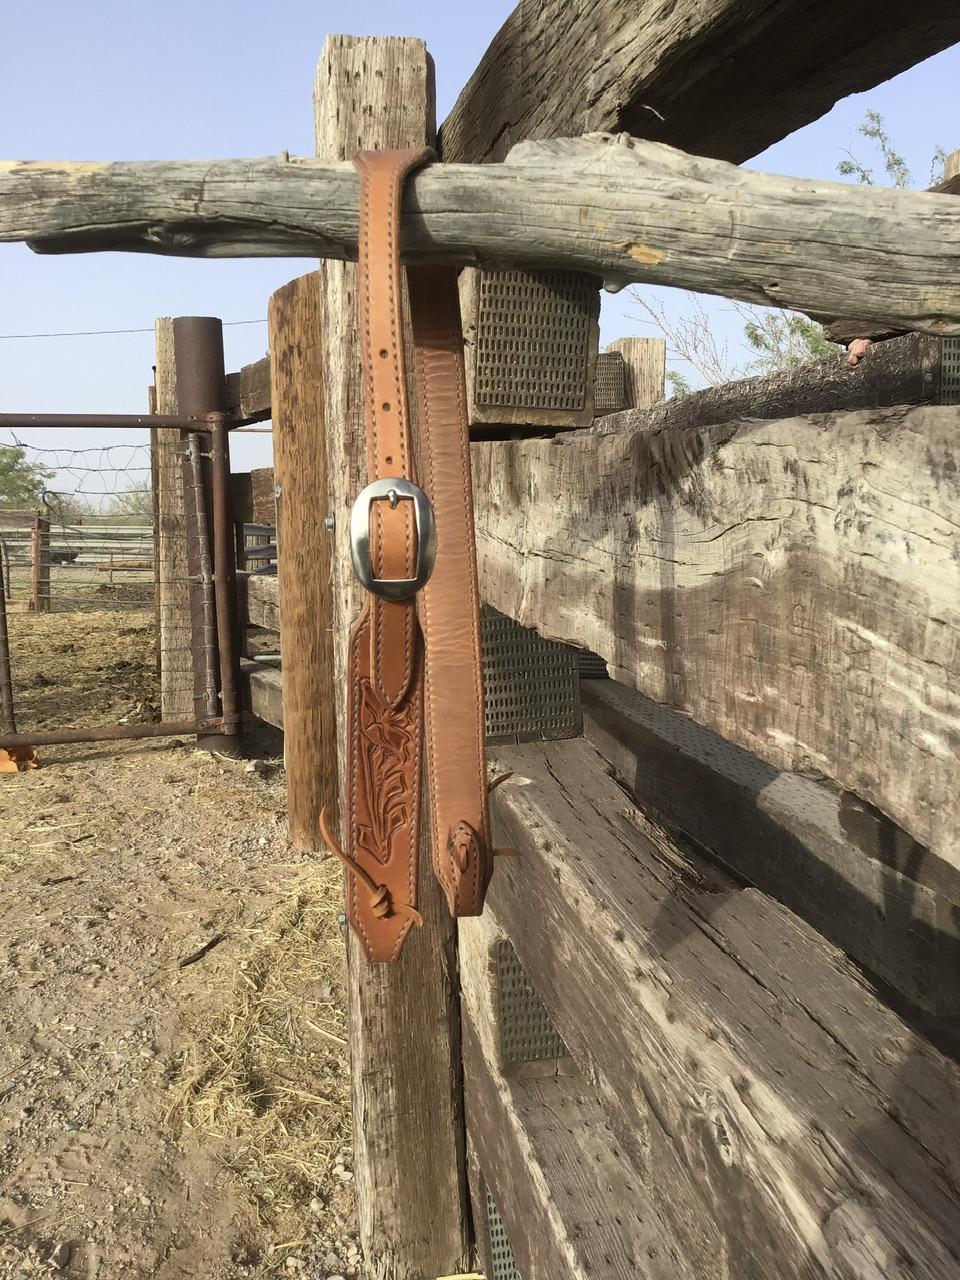
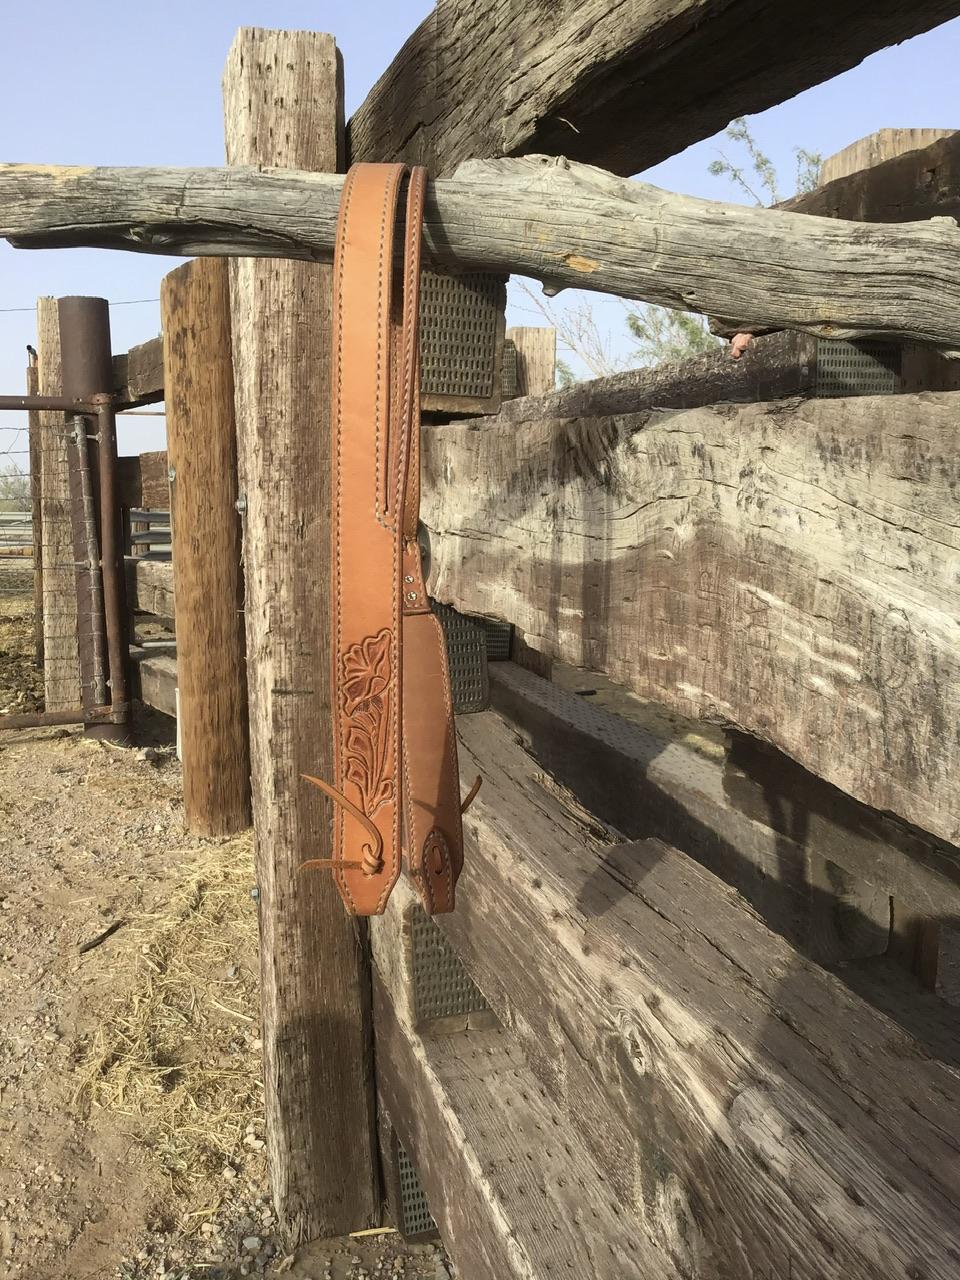
The ones I have been making are 8-9 oz veg tan lined with 2-3 oz veg tan. Then oiled the heck out of the liner and not quite so heavy on the outside. I like split ear head stalls. The leather I’ve been getting from Tandy, but I just ordered some Hermann Oak from Panhandle Leather, I can’t wait to try it out. I also ordered some Latigo to try lining with. Here is a picture of one I built that I’m starting my 3 year old in, and another I built for my daughter to ride her mule in. Hope this helps.


-
Thank you for the tool tip on setting them and also for indulging my random question.
-
What size rivets were you using? Based on yours and TomE’s usages they should be plenty strong. It is interesting that they caused a blue stain on the leather, in my experiences aluminum stains black and oxidizes white it must have something to do with a reaction with the tannins in the leather. Were you using chrome or veg tan on your shields? Maybe the tannin makes a difference? As to moisture causing problems… the only moisture problems we have in far west Texas is there is none. Was there any reason for using brass washers with the rivets instead of aluminum washers? Maybe that could’ve caused the blue staining was a metallurgic reaction from dissimilar metals? Thank you for the help and sorry for the random rambling questions and thoughts.
-
Accurately cutting "stretchy" leather.
JDFred replied to Shadders's topic in Leatherwork Conversation
What Fred said. -
Yes they would be hand set. It is a good point that the post might buckle with a glancing blow with aluminum being soft. If you have used them to hold billets onto a tree it the would probably be strong enough to attach buckles to a head stall. One day I will remember to modify my pattern before I cut it out to accommodate sewing in buckles. I usually remember about the time it is time to attach the buckle. However if I could remember the strength question is voided and I could use them as a solely decorative application. Thanks for the help.
-
I have been using Chicago screws, I always wonder if they are going to back off, so I put glue in them then I wonder if I’ll get them apart if I need to. Which I know is contradictory since rivets are hard to get apart. The other thing I really like the way rivet and burrs look which is what lead to this question.
-
Good thought about corrosion, I kinda forget some places actually have moisture. But sweat may cause problems.
-
Has anyone used aluminum rivet and burrs? I was in Tandy this weekend and saw some for sale, it got me wondering about their strength and durability. They were marketed as decorative which is what sparked the question. I really like using copper rivets they are pretty strong and give a nice look; however when used with stainless hardware it clashes. Aluminum would solve this problem. I know aluminum is a reasonably strong metal so I think they would be fine but anyone with experience using them that has any input would be appreciated. If it helps my intended application for these would be for attaching buckles onto horse headstall or show cattle halters. Thank you for any help.
-
I have never worked with canvas so I don’t know, but I can’t imagine it affecting any edge binding that you do. It might not take edge paint very well if you decide to go that route. There are some pretty good YouTube videos on how to do edge binding, my wife has been working on a purse that she is using a Mexican round braid around the edge. Chrome tanned leathers will also help you with keeping your malleability but it my be pretty floppy if you use it for the cover but an edge braiding will shore it up pretty well.
-
That sir, is a fine piece of work, good job.
-
I would recommend not using suede, for the reason you mentioned, unless you have a really ugly flesh side you’re trying to hide. However I would still would say line it with a grain side out. As far as over lap I wouldn’t. If you use two pieces of veg tan leather your edge finishing should be able to hide the seam, or you can lace the edge like Alzilla said, using edge paint or Fiebing’s Edge-Kote to hide the seam if you’re like me and your burnishing is not tip top. Hope this helps.
-
Are you shaking the dye before you use it? May be a separation issue.
-
A second generation of long-slide Glock holsters
JDFred replied to DeWayne Hayes's topic in Show Off!!
Those are pretty dang cool. Very nice work. -
All your projects are turning out very well. I really like your creative use of the veiner in this one. It’s pretty cool.
-
I would use leather that matches the panels on the bag in 6-7 oz. I like the tongue and loop closure you have on the bag maybe you could add a hidden magnet or snap on the end of the tongue. On your gusset if you use a lighter weight leather it will help prevent the rolling in of the panels as the panels would have more rigidity than the gusset. It would also give you the option of using a different color leather for a nice contrast. If you do that make your closure match the gusset color to tie everything together.
-
You have a good design on your bag. I would use leather on the shoulder strap and maybe put a small tab on the tongue of your bag closure that locks into the loop to help keep it closed in case of a spill. Keep up the good work.
-
Thanks for the tips. I like the felt idea I think I’ve got some pieces from a saddle pad where I cut a wither relief out that might work. Maybe I’ll take the plunge and get some tokonole next time I’m in town.
-
Thank you. I agree with you and Jonas about the buckle I’ll have to try that the next time. Do you have any good tips on edge dying as I always make a mess of it and get it on the front a back of the project, so o try to stay away from it. However you are right it would make it look a lot nicer. As for my burnishing I use glycerin saddle soap and water. I’ve been thinking of trying Tokenol or similar product, would that be a good direction to go? Thank you again.
-
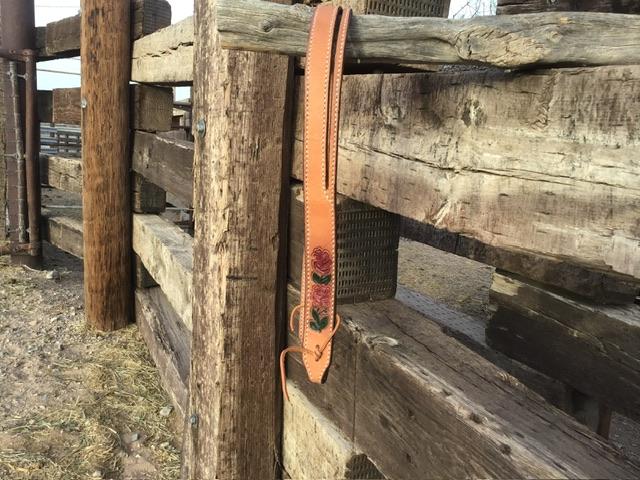
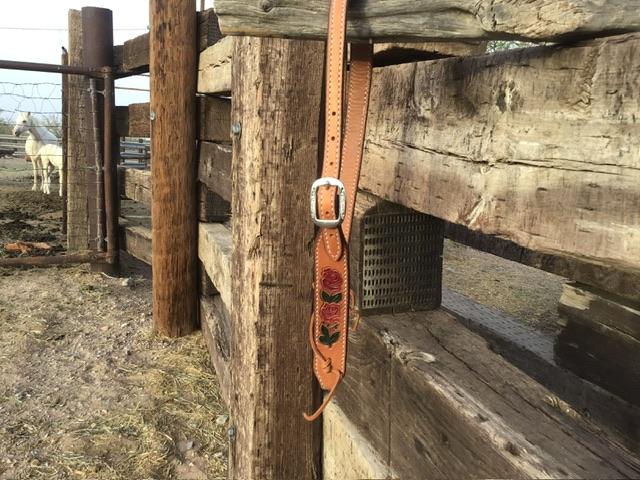
Thank you. I recently found some Nigel Armitage videos that really helped me with my stitching. You’re right about sewing in the buckle. It is the one regret I have about the project. They are called tube rivets, they are not as strong as rivet and burrs. It was the only colored rivet I had to match the buckle. As to my reason for using them instead of sewing I don’t know. Probably it is how I’ve done it before and I see a lot of headstall made this way, admittedly the were more production type headstall. Also I’ve never sewn in a buckle so I’m not really sure how to do it. I use stitching chisels rather than an awl so not sure how to get all my holes to line up. I’m sure I can figure it out I just need to sit down and try. Thank you again for the guidance.
-
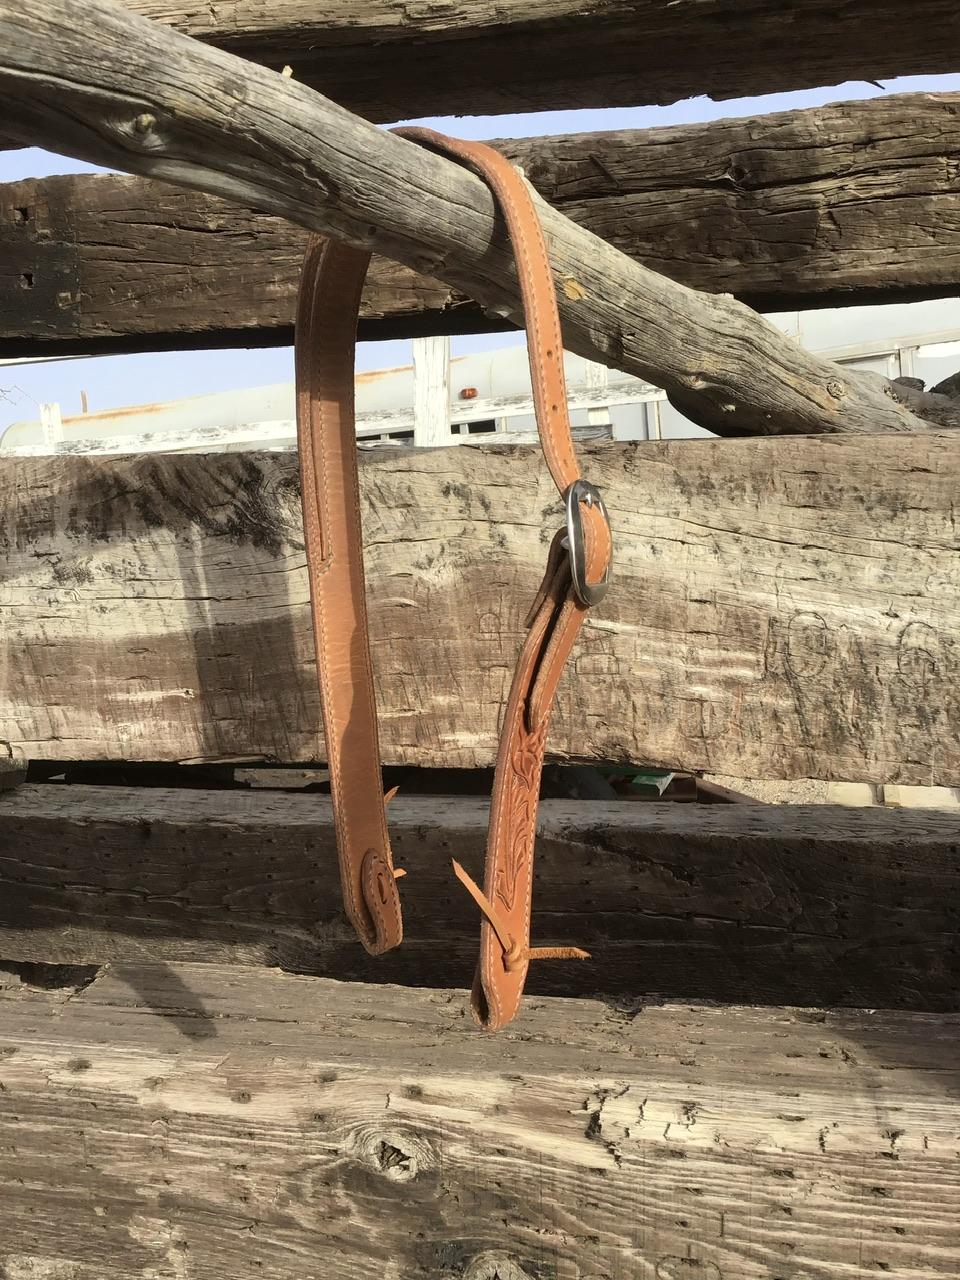
When I first started leatherwork I made a couple headstall that were less than great. I needed a new one for a new horse I got, so I decided to try again. I used 8-9 oz for the outside and lined it with 2-3 oz. It’s hand sewn with Maine thread and I used a 3/4” cart dome buckle. Then gave it a good coat of neatsfoot oil. Let me know what you think and what I can do better on the next one. Thank you for any input.
-
Best Letter Stamping Tool/Set for Craft Show Use
JDFred replied to Conciouscuero's topic in Stamping
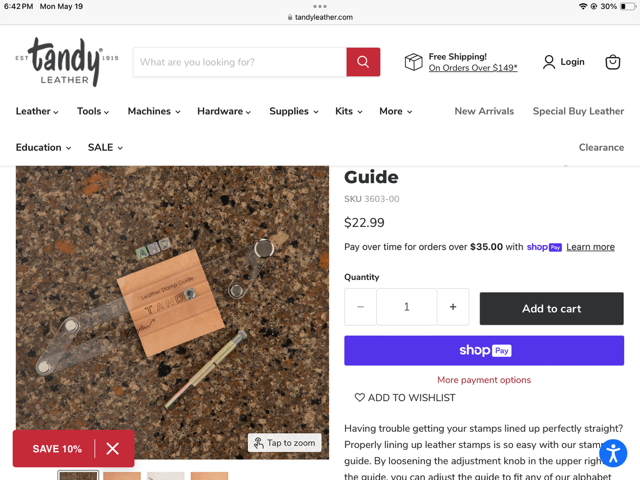
You could build a handle pretty easy for what you are wanting. I hate typing so I drew a picture forgive my poor drawing skills. Then you could use this jig that Tandy sells to keep everything straight.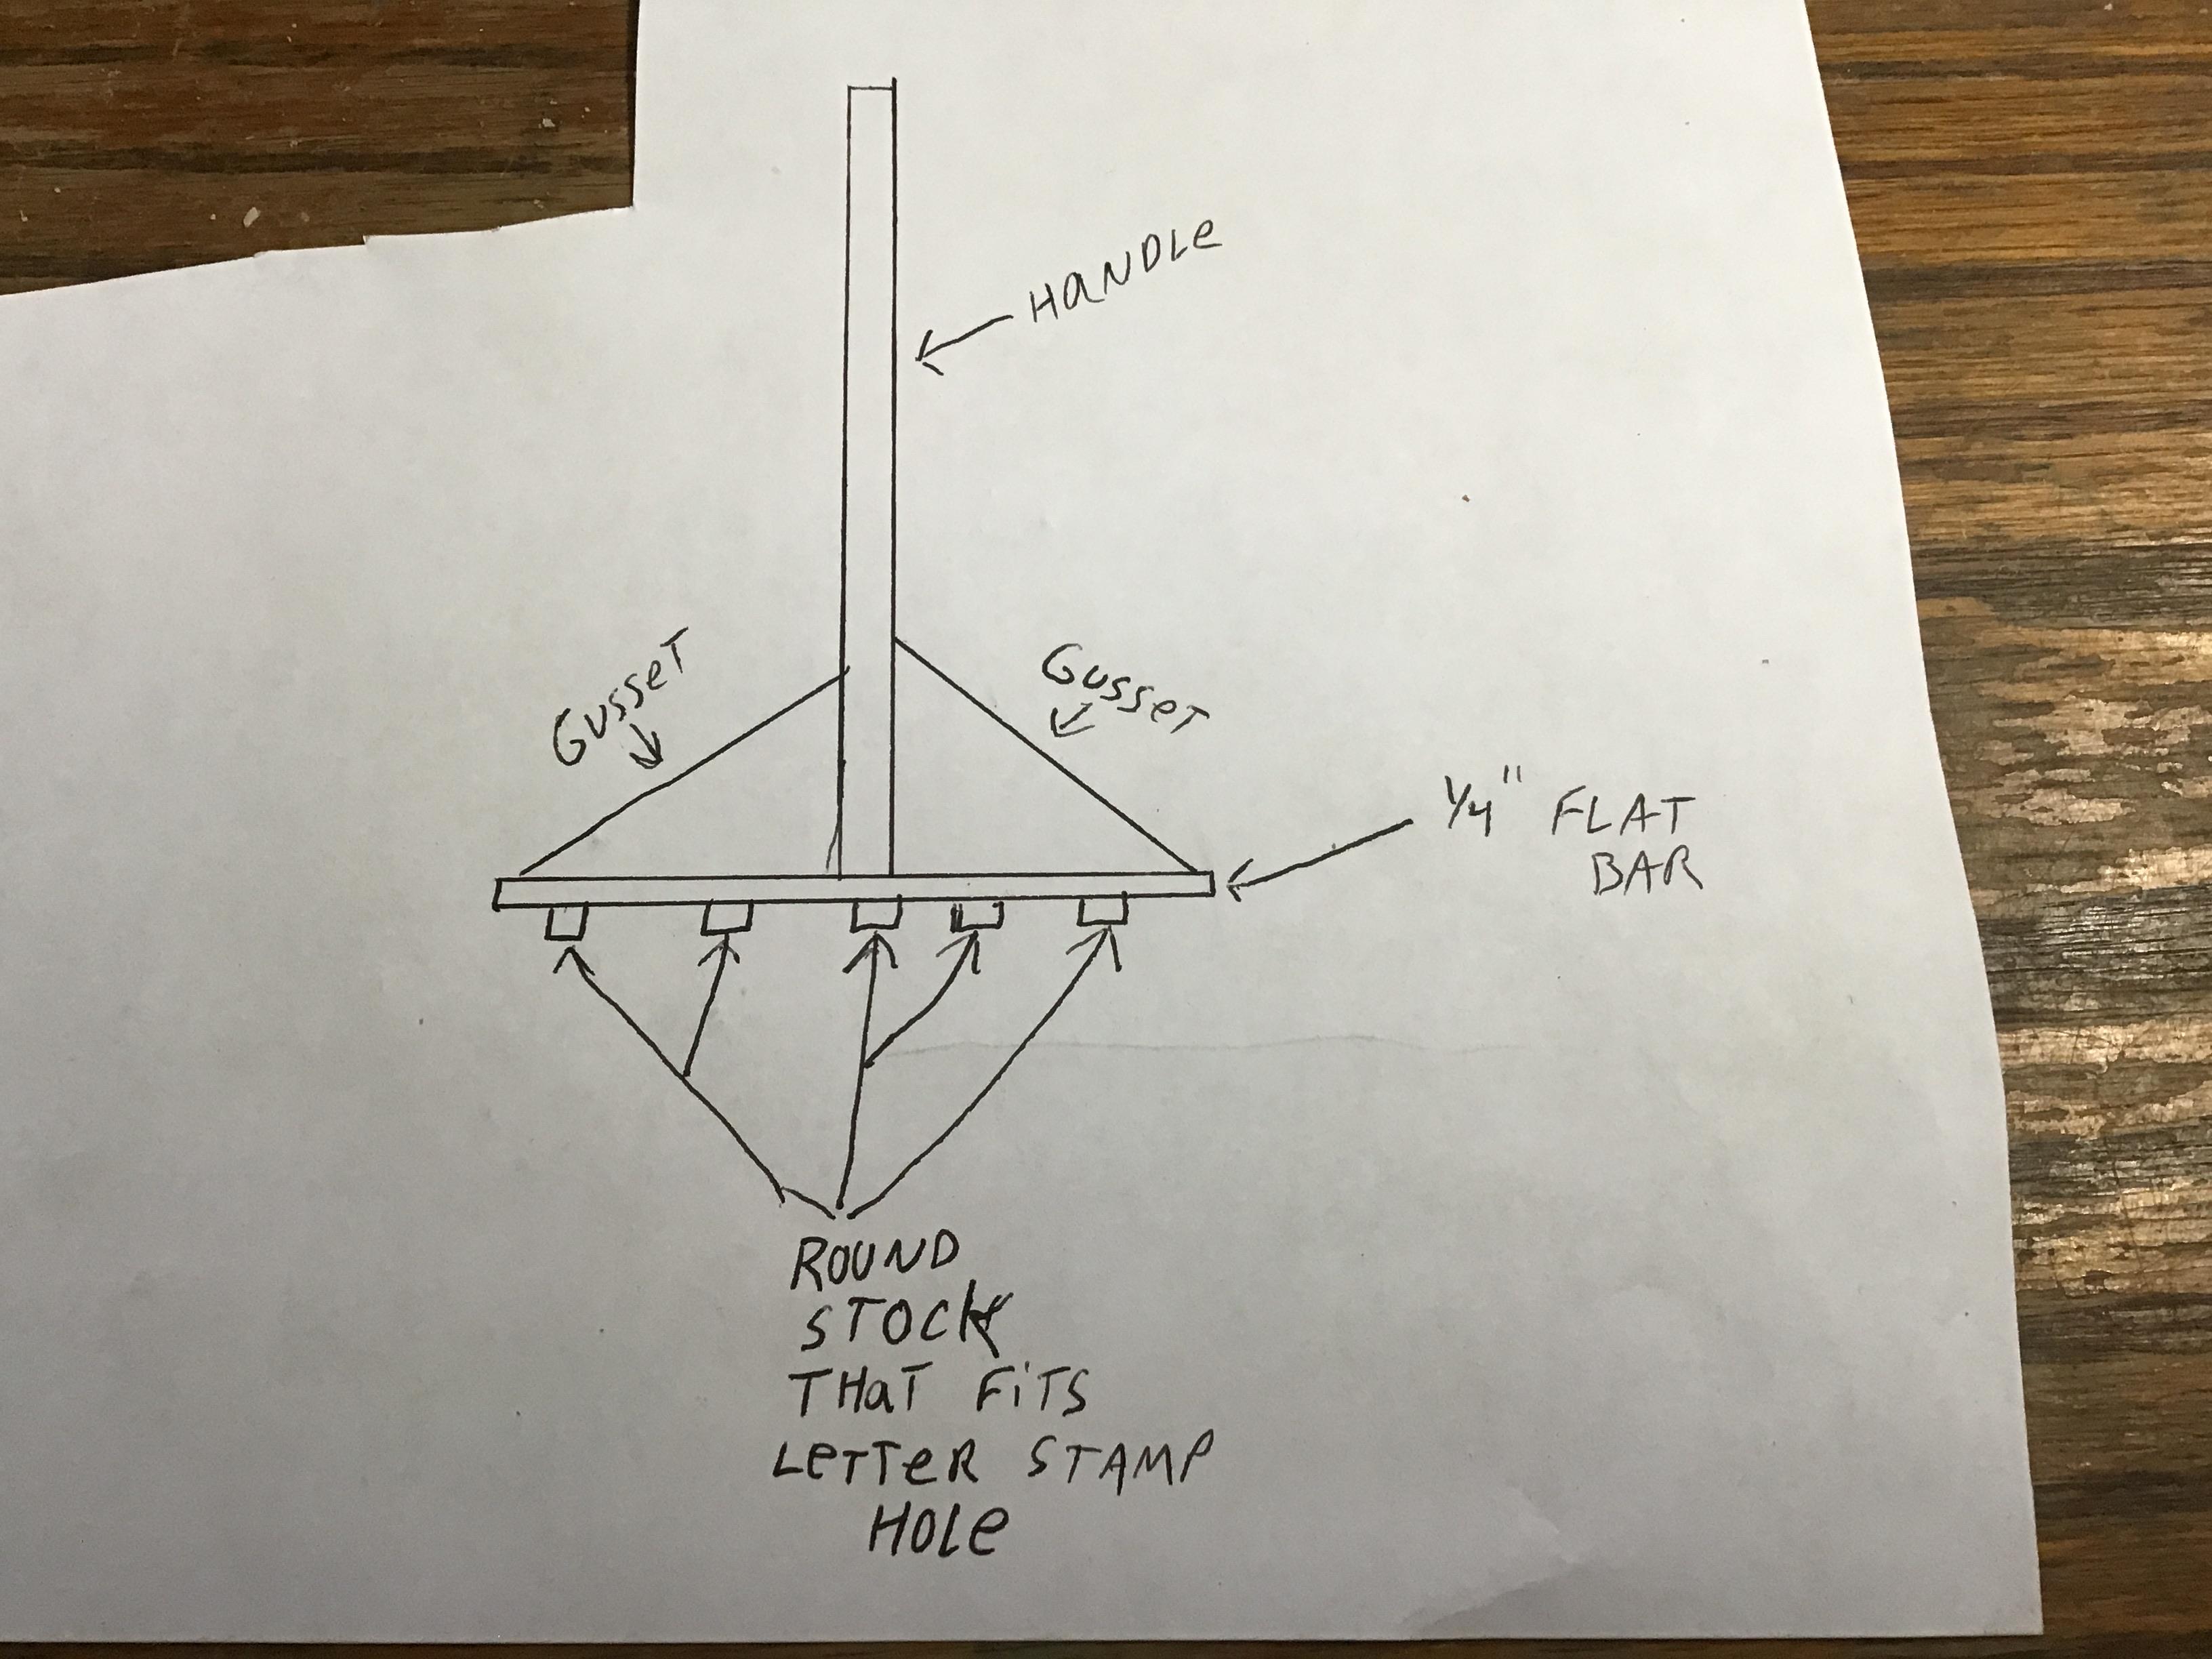
-
Thanks for the link. I glued the whole thing because I over build everything and I don’t know any better. On my next liner I’ll try making the liner smaller and only glue the edges and see if that turns out better.