DeeAnna
-
Posts
23 -
Joined
-
Last visited
Recent Profile Visitors
4,451 profile views


DeeAnna's Achievements
Member (2/4)
-
I agree -- that's why I prefer to use a pretend book made of cardboard rather than the real book when doing things like this.
-
Absolutely you need to allow for the leather thickness. Also you'll need to include a little extra ease to allow for the stiffness of the leather (I know it's supple, but it's leather, not silk!). You also need a bit of ease to allow the book to slip in and out of the bag easily. Sometimes a bag is even designed to be a little wider at the opening and a trim fit at the bottom. If you aren't comfortable calculating the extra ease, make a mock-up of the book and use that as a guide, a lot like how you would design a gun holster. You can make the mock-up lots of ways. What works for me is to cut pieces of corrugated cardboard and tape them together to create a "pretend book". Wrap the leather around the mock-up and see what dimensions you get.
-
Just found this discussion today. Funny ... I don't recall getting an invitation to present my side of the matter at the time this thread was active. Oh, well ... better late than never! Verlane's tutorials have always been available on my website after her death in 2007. I did a major upgrade and update to my website in spring of 2008. At that time, the addresses of most of my webpages changed, which is why the "404" error came up for Equiss in December of 2008. If she'd thought to ask me, I would have been happy to help. The current location of Verlane's tutorials is http:// classicbells.com/ info/ Verlane.html (remove the spaces). And if I someday do another major update and this URL doesn't work, go to the root URL of http://classicbells.com and hunt around. Or send me an email at info @ classicbells.com (remove the spaces) and just ask, okay? It's now been about 8 years since Verlane's passing, and I have maintained this archive of tutorials for all these years, along with a full disclosure about the origin and ownership of the tutorials. Verlane's family has not done anything to my knowledge about making her works available in any form, paper or e-book, free or paid. I suspect matters will not change in another 8 years from the tidbits I've gathered over the years. Leather work was HER passion, not her family's. It will take other people who are passionate about leather working to resurrect her legacy and work to make it available to the world. I'm still willing to help, but I don't have access to all of her works, nor do I know anyone in the family. Several others who have spoken to me about preserving Verlane's legacy and who do have some connection to the family have not had any success contacting them either. I have not and will not put anything on my website that Verlane sold, such as her book The Treasury of English Saddlery. But she freely shared her teaching tutorials with anyone who wanted to learn what she had to offer. If it weren't for these tutorials being available on my website (public) and on the IILG website (members-only section), all of this knowledge would be unavailable to others and probably forever. I am certain it would sadden her greatly to know that her knowledge was not being used to educate and enlighten others. I'd love it if someone would republish all of her work. If that day ever comes, I will gladly remove the tutorials from my website and direct others to the published versions. Until then ... I invite you to browse Verlane's tutorials on my website, learn and benefit from her teaching and experience, and use this knowlege to do superb leather work and to pass on her legacy to others. Regards, DeeAnna Weed
-
Uh, okayyyyy, but what about the rest of the info, starting with color? I use Wickett & Craig bridle in black, medium brown, and dark brown, and there are other colors too. Also what about the weight? As someone else mentioned, that's important too. I use 10-12 oz mostly, but also some 12-14. You mention width but not length, so do you want each piece the full length of the side or what? If you want the piece to be the full length of the side, you really should just bite the bullet and buy a side. You are asking for a swath of leather a total of 24" wide, which is honestly most of an entire side. My suggestion? Talk to Wickett & Craig -- http://www.wickett-craig.com/ or 1-800-TANNERY. They will sell you one side or a 1000. One of their locations is in Canada, so I suspect they can ship domestically to you. --DeeAnna
-
If you want American made products, be advised the stainless buckles and other hardware from Watt are mass market products made overseas. If you want handmade sterling from Jeremiah, then, yes, those pieces are American made. --DeeAnna
-
How To I Remove The "coating" From A Solid Brass Buckle
DeeAnna replied to ruthless's topic in How Do I Do That?
Some brass polishes do have solvents in them that will dissolve lacquer, but not all ... and even if they do, it's a tedious job. And you can't get the lacquer out of crevices very well. We use tumblers in our business for polishing brass, but we always remove coatings (paint, varnish, lacquer, etc.) with a solvent before tumbling. Tumbling to remove a coating can take forever, and it won't get the coating off in protected areas, leaving you with a rather ugly piebald buckle -- part shiny, part dull. My solution: Try a quick dip in lacquer thinner -- 2-5 minute soak, then rub dry with a soft cloth. That usually does the trick for me. Be careful -- lacquer thinner is highly flammable and a health hazard. If that doesn't work, then try a liquid paint or varnish remover -- look for the water-thin kind. Avoid the gloppy thick type of remover, unless the product is labeled that it can be rinsed clean with water. The kinds that don't rinse clean have waxes and such in them to make the product thick and gloppy. This gunk will remain inside the rollers, etc. -- very hard to remove. --DeeAnna -
Conway buckle as adjuster buckle on shoulder strap
DeeAnna replied to Troy1's topic in Hardware and Accessories
A conway will work with any leather, as long as you keep its limitations in mind. The combined thicknesses of leather need to be about as thick as the internal gap in the conway. If the leather is too thin, there's the potential for the strap to work its way off the center prong. The conways I use have about a 3/16" gap; that's about right for two 8 to 10 oz straps. I would think your 4/5 oz leather would have to be doubled to make a strap with enough thickness. The leather also needs to be fairly firm so it won't stretch or twist easily in use. Again doubling the 4/5 would help in that department. A single layer of the 4/5 oz chrome tan I've used (chaps, handbags, etc.) wouldn't work well for buckled straps. I would probably use good, firm veg tan or double and stitch the suede to make a strap with enough meat to be used with any buckle or slider. --DeeAnna -
Cleaning Horseback Riding Chaps
DeeAnna replied to jlb's topic in Clothing, Jackets, Vests and Chaps
If I was going to wash chaps, I would use the Leather Therapy "Wash" and "Rinse" products. People who have tried them on chaps and other leather garments are impressed by the results. http://www.leathertherapy.com/ Lots of online and regular retailers carry the Leather Therapy line. --DeeAnna -
"...But nylon thread??? Heaven forfend indeed. ... No Nylon Shall Pass! ... my mother's father ... a Master Shoemaker in the days of all hand-making. There I could have learned a few things!..." Like learning the art of stitching with hog bristles? If you eschew nylon and really wanna go for old-time authenticity, that's the direction to head. --DeeAnna
-
"...iF THAT'S ALL IT TAKES, JUST GO AND BUY A CHEAP CHISEL!..." A chisel has a one-sided bevel. Speaking from experience, the chisel will drift in the cut toward the bevel. That's not a big deal for thin leather, but it would be noticeable on something thicker like a dog leash. You'd need to regrind the chisel to have a bevel on both sides to make it work right. Not the end of the world to do, but it's not an off-the-shelf solution. --DeeAnna
-
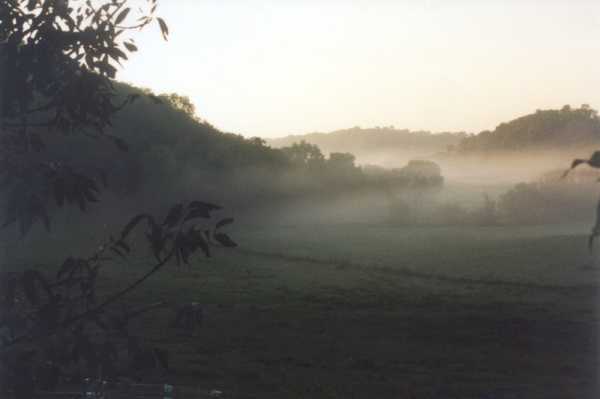
Our main business is Classic Bells. We restore antique sleigh bells, so the connection between the business and the name is probably pretty obvious. When I'm not doing bell things, I do a variety of repair work, tack, harness, personal gear, etc. I call that offshoot of the business Williams Creek Outfitters. We live in a real picturesque part of Iowa and the proverbial babbling creek that formed our rocky little valley is Williams Creek. The reason why I used Williams Creek in my business name is that the creek is a bit of a wander away from our house ... and W.C.O. is a bit of a wander away from Classic Bells. One of the attached pictures shows the creek valley from the vantage point of our front yard. --DeeAnna


-
"....a source of unwaxed linen thread for general purpose leather work...." It's flax thread, not linen thread. Linen is the name of the fabric made from flax fiber. Campbell-Bosworth, Barbour unwaxed flax thread, 1 lb spools, 3 to 8 cord, natural or black: http://www.campbell-bosworth.com/catalog/i...p/cPath/6_71_73 If you are looking for a hefty thread for visual appeal as well as strength, I'd suggest 5 or 6 cord. That is what many folks would normally use to stitch the heavier-duty parts of a horse harness. Left or right twist -- either one is fine for hand stitching. Left twist is more common. This thread needs to be waxed before using it to sew. The traditional method of preparing the thread is outlined in Stohlman's hand stitching book and others. Springfield Leather, waxed flax thread, 50 yard spools, black, brown, natural: http://www.springfieldleather.com/storefro...?idproduct=4877 Tandy Leather Factory, waxed flax thread, 25 yd spools, black, brown, natural: http://www.tandyleatherfactory.com/home/de...ture=Product_15 The waxed flax will not be as easy to get the ends tapered down to a fine point, but it would work for your purpose. Also, the spools are smaller and cost quite a bit less than the 1 lb Barbours spools from C-B. Nylon or polyester have some advantages over flax thread, but flax is quite durable and long lived. Flax and hemp were the threads of choice for centuries for horse harness until the mid 1900s. If a leather holster stitched with flax is cared for properly, the flax thread will outlast you. I have worked on harnesses and other horse tack stitched with flax that are well over 50 years old. The thread is still going strong. --DeeAnna
-
I agree with Bree about not stitching across a strap in a straight line. Make the line of stitching in an arc, a swoop, a "W" shape ... anything other than straight across. I got a project in the other day to re-create an old belt that looked like it was originally made in the 1930s or 40s. The buckle had been fastened in place with straight crosswise stitching. It took a long time, admittedly, but the leather eventually cracked and broke right across the stitching after years of flexing and use. I've worked on straps much older than this one that did not have this type of damage. The stitching on these was more-or-less parallel to the length of the strap. In my experience, the underside of a line of machine stitching on leather seldom looks as nice as the top, especially when the needle is punching through the grain layer from inside to out, as on your sheath. The edges of the exit hole are a little "frayed" and hide the stitches to some degree. As far as your stitch length varying, I also agree with Bree that it shouldn't be doing that. Could be a machine problem, could be a people problem. Some possibilities: Are you stitching UP hill where your stitches are shorter and DOWN hill where your stitches are longer? (In other words, did this sheath have a tapered welt?) Could you have consciously or unconsciously been pushing or pulling on the piece as you stitched? Was your machine at the upper limit of its capacity for the thickness of the leather you were trying to stitch? Is your presser foot pressure too light? When you stitched in reverse, was the presser foot off the edge (or nearly off the edge) of the leather so the leather slipped more than it should have? Yanno, if I were in your shoes, I'd get to know the machine better and build my sewing skills under low-stress conditions before trying a challenging project such as your sheath. (Maybe you've done that already?) If not, I'd try sewing on one layer of scrap leather that is somewhere in the middle of the thickness range for the machine. For my flatbed, that would be about 10-12 oz. Play with the stitch length, tension, and presser foot settings. Play with the reverse. What does it take to get the best stitch quality and consistency under those circumstances? Maybe there's something wrong with the machine ... or maybe it's just inexperience creating these problems. I don't know which it is at this point, but if it were me and my new machine, I'd just "play" for a bit before I'd assume the machine is faulty. --DeeAnna
-
Conway buckle as adjuster buckle on shoulder strap
DeeAnna replied to Troy1's topic in Hardware and Accessories
This might be a little late, but... Conway buckles are best used for straps that will only be adjusted occasionally -- oh, maybe once a month at the most, to give you an idea. If a strap needs to be fastened and unfastened frequently or adjusted in length often (daily, weekly) it's a better idea to use a regular buckle instead. The advantages of a conway is that it less bulky than a regular buckle and it is faster, easier, and cheaper to install. If installed properly, they are strong and durable. They are used a fair amount on horse harness for those reasons. If a conway is strong enough for a horse harness, it's plenty strong enough for a shoulder bag. The key is making sure the holes are punched properly so the straps lays securely on the "prong" in the center of the conway. You also want to use decent quality leather for the strap -- avoid junk that will stretch out of shape. The leather also needs to be thick enough and wide enough to prevent any play that could cause the strap to slip off the prong. I punch two different sizes of holes on a strap when I use a conway. The part of the strap that goes on the bottom of the conway prong will have a slightly larger hole. I punch this hole about 3/8" in from the end. The larger hole allows the strap to fit all the way down on that prong. I skive (taper) the last 1/4" or so of the lower strap so it is a bit more flexible at the tip. I also use a round end punch to shape the end. You can also cut the end square, then chamfer the corners (cut a little triangle off each corner). The part of the strap that goes over the top will have slightly smaller holes, sized to fit snugly over the upper half of the prong. The smaller hole will help the top strap stay in place, compared with punching an oversize hole. If you'd like pictures, let me know, and I'll see if I can shoot some for you. Hope this helps! --DeeAnna