

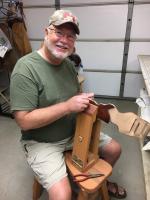
GrampaJoel
-
Content Count
971 -
Joined
-
Last visited
Posts posted by GrampaJoel
-
-
It looks great!
I wish I had the time to learn to braid.
I have always wondered. How are the buttons kept in place? Are they glued or do they have a hidden stitch?
Joel
-
I would suggest going to the top of the page and checking out this site. The leather machine co.
Or contact him directly.
at --->Steve Tayrien----AKA "Cobra Steve"
Leather Machine Co., Inc.
3545 Highland Ave. Ste. "C"
Highland, CA. 92346
1-866-962-9880
He's a very nice guy and can probably answer any questions you might have about the Singer machine you have. He might even know where to get the parts.
Good Luck!
Joel
-
Ok,
So I have Dusty's DVD on saddle making. So where do I go from here.
I haven't built a saddle, but would love to make one. One that I could use everyday for a long time.
I don't have any saddle makers around to learn from.
Which DVD should I invest in next?
Thanks
Joel
-
I might be way off here but in my experience you can't stop a oiled saddle from getting darker.
I use EVO oil to keep the veg tan a light color. But it will darken in the sun. Sorta like getting a sun tan.
At least everything I have used that has oil as a finish has gotten darker in the sun.
-
Thanks guys for the kind words!
Luke I just used a roller blade with a wave blade in it. It works well if the leather isn't thicker than the center of the wheel, and the curves aren't to tight. I really like using it for alum-leather pieces.
see here-----> rotary cutter
-
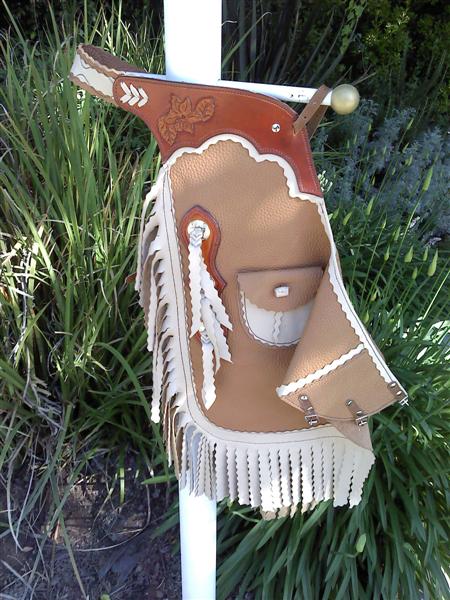
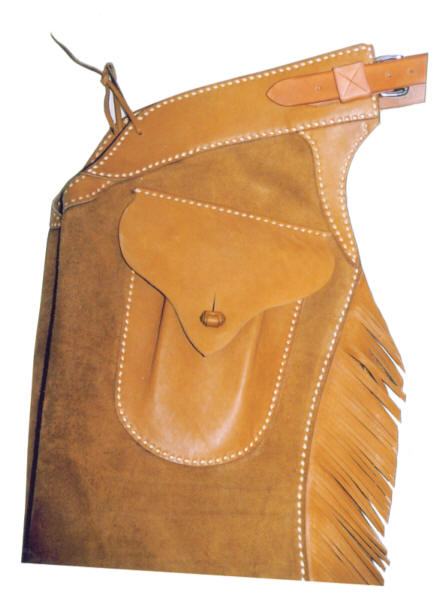
My wife ask for a pair of ruff out turquoise colored chinks when I had time to make her a pair. I found ( made) time.
She asked for a pocket and a butterfly on them, and a solid back belt with the ruff out on it too.
I figured I could do that , so I did.
I added three matching conchos to the back belt for some bling.
Here they are.
-
I would like to add that Marks' chink pattern is very good.
As is his 'how to make chinks' DVD. I recommend both.
Joel
-
Beary nice Bman.

I love the carving .
Is the glass glued to the leather handle?
Joel
-
Nice job on the saddle.
The design sort of reminds me of an endurance saddle I used to ride.
Joel
-
Thanks you for the complements, Bevan
The whole idea was to make this pair of chinks with a feminine flair.
Now days just about all females carry a cell phone, even while riding a horse, and they need a pocket to do that, so I went in that direction.
Thanks again
Joel
-
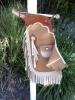
I would like to offer thanks to the folks that helped me with the Leather button and it's method of attachment. Here is what I made with your help. The pocket will hold a pertty good size cell phone. As that is the size I designed it for.
The chinks I made to go with the pocket.

-
jbird
Maybe experiment with leaving the (what would be the atached end of the leg straps) leg straps loose and just lace it on instead of using a rivet or sewing . put a snap where the buckles would go.
Joel
-
The finish rarely determines the texture of the leather as far as the wrinkly appearance of the seat. You may find a textured leather like that in the upholstery leathers- kinda looks like mission grain pig to me. Also,because of the way the "stamp" looks..... that seat looks like vinyl to me.
I'll say it is vinyl also.
Just a guess from viewing the stitching, edge and impression on the seat.
-
Joel with a little more info on what you need would sure help.....So are you after info on the Whole button?? do you know how to make the button?
I like to attach mine be leaving a long tail behind my folded button and then running the tail through 2 small holes punched vertically about 1/2" to 3/4" apart in the pocket ( in one hole and out the other, smash it with a hammer and it pretty much "Locks" in place) Cut off most of the excess laving enough so that the tail can't pull back throught the hole. ... This allows for adjustment if needed later and is still very secure and functional.
Depending on the aplication I sometimes make the button hole the same way so that I only need to punch 2 small holes in the flap (instead of the button hole itself) and if it ever tears/wears out all I have to do is put in a new slotted piece without ever damageing the flap itself.
Hope this makes sense?? if not just contact me and I'll try to explain it better.
Wes
Thanks for replying Wes
I have recieved enough answers to get the job done now. I know how to make the basic button, but I was looking for a way to attach it in an old western way. Seems that is the tail end laced through some holes. I can do that.
Thanks again Blake and Wes, you have helped alot.
Joel
btw.
Here's a photo I stole off someones site. This is what I am trying to achieve.

-
Thank you Blake for taking the time to try and help me.
Yes your answers do help somewhat.
The button I am refering to is , for a lack of a better discription, the Jelly roll type.
Thanks
Joel
-
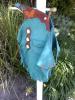
Please share with me the method(s) of attaching a leather button to a pocket?What is the best way to make the button hole on the over flap?ThanksJoelany help would be welcome.
-
Please share with me the method(s) of attaching a leather button to a pocket?What is the best way to make the button hole on the over flap?ThanksJoel -
ct701996i had an oh sh#t moment,
oh yeah I know about those!!
I think we all do.
But, nice saddle just the same.
-
You're working to hard!
1. Just bevel your edges while dry.
2. wet the edges with water let soak in for a minute or so
3. gently rub by hand with glycerin soap until the edge is rounded and shiny. this happens pretty fast.
4. Now rub fairly hard with canvas loaded with saddle soap. you want to feel the heat from the rubbing.
5. Now you have a nice hard smooth burnish, so just color with color of choice.
enjoy
easier than making brownies.
edit to add. this only works with Veg-tan leather. I haven't had any luck burnishing alum-tan leather
-
Good morning Joel,Just checking in to see how the new brown head maul is working for you. Are you finding it has a more "Dead Blow" feel? How's the balance? Does it seem to grip the tools better, with less ricochet? How does th "rebound" feel? Overall,,, what do you think? Please let me know. That also goes to anybody that has one of my new Brown head mauls. Thanks, Ed the"BearMan"
Ed, The maul is working great!
It is balanced just right for me. I love the way it fits in my hand. The weight alows me to hold it closer to the head for my swing. Better control I would say.
It is hard to tell if it is any different in the ricochet department than the 19 oz you made for me, as I have been useing the 28oz so far for heavy blows mostly.
I have used it a little on tooling and it works great for getting deep impressions with the first blow. I'll be using it a little more as I get used to it's weight, for tooling.
Rebound is ok, it doesn't sink into the object being hit and stop, but it also doesn't bounce back like a socker ball.
I like it completely. I wouldn't ask for anything to be changed about it. It is a bueaty to behold and a pleasure in the hand.
Joel
-
Hey Gramps, First, I use 10-12 oz on most all applications that require the use of latigo. If it needs to be thinner that that, I just split it down to the desired thickness. Second, there are some that advocate not using latigo on applications, however; that is a matter of personel choice, I almost always use it on cinch straps unless otherwise specified by he customer. Third, I have use latigo from several sources and the sides that I get from Wickett and Craig, and Seigle of California, and always been good.
Bob
Thank you Mr. Bob.
-
1. What weight latago should be used for cinch straps, billets and such?
2. What would be the best brand to use?
Thanks
Joel
-
Thank you very much for the info. That red metalic is totaly glowing!
-
Very nice!
Who do you get your Metalisc leather from?

Chap Making
in How Do I Do That?
Posted · Report reply
Here ya go.--->> MarkB chap making DVD
It's a good one to learn on and the pattern is real handy to start with. Plus it doesn't cost an arm and a leg.
I approve this!!
Joel