KnotHead
-
Posts
934 -
Joined
-
Last visited
Content Type
Profiles
Forums
Events
Blogs
Gallery
Store
Everything posted by KnotHead
-
Oh no... LOL... B...
-
I would so love to meet him some day. I would love just to have some email comms with him. But I don't even know if he still alive or what. All I have is that post above and his books. I'm only missing one of his books. But I can't find it anywhere for sale. I have no way of getting in touch with him to see if he has that one book for sale still or not. You are so blessed to have had some lessons with him. I envy you. LOL... Not really, just a wish to meet with him, or meet him over the internet or by phone. B...
-
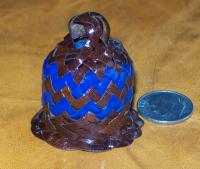
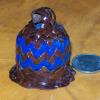
Hi all. I had a get together with a few colleagues about a month ago. A couple of years ago one of them showed me The Bell From Hell by Tom Hall. It was one of the most fantastic turks heads I had layed eyes on. What made it special to me is that it was done in some kind of raw hide. I am not too sure to this date what type of raw hide. But I know this much. I have seen this bell in person and handled it with my hands. For those that are familiar with Tom Halls books, you will not find this in ANY of his books. Christmas Bell From Hell - By Tom Hall. A very brilliant turks head by Tom Hall. Hope you all enjoy this as much as I did in person. I know that the photos do not do it justice at all, compared to seeing it in person. B...
-
Hmmm. Now that would be interesting to try out. But the only prob is not drinkin the dye. LOL... B...
-
Ron Edwards Plaiting whip handles is a good one. You should google ramskull press and it should come up with their site where you can go and find many books by Ron Edwards. All are for sale there and they use pay pal. B...
-
You should ask him if he want that braided handle to transition smoothly from leather to the handle. If he does you will have to carve away 18 inches of wood handle. If this were me, I would do some Fid work on it, or a handle plait . Either one works well. Sample of some fid work I did a while back. Putter Handle. Hope this gives a few ideas. B...
-
My friend Jorge got it from a guy not too far from where I live. He only has a phone number that I know of. I will have to ask Jorge again what the name of this persons business is so I can get the phone number. There's also a place called Centralia Fur and Hide. Just give that name a google and their site should come up in the list. They have horse hide also. Centralia Fur and Hide - These guys are about 2hrs drive south for me. So they are pretty much a local store. I do not know how well their quality is. The hide I am using was bought at the place that is closer to me. You don't have to drink coffee to make the mud. Just buy a half pound of it somewhere dirt cheap and then make your mud. LOL... B...
-
I did not use old coffee grounds. I used some stale coffee grounds that had been sittin around since last year. I did not like the coffee much and left it settin. LOL... This is how I mixed the mud. I have a 1lb coffee can. Either metal or the plastic ones, makes no difference. I ran my water from the facet till it got hot and fill my can up about a 1/4 full. Then I added the coffee grounds to the water until I got a muddy type consistency. Then I put my lace in the can with the mud and let it set over night. That's all there is to it. I did not use anything else in the rusty nail dye. Just rusty nails. Even rivets work really well for making rust. It's just the water and the metal and that's it. I am going to try out a metal type scratch pad that is used in a kitchen next to make some rust. Some one said that it makes a good rust and does it quick. I never thought of beets to make a red dye. I will have to try that out also. I would like to get a good red also. Thanks for all the kind comments also. B...
-
I'd use the 1/8" roo and about a foot and half of roo. Of course that would just be my preference. It is up to you ultimately to choose which size to use. The 3/16 is a bit larger and will cover more area much quicker. The end result will be the same, just not as much of it. Hope it helps some. B...
-
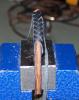
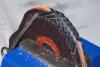
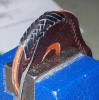
The final results are now known for me anyway on the 2 techniques used. In the inserted photo. From left to right, 1. Coffee Color. 2. Natural - The way it came. 3. Soaked for 4 days in a bucket of Rusty nails. The next technique to try is Tea with Pecans. Suggested by a colleague Enrique Capone. B...
-
No prob. B...
-
For those of you who are familiar with my works, you know that I pretty much work with just Kangaroo Hides. But last night I got an itch. I have been staring at the Argentine works for the longest time. I decided to take some of the horse hide lace I have here and dye it using two different methods, or techniques. Rusty Nails in a can. Coffee Mud mixed in a can. I have inserted a photo of the 2nd one because it worked much, much faster than the 1st method did. As a matter of fact the lace in the first method is still soaking after 4 days with not much notable difference. I think I like the coffee mud much better. I feel though that if I had left that lace in there much longer it would have turned black. LOL... Here's the photo of the second method used. In the photo above you can see the difference between the undyed horse hide and the dyed. Very noticeable. Thanks for letting me share my findings. B...
-
Gracias mi amigo. B...
-
This one did not and will not be up for sale at all. I made it for a friend of mine so I could have the practice on edge lacing. Keepin an eye out for me is a good thing for me. LOL... I like the other sets of eyes. It helps me out. Thanks for the kind comments too. B...
-
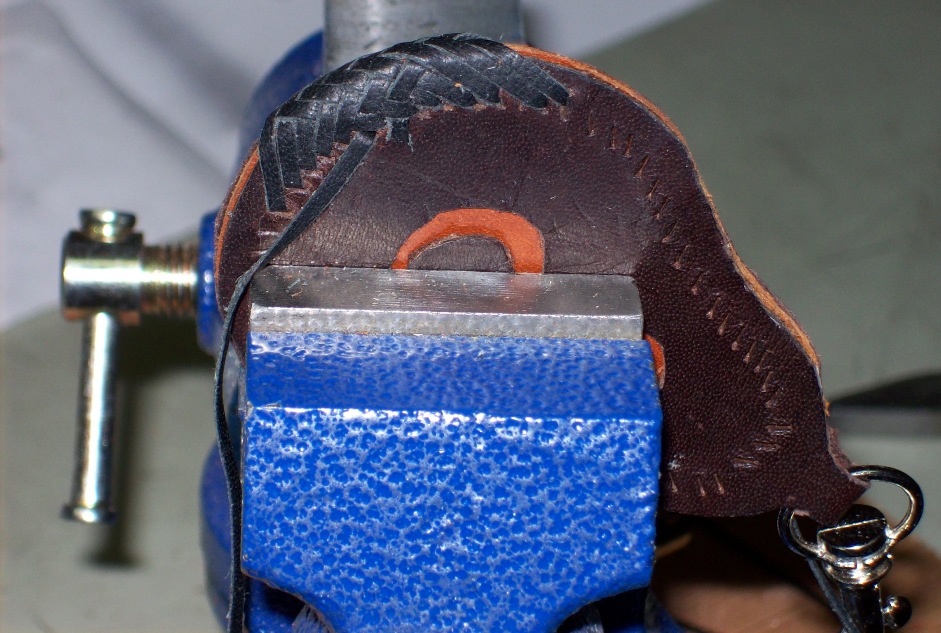
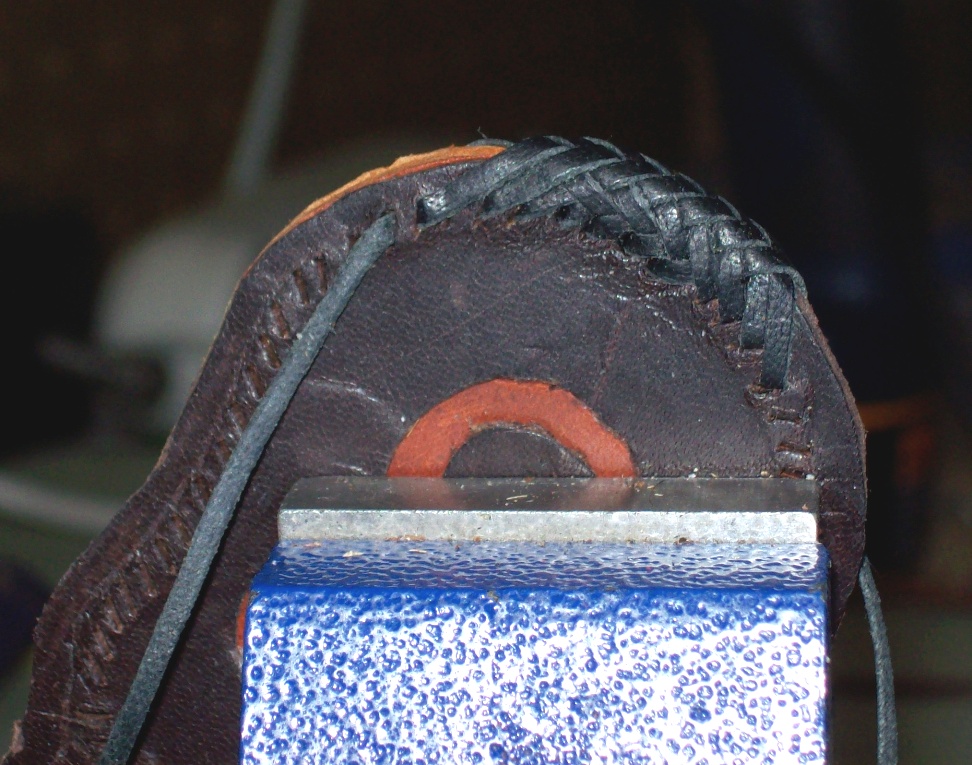
Okay folks. Here it is all done now. I think it's getting better now. What do you all think? The lace is kangaroo cut at 1.3mm wide with a 45 bevel. The shine comes from using Pecards on the lace while edging. I really suck at this right now. But just wait, it'll get even better as I do this more. You've got the bug really bad when all you do for half of church is sit there and think about the braid sitting at home on the bench. LOL.. Sorry God. But you're the one who gave me the gift. LOL... I'm serious too. No joke... The other half I paid attention to my Pastor. B...
-
I would go to that kind of thing. But I don't think that my edge braiding is good enough for that yet. I still have not quite got a process worked out yet to where I can make the items without so many mistakes. Thank you for the kind comment. B...
-
Uh Oh... The bar has been raised. LOL... B...
-
Well I guess I can come out with it. I've been holding this info back for a bit. That KHWW key fob was my very first edge braid ever. I guess it's not too bad. But as I have learned with braiding that it ALL takes practice to get it just right. B...
-
It's actually just a gift and gives me the practice at this type of braiding at the same time. I'll start to do commissioned pieces probably next month, or I'll even start to do combined artist pieces where one artist does one job and then sends the piece to me for the edge braiding to be done. Combined works of two or 3 different artists is something else to see done. The lace in this one is only about 1.3mm wide or there about. I think that this one should end up a lot better than the last one I did. Thanks for the kind comment. B...
-
Attached is one I am working on now for a friend of mine. 45 degree slits and a much smaller lace. I actually did some more research on this particular braid. I had to look up the tables in one of AG Schaake's and John Turners pamphlets. This has a herringbone coding. Most likely it takes on a 12 strand herringbone code but done with only one string. Just an interesting tid bit of info. B...


-
There are different techniques to the holes. Your awl is one and punching holes like mine is another and then there is, using your awl, or a pair of lacing snips which is like your awl and then there are the ones that you use the hammer with that Tandy sells. Depending on the size of your lace, the holes should be about of equal size and equally gaped by the width of your lace. Now you have a choice of whether you want to make those hole parallel the line around the edge, or angle them at a 45 degree slant. I like to see the angle myself and it does cover and blend really well that way. I look forward to seeing your work when done. B...
-
Thank you for the kind comment. B...
-
LOL... I so understand that part Fiddle. No worries though. It'll get there. The end result is worth the work you're putting into it now. @Nod; I look forward to seeing a post of your work when you're done with it. B...
-
My Quirt Is Almost Finish, But The Braiding Looks Old
KnotHead replied to Melanie Wilfong's topic in Braiding
Is that lace beveled on the bottom sides? If it is beveled you should not have to roll it out but once, maybe twice if you absolutely have to. Sometime adding too much leather treatment will cause it to antique like that. I find that in all of my whiskey tan and saddle tan strings. I hardly ever use any natural hides because of that issue. That would be like using white. LOL... Adding treatment should be done sparingly with the color you used. Unless you need it to be antiqued like that. To me that darkening like that looks pretty appealing. But that is just me though. B... -
If you have Bruce Grants book you will find a very, very similar edge braid on pg 302 and 303 Plate 122. Have fun... B...