Lil Doodler
-
Posts
66 -
Joined
-
Last visited
Content Type
Profiles
Forums
Events
Blogs
Gallery
Store
Everything posted by Lil Doodler
-
Thanks dikman, Good to share ideas, learn from each other
-
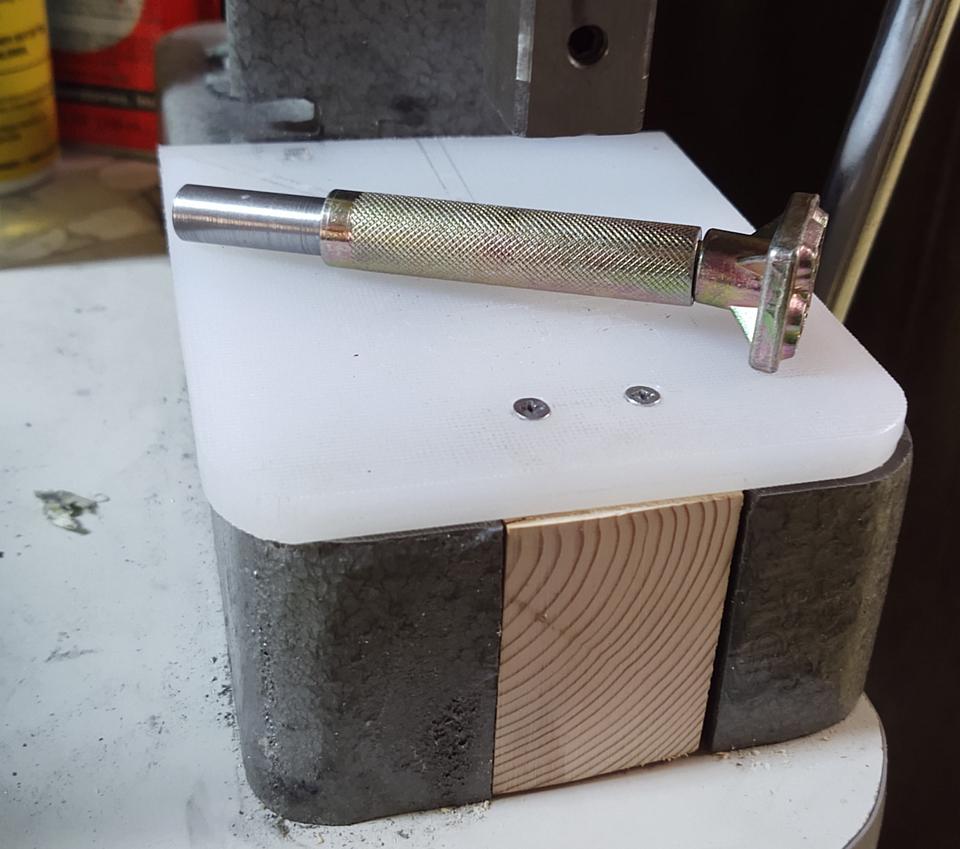
I also cut short the handles of a 1 1/2" and 1" oblong punches to use in the press. After cutting them, I drilled and inserted a 1/4" shaft to be held in the ram. No more hammering! Because the bag cutters do leave a mark in the bottom support, I use a scrap piece of cutting board or a piece of pine as a backstop. Because I have very limited space, I mounted the 1/2 ton arbor press on the backside of my Artisan Toro-4000 sewing machine.

-
I use a piece of steel over the top if using a rivet setting tool or for snaps. I use stamps in the arbor press too. With the pressure of the press, there's no need to case the leather first. For the smallest diameter stamps, I put a vinyl tubing as a sleeve over the stamp, then tighten in the ram. For big 3D stamps and letters, used a lathe to reduce the diameter of the holder so it fit

-
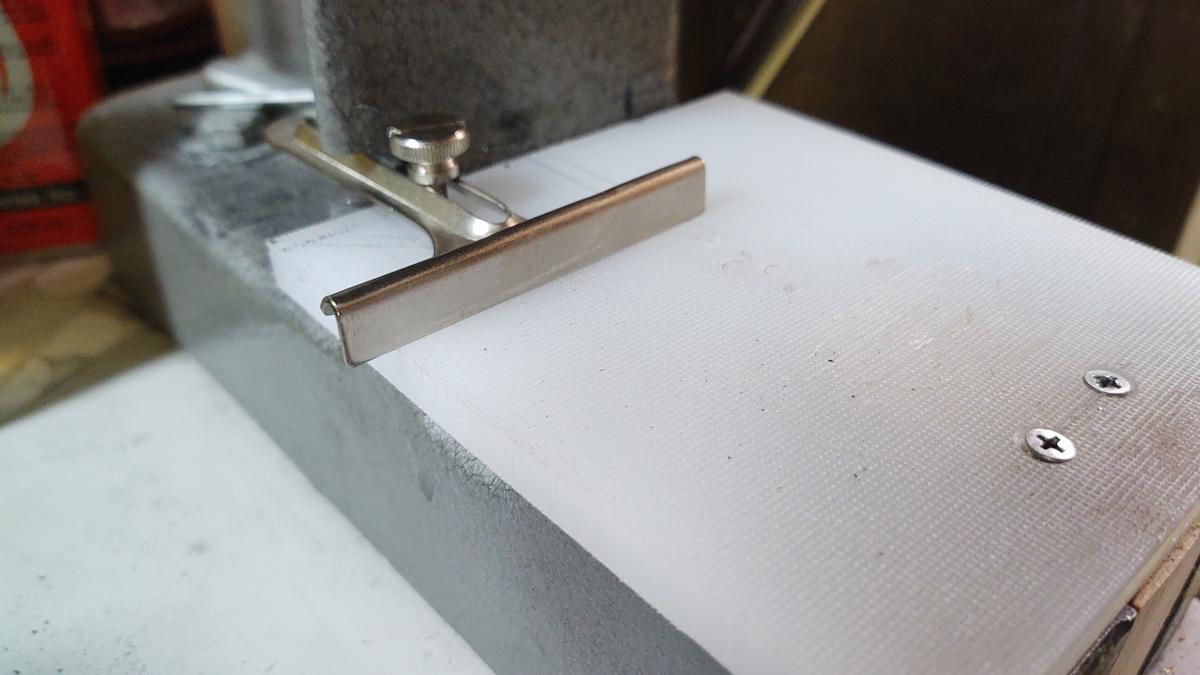
The guide is for a sewing machine. I drilled a hole for the screw and the screw self-tapped into the softish material. Cutting the side of the arm for the guide might cause a little loss of strength, but there's lots of other material in the arm and on the other side. I don't think there's been very much loss of strength in the arm.

-
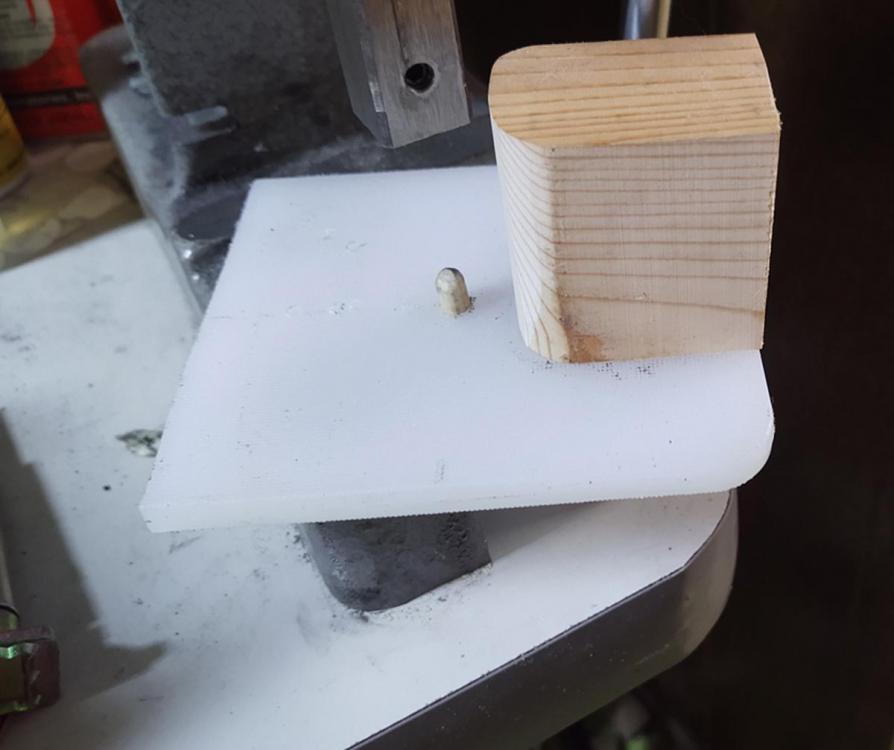
The round anvil that came with the press was thick, so there wasn't as much clearance as I wanted. I made this little table out of cutting board material. I added some wood below to support the cutting board material and put in a little dowel rod that fit in the anvil's center hole to hold it in place.

-
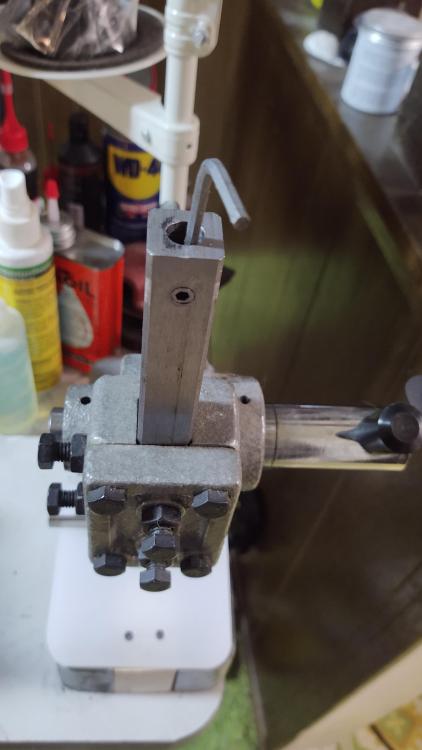
I went the way of buying a Harbor Freight 1/2 ton press. I found that the 1/2" square ram is reversible, you can turn the ram upside down and it will work just fine. I went the way of drilling holes in the ram. 1/4" on one end, 3/8" on the other end. I drilled and tapped for a small set screw with a hex/allen to tighten the tool on each end. Because the 1/2 ton press doesn't have a lot of clearance, I shortened the set screws so that they would be beneath the front of the ram so you could have a bit/tool still tightened up while the ram is up in the gear area. I also removed the locking ring holding the toothed shaft that rotates. It makes it easier to remove the ram and more importantly to me, lets me pull the shaft out quickly, move the ram to the approximate height I want it, then reinsert the shaft. I figure if I need a little more pressure, I could put a piece of longer pipe over the lever and get get more leverage.
-
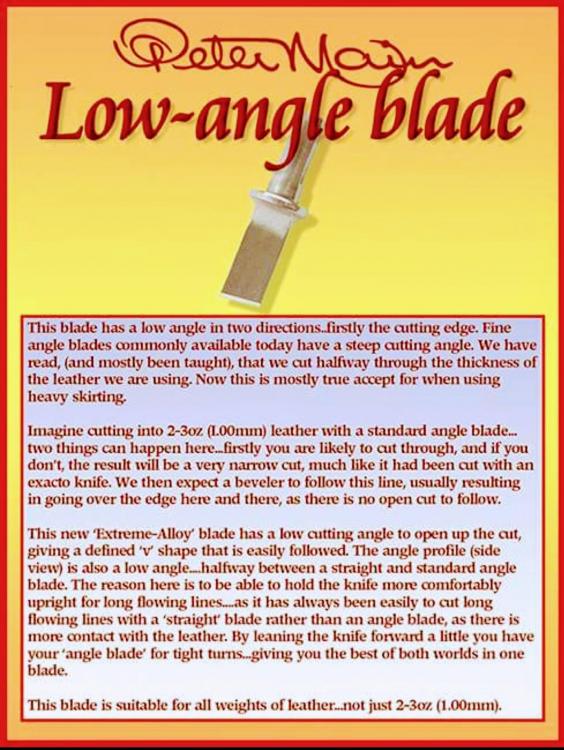
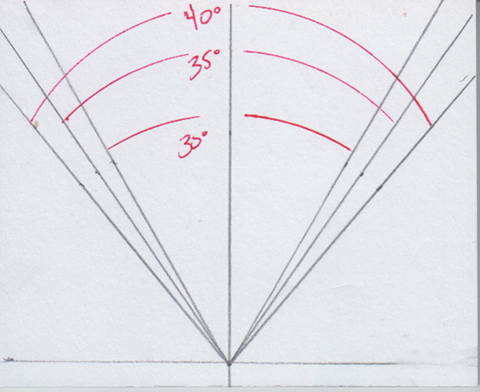
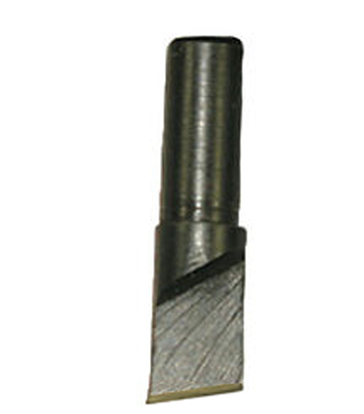
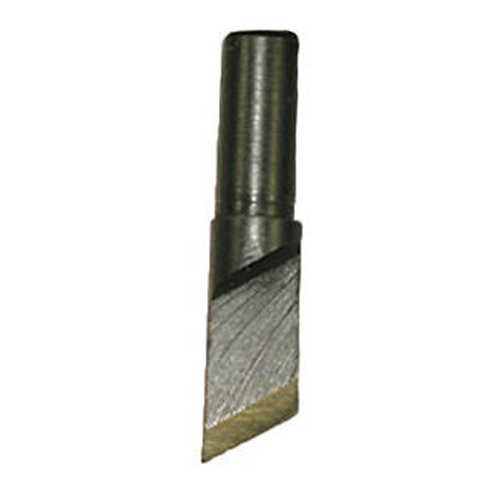
So, it looks like the sharpening angle is wider, more of a V shape causing a "low cutting angle"? Most swivel knife blades are 30 degrees, on each side. So a wider, less deeper cut would be 35 or 40 degrees? And the bottom of the knife edge is not square, but angled. But not as sharp an angle as the bottom edge of a filigree blade? VS a filigree blade The video from the previous post was from Immiketoo. Great work! Great video! Thanks Mike for the description you gave above. Using a digital caliper, I see that most of my swivel blades have a thickness of 0.080" to 0.100" I did find just one angled one that was 0.067" thick. I'm going to reshape the blade and see what happens
-
Here's a video of Mike Dale, using a Peter Main "Low Angle" blade and the concept of "Cut less, Bevel more" It looks like the Peter Main swivel knife blade has a wider angle, so it doesn't cut as deep and makes it easier to bevel I think this has been covered in another thread on Leatherworker. I'm experimenting with a 35 degree blade, might try a 40 degree and go from there
-
I am interested about the "Low Angle" blade too. But I couldn't find any reference to the exact angle. I thought I'd experiment a bit. I've found Almost all swivel knives sharpen at 30 degree. Using my "Different Knife Sharpener" I found that sharpening at 35 degrees each side does have the effect that Peter Main talked about. Check out the different knife sharpener and try changing the angle yourself to see if the change of angle works for you
-
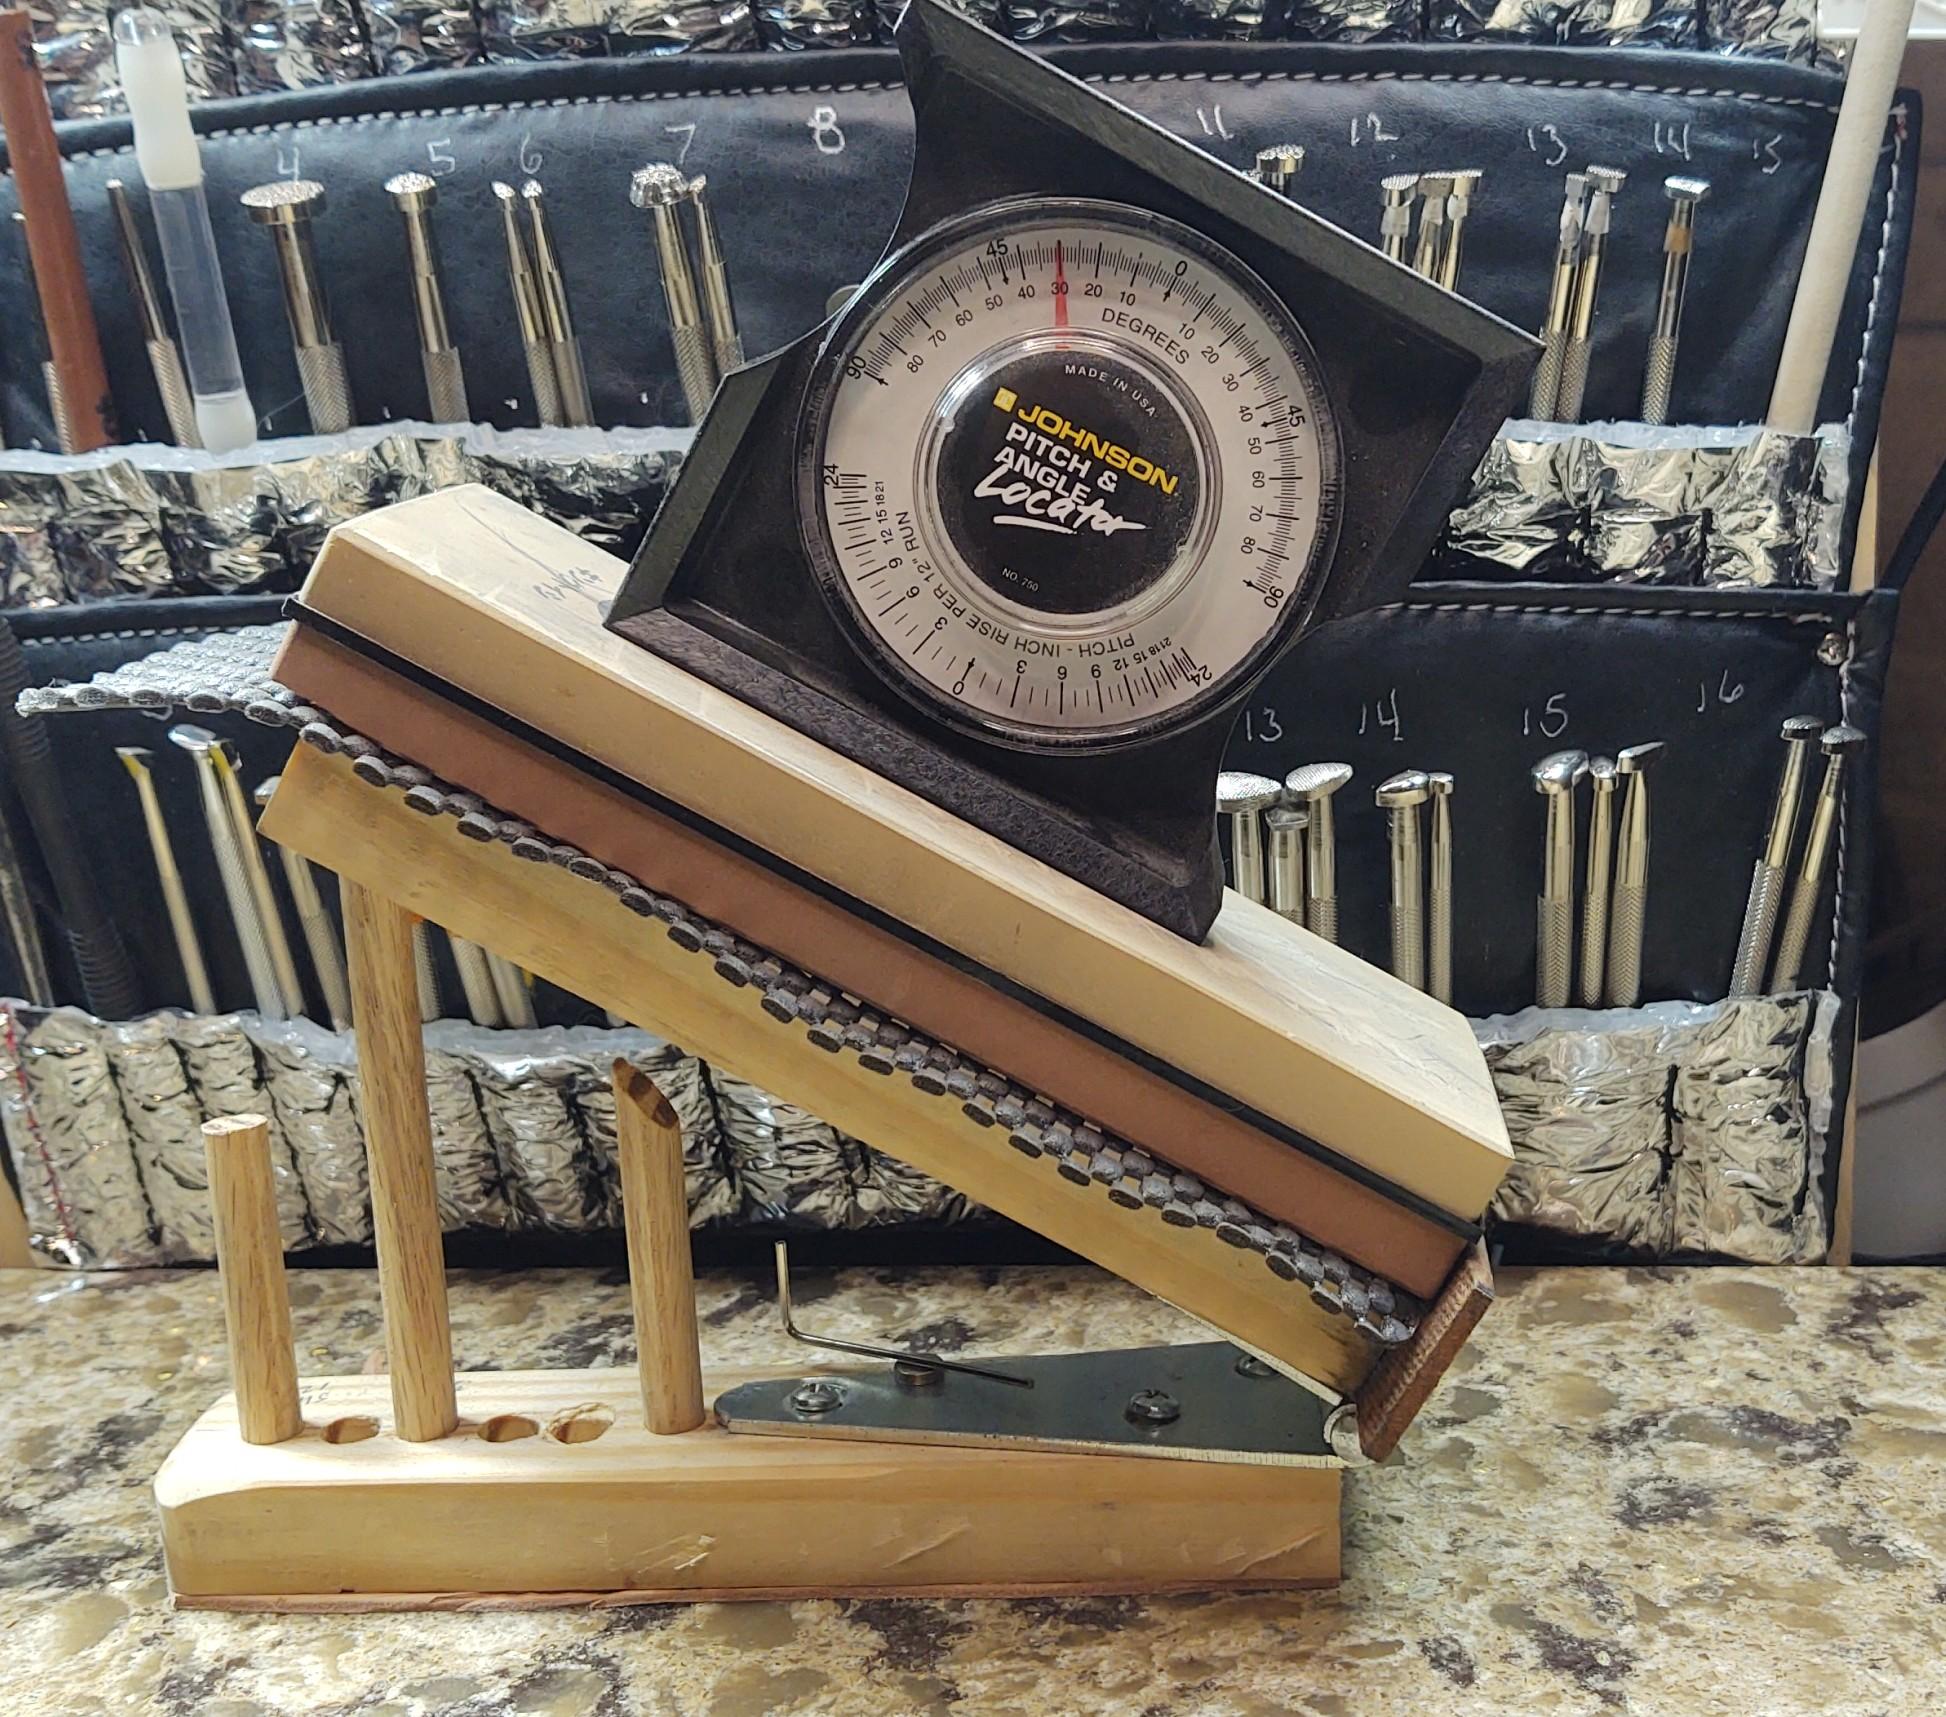
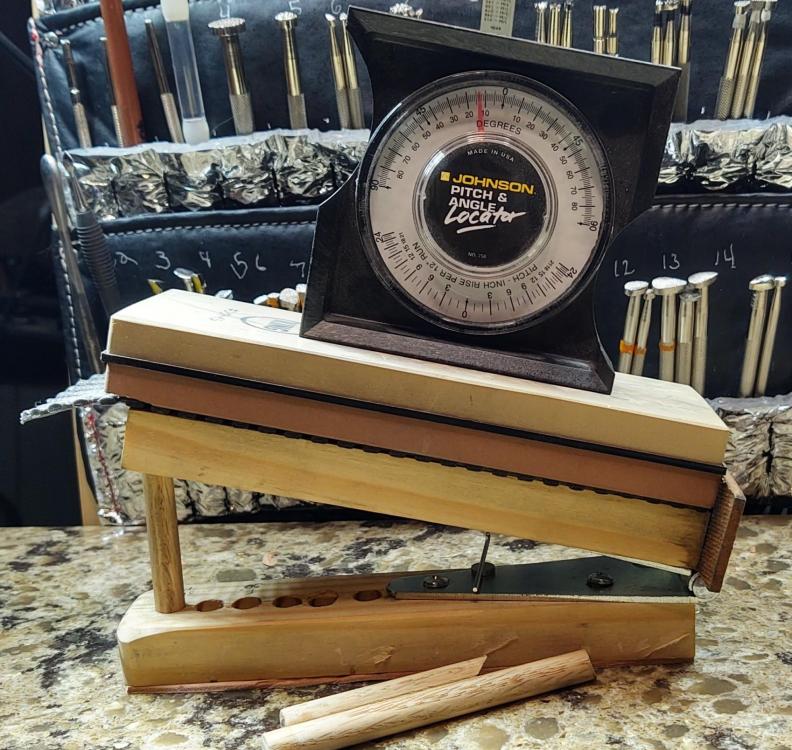
That Johnson's pitch and angle locator sells for under $7 at Home Depot and on Amazon
-
Sharpening the outside
-
Oh, I forgot to mention, using this at 15 degrees is excellent for sharpening your head knife. It can be challenging to sharpen the left and right sides at the same angle on a stone that's laying down. Again, just keep the blade horizontal
-
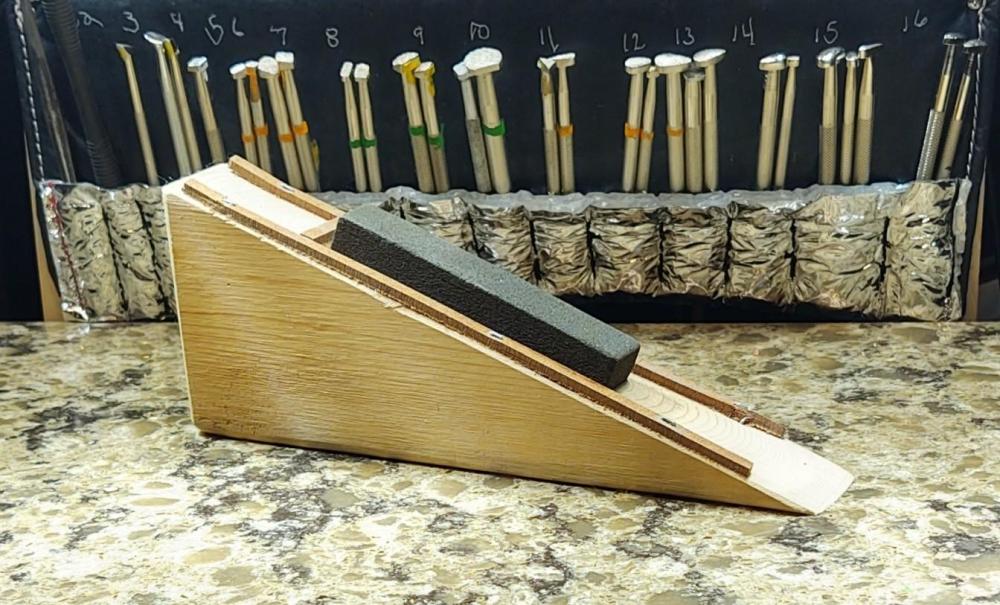
You can adopt this for other types of stones. If you can cut the wood at the angle you use the most it will be simpler - not adjustable, no hinge or dowel rods. This one is at 20 degrees for kitchen knives
-
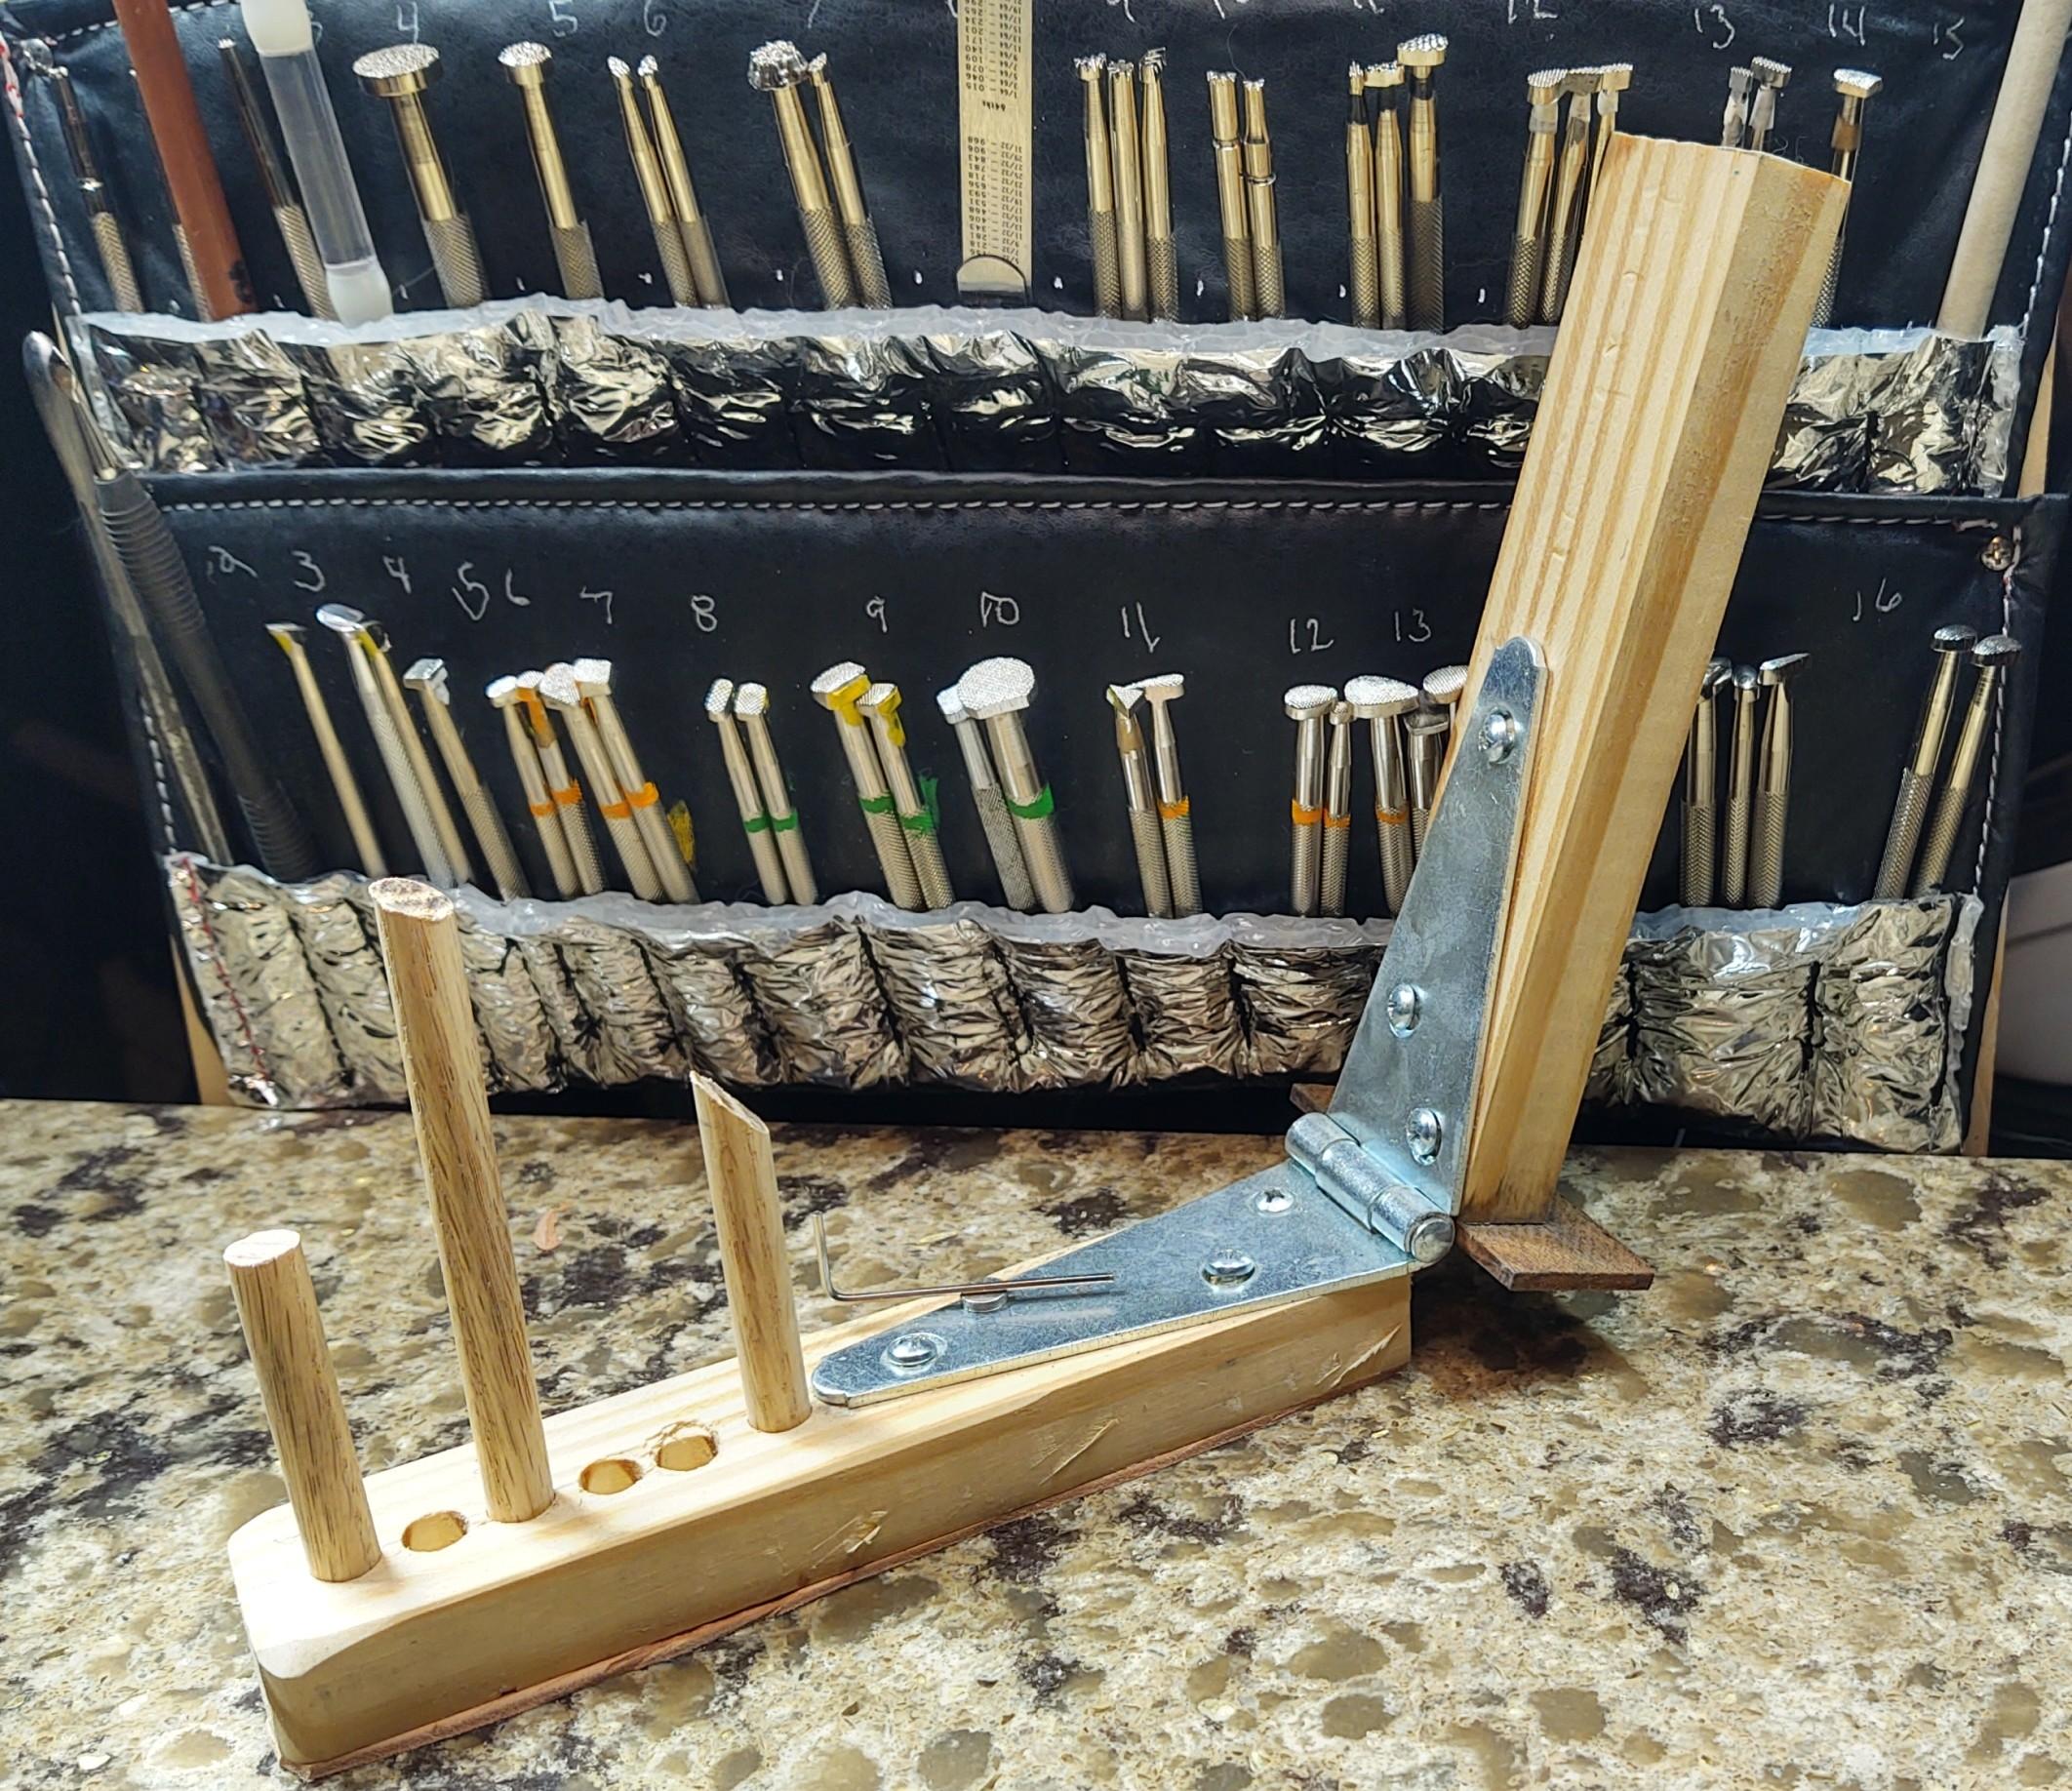
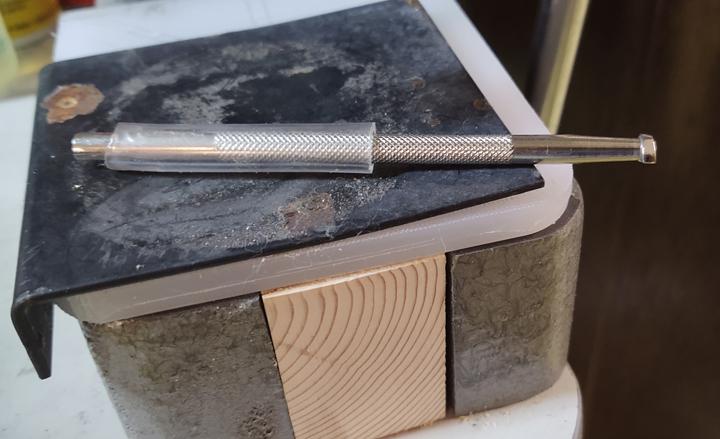
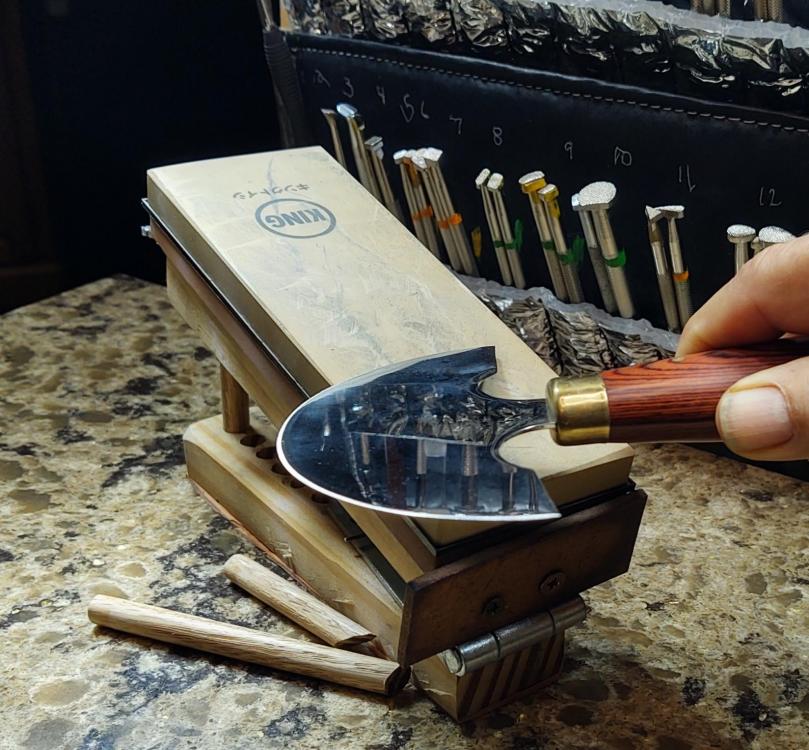
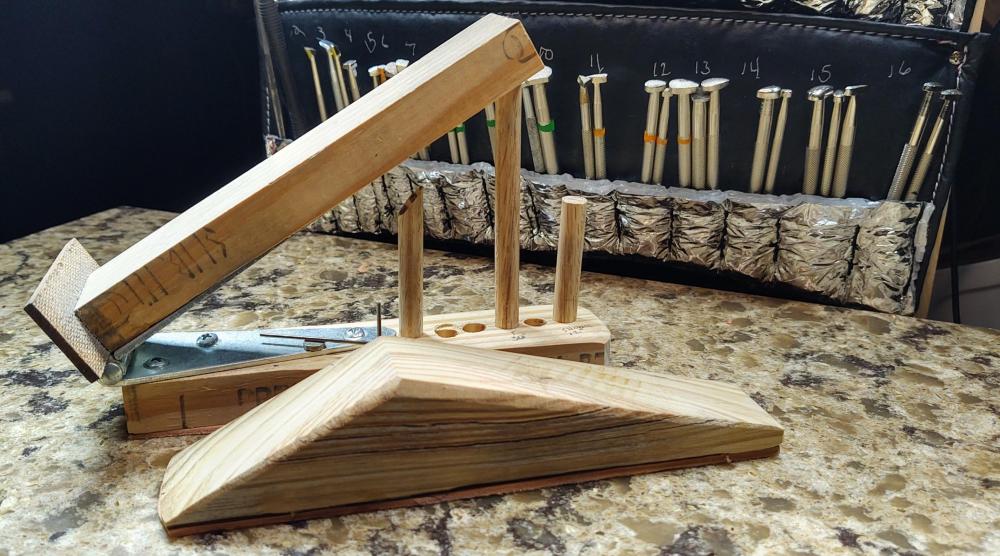
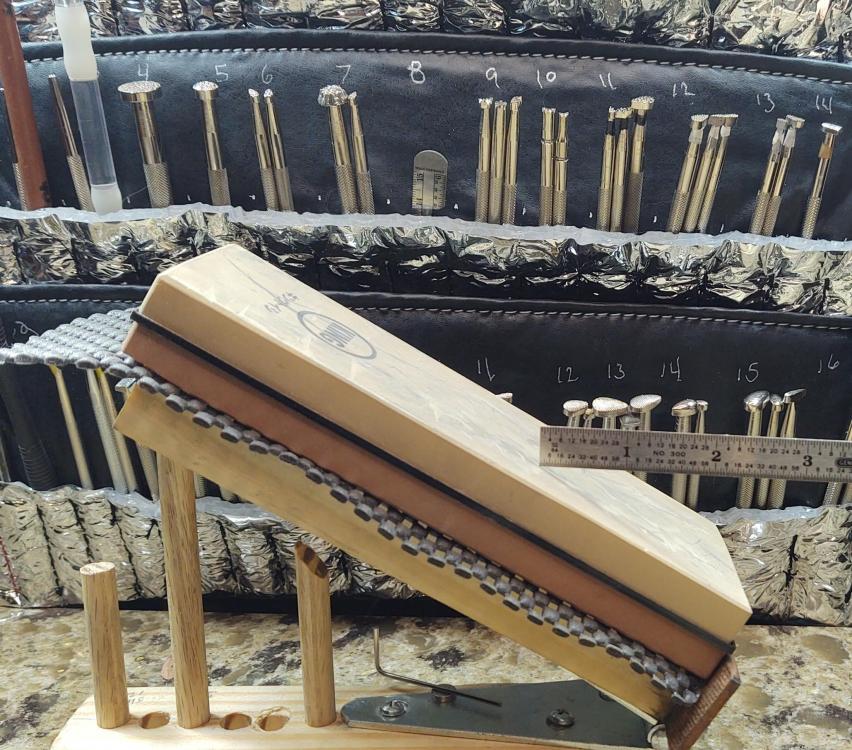
Just hold the blade horizontal to be at the proper angle for sharpening or stropping This one is good because you can adjust it to almost any angle used for sharpening. I made a smaller one to use for stropping the swivel knife. I use rouge on a card, put the card on the little block.
-
It's made of a couple of pieces of scrap wood, a hinge, dowel rod cut to different lengths and a piece of scrap screwed at the bottom to hold the stone in placw

-
Howdy, thought I'd share an easy to make tool to making it easier to sharpen. The ideal is that you put the stone at the angle, and hold the knife horizontally as you move it. This one I made is adjustable for many different angles. Move the dowel rods to adjust the angle. Use the angle locator to see what your is. Most swivel knives I've seen have an angle of 30 degrees. It's easy to move the different dowel rods in the different holes to get different elevations

-
Help! Bell skiver problem: scrap deflector malfunction
Lil Doodler replied to AlainaZ's topic in Leather Machinery
Thanks Keithski122 Is there something you are looking for? That chart came from this online manual. Lots of good information here http://sunstarmexico.com/wp-content/uploads/2018/02/Manual-KM-76_MME.pdf There's a guy with a lot of knowledge about upholstery tasks, and machinery (including skivers) on Youtube. First video shows kind of how the skiver works, its parts, and how to replace them Second video I think is dedicated to setting up the machine Harry Rogers on Youtube has good information on various leather tasks, projects and equipment too -
Help! Bell skiver problem: scrap deflector malfunction
Lil Doodler replied to AlainaZ's topic in Leather Machinery
Oops, I forgot . . . Under the feeding roller/stone, there should be a scraper that prevents the scraps from coming getting stuck just as Bmwmoa67707 suggested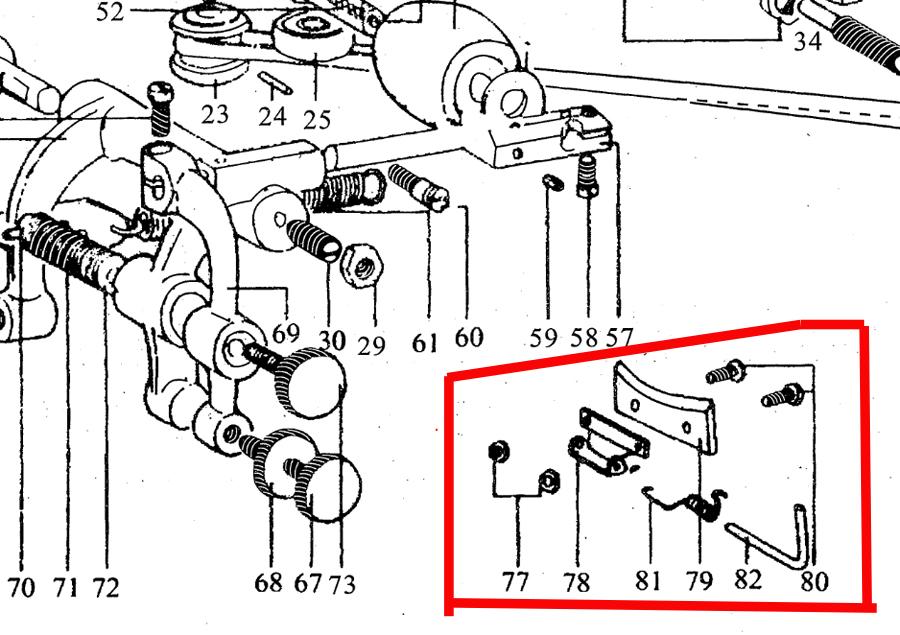
-
Help! Bell skiver problem: scrap deflector malfunction
Lil Doodler replied to AlainaZ's topic in Leather Machinery
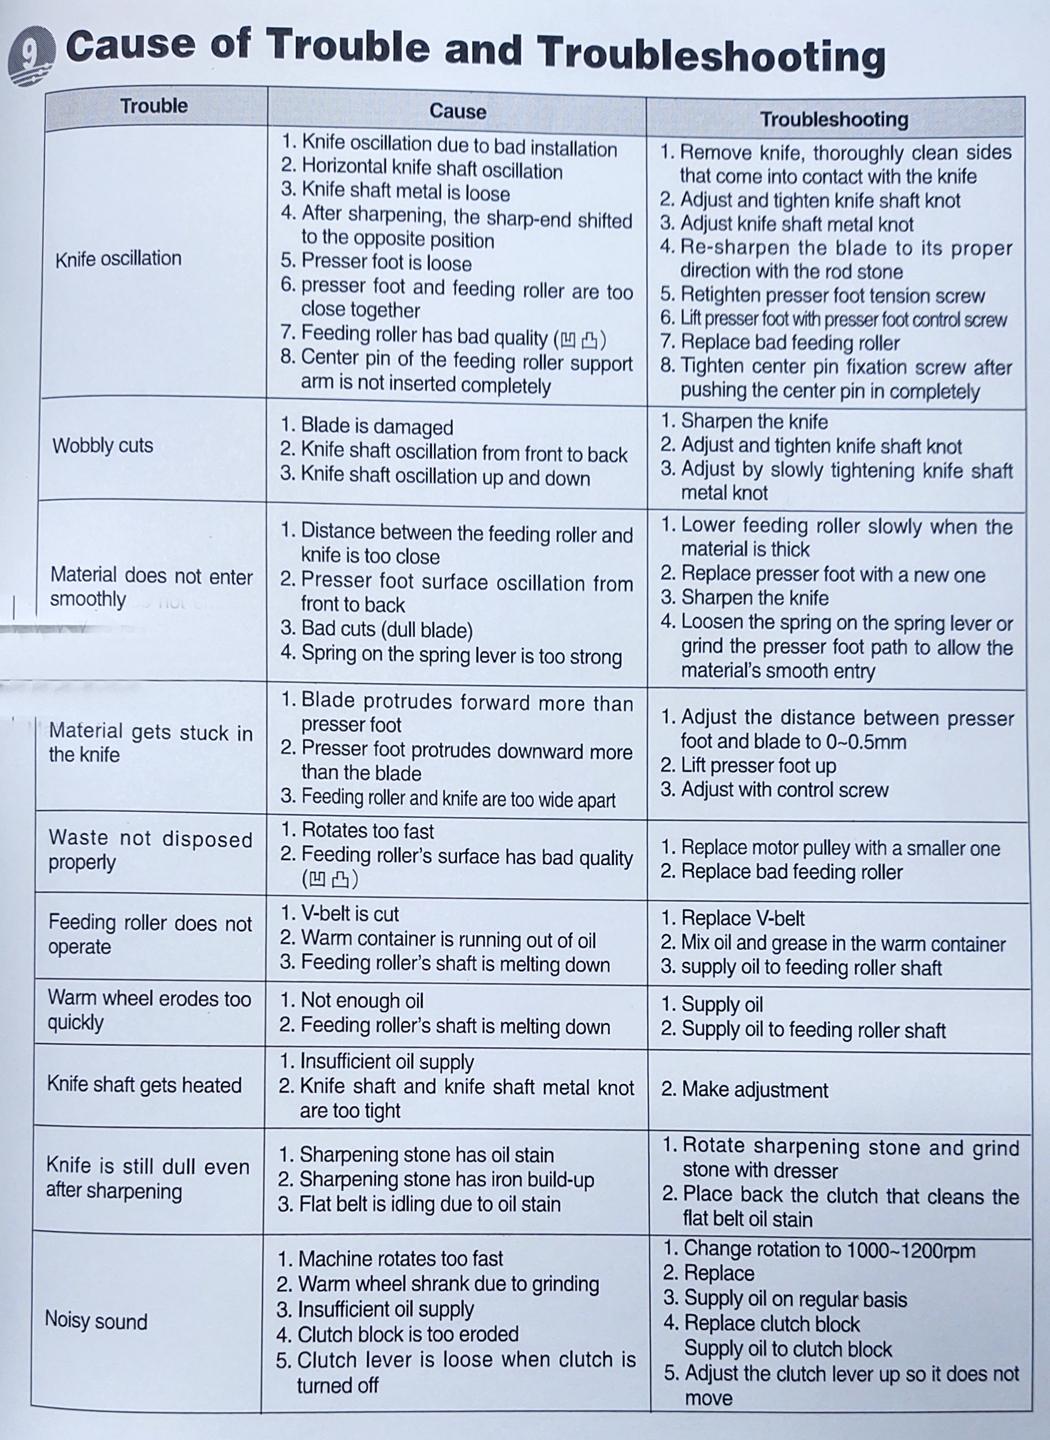
Hi, May I suggest . . . ? According to a skiver trouble shooting chart I have, it could be a) The wheel is rotating too fast b) Feeding roller's surface has bad quality Also the "waste disposal plate" inside the bell knife might not be in the best place? That's part #1 in the diagram you posted. The "waste disposal plate" shouldn't be deep inside the bell knife, it shouldn't be too close to the stone feeding roller. Over time, when you sharpen the bell knife many times, the side of the bell knife shortens and the "waste disposal plate" will need to be re-positioned away from the stone feeding roller Hope this helps!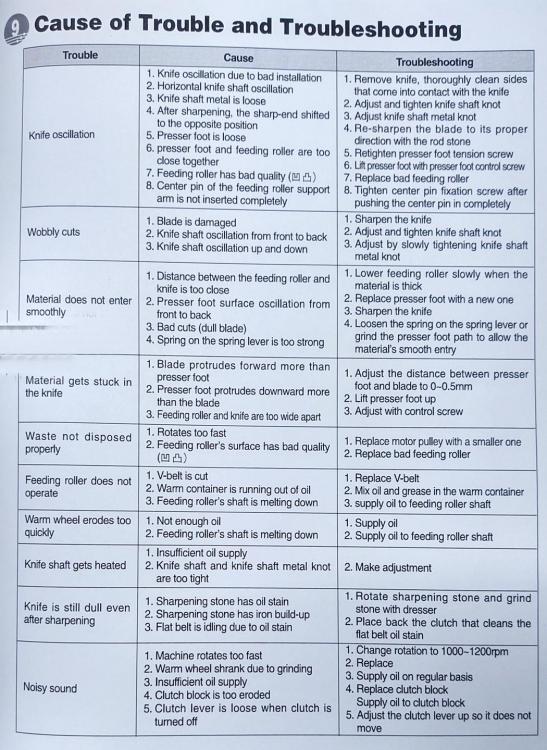
-
Hiyas! The manual for this machine is at http://www.artisansew.com/pdf/manuals/exisiting/1798_1AZ_Manual.pdf To sew at the max specs of the machine, you'll need to have it set up right. To sew thicker leather use the larger needle sizes, thicker thread. Changing the settings the tension for each thread size can take time. If the machine has a reducer/pulley and servo motor, it should be able to handle anything below 3/8" that is chrome tan leather and it should be okay with Veg-tan leather, but to switch from one to the other types of leather requires different tensions above and below which can be frustrating. I use only size 69 or 92 bonded nylon thread to keep it simple and the appropriate needle size (18 - 20). For the heaviest material/thickness, try the 138 bonded nylon thread and the #22 needle. Here's more info on thread and thread specs http://www.thethreadexchange.com/miva/merchant.mvc?Screen=CTGY&Category_Code=nylon-thread-information Always sew on a practice piece before working on your project to make sure the machine is sewing correctly
-
Singer Industrial Sewing Machines Manuals -
Lil Doodler replied to Lil Doodler's topic in Leather Sewing Machines
Hi Hank! Have you seen this website? It has a number of manuals, including patchers for Adler and Singer. http://www.bootmaker.com/manuals.htm -
Cylinder Sewing Machine Flat Bed Attachment
Lil Doodler replied to Lil Doodler's topic in Sewing Leather
Outchies!!! Didn't the guy feel any pain?? Did the teacher tell anything about safety before he let people use the machines? It's a good thing that guy wasn't learning a radial arm saw hehehe Scroll saws are usually very safe Thanks for your compliments! -
Hi Everyone! I found something that might be of use to you, if you are looking for a manual for an old Singer Industrial Sewing Machine. Here is Singer co list of manuals for industrial sewing machines http://parts.singerco.com/IPinstManuals/ When I was looking for a used sewing machine I found the manuals to be of great help. I wanted to see if needles for a machine, or parts, might still be available. In the manuals, there is a lot of information, like the purpose of the machine, how to thread it correctly, the needles used by the machine, thread tension and also how to set it up. In most cases, the setup info includes timing and the needle bar. The manuals online are scans of old manuals. Not perfect quality, but very readable! Good Luck to you!
-
Howdy! After seeing a flat bed attachment for an Adler, I decided to make one on my own for my Artisan Toro 4000. Thought you might like to see it. It is pretty easy to make and cost a lot less than the commercially available ones. It's made of 1/2" plywood. I used a piece of 1/8" x 1" Aluminium to make a strap to hold the bed securely in place Another view of underside There are two guides, easily moved or removed. When both guides are used, you can sew a perfectly straight line on a strap or belt. Cutouts on the wood were done with a scroll saw. If you didn't know, the scroll saw is a great piece of equipment. It can cut almost anything, including leather.
-
Hi, You might find the first 9 pages of this manual to be of a lot of help operating, and maintaining your skiver http://www.ou.edu/ao...r Model 10A.pdf Also, here is a skiving machine trouble shooting chart should be helpful to all! Skiver Troubleshooting.pdf