


Bob Blea
-
Posts
1,771 -
Joined
-
Last visited
Content Type
Profiles
Forums
Events
Blogs
Gallery
Store
Everything posted by Bob Blea
-
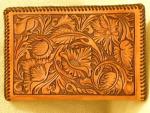
I think they look like excellent work!
-

Problems With Fiebings Antique Finish Paste
Bob Blea replied to KBCustom's topic in How Do I Do That?
Kody, I've seen where some of the pro's use Tan Kote as a final finish over Fiebings Antique. It does rub off some of the antique, changing your color a bit, because Tan Kote can be used to thin the Fiebings antique paste. When applied after antiquing, it evens out the antique and can even remove streaks or darkened areas. If you didn't have a coating of Resolene over that chipped area I'd suspect it could clean that up and even it out. It still might be worth a try. -
Have you tried contacting Barry King Tools? He doesn't list one on his web site but I know he has a lot more designs that just what shows up on his site, and I'm pretty sure I've seen a version of that in his display at a show. Bob
-
Looks interesting. I currently have an Etsy shop and Etsy doesn't seem to be very effective right now. First time I've heard of this site but looking them over they look like they are worth researching. I would be interested in anyone's experience with them as well. Bob
-
Dye Edges How To Avoid Getting Dye On The Grain Or Flesh Side?
Bob Blea replied to DavidL's topic in How Do I Do That?
I'v never had to do anything on an edge to make the ink stay, however in my case it's going to be covered mostly by lacing. I have used Sharpies to color letters and found that when a wiped on Wyosheen (same as Clear Lac or Neat Lac) it did take a little of the ink off. That's the only time I've had a problem with the ink coming off. And after a thin coat of Wyosheen the ink seemed very sealed. I put thin coats of this on all my notebooks and it doesn't have any problems flexing, as long as you keep the coat thin. Hope this helps, Bob -
My First Project
Bob Blea replied to Sasse's topic in Purses, Wallets, Belts and Miscellaneous Pocket Items
I think you did a great job. That rustic style is very popular with many people out there, so for a first project I think you did good. -
Nice work, thank you for sharing!
-
Custom Armor Made By Me The Grinning Dwarf
Bob Blea replied to TheGrinningDwarf's topic in Historical Reenactment
I really like your work. Keep sharing it here please! -
Here's a tip that will probably help: On a piece of scrap leather draw a straight line and then stamp a couple of rows of the basket stamp you want to use neatly along that line. Make sure the line of stamps is long enough to stretch across your logo. Let that dry and then cut it out, making it into a small ruler. Use that to help you line up spacing of the stamps across the logo. Also use a ruler to keep you lines on the project straight like Wild Bill said. And try practicing it on scrap a couple of times before taking on the project. Hope this helps, Bob
-
I think it looks great. Very clean.
-
Someone once pointed out that Xacto makes a very similar knife that swivels the same way a Tangleboss does. Before going to the trouble to track one down, you might want to find one of the Xacto knives. I think they called it a Craft Swivel Knife.
-
When Do You Stop Cutting Yourself?
Bob Blea replied to Chief31794's topic in Leatherwork Conversation
Ow, that makes me cringe all over hearing that story. Usually I'm more careful with the knife too when I put it down, but I clearly need to be MORE careful. -
When Do You Stop Cutting Yourself?
Bob Blea replied to Chief31794's topic in Leatherwork Conversation
I had an incident like this last week. My Leather Wranglers round knife was sitting on top of a box on my cutting table. I accidentally shifted the box and the knife started sliding off the box and onto the floor. I 'instinctively' reached out to try and stop it but fortunately my reflexes were slow and I only caught one corner of the knife as it fell. It cut my finger with a very shallow cut but I did manage to move my foot out of the way and the knife landed on carpeting, so the blade wasn't damaged. Lessons Learned: Think about where you set your knife down when not in use and never try to catch a falling knife.... -
I'm certainly no expert and I don't use drum dyed leather, but from what I've seen that doesn't look like drum dyed leather. Drum Dyed I've seen the color penetrates all the way through. That looks more like it had a dye sprayed onto it and that it has some sort of coating on the backside that is peeling off.
-
Hi Tallbald, I use Weldwood too and I may be in group that doesn't use it quite right, but I sometimes use two coats when I install pigskin liners in my notebooks. I put it on thinly (I don't thin the Weldwood at all, just thin application) and I do see my leather darken a bit at first. That quickly goes away and yes the leather can soak up the solvent. I find that occasionally I don't get a good bond in places and I need to do a second coat, but as I said I'm probably doing it wrong. And I might be putting it on too thin. Bob
-
First Swivel Knife And First Pattern
Bob Blea replied to Toney's topic in Floral and Sheridan Carving
Toney it is a good start, but I do notice one thing right off the bat: You're leather is too wet. Let the leather come back to it's natural color before you even put the swivel knife to it. Your tooling will come out much crisper and cleaner. -
A Leatherwork Journey Over Three Years.
Bob Blea replied to immiketoo's topic in Leatherwork Conversation
Mike you're not the first person to tell me I don't give myself enough credit. I might have to start believing it one day. -
A Leatherwork Journey Over Three Years.
Bob Blea replied to immiketoo's topic in Leatherwork Conversation
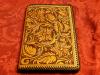
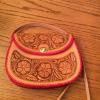
Mike, you've come an amazing way in just three years. I've been at this seven or so years and haven't come as far as you have. For my part, here's a few items. The first is a checkbook cover from a Tandy kit that was my first leather project, and I still use it. The second is the back of a notebook that was one of my first attempts using a geometric, and it wandered a bit. I got much better at those by the third picture, and a lot better at floral in the last two. The purse was just earlier this year and was my first attempt at building one of those from scratch. I still have a long way to go and this site has been invaluable in my learning and development. I too am very thankful for all the help I've received from others here over the years. Bob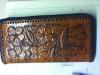

-
Sheridan Double Gun Rig
Bob Blea replied to Jackdawe's topic in Gun Holsters, Rifle Slings and Knife Sheathes
Very impressive! -
Excellent! They look great. I've wanted to make myself some type of leather armor for a long time. Someday..... Keep posting as you go along. It will be very inspirational to see this come together.
-
That looks first class Chief!! Nice work!
-
It looks great Mike! I love the detail in the folds of the clothing. Background looks great too.
-
Old Leather Tools Beard-Gore-Hack Barth-King Etc
Bob Blea replied to Junkyarddog's topic in Leatherwork Conversation
I think only the fires of Mt Doom could destroy the Robert Beard tools. -
Old Leather Tools Beard-Gore-Hack Barth-King Etc
Bob Blea replied to Junkyarddog's topic in Leatherwork Conversation
You made an incredible find. I'm thankful you were there to keep these from being scrapped. Keep them all. Your grandkids will inherit those Beard tools and they will still look as good as they do now no matter how much you use them. -
Anyone Know Where To Get These Tweezers For Dyeing?
Bob Blea replied to bylinesupplyco's topic in How Do I Do That?
I'm pretty sure you can get the hemostats / clamps at Harbor Freight. I know hobby shops usually carry them because they are very handy for building models.


