Bob Blea
-
Posts
1,771 -
Joined
-
Last visited
Content Type
Profiles
Forums
Events
Blogs
Gallery
Store
Everything posted by Bob Blea
-
Welcome David!
-

Stingray Inlay Archery Arm Guard
Bob Blea replied to Solofalcon's topic in Archery Quivers and Bow Cases
My wife wants something similar with a stingray inlay, but I haven't gotten around to that project yet. Your looks great. -
I think it looks great Colt! You did a great job for your first one. Bob
-
Ladies Clutch Wallet
Bob Blea replied to Bob Blea's topic in Purses, Wallets, Belts and Miscellaneous Pocket Items
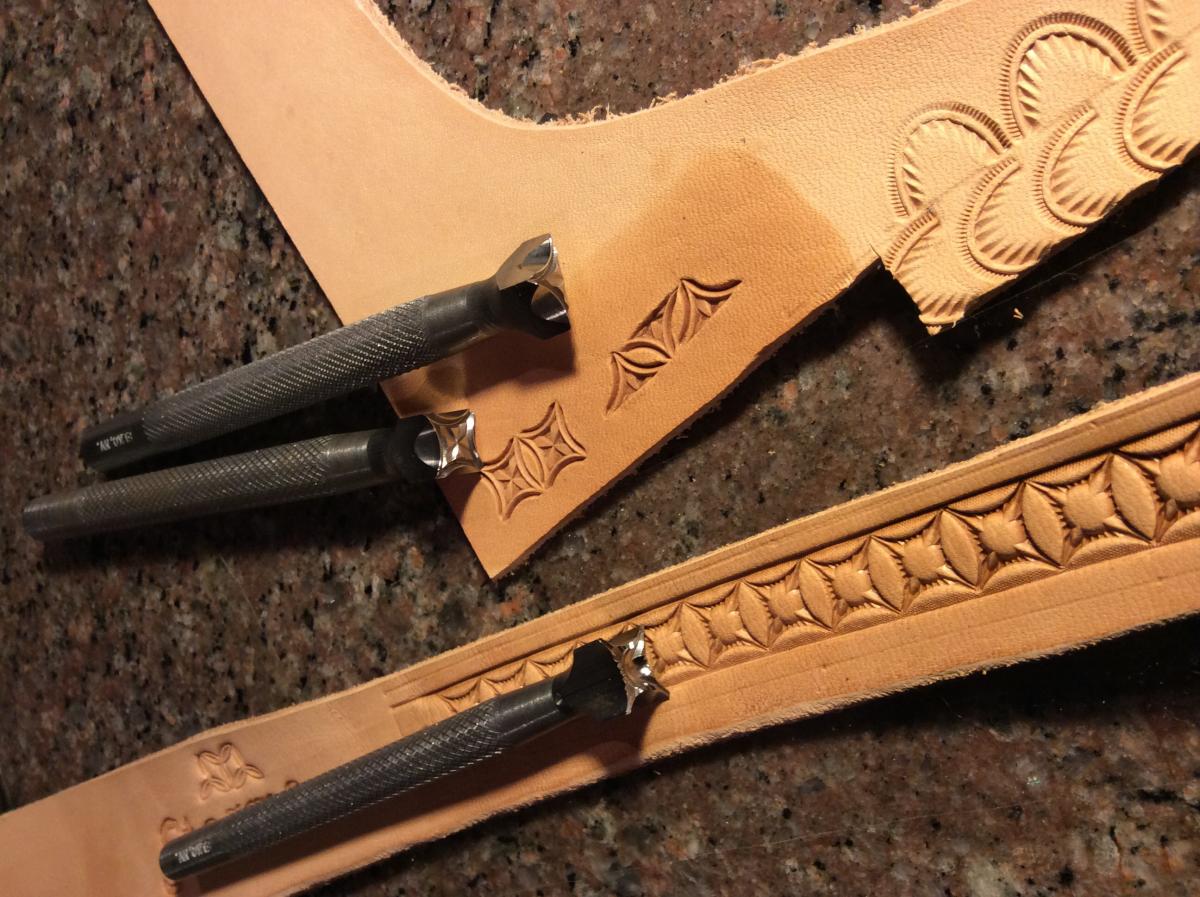
No problem Cheryl. This isn't the exact stamp I used but it's just like it. The one on the top is what makes the border and there is a sample of its impressions below it. It's half of a square geometric made by Wayne Jueschke in Elko, NV. the full size version is shown right next to it. IMO he makes the best geometric and basket weave stamps out there. I'm not at home so I couldn't take a picture of the exact stamp but this one is close and it's the same size. Wayne intended them to fill a stamped area when you just need half a stamp but they make a great border! That's what use them for.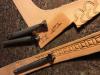
-
I think those look cool!
-
Snake Skin Inlay Wallet
Bob Blea replied to MonicaJacobson's topic in Purses, Wallets, Belts and Miscellaneous Pocket Items
Monica that is an awesome looking purse. It may be thick but I like the design and the inlay. I'll bet she'll love it. -
Ladies Clutch Wallet
Bob Blea replied to Bob Blea's topic in Purses, Wallets, Belts and Miscellaneous Pocket Items
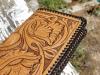
Thanks Cheryl, the notebooks on Etsy are all double loop lacing and on those I do just go through holes twice on the corners. I was using triple loop lacing on this because the leather was thicker than what I normally work with (probably around 8 oz total) and I decided to use triple loop for coverage of the wider area. I remember being told that you want to use triple loop lacing when dealing with a wide edge to get complete coverage. The book I was following said to go through each corner three times but I like Chief's suggestion better. -
Ladies Clutch Wallet
Bob Blea replied to Bob Blea's topic in Purses, Wallets, Belts and Miscellaneous Pocket Items
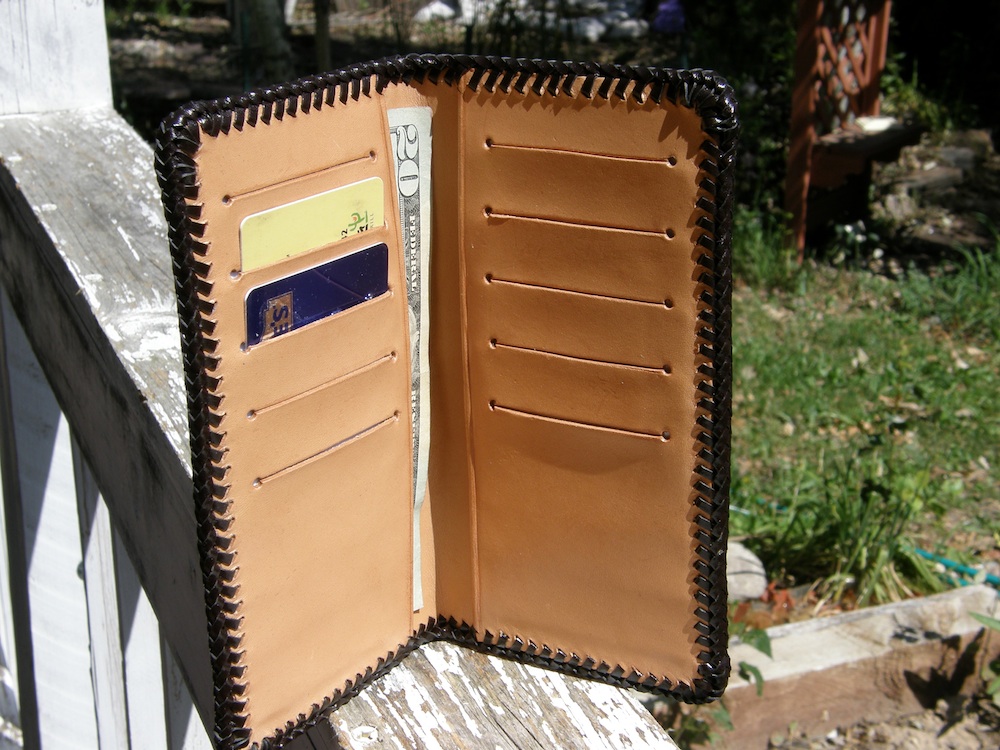
thanks both, they are actually very similar to the card slots shown in the KK Tutorial in the 'How do I do it' forum, except the pockets are glued in place instead of stitched. The Weldbond cement I use forms a very strong bond and I haven't been able to separate items glued with it without tearing the leather apart, so it should hold. -
Ladies Clutch Wallet
Bob Blea replied to Bob Blea's topic in Purses, Wallets, Belts and Miscellaneous Pocket Items
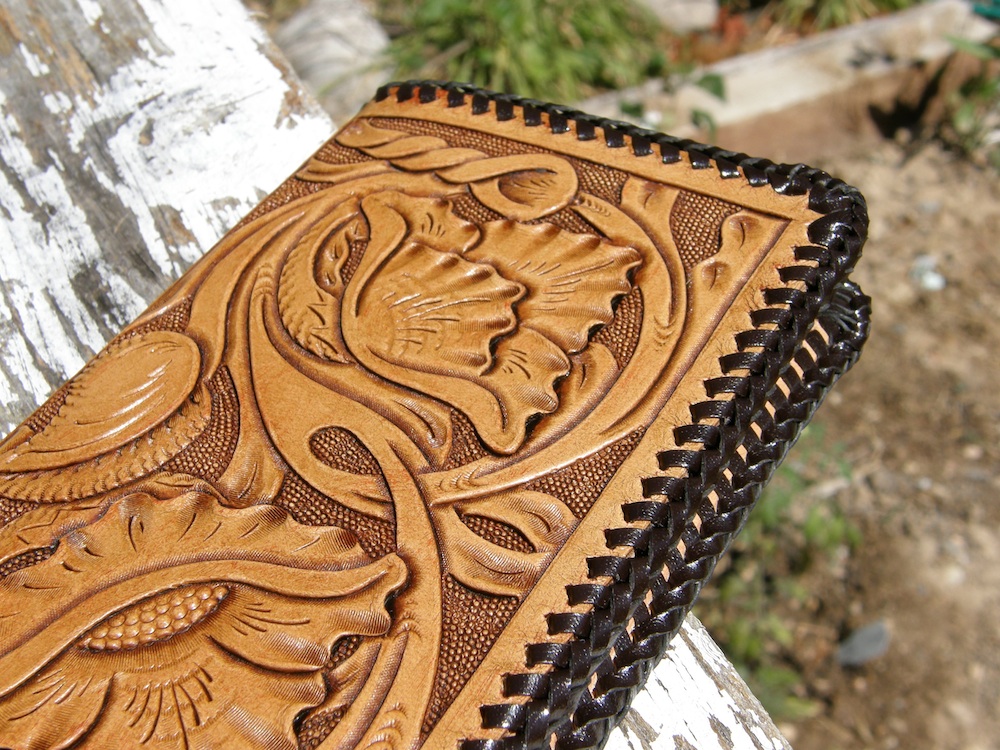
Chief, I do like the look of the corners on that. They don't look oversized at all. I think the wallet corners bulge out compared to the rest of the lacing, so I will definitely give the 2-3-2 technique a try. Thanks for the tip and the compliment! Bob -
Ladies Clutch Wallet
Bob Blea replied to Bob Blea's topic in Purses, Wallets, Belts and Miscellaneous Pocket Items
Thanks Rohn and benlilly1. Yes, I went through each corner hole three times because that's what the instructions I was following said. I might want to try going through only twice. To me it does look bunched up there. -
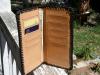
Here's something I finished over the weekend. It was my first attempt at triple loop lacing. Not that hard to do but for some reason I kept messing up the corners. I really like the rest of the wallet except it's maybe a little too thick for my tastes. I'm going to make another and line it with pigskin behind the pockets next time to see if that might make it less bulky. Might also try one with a fabric lining for a little more decoration.

-
Looks great Chief! Love the color on it. Bob
-
Hello piper and welcome to the forum! There is a demo on making a biker wallet in the 'Patterns and Template' section. It's pinned to the top of that forum and it will take you through how to make one of these. Good luck! Bob
-
Wallets (Ancient Antique Coins).
Bob Blea replied to Samar's topic in Purses, Wallets, Belts and Miscellaneous Pocket Items
I thought the coils were real too. That is excellent carving, and the design of the wallets is very unique! Amazing work! -
There are a couple of reasons I would say the round knife is better than the razor blade. First off I feel I have more control pushing the knife away from me, and I feel safer that no part of my body is in the path of the knife. I'm not familiar with your particular type of knife but with a standard utility knife you're always pulling towards yourself. I also feel I have more control when making small scalloped cuts or curves like Joe says above. A round knife also allows you to make a roll cut, where you roll the round part of the blade forward to make a cut which is sometimes really helpful when cutting short straight lines. Also, the round knife can be turned on it's side and used for skiving leather, which you just can't do with a razor blade. Finally if you have a good steel in your blade you don't have to do much maintenance on it. I have a Leather Wrangler round knife and I rarely need to do much more that strop it occasionally, so maintaining the edge isn't much of a problem.
-
Rubber Cement doesn't provide a very permanent bond so it wouldn't work very well. Adhesives like Barge or Weldwood do provide a very permanent bond once they are dry and they will last. Generally they will last longer than stitching because (with Weldwood at least, that's what I use) the leather has to be torn apart to separate two bonded pieces, where the stitches can be cut/broken and unravel with effort. However, it is perfectly acceptable to stitch the pockets in if you like, it just depends on how you want the pockets to look. If you stitch them in place you are going to have a line of stitching visible above and below each slit in the example wallet you posted.
-
Need Some Very Lightweight But Good Quality Leather.
Bob Blea replied to Campchair's topic in Leatherwork Conversation
Wicket and Craig will sell you individual hides at that weight. -
I think in most cases the buffalo leather is chrome tanned and chrome tanned leather won't edge burnish very well. If it's veg tan buffalo edge burnishing shouldn't be a problem.
-
It's actually similar to the 'KK Tutorial' in this forum, except each slot isn't folded into a pocket. You can do it with a ribbon of material folded accordion style behind the slots and glued in place behind each slot.
-
Shanwen Kia (Chinese Scale) Armor Question
Bob Blea replied to Buddahcjcc's topic in How Do I Do That?
You've got a really cool project there! It's going to be hard to duplicate what the ancient Chinese armorers were doing without any surviving examples. You are basically going to have to reinvent their technology that they may have spent several generations developing. My only suggestion would be to start off narrowing the top strap of the plate to allow you more room for error in how the scales interlock. Looking at the paper scales in the picture in the article you can see there is no tolerance for error in how they interlock. There are no gaps in how the upper tab fits into the scales around it. Not only will that make it hard to interweave them evenly (you can see if the small paper example its difficult to evenly weave just a few) it would probably make the finished armor very inflexible. That would make it hard for the person wearing it to flex or maneuver, which would be very bad for soldier. Making the upper tab a little smaller (and maybe all three tabs) will give you more flexibility when assembling and maybe make it more functional too. I also wonder if they didn't need to vary the size of the plates somehow to allow for curvature of the body. If you've ever tried stamping a geometric pattern on something curved, you will find that your rows can't line up evenly going through the curves and you have to make little adjustments and overlap stamps to make it work out. Usually you end up with a few overlapping stamps somewhat out of sight. They would have needed some way to adjust for a curved body shape, maybe by changing sizes or maybe shapes of the scales? Again without experience or an example to look at, it will just be up to trial and error. Good luck, can't wait to see what you come up with! Bob -
Very nice, I like them!
-
Unique Leather Carving Style, What Is It Called?
Bob Blea replied to ozzie111's topic in How Do I Do That?
I really like that style too. To my eye it does look like it is based on traditional Mexican artforms, but I'm no expert and I could be wrong. I do like the different way they've handled the linework in the flowers. I would like to know more about this style too. -
You could skive around the edges of the opening in the leather but you will need some material overlapping the edges of the MOP in order to hold it securely in place, at least with the method I'm describing. If you are trying to make the front of the MOP level with the visible layer of leather, you could somehow bond the material to the second layer of leather and then possibly wet mold the visible layer to the edges of the MOP. Once it dries there would be no guarantee you wouldn't have gaps between the leather and the stone you are inlaying, and the gaps could form over time as the item gets use. The leather would also do nothing to hold the material in place if your glue didn't hold for some reason.
-
If you are already planning on a purchase from Barry King, I would recommend getting some of his bevelers. They work well and you will never need to replace them. The pro series tools at Tandy I am told are comparable (never tried them myself) but I think for the price Barry King has them beat.
-
Hi Phillip, If I were inlaying that I would sandwich the mother of pearl between two layers of leather, with the outer layer having an opening slightly smaller than the piece inlayed in it. Bob