-
Posts
321 -
Joined
-
Last visited
Content Type
Profiles
Forums
Events
Blogs
Gallery
Store
Everything posted by Big O
-

Auto Pistol Holster Pattern
Big O replied to Itaricans's topic in Gun Holsters, Rifle Slings and Knife Sheathes
I do mine just a little bit differently. I make mostly wraparound holsters (as shown in that tutorial), rather than pancake holsters. I'm still new at this, but already I've made quite a number of mistakes, which I've learned* from. Here is my process at this point: 1. I do not yet own any blue guns, so I use the real thing. Unload it. Make sure it's unloaded. Make double sure it's unloaded. 2. Take a manila file folder and open it up on the work surface, with the crease running straight away from you. Take a pen or pencil and fill in the crease to make it more visible. 3. Check again to make sure the pistol is unloaded. Place the pistol upside-down, centered on the crease, with the center of each sight resting on the crease. Trace the outline of the slide. 4. Roll the pistol over to one side and trace its outline. Also trace as much of the inside of the trigger guard as you can, to mark the trigger location. Carefully roll the pistol over to the OTHER side, and repeat. 5. Measure the width of your first tracing, the outline of the slide. Take half that distance, and add to it the measurement of the thickness of the leather you're using. Using a ruler and a pen or pencil, plot a series of points on the folder that distance away from the outline of the bottom of the slide and trigger guard. If the slide of the pistol narrows at the front end, as most do, add about 1/16th of an inch for good measure so you don't need both hands, both feet, a pry bar and an anvil to get the pistol into the holster for the molding later (lesson learned*). Connect the dots using your pen and pencil. This is your stitch line. 6. Place the pistol on your belt where you intend to wear it. Find a comfortable (but realistic) height and angle. Make note of where the top of the belt relates to the top of the slide and the bottom of the trigger guard. If you're making the holster for someone else, have them do this, while wearing the pants and belt they'll most often be wearing*. Make note of the relative location of belt loops*, and of the width of the belt. 7. Find and mark those same two points on one of the side outlines of the pistol. Draw a line through them, and beyond. Draw a second parallel line below the first one, to represent the bottom edge of the belt. When measuring this out, add 1/8th of an inch*. 8. Find a handy location for a belt slot at the rear of the holster, and mark it on the template. Make sure it's at least 1/2 inch beyond the stitch line, and will not interfere with any offending belt loops*. Now drop it down 1/8th of an inch, because the angle WILL change when you unflatten that perfect layout by stuffing a pistol in it*. 9. Draw the outside edge of your intended holster, making sure it's outside the stitch line and belt slot. Leave at least 3/8ths of an inch clearance from both. Make sure you leave at least a middle-finger's width between the grip of the pistol where ti meets the trigger guard, and your outline at that point. 10. If you've incorporated a body shield/body guard/sweat shield, you'll have to move it back a little, because of the aforementioned dimensional shift that occurs when you unflatten the layout with a pistol*. Half the slide width has worked for me. 11. I like to incorporate a shallow half-circle at the top and bottom centerline of the holster, both for visual appeal and as a reference when folding the leather later. Omit this step if that's not your thing. 12. Fold the manila folder in half, so that you can see where you marked the stitch line, belt lines, and belt slot. Take the crappy, Made in Japan, too-small awl that you bought, not knowing any better*, and put it to a useful purpose: poke holes along the stitch line, belt slot, and at the far end of each belt line. This allows you to see those features on the OTHER half of your template*. I put an old mouse pad under the folder while doing this, to minimize the chance of marring the top of the computer desk and incurring the wrath of the War Department*. If you've incorporated a sweat shield into your design, also use the awl to poke out the top line of the holster on the front, where the body shield WON'T be. 13. Draw the belt lines on the "back half" of your template, by connecting the dots of the holes you punched. 14. Draw the outline of your reinforcement piece/belt tunnel, leaving at least 1/8th of an inch extra clearance on both ends for the belt. Make sure it doesn't overlap your stitch line*. 15. With the manila folder folder in half, cut out your template. Trim off the "extra" sweat shield, along the line of holes you poked in step 12. 16. Place the template on your leather, making sure you're cutting it out with the correct sides of the leather "out" and "in"*, and trace it with the marking device of your choice. Cut out your main holster body. 17. Cut out your reinforcement piece from the template, and repeat step 16 for it. 18. Place your templates on top of your holster body and reinforcement piece, take your awl, and poke reference holes for the stitch lines and belt slots on both sides. Make use of groovers and punches to create the actual stitching grooves and belt slots. This concludes the template/cutting process. All you need to do now is edge, groove, burnish, dye, wait, glue, wait, poke holes, bandage fingers, stitch, fold, glue, wait, trim, poke holes, bandage fingers, stitch, sand, wet-mold, burnish, wait, finish, and wait. Humming, whistling and cursing are optional. -

Holster Again :-D Mexican Triple Loop
Big O replied to Draxus's topic in Gun Holsters, Rifle Slings and Knife Sheathes
That is GORGEOUS! -
I haven't BROKEN any knuckles, but I've sure banged up the first one on my left index finger.... I wish they'd just make longer punches.....
-

Auto Pistol Holster Pattern
Big O replied to Itaricans's topic in Gun Holsters, Rifle Slings and Knife Sheathes
http://leatherworker.net/forum/index.php?showtopic=5696 -
Wow! Just.......WOW!!! If I thought it'd stop bullets, and didn't think the boss'd ship me off to the Enchanted Kingdom, I'd wear that to work.....
-
Looks great for a first try. I prefer wider belt tunnels, but that's probably not as important with smaller pistols.
-
I'm only just starting out at this. Most of the holsters I've made have been for my own use. I've filled exactly three orders. My main selling point is this: ANYBODY can sell you a holster that fits your gun. But they can't sell you a holster that fits YOU. I can. Bottom line: if you want a holster that's NOT either straight up, or at a 15-degree cant, you have to go custom. Maybe your ideal angle is 10 degrees. Maybe you need it to ride on your belt just a little higher. Maybe you have a pistol none of the big boys are making holsters for.
-

Second Shipping Day Last Week
Big O replied to Lobo's topic in Gun Holsters, Rifle Slings and Knife Sheathes
Wow! Do you have a system to ensure that each customer gets exactly what they ordered? Bins/bags/tags? I'm just making holsters one at a time, so it's not an issue for me yet, but maybe some day....... -

Magazine Pouches ~ Show Em!
Big O replied to ShortBBL's topic in Gun Holsters, Rifle Slings and Knife Sheathes
Not a single, but.... I'm thinking that if I made a single mag pouch, I'd do so out of an L-shaped piece of leather, using one "leg" to form the pocket, and the other to form a belt loop. -

Handcuff & Double Mag Holster
Big O replied to Sixer's topic in Gun Holsters, Rifle Slings and Knife Sheathes
That's going to take up a LOT of belt space. I think I'd consider "stacking" the magazines somehow to reduce that. Either have a split magazine compartment up front, with one mag on top of the other (belt-leather-mag-leather-mag-leather-air), or put them side by side, facing out. Either way, you're cutting the belt space for the magazines in half. I carried a 1911 on duty for about 5 years. Used a 2X2 mag pouch. -

Red Or Blue Guns?
Big O replied to ShortBBL's topic in Gun Holsters, Rifle Slings and Knife Sheathes
I read somewhere (I believe on this site) that the blue guns are very slightly undersized, and that the red guns are oversized. And I think the orange guns are from Blackhawk. I theoretically have an orange gray Blackhawk J-frame coming my way from Botach Tactical. Theoretically, that is, because the order is right there online for me to see, but its actual STATUS is, well, AWOL..... -
Nice. Can't possibly be a FIRST TRY, though. I'm throwing a B.S. flag on that play. (My first holster was as ugly as homemade soap) Does it have a channel for the front sight?
-
Love it! (Not just the piece, but the sentiment, too)
-
At this point, I just stick a ruler through the belt slots and push them together a little, then let it dry that way. I really should get a section or two of really thick, stiff belt blanks for that purpose......or something else with the proper dimensions. Someone mentioned wooden mandrels. How would I go about finding/making those?
-

Two-Way Holster For Taurus Public Defender
Big O replied to Big O's topic in Gun Holsters, Rifle Slings and Knife Sheathes
It's actually just black. I bought that particular piece of leather already drum-dyed and finished, Any questionable color appearance is likely due to the crappy cell phone camera I took the pictures with. -
I work in the airport environment very frequently. The issue isn't going to be airline policies, so much as it will be TSA regulations. You're definitely going to have to send most of your tools in checked baggage, so you might as well send them all that way. They probably wouldn't have a problem with groovers, and definitely not with burnishers, but if awls and mauls will need to go in checked baggage anyway....... The good news is that I can't think of ANY leatherworking tools that wouldn't be allowed in CHECKED baggage.
-
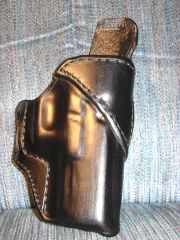
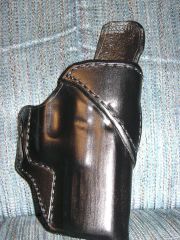
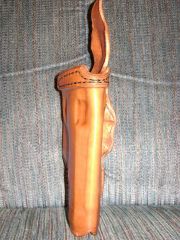
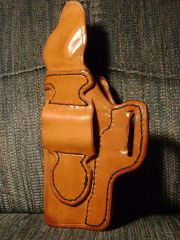
Grumpy old man or no, I value your opinions, Mike. I used the linseed oil kind of by accident. I had two different colors of Fiebing's leather stain - black and walnut. I found the walnut to be a darker brown than I'd like, so I called Fiebing's and asked what to thin it with. They said linseed oil. I mixed some up half and half and tried it on a different holster. Still came out darker than I wanted. Just out of curiousity, I put a single coat of plain linseed oil on this one, and I liked it, so I applied several more. I took those pictures about 2 hours after applying the Resolene, so it wasn't completely dry yet. It ended up a little less glossy. Unfortunately, I can't get a picture of it with the 1911 in it just now, because I took that holster to the local gun shop to put on display there in an effort to drum up some business. I actually DID use a #3 stitching awl for most of the holes on this holster. Everything on the reinforcement piece, and the stitch line running along the outline of the pistol. Up right above the belt slot, my awl got too dull to pierce the leather any more, and I didn't have the means on hand to sharpen it (I was at a table at a gun show at the time), so I reverted to drilling holes with my Dremel. I'm thinking maybe I need a wider groover blade. I bought my adjustable groover used, so I don't know what its size is. Going deeper is a good idea, and I'll try that first. The spacing looking even is almost an accident. I didn't even use an overstitch wheel, just winged it - but took my time to place the awl blade in as close to the right spot as possible. Same thing with the drill bit later on. Thanks for the pointers. I can use all that I can get. That applies to everyone else, too. I guarandamntee that NOBODY will be a harsher critic of my work than I am. I said that I felt good about this holster......not that it was perfect.
-

Can I See Your Tan/light Brown Dye Job Photos?
Big O replied to NewYorkerInSydney's topic in Leatherwork Conversation
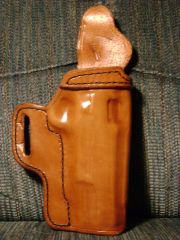
No dye at all. Just linseed oil. And 50/50 Resolene and water. -
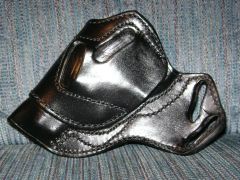
From the album: Concealment Holsters
-
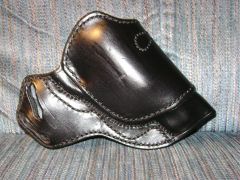
From the album: Concealment Holsters
-
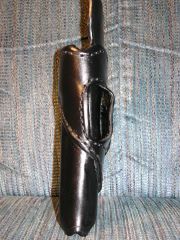
From the album: Concealment Holsters


