Eaglestroker
-
Posts
653 -
Joined
-
Last visited
Content Type
Profiles
Forums
Events
Blogs
Gallery
Store
Everything posted by Eaglestroker
-
2 Weeks Of Work Off The Bench
Eaglestroker replied to Frank's topic in Gun Holsters, Rifle Slings and Knife Sheathes
Frank, As expected they all look fantastic, but I really like that next to last rig. I've got to figure out a box like that in my free time On the black one that's some nice plug work! In regards to the cold I was in Houston late last week and got in ice storm, and it was 65* the next day. This weather might kill us all! -Robert -
Latest Holster Models.
Eaglestroker replied to troop's topic in Gun Holsters, Rifle Slings and Knife Sheathes
All excellent, great work! -
W&c "havana"
Eaglestroker replied to Eaglestroker's topic in Gun Holsters, Rifle Slings and Knife Sheathes
Thank you! The only noticeable difference is the extra coin still in my wallet Glad I could help out George. I think the "crust" term means it is semi finished. I email Linda now. If I don't get exactly what I ordered it makes for some accountability, and it is easier than playing phone tag. Skipping the whole dye process easily double my production capability in any given amount of time. I still have a decent amount of undyed leather and am having to force myself to use it up. -
Latest Exotic Rig
Eaglestroker replied to JRCHolsters's topic in Gun Holsters, Rifle Slings and Knife Sheathes
Nice work, and interesting overlay on your belt. That Wildebeast is very attractive! -
Something Different
Eaglestroker replied to Red Cent's topic in Gun Holsters, Rifle Slings and Knife Sheathes
I really like that rig, nice work! -
2 Gun Buscadero
Eaglestroker replied to Josh Ashman's topic in Gun Holsters, Rifle Slings and Knife Sheathes
Josh, fantastic stamp work. I really need to start playing with that Carlos border! -
W&c "havana"
Eaglestroker replied to Eaglestroker's topic in Gun Holsters, Rifle Slings and Knife Sheathes
This does not from the tannery it has cut resolene applied in the photos. I know bridle has the wax impregnated which made it a hassle in my experiences to mold. I case this saddle skirting and it molds up to my standard. I'll always prefer hand dying large projects but in reality the drum dyed is better struck than me dip dying the leather. When I go to groove it I rarely cut though the color unlike my dip dyed (try to remember to groove before dying for this reason). What Paul pointed out to me about W&C is the skirting is cheaper than the standard tooling sides. I cut my cost a fair amount by moving to back only skirting about 4 months ago. It is obviously more expensive to stock 4 colors than one or two 'in the rough' hides plus dye. When you factor in different weights it can brcome uneconomical for a lot of folks - it sure is nice not to have to screw with black though and I LOVE the pasted flesh side. When it comes down to it for me when someone is paying for a fairly simple production item I'd rather spend time working than dying. On large tooled rigs where I get paid for that 'perfect' color I'll continue to hand dye. The drum dye colors have been very consistant over the half dozen brown sides I've used which is a great service in terms of duplication for the customer in my opinion. -
W&c "havana"
Eaglestroker replied to Eaglestroker's topic in Gun Holsters, Rifle Slings and Knife Sheathes
Josh, thanks for your compliments! Thank you for the lead on that. I've been trying to find a dark brown thread and have not had any luck at all finding one I liked. Thanks Paul!' I've tried black, russet, brown, chestnut, and this Havana. The color of Chestnut was not a personal favorite but it made nice belts and the holsters did well too. It sure is a major time saver around the shop. The last rather large order I posted was the russet with a light brown antique applied over the top. Thank you! When I order 7/8 I get closer to 9, when I order 6/7 I get closer to 6. I started ordering straight 7 and it comes in between 7-8, usually towards 7, and that does well for me. As always your results may vary! -
W&c "havana"
Eaglestroker replied to Eaglestroker's topic in Gun Holsters, Rifle Slings and Knife Sheathes
Thank you very much! -
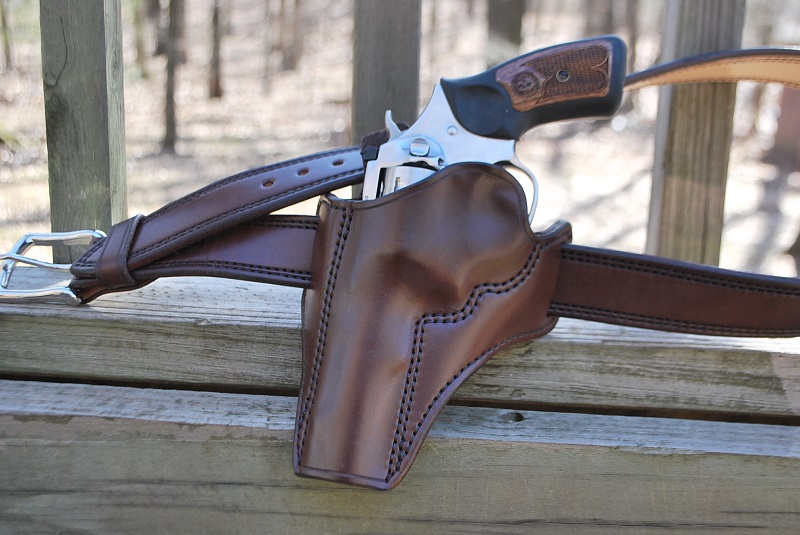
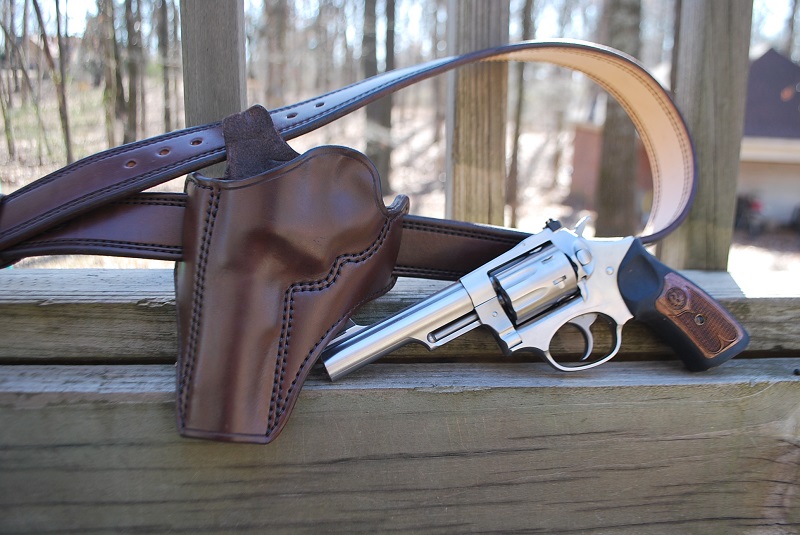
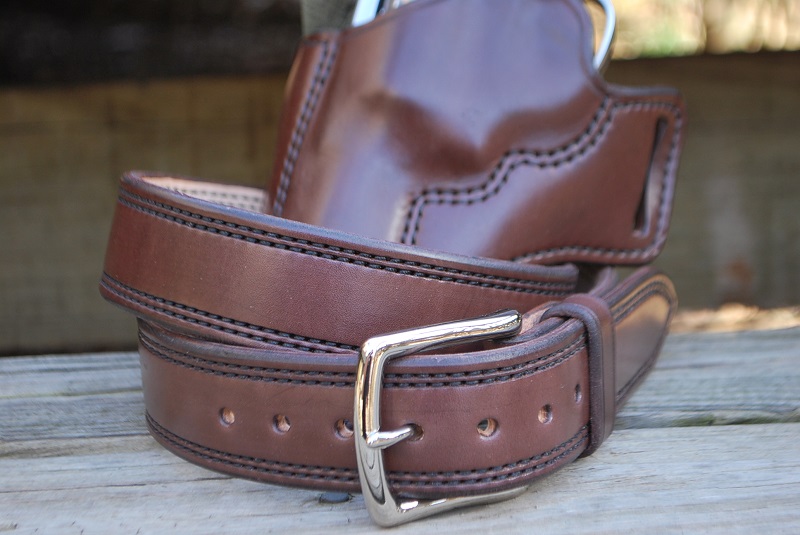
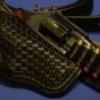
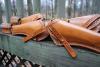
I'm currently in process of switching most production work over to the drum dyed leathers, and got turned onto this color option by another leather worker on here. The Havana color is a very dark/rich brown with little to no red hue. I suspect that this will be a very popular color with time. Pictured here is a double stitched belt & pancake for a Ruger 4" SP101.


-
I really like the hex head screw addition, adding that to my hardware store list now! I have a fairly old osborne of that design, and can't work it worth a durn. Haven't tried in about a year and a half so maybe I should revisit the subject. Sure feels more solid in the hand!
-
Wet Forming Holster
Eaglestroker replied to SpursNM's topic in Gun Holsters, Rifle Slings and Knife Sheathes
I've been using my converted filing cabinet for about two years now, basically a hot plate, bathroom fan, and some racks in the top drawer. I love the dryer idea and have an extra dryer at the shop.... Seems like the clothes dryer is better suited to dealing with humidity as well. -
Hey Paul, color is killer! Looks like your new machine is treating you well too!
-
You knocked that one out of the park, when fly fishing it is tough to keep everything you'd like to have at hand!
-
The 30/30SF interchange in my experience, the 30S is a league all it's own. The only difference between the 30/30SF is a Short Frame to my knowledge. If the mold is a Gen 3 the safety is smaller so leave some extra room.
-
Padding For A Rifle Sling?
Eaglestroker replied to Matt Alsaker's topic in Gun Holsters, Rifle Slings and Knife Sheathes
Neoprene was recommended to me by another member on the board, and it's all I've used with luck. Covered with suede it does quite well in my experience. -
A Different Gun Belt
Eaglestroker replied to Red Cent's topic in Gun Holsters, Rifle Slings and Knife Sheathes
Seems that would be a good option for a younger shooter, because it would be easy go grow into and just add a new center piece. Be good at keeping the buckle out of your gut too! Very interesting and thanks for sharing. -
End Result = Worth It!
Eaglestroker replied to Shooter McGavin's topic in Gun Holsters, Rifle Slings and Knife Sheathes
Quite unique Shooter, nice work! -
Case For Guns. Marlin 1895. 45-70
Eaglestroker replied to Samar's topic in Gun Holsters, Rifle Slings and Knife Sheathes
Absolutely fantastic work! -
Absolutely fantastic!
-
Surprise For My Brother-In-Law
Eaglestroker replied to Ran's topic in Gun Holsters, Rifle Slings and Knife Sheathes
Nice belt! From experience there is a mass appeal for a quality belt that reaches far outside of the gun culture. Then only downside is all that edging -
Modular Cowboy
Eaglestroker replied to Eaglestroker's topic in Gun Holsters, Rifle Slings and Knife Sheathes
Thanks Josh! Appreciate it Jack! Thank you Matt. I did that veiner on the first slide I ever made and liked the look. If you center it on the loop the fact it's not stamped all the way down the side never shows once ammo is loaded up -
Modular Cowboy
Eaglestroker replied to Eaglestroker's topic in Gun Holsters, Rifle Slings and Knife Sheathes
It was probably close to 3 weeks of work from start to completion, I'm about ready to never stitch an ammo slide again I was worried about colors matching considering this was an entire side and half of another for liners but the antique did a good job of tying almost everything together. Thank you! -
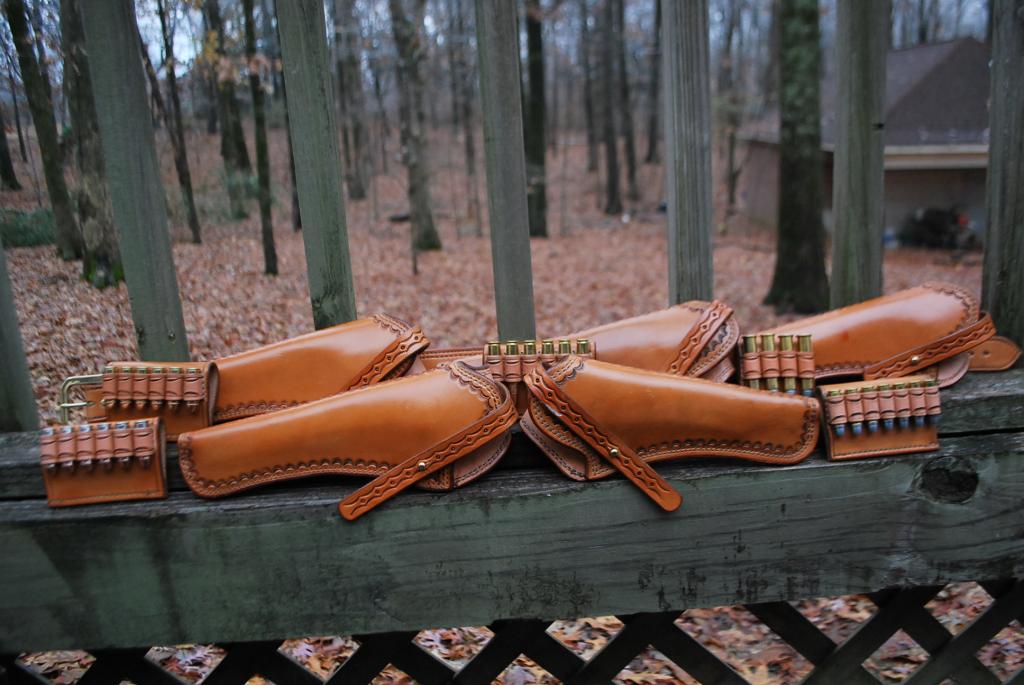
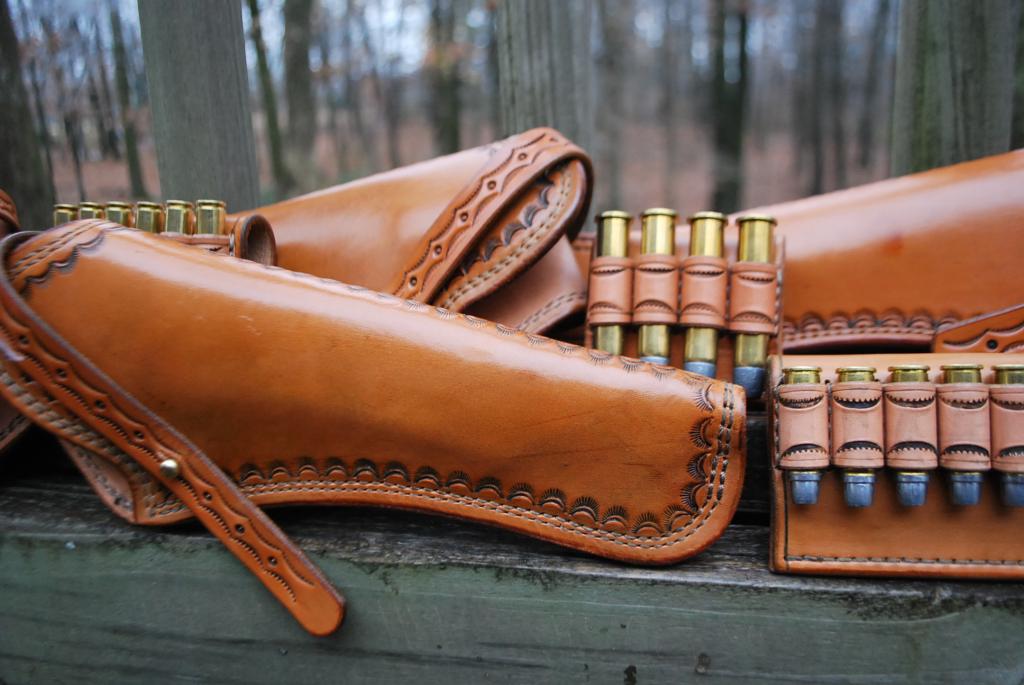
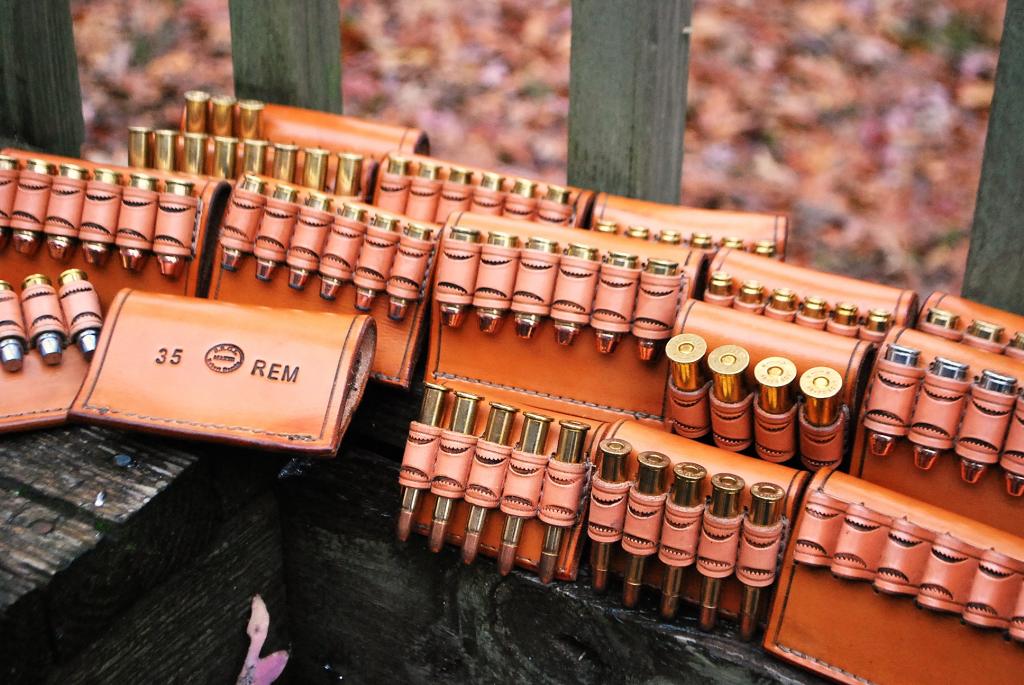
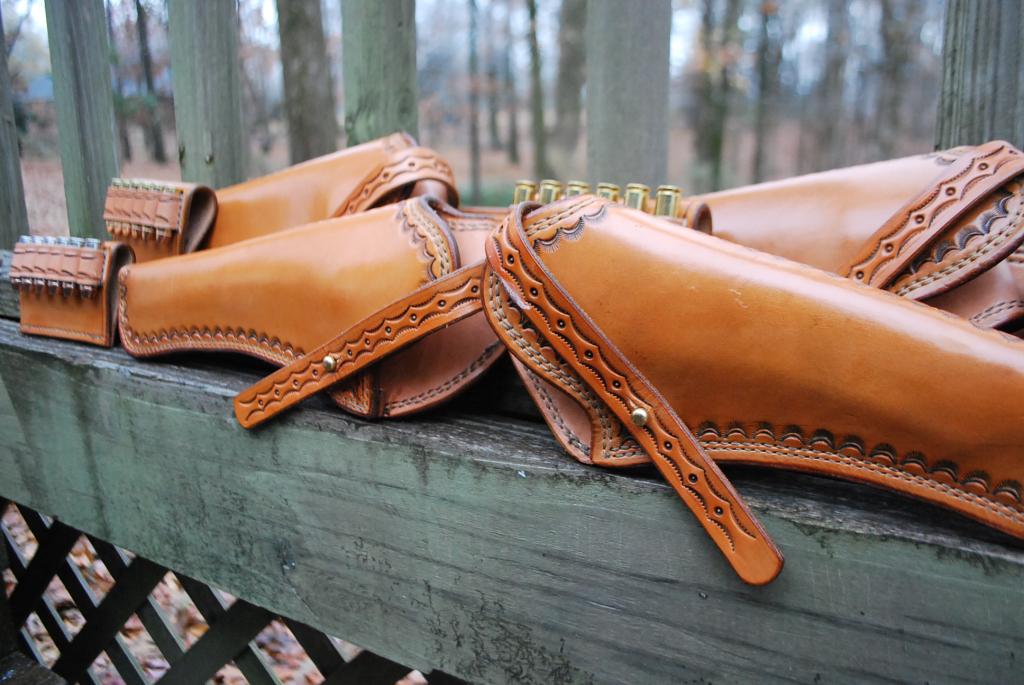
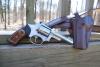
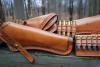
This is my largest rig to date by more than a few pieces and I’m extremely happy with the way it turned out. It consists of 5 Ruger SBH holsters, with the intention by the customer of being used with various other single actions as well which is why he requested a retention strap. Four of the five are southpaw & two are cross draw rigs as well. Rig also has a 2.25” wide Scout style belt along with 19 caliber slides in 9 different calibers. On pistol calibers I aimed for a minimum of 6 rounds and if I could fit more in the pattern I sewed them in. The markings aren’t all attractive but each caliber is marked to help prevent confusion and stretching of loops. The exterior leather is W&C Drum Dyed Russett with natural liners. I used a light brown antique on the entire rig inside & out followed by buffing the heck out of it, letting it rest, oiling it and buffing the heck out of it again. Final finish was two coats of Feibings Leather Balm with Atom Wax and I’m VERY pleased with the finish which looks / feels awesome. One other new thing I tried on this rig was pounding the stitching with a smooth faced hammer to help ‘set’ it per a recommendation in an old thread of Particle’s. It has an extremely noticeable difference to me especially on the holsters. All in all I know my customer will be tickled when this rig gets to Texas. Apologies for the photos as the ice didn’t want to cooperate with my normal backdrop this weekend!


-
I really like the saddle tan dye, nice work as usual Paul!