Go2Tex
-
Posts
726 -
Joined
-
Last visited
Content Type
Profiles
Forums
Events
Blogs
Gallery
Store
Everything posted by Go2Tex
-
I've thought about trying something like that but then I thought about how much my time was worth and recalled all the times I've tried to modify or jimmy rig something to make do and save a few bucks. It almost never pencils out. Pay the pain once.
-
Thanks, Steve. That's very helpful. I have tons more questions but I guess the seat ear cut is way off topic for this thread and probably been discussed elsewhere. Anyhow, this has opened my mind to a whole new method and I'll have to give it a try.
-
Well, it may not seem like much to you but it's a hell-of-lot to me. Thanks. So, it's not the fat exactly but the protein and more particularly the way it's fed at the feed lots, which probably account for the fast majority of the domestic hides on the market these days, right? Could we safely infer then, that these lines are caused by rapid growth associated with feedlots? Whatever the cause and by whatever name they should be called, here's an example of the marks on a seat from the heart of a side of Hermann Oak. They aren't deep and will not look that bad or detract too much from the finished product, but I'd prefer not to have them right across my seats, frankly. It was an order from a distributor who will remain unnamed, but it is a problem with the TR grade system I suspect. Sometimes you win and sometimes you get what you get.
-
So much for names. Might have absolutely nothing to do with fat, but that's what the tanneries and distributers call them, and it seems to me the occurance of them is on the increase of late. Maybe it's like stretch marks. Those skinny Holsteins were maybe a lot fatter at one point in their life and they got stretch marks, eh Ben? heh heh.... kinda makes sense. Any relation to the gender of the donor and the incidence of these wrinkles or stretch lines? I don't mean your Holsteins, Ben. I mean any other hides where bulls or beef cattle were included in the sample. Might be a correlation between breeds, gender, etc.
-
Thanks for the info Jon. I really appreciate your help on this weight issue. I'm totally blown away by the numbers, though. Guess I'll have to get out the scale again and try to figure out where I'm adding in the extra weight. Do you order your leather leveled?
-
What you are looking for is a tight grained leather, if you can get it. Seems to me, and correct me if I'm wrong, but is the industry just producing fatter beef and thus more fat wrinkles in our skirting as opposed to years past? Some of you old hats might have some insight on this. You will tend to have more blemishes or imperfections like this on the neck and stretchy areas normally, so keep this in mind when selecting your piece to work, but sometimes it's hard to find a nice clean spot on oven no.1 grade. I guess it depends on your source and your buying power.
-
I do the same as above except that I use a drafting compass with a relatively soft lead to make my mark and a round tip on the other end that rides quite nicely on the edge of the leather. I use it on all borders to scribe my first line then follow it as closely as possible with my swivel knife, using my fingers on the edge of the leather as a guide. Going around curves is always a challenge but practice helps. I use Barry King's push beader to make the second mark, then cut it and continue working the bead with the beader tool until it is nice and round. It also works well to clean up your bead if your tooling messes it up a bit. Tilt the tool backwards to go around tight curves until the bead is established and you can begin to work the beader around the curve. Remember, haste makes waste.
-
Thanks for the pics. Always good to see other ways to do it. I got a couple questions, though. It looks very efficient and makes sense to do it in that order but I just don't see how I could cut the seat and finish it before I knew where the cantle filler and back piece was going to end up. It's always a crap shoot for me no matter how I do it. I cringe at the thought but obviously it works for you. Also, it looks like you put all your groundseat pieces on grain side down. Am I seeing this right? Makes sense to do it that way because the strength is in the grain side and it would skive and carve easier on the flesh side. I like the way you end up with that perfect curve from the fork to the cantle, almost the same as an english seat that is stretched with webbing.
-
Woo yeah! Very sweet indeed Sir. I'm impressed with how light your trees are, at 4 lbs. How do you achieve that? Is most of the weight savings from not using rawhide? I'm not a tree maker but I know there is only so much one can cut off a tree and still keep it sound. Even still, how do you get the weight down to 30 lbs using heavy weight leather? Does that include the stirrups? I notice you said with everything hanging but the picture shows it without them. The reason I ask is I can't seem to get mine even close to that weight. Also, it looks like you used Hermann Oak Chestnut. It looks like you managed to get some without all the fat wrinkles I got when I ordered it. It seems they tend to use their less than perfect hides for the drum dyed stuff and it's all TR grade. Has that been your experience with it? Anyhow, really nice, clean work. Definitely quality of which to aspire.
-
Groundseats are like a lot of aspects of saddlemaking, the more you do it the more ways you figure out how to improve the process and that is true whether you choose tin or leather. That is why there must be as many ways to make groundseats as there are makers building them. The more I learn about different methods, the less confident I am that I'm doing it the "best way", the most efficient way and the way that will please my customers and still be a good value. Personally, I like the 2 piece tin with stirrup risers under it and enough leather on top of it to smooth it off and shape it the way I want it. It allows me to be flexible with the shape, it will flex somewhat but it won't break down even if the saddle gets totally soaked and used by a Sumo wrestler with really bad riding habbits. I tried the pre-made one piece tins and I've made leather seats. The 2 piece tin works the "best" for me as it combines the 2 methods. As for creating the tunnel effect between the bars, if the tree fits the horse properly, the area between the bars should be high enough that there is no need for the seat tin or leather seat to be shaped in an arch except in the front where it goes over the withers. The tree bars and risers provide sufficient clearance in that area and the front tin piece is shaped with an arch over that area. If a heavy enough tin is used, it is quite strong and gives plenty of support over the stirrup slots and around the hand hole. This is the area that I believe is the weak point of the all leather groundseat, depending on how the slots and hand hole is designed, of course. I'm sure I'll get an argument about that point from the all-leather proponents and I welcome their thoughts. As for which method is the easiest, I would have to say the all leather, since I make my own tins and then put just about as much leather on top and do a lot of carving and fussing for days to get it just right. So, for me, the all leather is a short-cut because I don't have to make the strainer. ..... six of one, half dozen of another.
-
Well that shouldn't surprise anyone. Don Butler is usually in the money. He never seems to fail to come up with a new twist on it. Yeah, I should have at least gone up there to see it but 6.5 hours is a long drive..... Of course, down here, everything's a long drive. Bruce, about those rear billet conchos..... that came about because the customer changed her mind after I'd already punched the holes for ties, so I had 3 holes and she wanted the new Jerimiah Watt billet loops. So, I did the best I could with the conchos. I just ran the 2 ties from the backside through the top hole and down under the concho in front.

-
Very good work. As I'm not an expert or even all that informed about the period, it looks to me like you nailed it. I was aware that the rank and file sat right on the bars but I didn't realize the jockies were screwed on with brass screws! You know they were sitting right on those screws and if they don't go in exactly flush, or work loose at all, it could make for a loooong march. I just can't even imagine the pain. Which leads me to speculate that more than a few of those horse soldiers were inclined to line their britches with something to soften the ride.
-
Well, thanks for saying so. I actually thought about it for a couple of seconds....just long enough to remind myself of the caliber of work that has been entered up there in recent years..... Guys like Troy West, Don Butler, VanDyke, Pedro Pedrini, to name but a few that consistently bring their jaw dropping, eye popping best work. I do have one I was planning on entering, but I ran out of time and I'm still not done with it. The way the show works, and, correct me if I'm wrong, but if you have any floral carving you must enter in the open floral and that catagory puts you smack dab up next to the likes of the aforementioned talent that take the term "full carve" to a whole new dimension. And if it ain't carved it's covered with silver. So yeah, I'm still workin' on it.... But thanks again for the encouragement. I'd like to see some pics of the entries, though. Anybody got some?
-
The leather will tell you when it's ready. If you don't get a nice burnish and you don't feel a resistance from the leather when you strike it, it's not ready. The problem is keeping that way long enough to complete your work! Weather conditions affect this process quite a bit and I just never know how it's going to go. I find that proper casing, over night in a plastic bag to distribute the moisture evenly helps it to dry out slower. There is always one part of a piece that will start to show signs of drying out quicker than the rest so I just start there and work the rest as it gets ready. Re-wetting is something I really try to avoid because I usually get too much and have to wait again to work it.
-
Thanks Art. I forgot to weight it before I boxed it up this time, but these usually weigh in around 38 lbs. It should be a little less due to the shorter bars and skirts, but I doubt that cut it down too much.
-
Thanks to all for the very nice compliments. It is always very satisfying and encouraging to hear from one's fellows in the trade and particularly comforting in tough times like these.
-
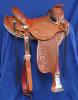
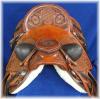
Those lumps are called bucking rolls. They are used on slick fork tree saddles to replace the swells when needed to keep the rider in the seat when things get "western". They are screwed on and can be removed when not needed.
-
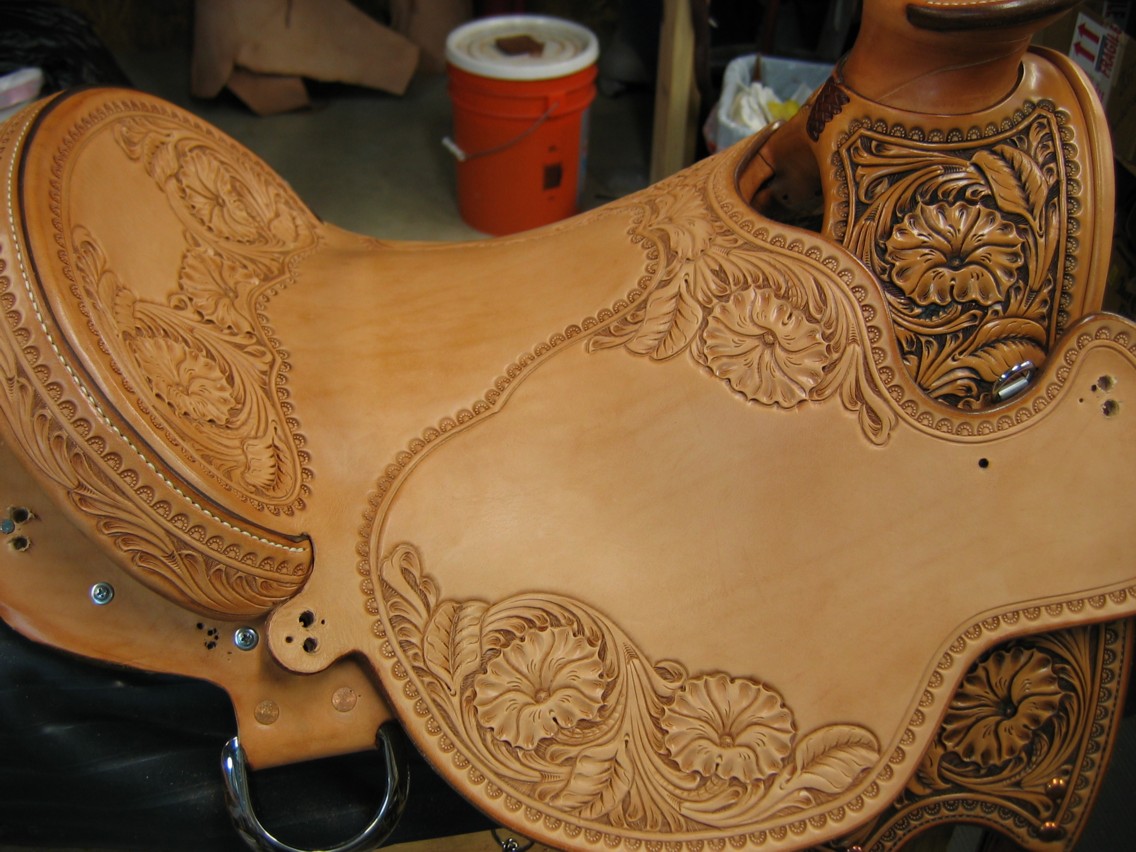
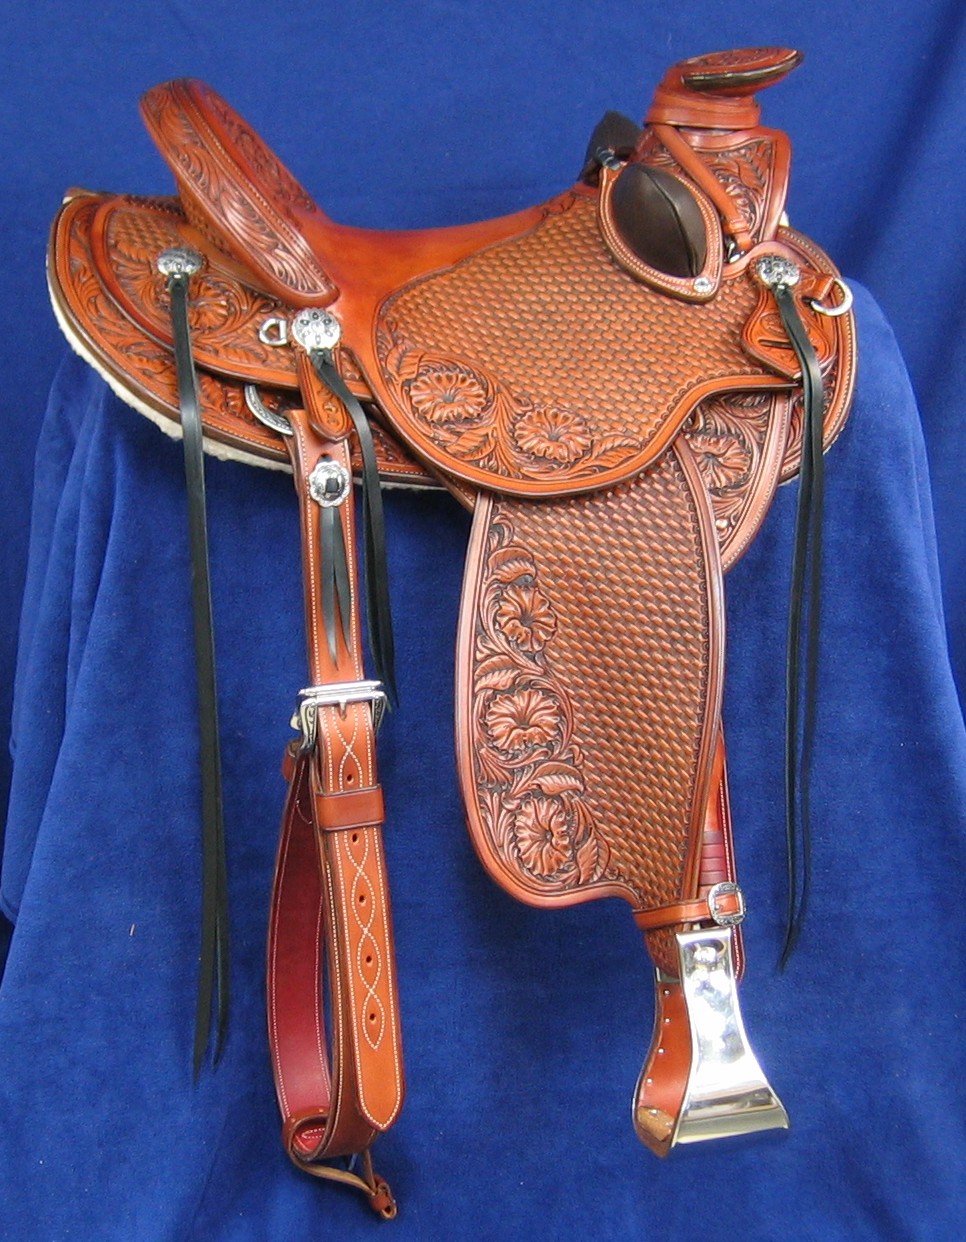
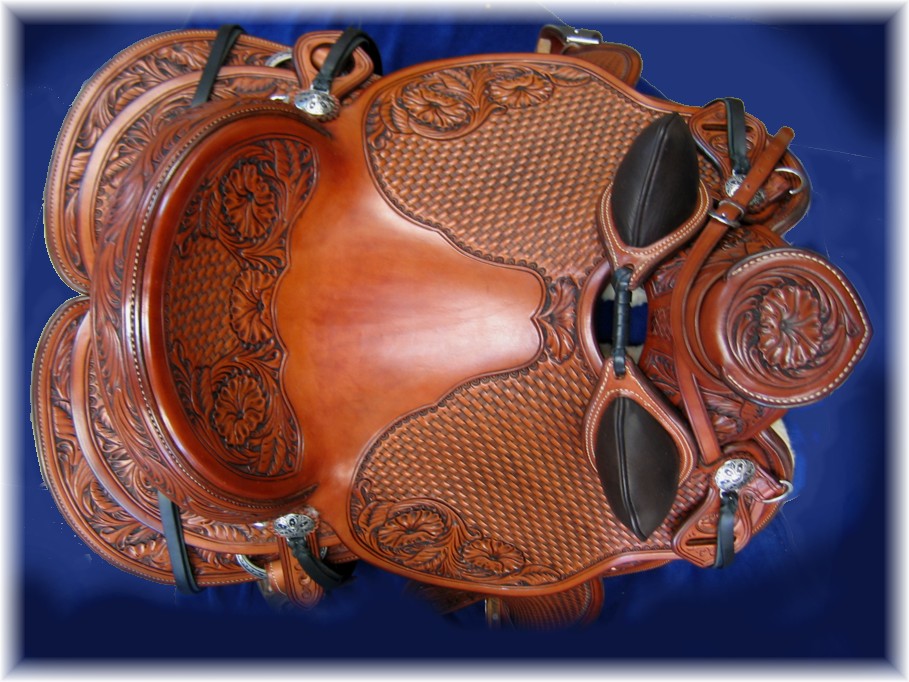
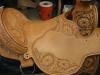
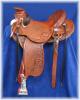
Yes, this was made to fit an Arab horse. After much consternation and deliberation, picture takin', measuring and back and forth with Randy at Timberline, we arrived at a perfect fit. As it turned out, the rocker of his regular bars was fine for this one and all we needed was to use a slightly wider angle, (full QH), on a 6.5" gullet, and cut the bars down to 22". We did a fit on the horse in the wood, (pre-rawhide), just to make sure. I kept the skirts short as well, just 27" after blocking, which explains why there isn't much behind the jocks. It's Wickett & Craig chestnut leather, 4" Monels by Trina Weber, and Weaver's natural color shearling. Comments welcome, good or bad. Thanks for looking.

-
 Yeah, I noticed that too, but is it the same? Has anybody tried it and what are the results?
 -
Has Tandy dropped their satin sheen product? They don't list it on their website and the local store didn't seen to have it. I like the satin finish better than most acrylic finishes/resists I've tried as it doesn't look so plastic and it will still take up oil fairly well. Has anyone tried the ecoflo replacement product? I notice some threads about cracking with the super sheen. How about Fiebing's Bag Kote as a resist? Is it acrylic or what?
-
Don't think it's a problem so much, but I have a tendency to turn hobbies into businesses. It just seems to happen, due to the tax issues. But, if you keep making a profit, Uncle Samski is gonna come looking for his cut sooner or later.
-
Well then, guess it's time to apply for one. As long as you aren't making a profit 3 out of 5 years, I think it is, you don't have to file as a business for your Federal income taxes and go through all that hassle. The way the economy is going, that shouldn't be hard to do.... (not making a profit).
-
It's hard to beat Weaver's tools. They come sharp and are worth the extra bucks in my opinion.
-
matting black dye??
Go2Tex replied to Jimbob's topic in Dyes, Antiques, Stains, Glues, Waxes, Finishes and Conditioners.
You might also try Tandy Satin Sheen finish. It's acrylic but doesn't leave that shiny plastic look. However, as you know, that seat will get polished with use and I would speculate almost any finish will end up being fairly shiny. -
'To back stitch or not to back stitch ??'
Go2Tex replied to Handstitched's topic in Leather Sewing Machines
I usually back stitch 2 or 3. Now that I think about it, that's probably overkill also. It really depends on how much pull it might get, like at a buckle or dee.