Go2Tex
-
Posts
726 -
Joined
-
Last visited
Content Type
Profiles
Forums
Events
Blogs
Gallery
Store
Everything posted by Go2Tex
-
After reading your intro remarks I was expecting a real mess, but I was pleasantly surprised to see a real nice job! You have obviously picked up a lot of good info and it really shows. You are a quick study, as they say. As for the underside of your roll, take a look under almost anyone's roll and you'll notice most aren't perfect by any stretch. You may be correct about not skiving it enough, but you'll find that selecting the right piece of leather to use is even more helpfull. I've had a real battle at times trying to get them shaped and then the next one is a snap. go figure. If I have trouble with it right away I rip it off and get another piece of leather. It just ain't worth the hassle. Yeah, the jocks are pretty loose and that can be fixed. I'd take them off, take the frog off, trim some off at the join at an angle toward the cantle, zero the cut at the cantle. That will pull them down tight in the back. Besides that, congrats on a job well done and I look foward to seeing your next project.
-
'To back stitch or not to back stitch ??'
Go2Tex replied to Handstitched's topic in Leather Sewing Machines
It's an interesting question in light of the other thread about the appearance of the back of the stitched piece. If you notice on the DVD that Artisan put out, they show 3 stitches forward then back 3 and then another forward to lock the end of the stitches and the same with the start. That seems like tremendous over kill to me. What I have tried is to start in reverse and make a couple back stitches and then just go forward. It makes the backside look a bit better and is certainly going to be hard to rip out. -
Problem with stitches on the back....
Go2Tex replied to hidepounder's topic in Leather Sewing Machines
Something worth trying on the Artisan 3000..... I have not been able to get enough bobbin tension since I first bought my machine. Finally I tried using a smaller screw that holds the tension spring and was able to tighten the bobbin thread down as much as I want. Now I get nice tight stitches. Of course, now I have problems with the stitch length varying anywhere from 6-9 per inch on one strap! Something else I did recently that I almost wish I hadn't. I finally ground the groover off of the center groover. It doesn't make that damn mark anymore, but I think I liked the look of the stitches better before and it seemed to help keep the needle lined up when back stitching. And, a new part costs $95! Too bad they can't come up with a center groover that you could just flip up when starting your stitch and those tight turns. -
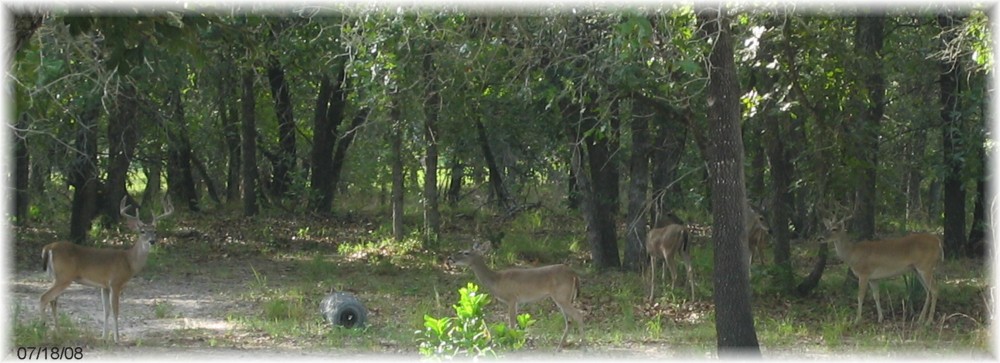
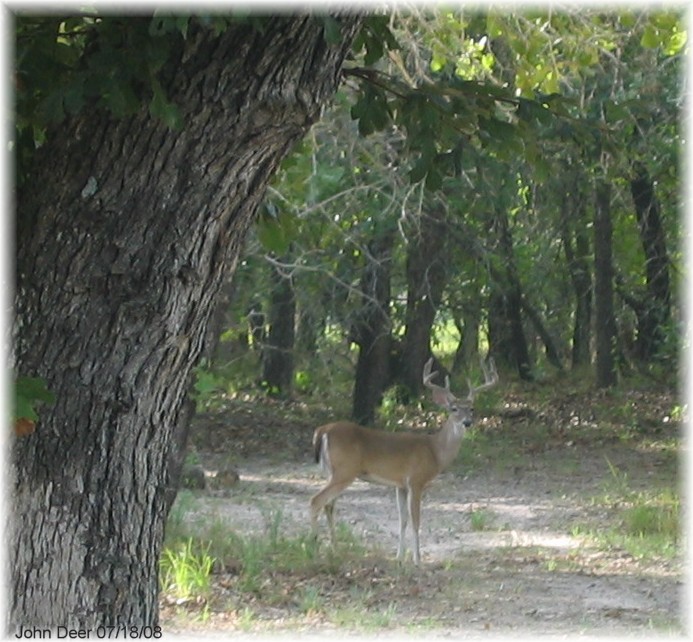
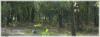
Here's my favorite back porch pic taken a couple years ago. They were right behind my shop one morning. My wife snapped these shots out the breakfast nook window.

-
cross draw holster question
Go2Tex replied to figthnbullrider's topic in Gun Holsters, Rifle Slings and Knife Sheathes
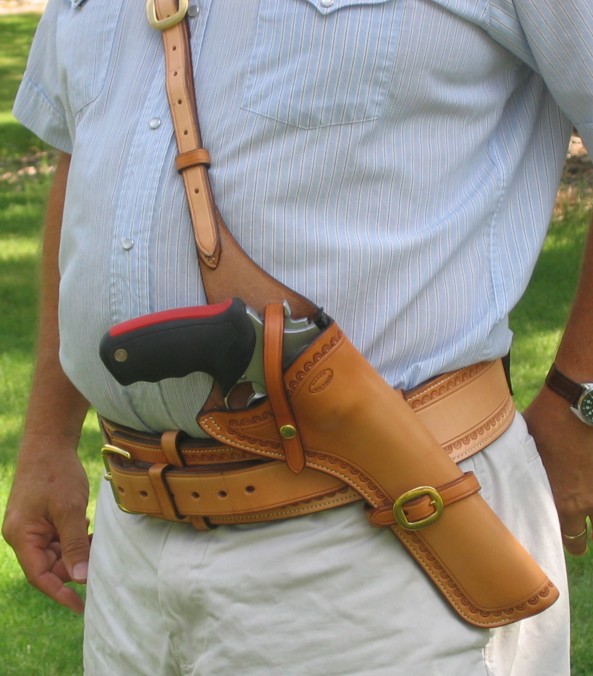
Did somebody say "cross draw"? Check this out ya'll. It's made for a .454 Casull. Obviously, I didn't make it to fit me.....

-
Problem with stitches on the back....
Go2Tex replied to hidepounder's topic in Leather Sewing Machines
Well, I hope ya'll get this problem solved because it is one that has been bothering me ever since I started. I've tried running an overstitcher over the stitches on the backside but unless I have it gouged, it's dang hard to keep it on the stitches. I've tried pounding them down flat and that didn't work much either. -
We had a pretty good thunder boomer a while back and a house not too far from here got hit with lightning. Made me re-think this whole lightning thing. I never realized houses got hit that much. Makes you wonder why there aren't building codes for lightning rods on every house... I mean, they have codes for everything else, why not that?
-
De-activating Vinegaroon
Go2Tex replied to OSOK's topic in Gun Holsters, Rifle Slings and Knife Sheathes
I have a batch that I made up recently that has turned a very dark purple tea color. I used straight vinegar and lots of steel, a pinch of steel wool, nails, a chunk of steel plate, used saddle tacks and filings from my grinding bench. It took about 2 days of aging to turn leather black with a quick dunk. It was strong. After about a week, I strained off the liquid from the steel and residue and let it sit. It quickly started getting darker and darker. So, I'm wondering if the proportion of vinegar to iron (steel) in solution makes it stronger and quicker. -
De-activating Vinegaroon
Go2Tex replied to OSOK's topic in Gun Holsters, Rifle Slings and Knife Sheathes
I don't know, but maybe you are soaking it too much. The stuff I made up reacted instantly and just took a quick dunk or wiped with a sponge or brushed on. I don't see why you need to to soak it for 5 minutes in anything. -
Well, I tell ya, when I started down the road of building saddles, I too never dreamed that I could create something like this one. In fact, when I started THIS saddle, I wasn't totally sure how it would turn out. But, with each saddle, you get better. You gain confidence. You try new things and you grow. Sometimes you have to really reach out there and take some risk. .... "nothing ventured, nothing gained". So, this time the leather gods where smiling on me and it worked out ok.
-
Well thank you, Sir. That means a lot coming from such an accomplished maker such as yourself. I spent the morning doing the international shipping, so by this time tomorrow, this baby is going to be history! I already have some ideas for the next one and I think I'll hang onto it for a show or 2. Oh, and by the way Keith, I did finally break down and bought a clipper. I got the Wahl Chromado cordless. With the number 10 medium blade, it does an incredible job. I can't believe I waited so long. Wow, what a difference! It actually arrived after I took the photos of this saddle, but it got a good trimming before I boxed 'er up. Thanks again for the kind remarks and to all who commented.
-
Sheridan Style Website
Go2Tex replied to Cowboy Crafts Online's topic in Floral and Sheridan Carving
You can see Don Butler's influence in his work. I don't recall, but did he show at Wichita Falls at all? -
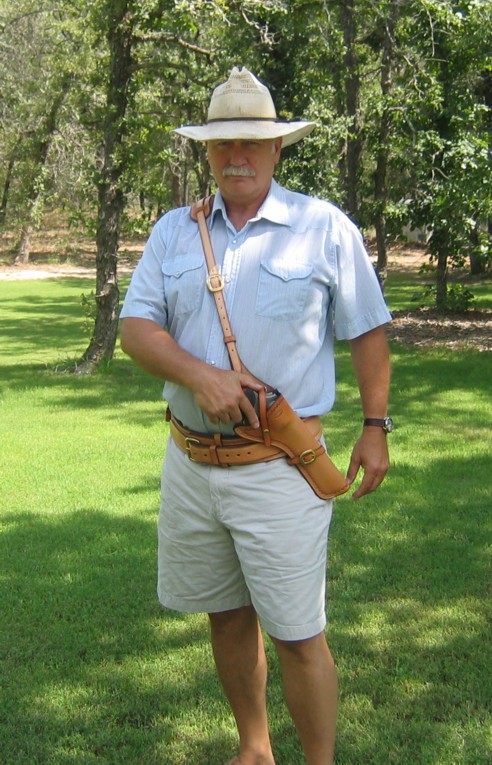
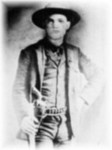
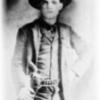
Hey, nice hat.... I hear the Abe Lincoln look is making a come-back.
-
It only took me 2 years.......
Go2Tex replied to The Major's topic in Gun Holsters, Rifle Slings and Knife Sheathes
Very nice indeed! Coloring leather is an art in itself and you did a good job of it. Did you also add some antique or highlighter to the roses and leaves? -
Maybe the show in Wichita Falls.... they have lots of boot and shoe leather folks there. And mabe a lead to this "Castano" leather. The thing is, when folks say "saddle leather" you have to wonder just what that is. English saddle leather is nothing like western saddle leather. You wouldn't normally think of veg tan as upholstery. I suspect it is merely a good grade of chrome tanned chap leather that is being made south of the border....
-
Oh yeah, I saw those pics right about the time I got this order and it definitely gave me the idea of how to cover the horn. For sure, I give credit to Don for that inspiration. Also, the colorization, the black trim and dark antique sort of "evolved" in my attempt to duplicate the color of Rick Bean's Outlaw saddle. I never even came close to that in a practical process for my saddle but the overall black trim was inspired by that one. All driven initially by the customer. There was also another saddle that was shown recently, I believe, that had the charro horn. Funny how these trends get going. All of a sudden everybody wants a bigger horn. Mucho Gracias, compadre!
-
Thanks, how about posting some pics of your Dad's saddle. I'd love to see another version of this idea.
-
Energy consumption around the workshop
Go2Tex replied to esantoro's topic in All About Us and Off Topic
And also who's hot and who's not. -
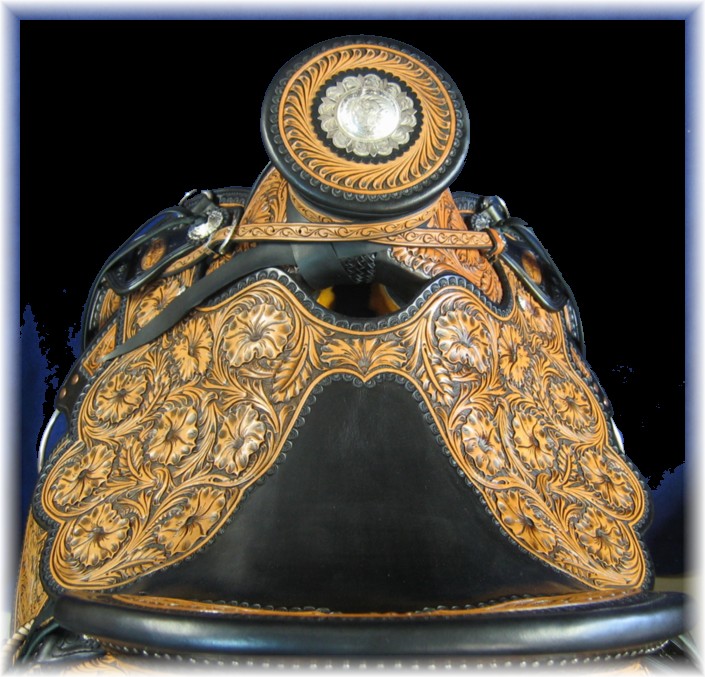
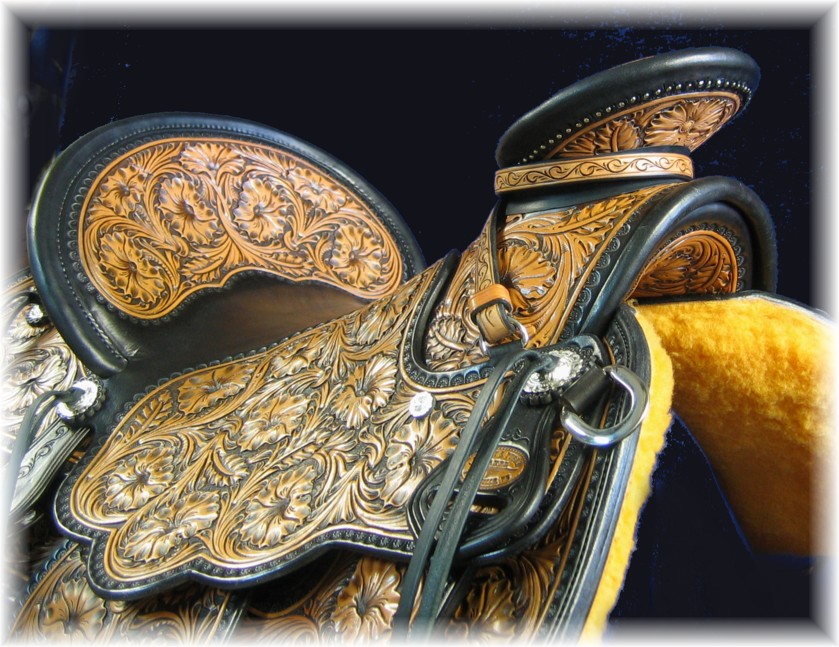
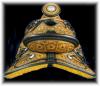
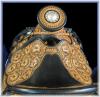
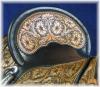
Ah yes, the horn ..... I stitched the bottom piece and filler together. The filler gets nailed down on the top of the horn, so the whole thing is solid. The bottom piece overlaps in the rear and is glued and tacked down, the flange is then folded out flush with the round filler. The neck on these charro horns is so short that there is very little space anyway, so a tack holds the upper lap below the swell cover line. Then, the top piece is cut round, folded down wet around the horn for marking, removed, scalloped and put back on to dry. Then you nail 'er down. It's that simple. Nice thing about it, if your stitching sucks, do it like this. It don't show. Same with the cantle. Your front stitch line shows, of course, but the back side.... NADA. I flew around this cantle! Well, until I had to put all those pins in the backside.
-
Well ok, don't say we didn't warn ya. And if we happen to see ya'll parked along side the road there talkin' to Wyoming's finest, we'll honk just to say howdy.
-
Ah, I guess you never heard that song by Chris LeDoux?..... the one where he's racing to get to the rodeo in time for his 8 seconds of glory and ends up with sheep all over the front of his grill and a ticket? I think that was a true story.....
-
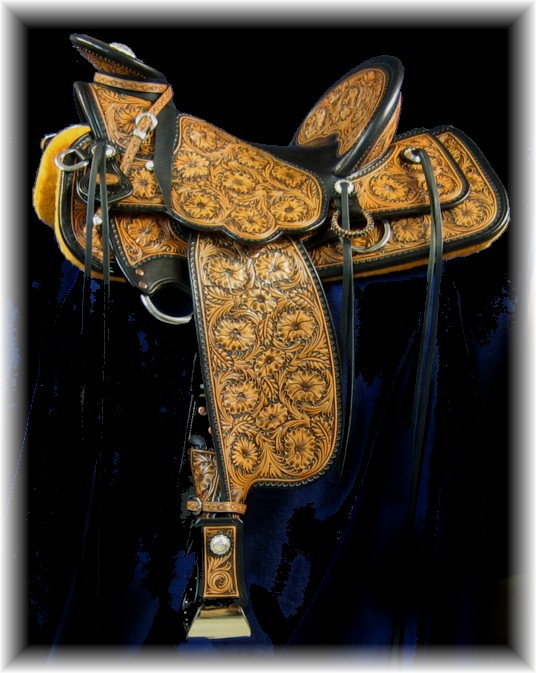
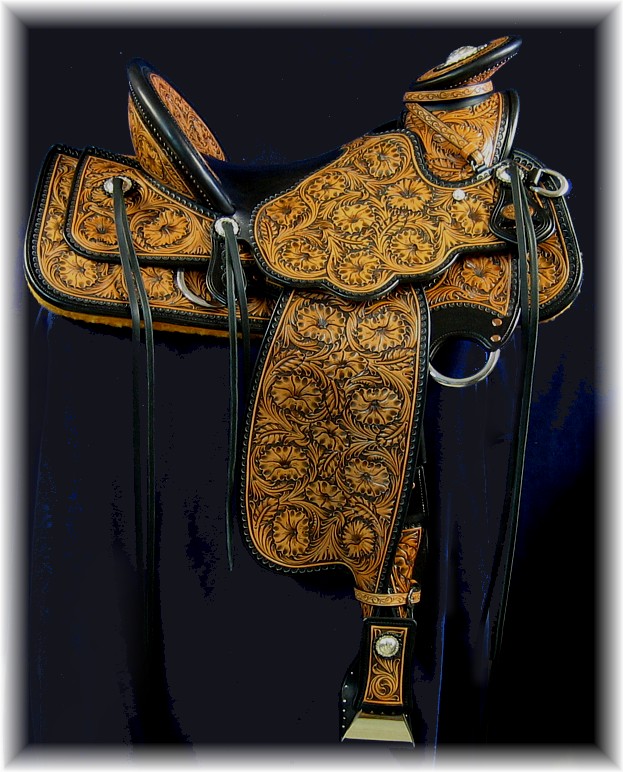
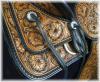
Thanks to all for the great comments and compliments. I'd love to enter this one in a show, maybe even Sheridan, but, it's promised to a customer in Italy and I know how much he wants to have it for the Spring riding season over there. That's why I've been working long long days to get 'er done these last few weeks. I started it, officially, on March 9, when the tree arrived. The color, the black borders and trim, all took extra time and considerable consternation. Not to mention all those pins I had to nail in. It's hard to see but the horn cap is scalloped and pinned and so is the cantle binding. I had to make a tool to cut them since the one I use for rosettes was too small. It's a 1/4" drive punch ground off on one side and then sharpened and polished. No big deal but time consumming. Getting it all to match up was a real challenge. Normally, I try to avoid all those lines coming together so if something gets a bit distorted during the build, it doesn't show as much. There was no avoiding it on this one. Thanks should be given to Barry King for his excellent push beader tool that I used all over this one. It works great once you get the hang of it. I used a resist on the beads and then carefully dyed the edges right up to the bead with a small brush. The border stamp helped to capture the dye so it didn't blead into the bead. Yeah, lots of sweat and a few stiff swigs of JD was needed after that work to calm the nerves let me tell ya. But then, the dark antique did the rest. Any missed areas between the bead and the border, down in the border stamping was filled in nicely by the antique. I discovered I really like that Tandy Satin Sheen. It dries quickly and doesn't leave that plastic look that you get with Resolene. it also seals the black dye and leaves it looking like a soft leather, rather than patent leather. The flowers were a little change-up. I came up with a new one after looking at my Wife's Petunias. I thought it would be a neat one to do, so I developed something that would adapt to leather carving and viola'. It kinda evolved as I went along. The nice thing about this flower is that it can be reshaped to fit the area quite nicely and that adds variety. I also threw into the mix an old Sheridan stand-by flower every now and then, just for a little variety. The flower center stamps I have just didn't work on Petunias, so I went back to using a Craftool single background matting stamp. It's about the size of a medium sized seeder but makes a bunch of tiny holes in a circle. I use it on different angles on the center area to give it depth and roundness, then leave a highlight area clean in the middle, much as you would the center of an eye on a painting, to give it life. This also evolved as I went along, so you'll notice a few panels that didn't get that little effect. At first I was just making it like Petunias look, a deep hole with lines converging into it.
-
You're right. 2 hours. And a beautiful drive at that. It goes real fast. Nobody on the road but you and the wildlife.... and eh, the cops. And they love out of state plates.
-
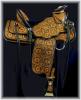
Well, here it is, my latest creation. Timberline Ray Hunt Wade tree with a 5.5" charro horn. scallops on the horn, cantle, skirts and stirrup half covers. Hermann Oak leather with dark brown antique and black trim. Trina Weber 4" bell stirrups, and Hansens sterling overlay conchos and buckle set on the rope strap. Oh yeah, Weaver black latigo and shearling.


-
Sheridan has an airport but I don't know who flies into it. You might try flying into Billings and renting a car and driving down. It's about a 3 hour drive.