c2369zulu
-
Posts
226 -
Joined
-
Last visited
Content Type
Profiles
Forums
Events
Blogs
Gallery
Store
Everything posted by c2369zulu
-

Leather Covered Telecaster
c2369zulu commented on chancey77's gallery image in Our Leatherwork Galleries
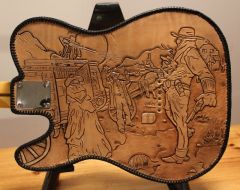 Thats really sharp looking! Great Job!.......Rory
 -
Carving and tooling, period. I just have not gotten this stuff down yet and it bugs me. Especially the really small tight lines and curves. I have guidance from everyone here though, so I will get there......Rory
-
Making Molding Card Case
c2369zulu replied to hunio's topic in Purses, Wallets, Belts and Miscellaneous Pocket Items
Looks like it is coming along nicely. The tool in the first photo is interesting. Is it made for corner cutting? I have been looking for something like that already made. An "edger" may help speed up your process for prepping those edges for burnishing. Just looks time consuming with the plane and sand paper, etc. Again, looks good. Keep is updated.......Rory -
Thanks for the responses TwinOaks and Ramrod!
-
Money Clip Replacement Bar In Brass?
c2369zulu replied to antipaladin's topic in Leatherwork Conversation
Springfield Leather may have them. I found the brass and silver key wallet key rings there..........Rory -
Thanks everyone for the responses and suggestions.........Rory
-
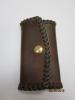
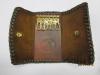
Bob, Thanks for the response. Yes, the inside was just dyed along with everything else. the key drop is mounted on veg tanned of same thickness. IIRC, I just bought one of the 8.5"x11" tooling leather sheets for this at a hobby store. I was going to line this one, but decided to just do like the book showed for the first one. I used the tubular brass rivots that use the star shaped setter for this too because the quick rivots and double capped rivots seemed too long. I cut about an 1/8th inch off the tubular rivot shaft. Good point on starting/ending at the insert to tuck the ends into. Now that I think about it, it was dumb of me not to. Thanks for looking.........Rory
-
Hello All, Thought I would share this little key wallet I made over the weekend. Found the pattern in the Leatherwork Manual I bought from Tandy. I did not do the tooling shown for the pattern. I used the single loop lacing method. Tandy does not carry the key drops any longer BTW. I found these at Springfield Leather Company. Only problem I found was not knowing how to finish the lacing when lacing around a single piece of leather (I dont think the book implied using a liner or two layers of leather. The lacing method shown in the manual appeared to be for a lined holster or a billfold that will have two layers of leather. The finishing lace ends would normally I guess be sandwiched between the two layers. Any suggestions/changes would be appreciated. I had a friend say he thought a bi-fold instead of tri-fold may be better...........Rory
-
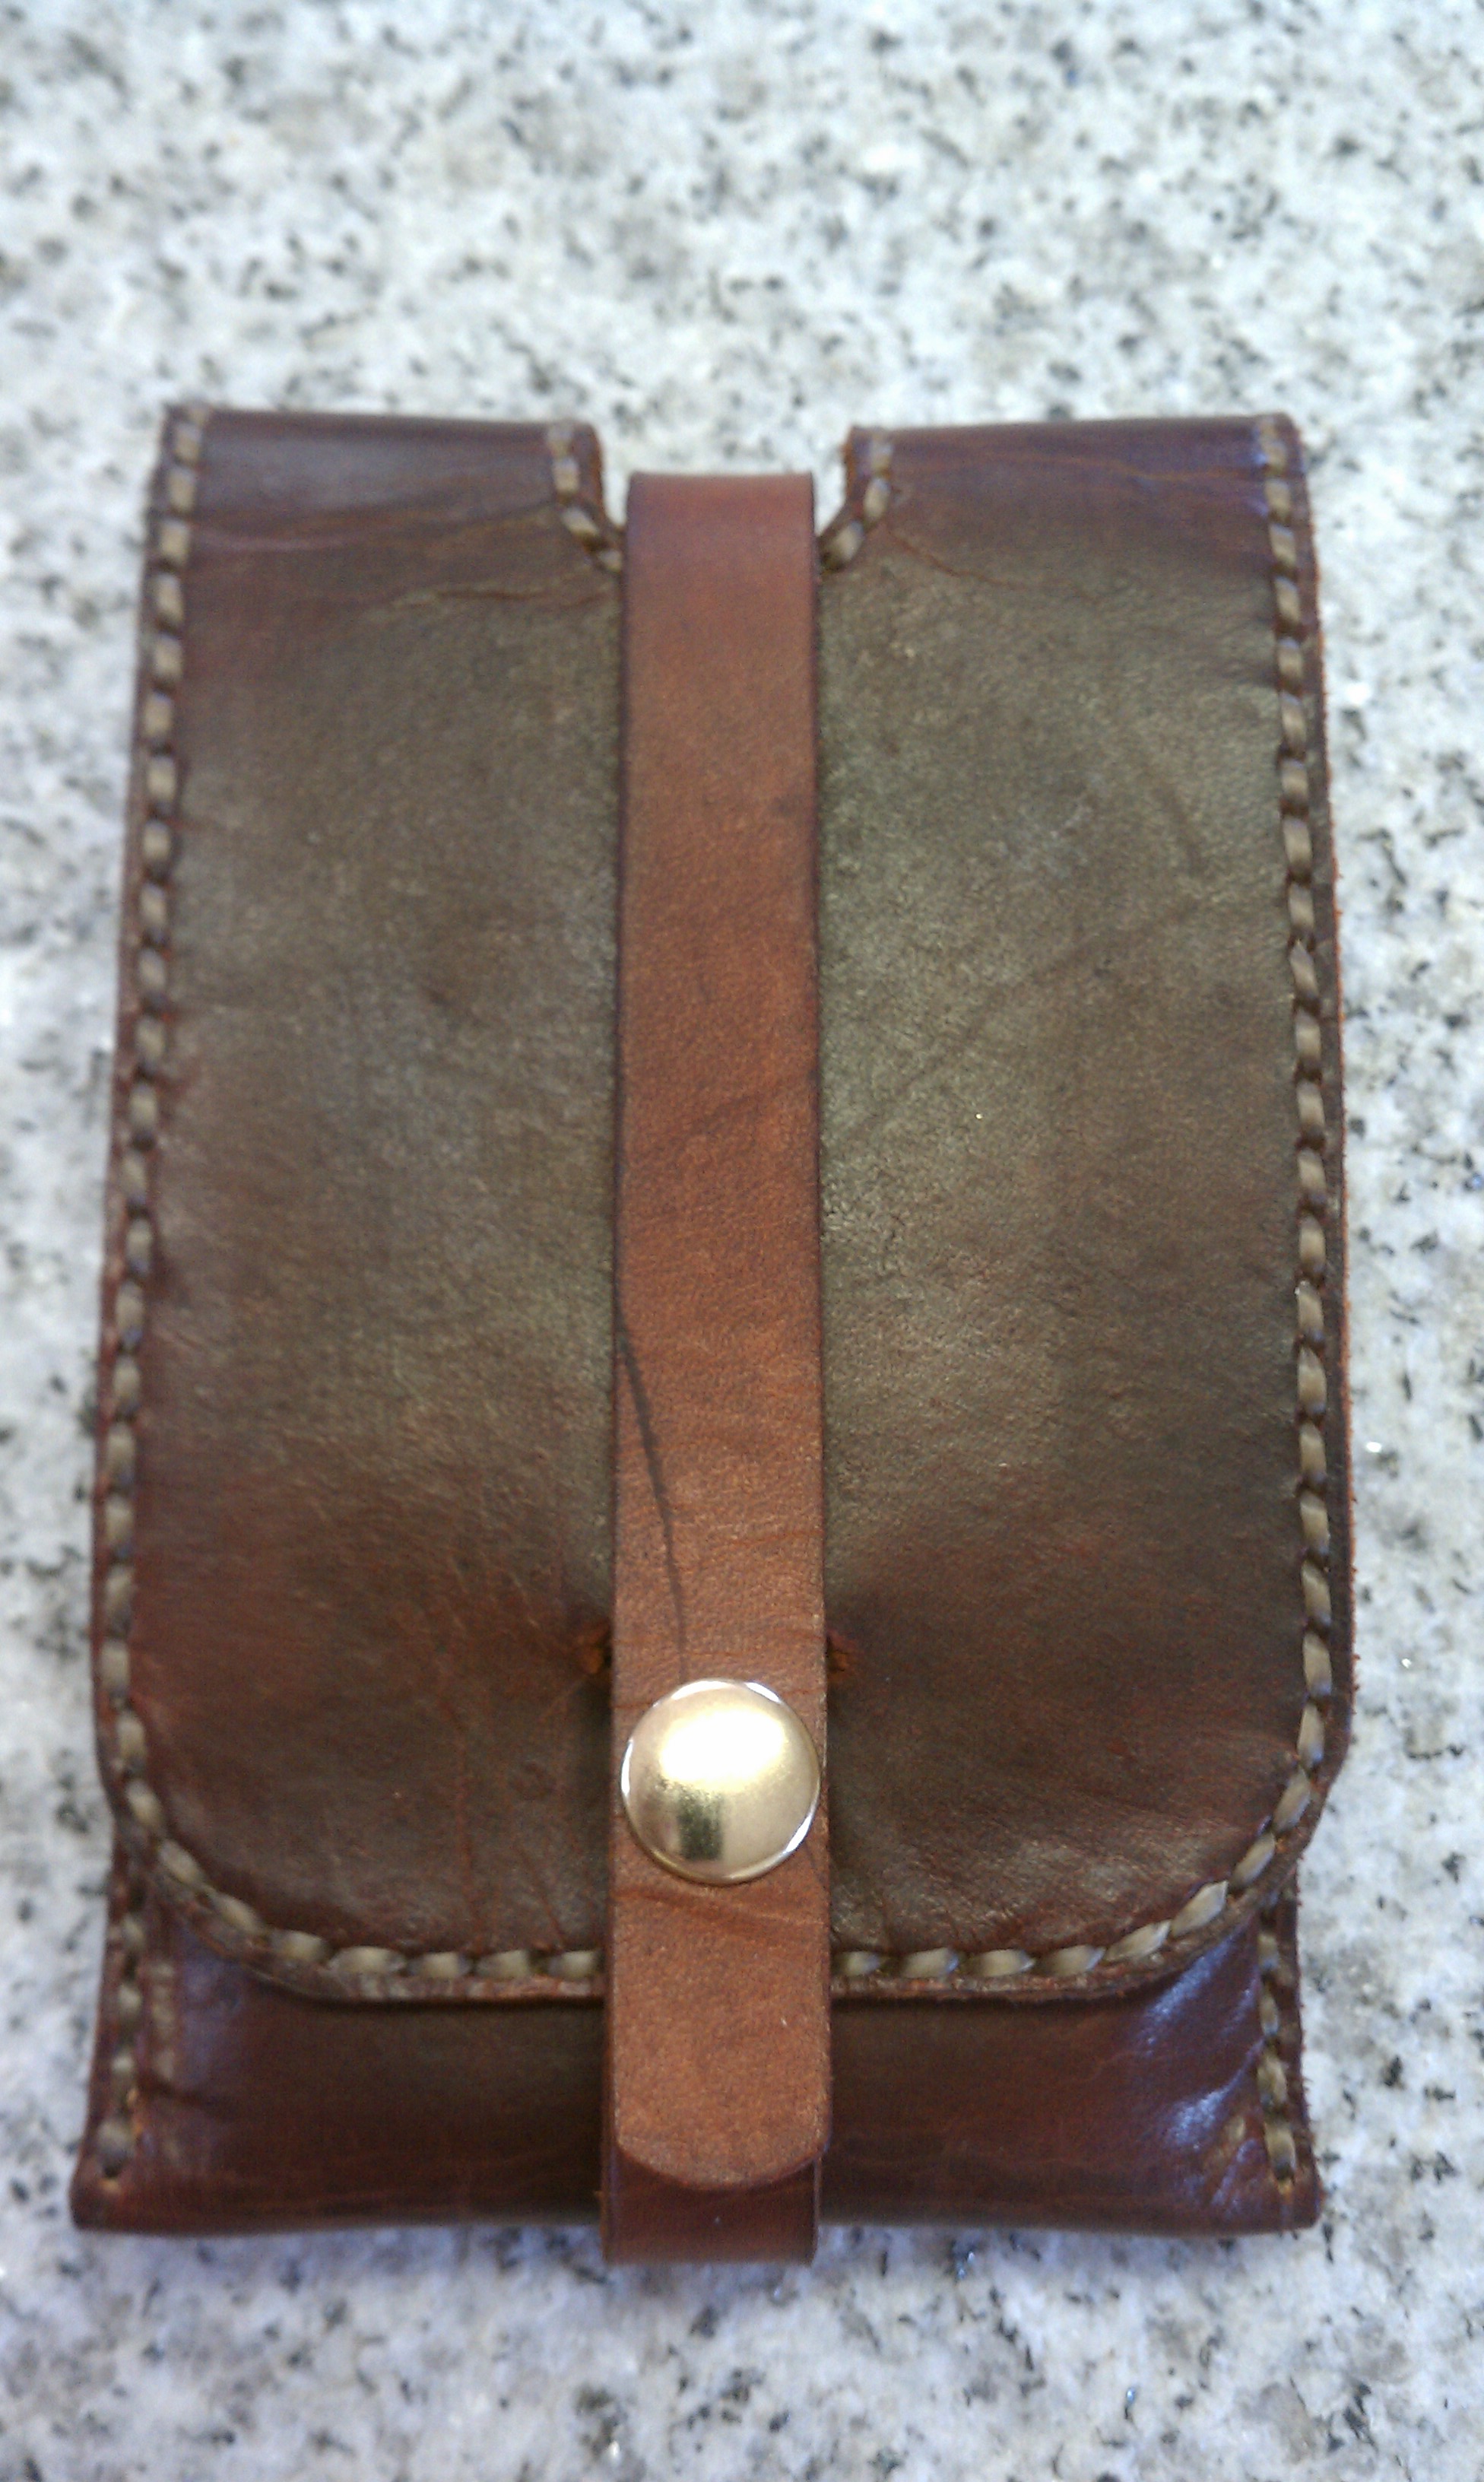
Phone Case W/button Strap
c2369zulu replied to c2369zulu's topic in Purses, Wallets, Belts and Miscellaneous Pocket Items
Artimus, It is "Natural" colored artificial "flat" sinew. The sinew I buy is from Kentucky Leather and Hide. I like using the artificial sinews as they don't stretch like some of the other nylon threads. Some of the artificial sinews I have bought from hobby stores are not as waxy and tend to fray more. I am sure it can be rewaxed, but I like what I use from Kentucky. Thanks for looking. -
Background And Bevels Just Don't Stay Down
c2369zulu replied to c2369zulu's topic in Leatherwork Conversation
Thanks for the response Benlilly1........Rory -
Hello All, I tried to make one of the Al Stohlman "playing card" cases from the Volume One: Art of Making Leather Cases book and had quite a bit of trouble trying to hand stitch the "Miter Box" type stitching using the larger blunt tip stitching needles. I am sure they are the wrong type for this application as the larger eye would stretch open the hole too much, but do they make smaller blunt tip needles for finer work? I was under the impression that when hand stitching you would want to use the blunt tip needles to prevent piercing the thread and causing knots as you stitch, however I do know harness needles and such are sharp...............Rory
-
Background And Bevels Just Don't Stay Down
c2369zulu replied to c2369zulu's topic in Leatherwork Conversation
Bob, just re-read your post. Yes, I do tend to re-wet with a damp sponge while working and most of the time I go over the whole thing again each time I do. No, I do not wet form any holsters. Thanks again......Rory -
Background And Bevels Just Don't Stay Down
c2369zulu replied to c2369zulu's topic in Leatherwork Conversation
Hello again Everyone. Thanks for all the responses. I know, I have shamed Will Ghormley on that holster . I think you guys are right. I have questioned myself on whether or not I have the proper moisture content (too much) after waiting. I do get the jagged torn edges a lot and not so much burnishing. I do try to wait until the original color returns, but may still be too soon each time. Must still be too spongy. Thanks for all the comments. Luke-Thanks for the response. Yes, I have Tech Tips/Leather Tools/How to Carve Leather/ABC's of Leatherwork/How to Make Holsters/Etc.and several other Al Stohlman books, but not all of them. I love the drawings and illustrations...........Rory -
Background And Bevels Just Don't Stay Down
c2369zulu replied to c2369zulu's topic in Leatherwork Conversation
Hello Pete. Thanks for responding and here is an example, even though I hate posting my carving. The background in the upper right areas shows best that it is nearly flush with the surrounding leather that should be in relief. Don't pay any attention to the poor carving and bad stamping outside of the beveling and backgrounding (just kidding, I need the criticism to see what else I am doing wrong ) I cant seem to get away from the choppy swivel knife cuts. I think I need to strop more...........Rory
-
Hello All, Not sure of this has been discussed very much or not, but it seems that I cannot for the life of me get my backgrounds and bevels to "stay down" after tooling. My carving is choppy and needs a lot more practice and this is bad enough, but this backgrounding and beveling issue just adds to my frustration. I don't know if the dye application is introducing too much moisture back into the leather causing it to swell back up or if I am not getting proper moisture content to begin with and the compression of the leather while tooling is not proper. Also, do you leave the swivel knife cuts open or smooth them back tight with the modeling spoon? I have seen this done by some and wondered if it affected the results. Any help would be great. Thanks........... Rory
-
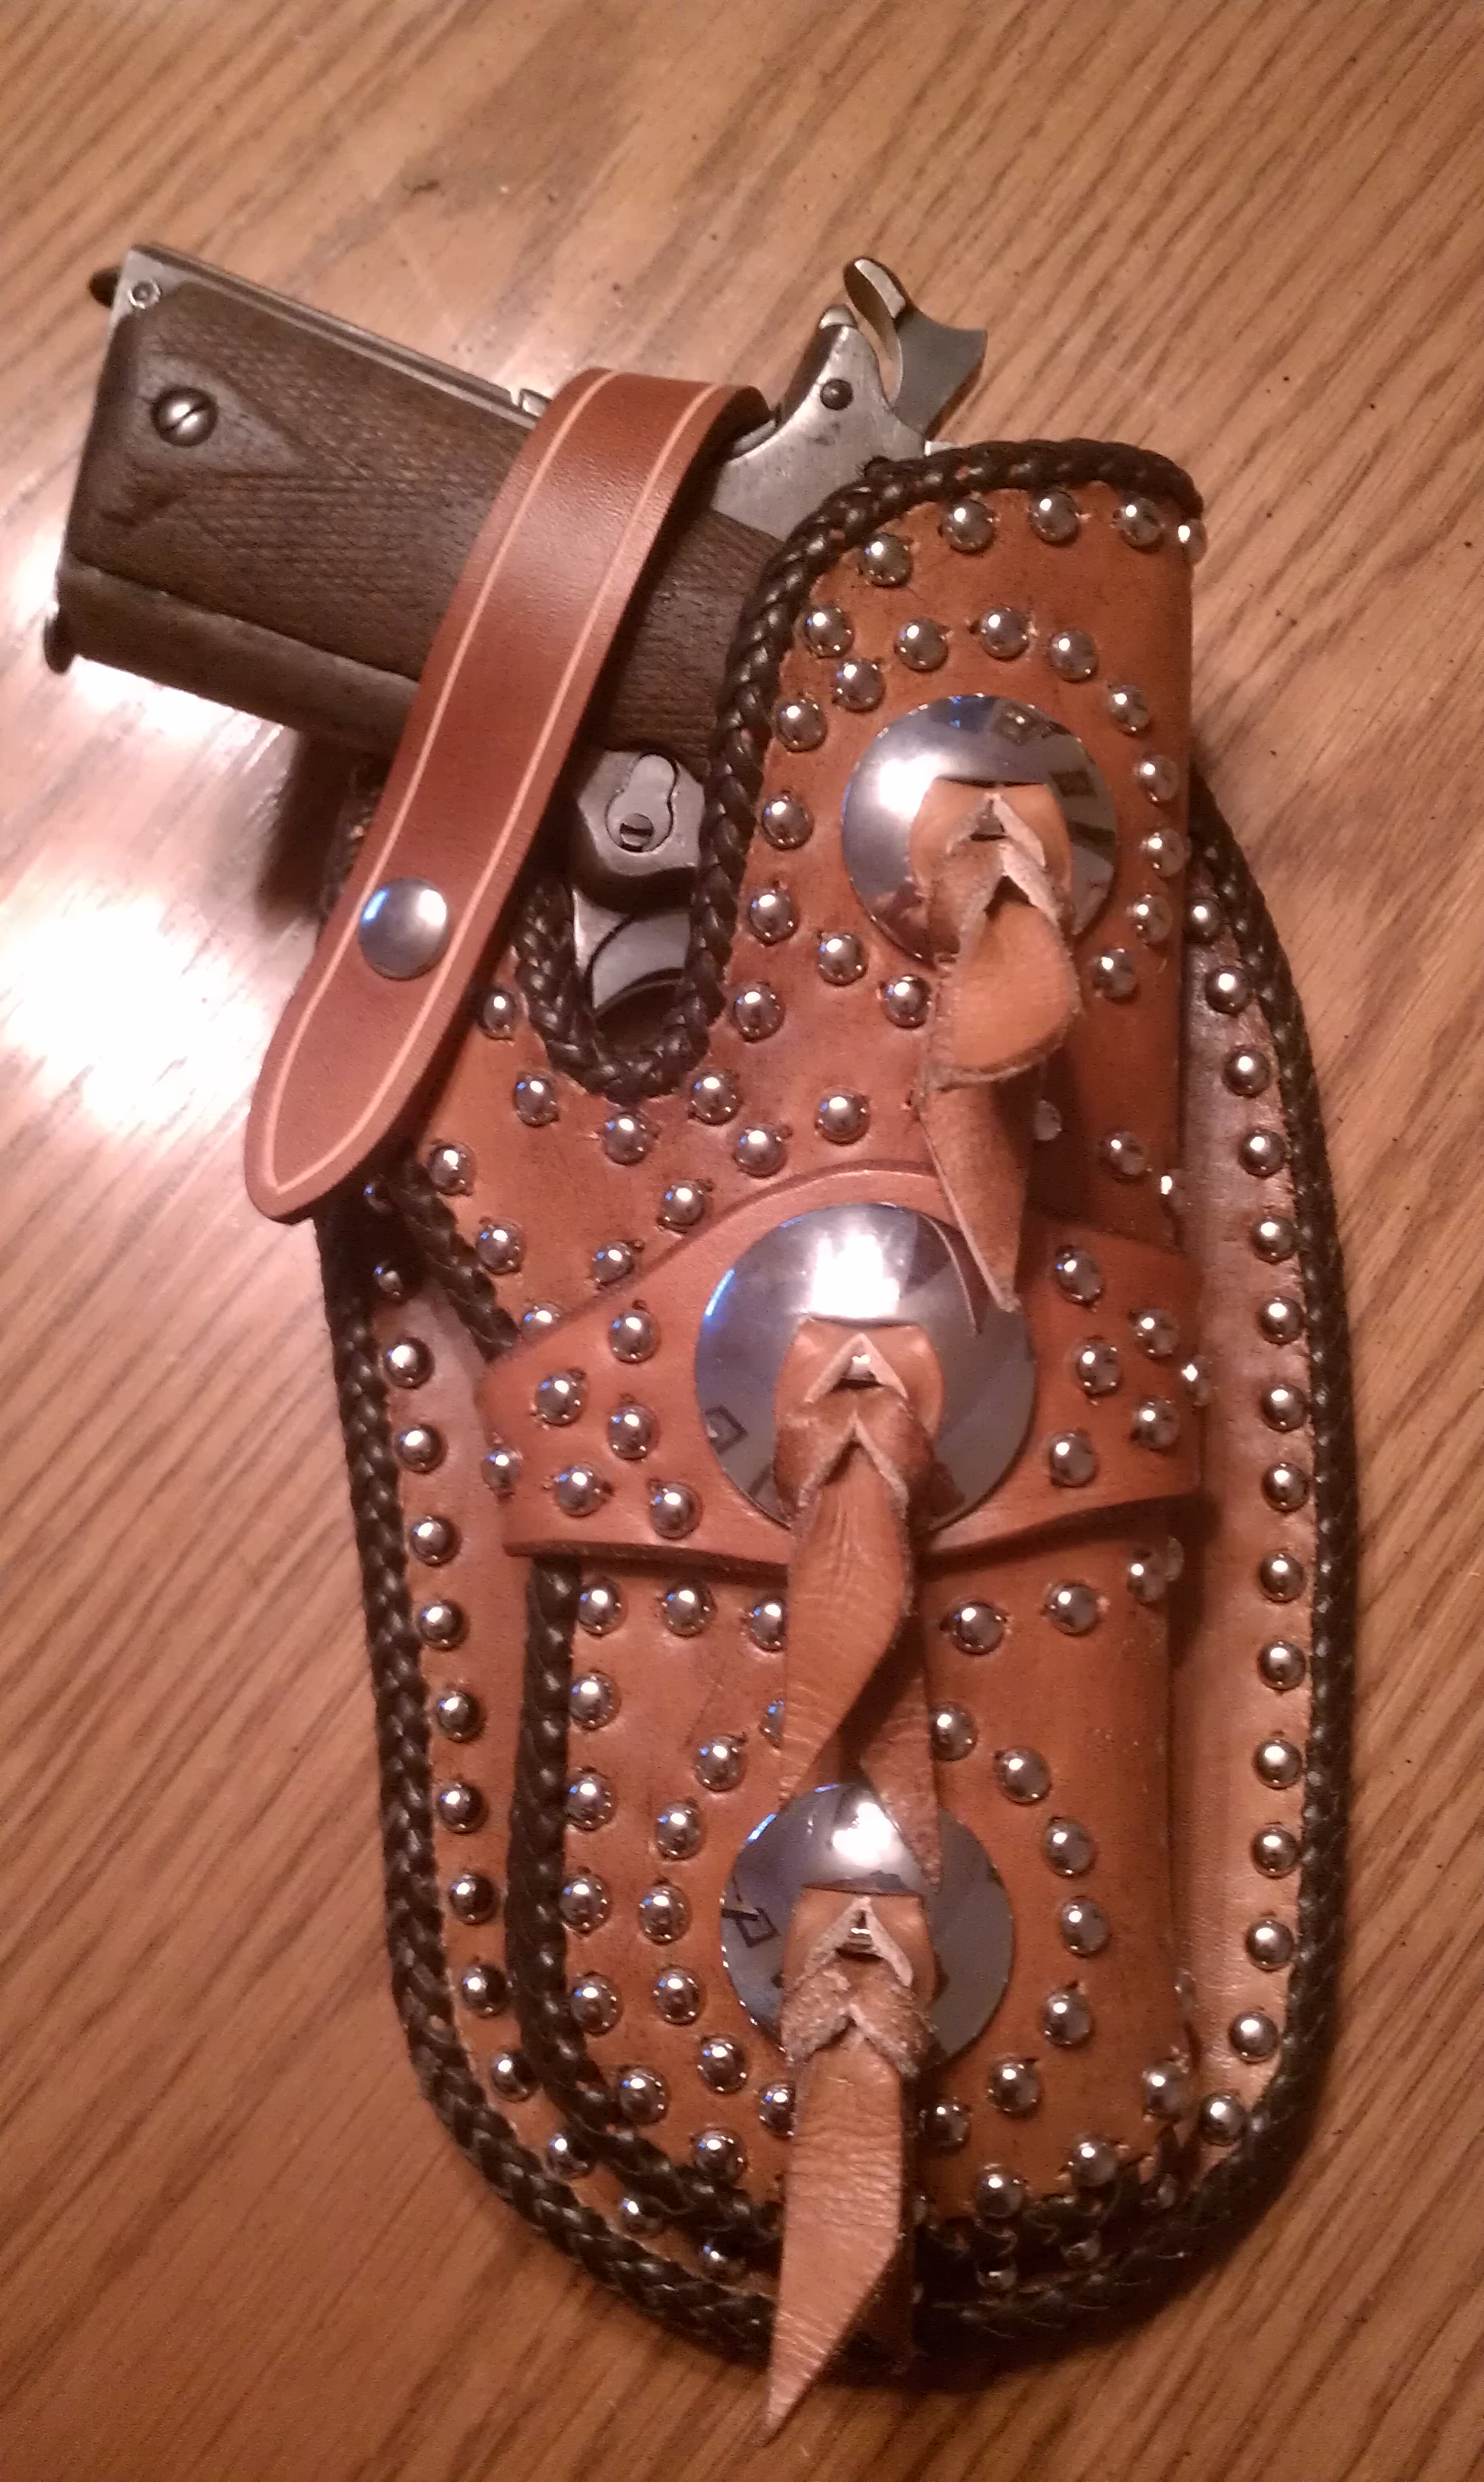
Will Ghormley "frazier" 1911 Holster
c2369zulu replied to c2369zulu's topic in Gun Holsters, Rifle Slings and Knife Sheathes
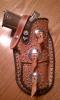
Thanks guys. SooperJake, thats a great looking Sig you got there! You will have to show us your holster when you complete it. I am not very good with altering or making my own holster designs. LederRudi, Yes I did line the holster. The lining leather I ordered from Tandy and I believe it was just called "lining leather". It is really thin, but very strong. I have lined holsters, like theWill Ghormley "El Dorado" Rig, with 4-5 oz. leather as he suggests. The lacing pattern was provided with the pattern pack. I can't remember what it was called. Let me know if any more questions. -
Phone Case W/button Strap
c2369zulu replied to c2369zulu's topic in Purses, Wallets, Belts and Miscellaneous Pocket Items
Thanks Wishful and thanks for looking! -
Hello All, Here is a holster I made recently from the Will Ghormley 100th Anniversary 1911 Holster pattern pack. This one is called the "Frazier". Thanks for the patterns Will!........Rory
-
Phone Case W/button Strap
c2369zulu replied to c2369zulu's topic in Purses, Wallets, Belts and Miscellaneous Pocket Items
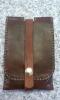
Sorry,forgot the other photo.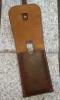
-
Hello all. Here are a few phone photos of a quick, fully lined, phone case I threw together for my Droid Incredible. FYI, If I were to make another, I would make the finger grab hole deeper on the back for more grip. Probably should have used a black thread, but I really like this "natural" artificial sinew I bought from a Kentucky vendor at a Rendezvous in Indiana. The Tandy sinew does not seem to be waxed enough for me and does not lay as flat or pull tight as this stuff does..........Rory
-
Custom Tool Pouch And Sheath Combo
c2369zulu replied to Blazin's topic in Gun Holsters, Rifle Slings and Knife Sheathes
Looks great!! Just a thought, but why not cut the length of the "sides" (not including stitch area) of the pouch longer so the longer portion at bottom folds inward like a cardboard box and have the main flap and "bottom side" of the pouch (where you stitch it on) be one piece that folds around the side flaps, inside along the backing plate then up and over to create the flap? I'm sure this made no sense, but its hard to describe in words .......