.jpg.d60258221c476480a6e073a8805645bb.jpg)


Peter Ellis
-
Posts
236 -
Joined
-
Last visited
Content Type
Profiles
Forums
Events
Blogs
Gallery
Store
Everything posted by Peter Ellis
-
If you do a search with google for conservator and leather you'll find many views on what to do and how.
-
Since their website refers to the patented Lever buckle, my guess is it's not something that one will just pick up from Ohio Travel Bag. I don't recognize that style of buckle as being available from any of the suppliers I am familiar with.
-
I like it too. The design is great, the tooling well done and highly effective. A couple of things that could make it even better: it looks like the top of the castle needs its edges slicked; the stitching up the back doesn't compare well to the rest of the project. I really appreciate the ugh about hand stitching, I hate doing it and don't do it well myself, which, predictably, makes it something I see right away in other people's work. There's something called a "tunnel stitch" where you go in through the flesh side, out the edge, in the edge of the other piece and back out the flesh side. It never shows from the grain side. While it would be a collossal PITA to do on a piece like this, it would give a great look. Not sure it's possible in 5-6 oz.
-
I'm another one who is in the city weekdays for the "day job". Live in central Jersey and do my leather there.
-
Well, they haven't got the website sales part going yet. One would think that might be a high priority item if they are intent on being profitable. They might at least have a website that has their product line, not just samples of two lines of stamps. I would really like the pebble background stamps, but perhaps the answer is to just make my own.
-
Ya know, one thing about using rivets to protect the stitching in a sheath...you won't have to worry about that knife being too sharp... If there's a proper welt in that sheath, the stitches aren't exposed to the knife edge, and the knife edge doesn't get pushed back and forth against metal rivets. Get it just right and the edge shouldn't be rubbing against anything.
-
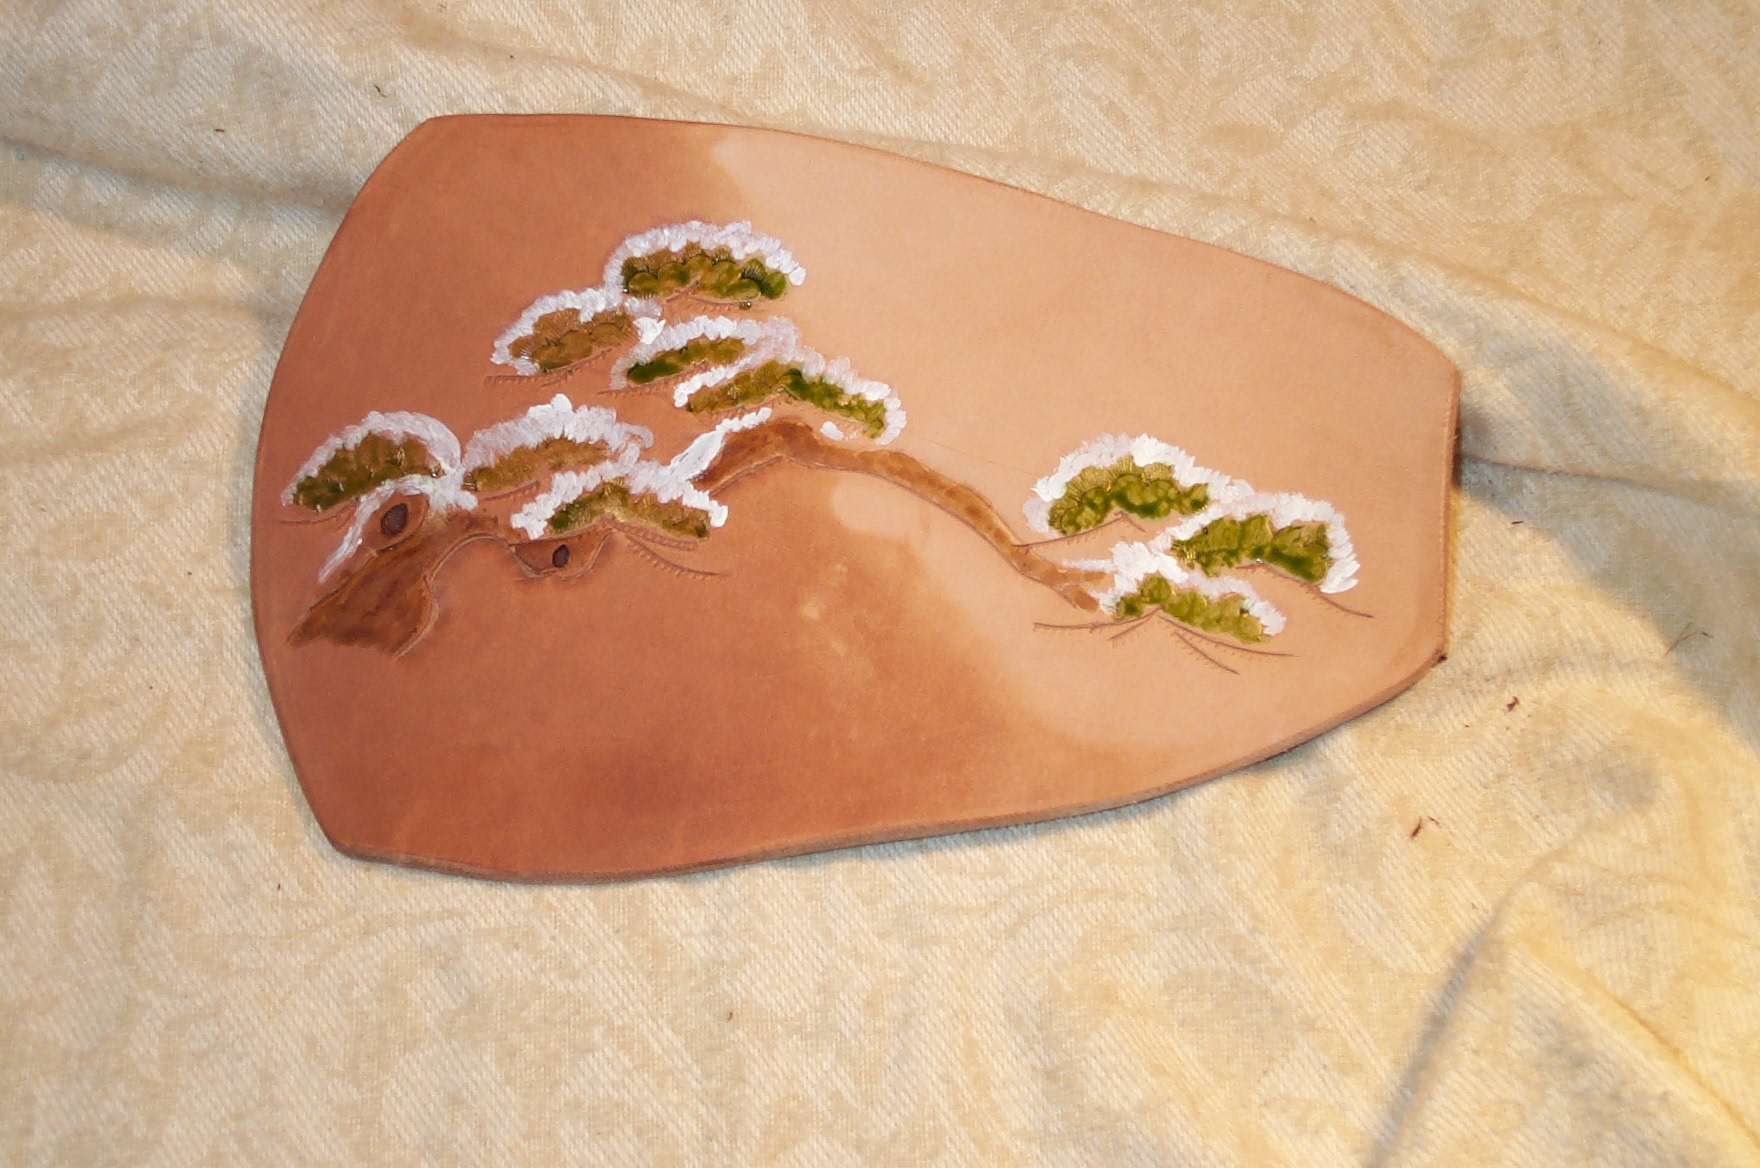
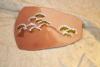
I got a request for a couple of pieces with a Japanese theme to them, for a lady archer. Here is the bracer, which I think came out pretty well so far. Not quite dry yet in this picture. The artwork : Snow-laden Pine Boughs 18th century Attributed to Ogata Kenzan , (Japanese, 1663-1743) Edo period
-
Welcome to Leatherworker.net. I do earlier period leather work, focused on western Europe, primarily, over the course of about 500 years, more or less 1000 to 1500. During that time frame, there was a very common practice of decorative metal mountings on belts. These would be cast in any of several metals, with integral rivet posts that would be put through the belt and peened over. It doesn't appear to be the case that they commonly put pieces together with rivets, but they definitely knew how to rivet to leather. Doesn't help much for F&I era stuff, I know ..
-
Thank you for the information. May have to save up some pennies...
-
It's a nice looking piece. The decorative metal work is excellent. I do have a question, What is "cold cast bronze" ?
-
which spacing between straps do you like better?
Peter Ellis replied to esantoro's topic in Satchels, Luggage and Briefcases
I think the spacing on the straps is a trivial difference between those two bags. I prefer the Ghurka for the proportion of the top flap. I like the way it comes further down the face of the bag. The Ralph Lauren bag looks like it came up short, didn't close all the way or something, because of the short top flap. -
Consistent Dying
Peter Ellis replied to adamncl's topic in Dyes, Antiques, Stains, Glues, Waxes, Finishes and Conditioners.
Al Stohlman put together a pretty good book that goes into quite a bit of detail on how to blend dyes for leather working, and how to apply dyes and paints for the best effects on leather. Tandy carries it, it's not expensive and it's got lots of good solid information. Coloring Leather is the title. -
These look very intriguing. Question for those who use them, are you going with circular blades or the hexagonal ones ?
-
Might be worth looking into this outfit http://usineunion.belgium-products.com/en
-
Were you using any lubricant when drilling the stainless, Bruce ? Water actually works quite well as a lubricant when drilling stainless, and you don't have the concern of oil staining your leather. Cobalt bits are pretty amazing.
-
Hardware stores sell a tool called an "end nipper" that is excellent for clipping off rivets so they can be removed. Very efficient and pretty clean.
-
ebay changes & boycott Feb 18-25
Peter Ellis replied to unicornwoman's topic in Marketing and Advertising
Or why Ebay is really nothing like a live auction. Wait until that last minute, throw in your bid to "steal" the item at a good price, get outbid by the computer, bump your bid, get outbid by the computer, bump, outbid, etc. And there you are at the last minute typing like crazy trying to beat a bit that was set the day the auction opened by someone who is anywhere but at their computer while you are bidding. The things that I find bother me most about Ebay are that there doesn't seem to be any real mechanism for handling people making totally false claims for the things they are selling, and the idea that people are free to leave retaliatory feedback. You buy something, it turns out to have been severely misrepresented, you feedback to that effect and the flamewar begins ... just a lousy system -
There was a thread that discussed Verlane's method for making "Craftaids" using an engraver and plastic, I think it was LDPE but as I recall there was never a mention of what weight/thickness of plastic was needed. I seem to recall one of the Clay's having started the thread.
-
Not going to heckle, really, but.. Surform is a brand name. They make a variety of rasps and some other tools generally intended for forming wood. I can see where some of them might work on leather and might be useful for skiving where a bunch of leather needed to be removed. But from what I know of their tools, I can't imagine one that would be good for smoothing a surface. Doesn't mean there aren't any, I don't pretend to know all of their tools.. but Surform isn't quite enough information for someone to find the right tool with.
-
Food grade silicon, smooth-sil 940
-
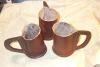
The English used leather "Jacks" for drinking vessels for several hundred years. Before the data crash here, there was a thread or two dealing with leather bottels. I've been working on Jacks for a bit now, and have found a satisfactory modern substitute lining material that allows one to use a jack for hot drinks and is FDA Food Grade. Here are some early examples of the jacks I'm making.

-
Wow... Thanks loads for pulling it all back together. There's something going around, though. My other favorite forum, the Armour Archive, just had a total and complete loss of the past 8 months worth of posts, private messages, everything. Over there, it involved a tired volunteer admin answering Yes - more than once - to those questions you really shouldn't answer with Yes. Remove Database - Yes. Are you sure ? Yes. o my god i can't believe i just did that
-
Recommeded thickness for Renactment Armor
Peter Ellis replied to GJMarko's topic in Historical Reenactment
It depends a great deal on what it is you are trying to do. Are you looking to make armour for fighting in the SCA ? Are you looking to make armour for dressing up at Ren Fairs ? Are you looking to make armour for fighting in Western Historical Martial Arts ? Each has a different set of parameters, although it's possible to build one suit that works for all three. I make a fair bit of armour for SCA use, using 13-15 ounce saddle skirting. Some people prefer to use sole leather, the full 16 ounce stuff run through rollers so it's even and hard right from the start. You might want to take a look over at the Armour Archive, where this subject gets a fair bit of discussion and there are several people working with leather for armour. There are a number of people using wax to produce hardened leather armour. Most of the evidence suggests that wax wasn't used for making leather hard for armour purposes, but that they had some pretty elaborate procedures for waxing boots, and that the English (and no one else) waxed leather drinking vessels. Leather for armour looks to have been hardened by heating it. You've said you don't want to use your oven. Unfortunately, that's the best tool most of us have for bringing something up to a controlled temperature of about 180 degrees. Some people have success dipping leather in near boiling water. I have had disasters trying that technique. It's tricky and I think very difficult to get consistently good results. If you wet your leather and mold it to your body while damp, you can get lots of shape into the pieces pretty readily. If all you do from there is let the piece dry, you'll get a dry stiff piece of leather. Not the same as a hardened piece of leather at all. However, you can take that molded piece, wet it some more and heat it to produce a chemically altered genuinely hardened piece of leather. -
A maul works much better than a mallet
Peter Ellis replied to RawhideLeather's topic in Leather Tools
I use a 20 oz version of the wood carver's mallet from Wood is Good. It's quiet, comfortable and I haven't managed to put a dent in it yet. I use it for a fair bit of stamping and punching holes. -
I picked up the EcoFlo dye sample pack from my "local" (only 120 miles away) Tandy a little while back. The manager, Jeff, had a heads up for me abou tthe Blue EcoFlo dye. Apparently, about 30 days after you open it, the formula changes (presumably it's oxidizing) and the color goes from blue to a steel grey. Can't independently verify yet, as I haven't even opened the bottle. Just thought people might want to know.