


Sylvia
-
Posts
1,881 -
Joined
-
Last visited
Content Type
Profiles
Forums
Events
Blogs
Gallery
Store
Everything posted by Sylvia
-
Chrome latino? ha ha ha ha!! I think you meant, Chrome Latigo. I've tooled Chrome tanned, too, before I learned it "couldn't be done." lol It looked ok at first but it eventually just looked embossed. My Grey chrome tanned changes color with water... it gets darker. Mine doesn't feel as though it has a burnished or finished surface. It almost feels like suede... but not quite. But it sounds as if Natalie is pretty certain she got Veg Tanned.
-
Yes. on the table or on the floor... even on your lap if you want and can handle the weight. I tooled for months on a little patio table... talk about noisy... then put a granite slab up there and that quieted it down a lot.
-
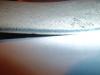
Ok... so you can see... here' is the white-ish grey chrome tanned I have. Freshly cut the grey line is clear. Sorry Fellas....her leather looks chrome tanned to me. Natalie: your suppliers may not know it as Veg Tanned. Ask for Carving Leather or a brand name like Sherman Oak leather. See if your suppliers are better able to help you.
-
Natalie: When you cut your leather does it have a uniform look on the cut edge or does it have a greyish line in the center. The greyish line is indicative of chrome tanned and though you can emboss it... you'll never get a good stamped impression. If your leather's cut edge is uniform in color... it is probably veg tanned. As for casing... go to your bathroom sink... fill it about half way with warm to tepid water and a dash of baby shampoo or mild dish liquid. (just a couple drops) mix that up (I agitate with my hand like I would if I put bubble bath in the bath tub) allow the bubbles to settle until the bubbles are gone. Now the fun part. Grab your piece and give it a 4-6 second dunk. Pull it out of the water and listen do you hear the water soaking in and do you see little bubbles bursting on the surface? If so... you know this piece is taking in water. Wrap the piece in plastic bag and allow to sit FACE DOWN for at least 1 hour then flip it face up allow it to sit another half hour. Take it out and allow the piece to return to it's natural color. Now attempt your cutting and stamping. I suspect your supplier went for color rather than tanning process and you have chrome tanned. But I hope that's not the case. As far as your work surface. You definitely want a hunk of stone of some kind. Marble, Granite... something sturdy at least 2 inches thick should do it. A lot of us in the states have visited stone counter top places or cemetery headstone places for their cast offs. (misspelled head stones) or sink cut outs. They are mostly free.... but it is nice to bring them a treat as a way of saying thanks! Also make sure your tooling hammer is heavier. The more weight means a cleaner impression my two favorite mauls are 11oz and 16oz and I think I want a 20oz one too, eventually. I used to beat my leather until I was silly because I was using that crazy little wooden mallet that comes in some of Tandy's kits. Throw that away if that is what you have and get a real maul/mallet
-
Received mine this week and I am very happy. Thanks!!
-
This reminds me.... I had an idea a while back when folks were showing off their photo set ups and recommending diffused light and lots of it. I saw one of these http://www.walmart.c...oset/17108667 or this one http://www.walmart.c...-White/19625952 And though... hmmm.... photo booth. Add a table inside with a white cloth... plenty of lights outside directed inward... and tada... instant photo booth. Of course in this case the cheaper ones with thin white material is better.
-
I have a small home embroidery machine, I've been tempted to embroider some inserts to trap between layers of leather. If you really want to get into this contact Cobra Steve @ Leathermachineco.com and ask him about a Cobra Machine or a used one that will work for you. He's also very helpful and will work with you and take good care of ya. Paying a local guy to sew could get you by for a while but it will also increase your cost of goods sold. Just something to think about.
-
Can I steal the roses design. I like the larger blossoms.
-
Do you plan on machine embroidering these? If so make sure your design isn't too dense or the embroidery will just pull off like a patch... that is unless you use a good stabilizer. (Which I'm sure you know) I would use upholstery weight leather... embroider then use a heavy stitcher or hand stitch it to the body of the halter. For you I would buy predyed leather... doesn't really matter if it is chrome or veg dyed. A lot of people here adore Springfield Leather and I've heard good things about them. I would call and talk to them for suggestions too.
-
I oiled too much once. What a pain! The only thing that finally worked after letting the piece sit for 3 months in cat litter... was Dawn dish liquid followed by saddle soap. Your mileage may vary but for me that was enough to lift a good amount of oil...however, the excess water from "washing" it didn't do the design any good.
-
It's some Walmart thing that my hubby bought me. It does provide 360* heat but it doesn't do much in the shop. It would be better for an office space or under a desk. I think he went frugal on me and bought the cheapest one he could get. I don't know what I'll do about a heater yet. I've had one of those oil radiators before, they aren't too bad. Just spent a couple hours in the shop in my fancy Dan insulated britches and I didn't mind the cold so much.
-
I think it was Jeff Foxworthy that said his wife's hiney got so cold that it was like snuggling up to a butterball turkey. That's where that comes from.
-
Well, my insulated bibs arrived today. I went to the store to pick them up and thank goodness I decided it would be smart to try them on before I left. The size I ordered was entirely too big. If I pulled the crotch up where it is supposed to be the front of the big was at the bridge of my nose. LOL That was good for a good giggle. Luckily I found a pair in the store that fit ok but they were marked $40 more than I paid for the ones I ordered. Tried them on and they fit ok but one zippers was bad. I pointed that out to the manager and he let me have them for about $18 more than I paid for the original off branded ones. When I got them home I examined the zipper. Jiggled, tugged and got the bottom slide up to the hip. Tugged some more and got the teeth aligned. woot! zipped the slider down... and it separated. Grrr.. did that a couple times before I realized it was separating at the same spot. So... I did an old trick.... zipped both sliders up as far as I could get them and squeezed the slider head a little with a pair of pliers... shazaam! Zips fine now. Cha-Ching! Tried them in the garage... much better. No more frozen turkey hiney. Now to figure out how to keep my NOSE warm. lol
-
I take it that your servo is a smart servo... right? I had mine stuck in reverse once. LOL that sure is disconcerting. Someone on the forum posted a MOD that looked pretty easy. Basically you attach a piece of paper with a gradient on the little arm that goes under the servo's sensor with double stick tape. I'll see if I can find it. Ok here you go. http://leatherworker.net/forum/index.php?showtopic=41483
-

Walnut Telecaster And Leather War Bonnet Pickguard
Sylvia replied to chancey77's topic in Musical Instruments
Where's the pups? Are they under the ashtray? -
Bench top belt sander and a gloved hand. Sand the grain side... at an angle.
-
Don't you just LOVE trying to get those gears just so? UGG. I'll never do another Steam Punk.... or if I do... 40X the normal price. lol
-
Best Carbon Paper For Leather
Sylvia replied to charlescrawford's topic in Floral and Sheridan Carving
Charles: I do prefer clear vs opaque paper. Placement is much more easy with clear. I do not use the transparencies. I use those clear sheet protectors. They can be opened to allow for larger designs and if you want you can slide your opaque paper design right into them and trace through all three layers (I don't do this) Anyway I use my monitor as a light box... Size up or down on the computer then trace from the monitor onto the plastic with a sharpie. If I need a longer or bigger design than my monitor allows, I just make note of a reference mark and move the design around until it lines up. EASY. Then once the leather is CASED... I place my piece secure it (sometimes with push pins if the designs allow.... and trace with a stylus or you could use a spent ball point pen. -
I have a few of the LCL pdfs. I like to buy them when I get the $5 off coupon I get with my gold membership. I think they are fine, since you can print them as many times as you want and they work like any other "put it together" type patterns.
-
The easiest way to make a profit from this leather is to package it into "one pound crafter's bags" and sell them on ebay. If you really want to do something with them that will sell and cost almost nothing to make. Buy a bunch of inexpensive picture frames at the $1 store and cover them with leather. Sell them for around $25-50 each.
-
I'm sure you found Leathercraftlibary.com But if you think outside the standards.... try searching for Embroidery patterns, stained glass patterns, even a coloring book can offer interesting designs.
-
Did you get an instruction booklet with your 99k? If not this PDF will help you at LEAST get the thing threaded correctly. Users Manual: http://www.sew-classic.com/uploads/99K.pdf adjuster's manual. http://parts.singerc...Manuals/99K.pdf
-
ah ha! Had to search "Dye powder" on the site then it came right up. http://www.goodsjapan.jp/category?top_searchString=dye+powder&searchString=dye+powder I don't see why any fiber reactive dye couldn't be pasted up in alcohol and dye leather with it.
-
That Japanese company carries it too. Goodsjapan.com But I just looked and their page is blank... I imagine if you ask about it they can help you out. Here's the youtube video of them making it up. That Japanese site has it...well they did anyway. goodsjapan.jp. here's the youtube vid
-
Whatever you do... don't brand any chrome tanned leather. You'll be sick for days. (ask me how I know) I used a wood burning tool and "signed" my work for months before I got a makers mark stamp. I still use it occasionally on smaller things.
