ouchmyfinger
-
Posts
178 -
Joined
-
Last visited
Content Type
Profiles
Forums
Events
Blogs
Gallery
Store
Everything posted by ouchmyfinger
-
I've heard of some people doing something like this to make a cheap clicker, has anyone done this. a guy at a gun show that makes holsters (not the best btw) told me about this. super nice guy but his work that i saw was lacking a few steps to really bump up the professional look. i don't think any of this was due to his homemade clicker though
-
if your tooling a piece that big you can use a piece of plexiglass on the parts that your not tooling, this will keep your hand oils off of your project as well as keep the water from evaporating and drying out too fast. it will also help keep your leather from curling, if your a quick tooler you may want to try the paper weight method the other guys were talking about or maybe a combination. i tool slow so the plexi keeps me from rewetting, also to keep it from stretching (just asked this a few days ago for some better methods) use GOOD packing tape from 3m aka the scotch brand. this will keep it from stretching. then you can rubber cement it onto another piece of plexi to reduce stretching a little better and this will keep it from curling. the best part of going through the hassle of the tape and rubber cement is when your messing with thinner leathers like 4 oz. the plexi will be perfectly smooth and you won't have the inconsistencies as you do in your granite that your tooling on, I'm sure we all have those little spots where its not sanded down and as smooth as it should be, at least i do lol good luck i hope this helped
-
Sheridan Rifle Strap
ouchmyfinger replied to FOXERJOSE's topic in Gun Holsters, Rifle Slings and Knife Sheathes
what color antique are you using......im using the same method and keep getting a light brown color thanks -
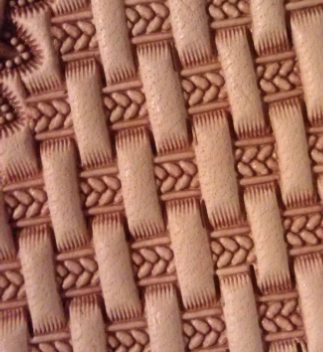
I received my tools a few days ago and have been waiting to get to the part of my project where i could use this wow...this is the smallest of the sizes available and the detail is ridiculous. the website does not do this tool justice. just wanted to let u guys know, I've always been happy with the tools i got from him and i was skeptical of spending the 50 bucks for a basket weave stamp but i am so glad i did. definitely try one out if you can, like i said the website does not do these justice so i wanted to show a pic for you guys the final project will be posted soon hopefully. I'm waiting for the clearlac to dry then antique then clearlac and a little hand stitching and I'm done. can't wait to get my cobra 4lol
-
Sheridan Rifle Strap
ouchmyfinger replied to FOXERJOSE's topic in Gun Holsters, Rifle Slings and Knife Sheathes
what was your finishing process for that, great color and finishing job. i was looking to get a color like that with this thing that I'm working on, maybe once the clearlac dries it will lighten up like it did with the first coat before the antique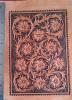
-
me too lol. i can't wait to get mine. i have been stitching by hand forever :0) i couldn't say enough good things about my experience with them also. you see a lot of people come and go in the business world and i can honestly say that having that kind of customer service is exactly why i wanted to buy my machine from them. i know they will be around for a long time if they keep that up.
-
yeah man, you need to have a price list or something so people will know. FWIW when people go to your website and don't see prices that just means they are going to keep surfing and playing online looking and window shopping. maybe work on your website design a little more also. nobody knows what those numbers mean. you need to make it as easy as possible for people to buy your product. barrys website is a good example as far as looking for what i need and clicking right on "thumbprint" or whatever i may be looking for. Ive recently been working with a professional web developer that has his own business with people working for him, not just some random guy. these are things i have learned from him and just wanted to pass it on, its nice to see another person out there and even trying something different with the blueing. good job man.
-
I'm going to post the pics in the critique my work section since it really has nothing to do with this thread. my beader blade from barry came and ill work on it some more and update later, pics will be there shortly thanks everyone
-
I just put the tape on the back but it was the cheap kind I think. I'll run to home depot n grab some 3m. This tape was sticking a little better after it dried out a little. I tooled the corner and it seems to be working but ill switch the tape to ensure I don't ruin the project. I'll post pics when I get back from home depot. I took pics of various stages so far and will post them in order. I only have beveling and backgrounding to do. Ups is on the way with my beader blade from barry. I can't wait to get it and my basketweave and border also. Thanks
-
putting the tape on the surface first is what i did but because I'm only using 4 oz herman oak when i ran it under the sink for a few seconds it soaked right in and the tape came right off. i have quick cased most of my stuff before by just wetting the surface but then when you cut with your swivel knife it drags on the dry leather under the surface so i was trying to case my leather by wetting it and letting it sit for a few hours. i have a piece of plexiglass that i put over it to help with evaporation while tooling. i waited overnight with the plexiglass on top and ill see if the tape will stick to the back now. i pre stretched my leather with a glass burnisher and I'm sure that helped a little but all i have done is the lifters and thumbprints and i could see it was starting to stretch a little already so i left the plexiglass on top to help flatten it out also I'm about to see if the tape will work after the drying time under the plexi thanks guys
-
Leatherburnishers.com Signing Off...
ouchmyfinger replied to Spinner's topic in Leatherwork Conversation
that is pretty shady, I'm sorry to hear about that. i was unaware of the situation. if you need some detailed pics of the one i got to show your argument i would be happy to send them over to you. i would of course love to support the forum members instead of anything on ebay, i am not a big fan of ebay since i had a problem with them years ago and they were impossible to get a hold of anyone for any customer service. since then i have stayed away whenever possible. i try and always look in the services section of the forum if i need anything, such as some clicking that i may need done but i didn't see anything for burnishers but yes that is the guy that made my burnisher i noticed that a few of the members have talked about putting their burnisher in their dremel, the shaft of mine is obviously designed for a drill press application or something of that nature. the steel shaft is 3/8"s of an inch. i was actually going to ask what people are using other than a drill press to spin these things. my drill press is a tim "the tool man" taylor binford made press i think, it stands about 6' tall and i think it probably cost more in electricity to run a month than a new one would cost lol. but its hard to find quality like that anymore without breaking the bank. any ideas would be appreciated i tried to order the "fantastic leather burnisher" but the lady told me that they could no longer get the motors and they were looking for a new supplier but that was a long time ago. i was not happy with the small burnishing wheel that is provided with the machine since it does not have all of the groove options for different thicknesses. plus the fact that they want 60 bucks for something you can build with 25 cents of home depot tools and scrap wool from the saddle pads or whatever you guys use that stuff for, there was a tutorial by bianchi that showed you how to make the whole rig but i couldn't find the motor. i actually went to a supply store near by that sold small motors and managed to find some nylon rod and tried to mount the motor and grind some grooves in the nylon rod using my bench grinder, the nylon rod came out good and made a heck of a mess (looked like it snowed in the corner of my shed) but the motor was 24v instead of 12v so i returned it and got a 12v one so i can wire it up and plug it in without running new wire through the attic for the 24v. i didn't know the 24v thing until my father explained it to me btw. weird how we go through life and never learn these things till your have to return something and look like an idiot, anyways. the smaller motor just didn't have the power to keep spinning under the friction created by the leathers edge so the whole idea was a bust. since i usually work in the garage and my drill press is in the shed i would appreciate any ideas that you guys have, i really don't want to have to buy another drill press just for the burnisher, it seems that there should be something out there for us, like a simple motor that you can mount without having to build some type of da vinci machine. -
i have heard that you can put tape on the back of a project to keep the leather from stretching while you tool, i have also heard that you can rubber cement it to something but for some of the things i want to make the rubber cement option isn't an option my problem is when i case the leather the tape won't stick to the back, it will if i quick case it with a sponge obviously but i want to learn how to do things the right way any ideas would be appreciated I'm using herman oak 4 oz and want to tool a kindle cover for someone using the chan geer notebook patterns so it will be completely tooled thanks in advance anyone
-
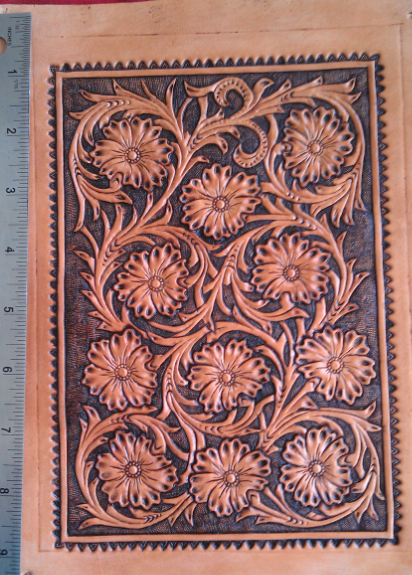
i have been using the ecoflo gel antique and just received my order from springfield to try the methods i have read about here as well as in the sheridan style leather carving book by bill gardner and clinton fay that i got off amazon a while back. this is what i am using and what i did. i just received my order from barry king and was excited to try em all out, i ordered the kit for small to medium size projects as well as a border and basket weave stamp. it is the first time i was able to use herman oak as well as clear lac and the antique paste so i was a little impatient on tooling the leather, i should have let it dry out a little more i think, any criticism on the tooling is appreciated as well, thanks in advance everyone 4 oz herman oak veg tan from springfield 100% pure neatsfoot oil clearlac from springfield fiebings sheridan brown antique paste i did my tooling, let it dry and applied a coat of oil with a wool dauber waited 20 hours and applied a coat of clear lac using cheesecloth since i had no wool scraps but it worked pretty good actually and left no fuzzes waited 4 hours and applied the sheridan brown antique paste waited aprox 1-2 min and wiped the residue off i have not applied a final finish yet but i doubt that will change the color much I'm trying to get that "magic" color that you always see, the sheridan book is full of examples, it seems that that color is almost a saddle tan or more golden color, i would be happy with either, i am getting a light brown please help lol ps the pattern is from chan gears book of billfolds and checkbook book that i got from sheridanleathercarving.com as an e book, it was a quick transaction and i saved it to a disk and had staples print it on some thicker paper and then put the pages in plastic sleeves in a 3 ring binder with the tooled example page in front and the pattern behind it and one on the other side, i managed to put 2 of his books in a well organized binder only using 14 of those plastic sleeves, i am looking for as many floral patterns as i can get so if anyone has some or a good source i would appreciate that info too

-
Leatherburnishers.com Signing Off...
ouchmyfinger replied to Spinner's topic in Leatherwork Conversation
i recently just send a message to a guy selling them on ebay and he called me back and i had one made to my specs and he turned it in a couple days and had 2-3 day shipping for close to 40 bucks i think, it was made from cocobolo and is made extremely well, i was searching the forum for someone who makes them and was directed to ebay so maybe its another member here, i assume it would be, he has many other items available for us too -
I'm sure if you still used your method and followed it up with mine it will come out super nice. what do you use to shave down your fuzz
-
Another First Attempt At Sheridan Style...
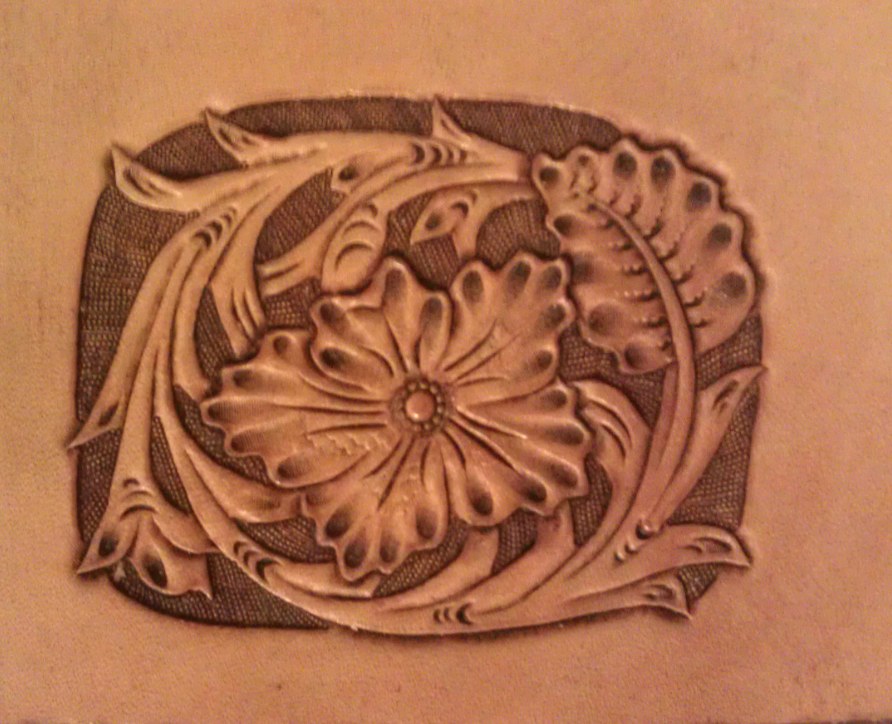
ouchmyfinger replied to tatehunt's topic in Floral and Sheridan Carving
lol, your the same as me. my pointers would be, depending on the size of the beveler (which may be too lg for this project) if it wasn't then you were too rushed or the leather was too mushy to get smooth curves around smaller curves(like on your petals) because your other lines don't seem to have this problem. either the beveler was too lg or you were impatient like i was and did the flower first and once you got to the other parts of the pattern the leather dried out a lil. the other thing that led me to this was the bargrounder impressions, try letting your leather dry out more, i struggled with this and asked plenty of very accomplished leather workers. all this will come with practice of each of these tools. your flower center is up to you. try just carving a small circle and using your seeder to make the seeds around the center, you won't always have every tool for every job. the special tool list for me was like this, steeper beveler, lifter, and thumbprints you can make do with the craftools by using a vertically lined pear shader instead of paying 30 bucks for a center shader, they do make thinner veiners or you can always grind yours down. everything else is pretty much treating yourself but unfortunately craftool doesn't make the bevelers and thumbprints you will need. and they do make a lifter but it isn't nearly as nice, everything else you can make do with until you take the plunge into the custom tool market barry king has about 1k of my money lol but some of my favorite tools are craftools, if we all had the same custom tools all our patterns would look very similar, so use what you find that you like and just like everyone else has said, get a good swivel knife and blade, keep it sharp and polished and case your leather properly. the good thing about sheridan is that the order that you use the tools in complements way the leather dries out during a project, usually (once again depending on temp and size of project) message me if you have any questions anytime good luck -
when you saddle soap the flesh side if you take a glass slicker you can slick the flesh side so smooth that you won't have any fuzzies and that will also help seal up the fibers so the dye will not come off as easily, plus it will be more comfortable and slide easier. i learned that from a leather crafter and saddlers journal ad and was so surprised by the result i do it to almost everything i make.
-
like previously said it will depend on the leather a little as well as the part, i have managed to match that exactly so i figured i would chime in and let u know how i did it first was euro bend from tandy, super expensive but super nice second was after i finished my tooling i airbrushed a few coats of fiebings oil dye, british tan....to an almost orange color third, super sheen a few coats fourth, ecoflo mahogany antique then i sealed it with tankote i think it is kind of like candy paint on a car, the base coat then when you apply the dye it will tint the sealer coat you put on before the antique and create a new color. i was doing this and just created that color, i wouldn't have known that it would turn out this way but I'm glad it did. i get a lot of complements on it and i actually use it as a demo pc to show. I'm not sure if this is the most reliable method since there will always be minor variables between all the steps. ps. it was super hot outside and that could affect the absorption of the dye when i was airbrushing it, you should also let it soak in before moving on to the next step, i have noticed that when i do airbrush something that i do enough coats to get the desired color and then once it soaks in all the way it is a noticeable difference so i may have to shoot a little more dye good luck, sorry my answer is going to be a pain in the butt to try