-
Content Count
366 -
Joined
-
Last visited
Content Type
Profiles
Forums
Calendar
Blogs
Gallery
Store
Everything posted by rdl123
-
I like it - Very nice work for a first rig! What kind of tree did you put in it? I like the old timey look. R
-
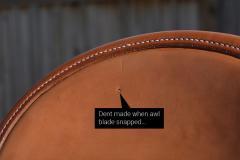
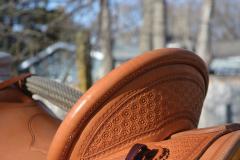
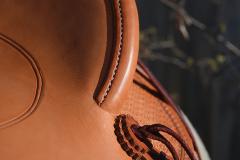
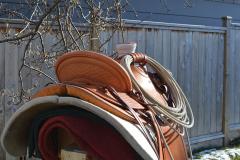
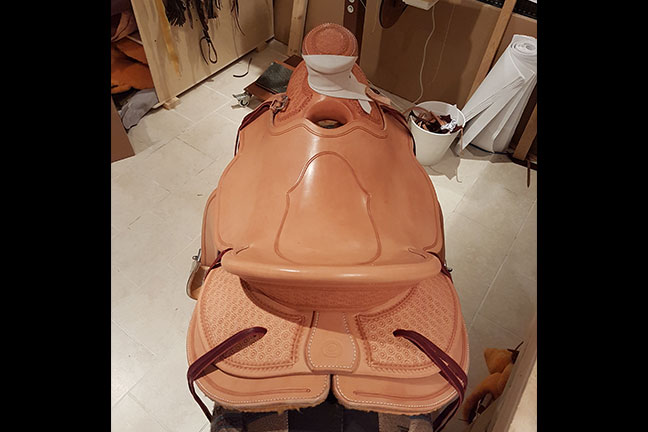
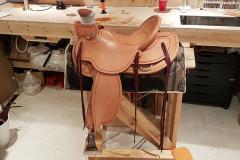
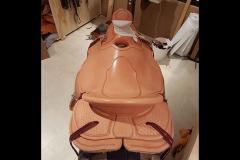
So no earth shattering progress recently as I have been busy getting a house fixed up... But I did sew in the inlaid seat on this rig. I have the house largely under control now so maybe it will free up some time for me to get this saddle done... Ron
-
I couldn't say which one is best - However I own a Cobra Class 4 machine and love it so I can speak well of Cobra for sure.
-
Randy, Congratulations - Really nice job! It's neat to see your progression from saddle to saddle. Ron L
-
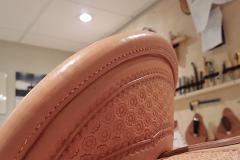
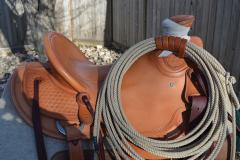
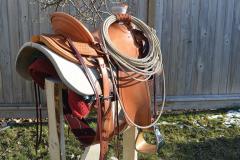
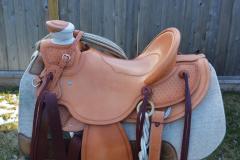
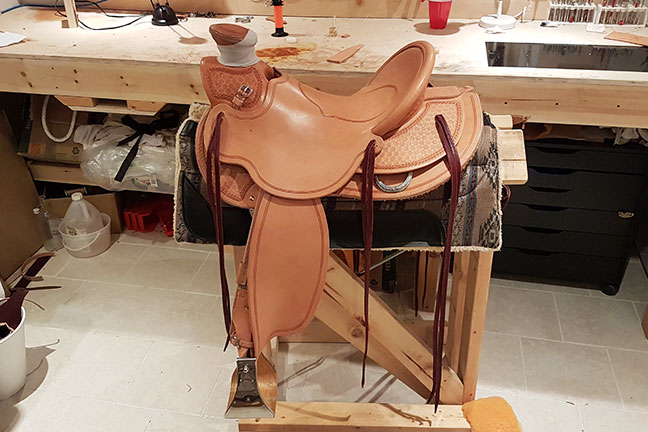
30/03/15 Hello! This past saturday I made some decent progress. Cut out fenders, billets and finally got up the nerve to proceed with the inlaid seat portion of this project. Built my pattern by looking at saddles by Kent Frecker, Cary Schwarz & Steve Mason...I'm sure it isn't as nice as what they do but overall I'm happy. Here's what I did: Pulled the seat off the saddle. verified by measurement approximately where the pattern was going. Using the center line I had scratched into the back I ran an awl hole up through the seat 2" in from either end of the pattern. This let me center the pattern on the top side of the seat accurately. I then traced around it and cut the pattern out. This required very sharp knives and nerve...once mis-step and you can wreck a piece of prime Hermann Oak. I used a piece of nice top grain chap leather for the inlaid portion - This sets in a 5/8" by 1/16" deep channel I cut into the bottom side of the seat around the inlaid portion - Used a french edger to create this channel. The padding is the foam you get from Sheridan leather - It's 1/4" thick. My seat leather is close to 3/8" in the center so I needed to build it up. I used two layers of pretty heavy chap leather - The were probably in the 7oz. neighborhood and I glued these two layers to the underside of the foam. The top grain leather was glued to this. Prior to gluing the top grain leather on I skived the outside edge to a near feather. This whole set-up fits into the inlaid cut out very tightly. I cut the foam piece 1/6" smaller on all sides than the cut out I took out of the seat. This gives the chap leather space to fold and wrap under. Here are some cell phone pics. R
-
Very interesting thread! I am a very inexperienced saddle 'maker'. I am currently building my second rig for my fiance and I have in the past liked strings to run through the tree. However, on the first saddle I built I ran into the situation Keith describes of there being very poor fastening material left for the latigo carriers up front. Since, I have come across this theory: I would value input as I am getting close to where I am going to need to make a decision on the method I use. Ron L
-
Saturday: Got seat rough fitted - Pulled it in and then let it dry up to where the seat and front jockeys were firmed up. I follow Jeremiah Watt and Dale Harwoods theory that you need to pound the leather into the middle - Draw the bubble into the center and pound it in. I also do like Jeremiah Watt and work a bubble into the cantle face and then compress it in - Really helps leather fit into cantle dish. Sunday: Wet the center part of the seat down and pulled it back into rig. Marked my cut lines on the on side and cut that out. Flipped it over off of center line and cut off side. Pulled it back into seat and nailed in. Went in very symetrical. My clearances off of rigging rivets tuned out to be identical on either side. Here is a grainy cell phone image - I will post proper images soon. There is one thing I do not like. I made my handhole too shallow. I wish I had the back edge of the handhole 1" further back. I used a centerline on this seat and worked off the centerline on the ground seat - I believe this really helped the seat go in square. The other thing obviously is that this tree is dead square - Sure makes the amateur saddle makers life easier. More images to follow. This saddle is going to have a padded seat. Hope it looks like this: (Saddle by Gordon Andrus Sage Creek Stock Saddle Co.) Maybe without the scallops on the back edge though... I picked up my 3" monel stirrups on sunday too. R
-
Thanks for the kind words Randy... My only concern with this swell cover is that I really pounded it in with a flat faced hammer (over a protective leather)...despite the protective leather it still left some subtle 'hammer tracks'...I am going to tool the swell but next time i'm going to be a little more discreet with the use of a hammer... Overall though the swell is better than the first one! Still want to get the third one better than this though! How is your third saddle coming Randy? Sure would like to see it! R
-
Last night I tooled up one of the skirts - Just a simple border pattern set 3/4" in from the outside edge. Here it is sitting under the rig... And then I cut out the cantle filler / cheyenne roll stiffener...It's out of 10oz Hermann Oak - and skived to a feather edge where it fades into the seat. Once the barge is dried up solid i'll really wet down the outside edge and pull and glue it down onto the single ply that is the start of the cheyenne roll. Once that's done I'll start the seat fitting process...i'm still apprehensive of seat fitting - It's probably the trickiest thing to get right - The ear cuts require a fair bit of careful attention. Thankfully Jeremiah Watt has a really good section in his DVD series going over seat fit - So that definitely helps. R
-
Hello CourtneyLynn, I like a smooth seat - Its all I have ever ridden and like you I prefer the ability to shift around. I've ridden some very rough roughouts and didn't care for them at all - That said I have a friend who rides for the PFRA and he rides a wade roughout - He's put a lot of miles in that rig and its so burnished its like riding a smoothout - I've ridden that saddle and sure didn't mind it. Keep in mind that not all roughouts are created equal - Some makers will really buff that flesh side of the hide and get it pretty smooth - I've also seen some that were left pretty raggy. One thing about a roughout - They're probably more versatile...If you want 'grip' leave it pretty rough and maintain it with a wire brush - If you decide smoothout is the way you want it to ride just let it burnish up with time and miles... If you have the opportunity do like Reid says and ride both types. That'll be the best way to determine what you like. Roughouts can look really nice - Especially the 'half breed' styles - Checkout: http://www.oxranch.net/saddles/group_03/026_26.jpg http://www.sagecreeksaddles.com/image/obj106geo117pg6p1.jpg http://www.stevemasonsaddles.com/images/saddle1.jpg Ron
-
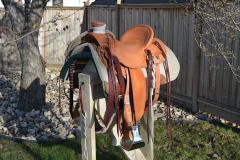
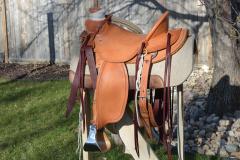
Dang - Just typed up a whole entire update and the thing deleted somehow. This post is going to contain a lot less detail! Anyhow - Life has been busy so haven't put in much time in on this thing, but here is progress from Saturday and last night. Rigging plates installed saturday. I like to glue mine in as well as fasten mechanically. Last night I blocked on my skirts and cut them to the bottom profile I wanted: Also, this time i'm not lacing my skirts all the way to the back tip. I;ve noticed a lot of guys end up cutting their lacing as they are wearing the loin hair off a horse. I figure this time i'll just lace to within about 2" - 2.5" of the skirt tips and see how I like that...the lacing will be hidden by the rear jockeys - So instead of using a shield to connect the jockeys i think i might lace the ones on this rig together. So far so good - Managed to not wreck these skirts - As some of you may recall I wrecked my first pair on saddle #1. Expensive mistake! Next step is cantle filler to help stiffen cheyenne roll and then swell cover - Last time my swell cover wasn't that great - Front lip was too thick and was also set back about 5/16" too far back...we'll see how it goes this time! Also, last time i used a full 14oz piece for my cheyenne roll stiffener - Made for tough sewing when I put my cantle binding on...this time i'm gonna experiment and try a nice piece of 9oz. Help keep that cheyenne roll from getting so thick. R March 03, 2015 So over the weekend I cut, fitted and stretched the swell cover in. I'm not 100% sure why but i seemed to really have to fight this one. It didn't want to stretch in tight on the front lip. Anyhow, i got it in more or less to my satisfaction - However it seemed like I had to fight it way too much - If anyone has tips / advice on how to make this go a little smoother / easier I'd sure be up to hear them . Here are a couple of pictures - The saddle is just sitting on the skirts - They haven't been fastened - For tooling on the skirts I am going to do a serpentine border... The border around my makers mark is what i'm going to do on the skirts... If anyone has comments / advice on things i should be doing different i'm very happy to hear from them! Many Thanks, Ron L
-
Bill, Yes, it sure is enjoyable - I don't consider saddle making 'fun' like I do riding colts or roping but it is very satisfying! If you do not have time in your schedule to attend an actual school I would highly recommend Dale Harwood & Jeremiah Watts saddle making DVD's - I find them very helpful - I'm sure they don't replace hands on, one-on-one teaching but for someone like me who can't get away from my real job they sure are handy. Let us know how your wife likes the saddle! From the pics your seat profile looks like it should be nice to sit in! Regards, Ron
-
Very nice Job Wrangler B... I like the clean look! Now for the fun part of actually riding it & enjoying all that hard work! R
-
Hello Archer 55, I believe you will be best served following Keith's advice of going with a solid used rig from a reputable maker. However, in the event that funds are just not available for that expense I could recommend Corriente saddles. I spent a few days in a couple of their wades on a ranch in SW Saskatchewan. They sweated up the quarter horses he had good, were pretty comfortable and the guy who owned those saddles routinely ropes yearlings so I know the hold up all right. They are fairly inexpensive. That is the route I personally went - I purchased a lower end but pretty well built rig and rode it for a couple years until I could afford to build my own 'custom' rig. The lower end saddle kept me riding and it actually fit horses pretty well. It wasn't something I would have wanted to rope anything big off of. I did hock some calves at brandings off it a few times and it held up fine. The bottom line is it kept me riding horses - After I had built my 'custom' rig i sold it for just a little less than what I paid for it to a trail rider. Now having a saddle that really fits horses well and really fits me well I'd never ride anything less than a custom rig. Anyhow, just some ramblings. Ron L
-
Here is the latest progress: Rigging plates are all tooled up and have one sewn and riveted, the next is ready to sew and rivet. While I waited for glue to dry I built some stirrup hobbles - These are 1/2"w and set-up for 2.5" stirrup leathers. Jeremiah Watt buckles. Used 1/8" beader to create edge detail. For my rivets - I know there is a lot of debate surrounding 'doming' rivets. I certainly agree that too heavy of a dome is undesirable - However, I purchased the domers from Sheridan Leather and am pretty happy with them. They just ease the rivet enough to keep the sharp outside edge down and when you polish them up they look great. As you can see I sewed up the off side rigging plate first - Mainly because I'm still trying to get handy with my Cobras Class 4 - It works good that machine. Sewed up that first plate like it was butter. Really happy with it. I'd still say though that hand stitching does that most accurate clean job...but for those of us who do this as a hobby and don't have lots of spare time, A cobra machine is a great investment - Does a very good job, easy to use and save hours. One thing I'm doing on this project - I'm trying to get ahead of all the little stuff - Stirrup hobbles, rope straps and latigo carriers etc. That way at the end you can save some serious time by not having to mess around with all that little junk...Anyhow, next step is to install these plates, the swell cover and then black the skirts on! 30/01/15 - So last night I glued up the last 'on-side' rigging plate and while I was waiting for that to set-up I polished up 7 rivets - I personally like a polished rivet and I also like them to have a light dome to them. For those who have never 'domed and polished' a rivet I will explain how I do it. Doming & Polishing Rivets: Tools Needed: Hammer, Domers (Sheridan Leather), Mini Anvil (Tandy), sand paper (200 & 400 Grit), and leather scrap with stropping compound. I have modified one of the little mini anvils from tandy. I have drilled holes in the top - These are sized just larger than the two rivet sizes I use - #9's and #12's, The holes are drilled far enough down into the anvil that the rivet sticks out of the top of the anvil by only about and 1/8" or so. This gives me a secure way to hold the rivet when I 'pre dome' it. I grab a rivet, stick it in the hole in the anvil and then pre-dome it using my Sheridan Leather domers - A few good shots with a hammer is all it takes. I then chuck the rivet into a cheapo 3/8" electric drill I keep handy - I have the drill rigidly mounted and this allows me to use a fine sandpaper (200 - 400 grit) to sand the nicks and abrasions that seem to come with typical copper rivets. The drill spins the rivet and all I have to do is work the sandpaper till the rivet smooths out and all the nicks and ridges are gone. I then take a piece of heavy hermann oak that is loaded with stropping compound and do the same thing. This polishes the rivet till it really shines. If stropping compound remains on the rivet I buff it off with a cloth. This is the result: I'll try to get better pictures of this on the weekend. Anyhow - basically I think it makes the end product look better and it also keeps the sharp outside edge of the rivet tucked down so it won;t catch on clothes/other leather etc. rdl
-
Spent a little bit of time on saturday working on this - Re-made the cheyenne roll. First attempt went kinda bad so I decided to start over - Second attempt went smooth! Not sure if you have see Dale Harwoods DVD's but he has some pretty good little tricks - One of them is to cut the bottom edge of the cantle back a little flat - That way you have to stretch the leather down and in - It puts a lot of tension on the top edge of the cantle filler so that when you go to fold the leather back to make the Cheyenne roll it wants to 'snap' into that position. It also saves cutting the little 'v' out of the cheyenne roll that you see some guys doing to get rid of the bubble that can be created there... It's a neat trick and it really seems to help make a Cheyenne roll come out stiff. I have found Dales DVD's to be really beneficial with Jeremiah Watts being real good too - Just in different areas - I find Jeremiahs seat fitting portion to be really helpful. On saturday I also rough cut the rigging plates, skirts and stirrup leathers out and I actually finish cut the rigging plates Sunday morning, this weeks projects after work are to finish tooling the cantle back, and tool up the rigging plates. I'd like to get rigging plates installed next saturday and get the skirts blocked on and finish cut as well...At that point it feels like you are getting somewhere! These pics were just taken on my phone so not too crisp! 22/01/15 - Installed the cantle back the other night. It went on pretty good. Less 'bubbling' issues than saddle #01. Tooling up the rigging plates right now. Ron
-
Kinda forgot to keep posting images of stuff I have sewn. Really haven't done that much as I have been busy. However here are some chaps i made a month or so ago... Sewing machine really works awesome - Zero complaints!! I've sewn up some martingale type collars, chaps, bridles, billets etc. Building saddle #2 right now so sewing rigging plates and skirts will be next. R
- 2 replies
-
- sewing machine
- new
-
(and 2 more)
Tagged with:
-
Randy, I see there is some discussion about ground seats...I agree that it is the one area of saddle building that is the most subjective and I believe it is probably, on working saddles at least, what really sets one maker apart from the other more than anything else... I believe everyone will have a slightly different take on what is comfortable / functional depending on riding style, body type, leg length etc. I have found Steve Brewer's how to on this site very helpful. it is available here: http://leatherworker.net/forum/index.php?showtopic=19473 I wish I could get my seats to look like his. Also, have a look at Steve Mason's websites - His saddles look to me like ones I could spend all day in...http://www.stevemasonsaddles.com/saddles.htm Also, I know the all leather vs tin ground seat is a huge debate - However, I believe that for a start-up maker the all leather option gives more flexibility as you can skive and skive and skive and, leather is in my opinion, is easier to shape then tin. Anyhow, happy building and I am looking forward to seeing the Will James rig! Ron.
-
I really haven't had much time to work on this saddle as I have been very busy with work and a house I am renovating - However, on Saturday between building a staircase and loading a bunch of square bales I was able to get this final ground seat piece in - Overall shape is comfortable - I wish it was a little flatter in profile up front...Less rise I guess is what I mean. Ground seat shape is so subjective. I am very slim. My pin bones are right there. To me a ground seat with a little dome to it (If you were to section the saddle right where your pin bones sit) feels good. A seat like that I can ride all day and still feel just fine. However, I was riding some colts recently at an indoor arena with a friend and a cowboy/colt starter/farrier I respect showed up - He had some really nice saddles and we got talking. He likes a saddle with a ground seat that is fairly flat side to side. Now I am second guessing myself... I'd appreciate comments anyone might have on this...I know some people refer to the triangle 'bicycle' shape seat...How flat do you go with that? Anyhow, here is the picture of my completed ground seat - Red dashed lines highlight the center marks and other lines I made. To me, so far the seat feels alright...hard to tell tho till you spend a 12hr plus day in one... Anyhow, tonight after work I plan to cut out the skirts and maybe the rigging plates pieces...I need to make up some time as I want this rig ready for early spring.
-
Randy, I am not qualified to comment so I won't...But I can see definite progress from your first saddle so good job! Regards, Ron L
-
So on Saturday I got the ground seat for this rig started - I use an all leather ground seat based off of the tutorial provided by Steve Brewer in the saddle construction forum on this website.. I like the all leather for the simple reason that it gives me a lot of flexibility - Especially for an amateur maker - If you don't like how things are feeling you can skive away more leather. On this one I still need to install the final cover piece, however want to make sure I am good and happy with the fundamental shape I have before I go too far. It's feeling good so far. I'm actually amazed at how much easier this seems on the second go around - I'm doing a lot less second guessing myself and I have patterns all made up - Makes it a lot faster and more enjoyable. Here are some pics: Anyhow, If anyone has advice let me know. Ground seat shape is a bit subjective I suppose. I like a seat that doesn't plant me against the cantle - I want to sit fairly centered, but I still like some rise to the ground seat up front. I also like a slick seat - Nothing worse than 'grippy' feeling in a saddle seat in my opinion...I used some saddle paste on my first saddle this summer and it made that seat really tacky - Drove me crazy until it shined up. Guess thats why I'm unlikely to build a rough out or half breed although I think they look awesome. Anyhow, next step is final ground seat cover piece and cantle back. This one has a cheyenne roll going in and the cantle back piece will be tooled. Still have to work up a tooling pattern for it though. Regards, Ron
-
Randy, I am impressed! Looks awesome I like the flow, I constantly struggle to get 'flow' when i try to create a floral pattern. Be nice to see this when its all tooled up! Regards, Ron
-
Here's my new saddle shop - It's really compact - 8'x10' - However that's all the room I had and it is definitely functional so far. And here is my first saddle which has a few months of riding on it now...There are things I am doing differently on these next saddles based on having used this one. Some differences will be: Narrower cantles - 12.5" instead of 13" wide. Less cantle dish - 1" instead of 1.5", stirrup leathers will be 2.5" instead of 3", trying to get a flatter more forward ground seat in...this first saddle is very comfortable for me - However I wish it had a little less rise in the ground seat. Regards, Ron L
-
Corrected Link: Click Here Corrected Link - Click here
-
So in view of getting back into the groove of leather work (I spend all summer riding / doing outdoor stuff) I have decided to do some practice work first - Meaning building a pair of chinks for a friend. These will be square bottomed, 'buckaroo' style out of a glove tan leather in a tan color. My biggest challenge with leather work is floral tooling. I'm reasonably artistic, however, I have never drawn a floral pattern I really liked. With that being in mind I purchased Cary Schwarz's floral layout and carving DVD's. They are very good and help to understand how to achieve flow etc. I find that its not to hard to draw a flower or a leaf but to get it all to flow in a cohesive pattern is a nightmare...These DVD's have helped quite a bit. For the yokes on these chinks I created a floral pattern - I have one side carved - The design incorporates my friends brand - The '04'. I'm still not very happy with the pattern but it is probably one of the better ones I have come up with to date. Clearly still need practice though. Here is the yoke for the right side. The other reason for building these chinks first is to get the hang of my new Cobra Class 4 Sewing machine a little better - This machine works great - However I have never used sewing machines prior to this - So there is a definite learning curve. R
-
- floral tooling
- yoke
-
(and 2 more)
Tagged with: