rdl123
-
Posts
366 -
Joined
-
Last visited
Content Type
Profiles
Forums
Events
Blogs
Gallery
Store
Everything posted by rdl123
-
 Thanks Hennessy - And yep - I sure like those Stohlman books too - I have the set and refer to em all the time! R
 -
 Just sent you a PM...
 -
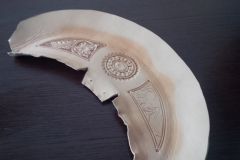
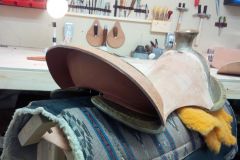
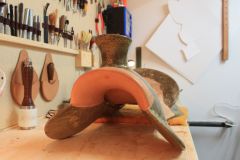
Spent a little bit of time on saturday working on this - Re-made the cheyenne roll. First attempt went kinda bad so I decided to start over - Second attempt went smooth! Not sure if you have see Dale Harwoods DVD's but he has some pretty good little tricks - One of them is to cut the bottom edge of the cantle back a little flat - That way you have to stretch the leather down and in - It puts a lot of tension on the top edge of the cantle filler so that when you go to fold the leather back to make the Cheyenne roll it wants to 'snap' into that position. It also saves cutting the little 'v' out of the cheyenne roll that you see some guys doing to get rid of the bubble that can be created there... It's a neat trick and it really seems to help make a Cheyenne roll come out stiff. I have found Dales DVD's to be really beneficial with Jeremiah Watts being real good too - Just in different areas - I find Jeremiahs seat fitting portion to be really helpful. On saturday I also rough cut the rigging plates, skirts and stirrup leathers out and I actually finish cut the rigging plates Sunday morning, this weeks projects after work are to finish tooling the cantle back, and tool up the rigging plates. I'd like to get rigging plates installed next saturday and get the skirts blocked on and finish cut as well...At that point it feels like you are getting somewhere! These pics were just taken on my phone so not too crisp! 22/01/15 - Installed the cantle back the other night. It went on pretty good. Less 'bubbling' issues than saddle #01. Tooling up the rigging plates right now. Ron
-
From the album: Second Saddle Project
Cheyenne roll started. -
From the album: Second Saddle Project
Tooling partly done. -
From the album: Second Saddle Project
Fitted & Drying up. -
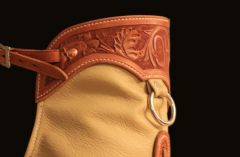
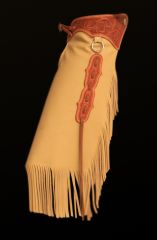
Kinda forgot to keep posting images of stuff I have sewn. Really haven't done that much as I have been busy. However here are some chaps i made a month or so ago... Sewing machine really works awesome - Zero complaints!! I've sewn up some martingale type collars, chaps, bridles, billets etc. Building saddle #2 right now so sewing rigging plates and skirts will be next. R
-
 Stitched on my new Cobra Class 4.
 -
From the album: Chaps, December 2014
-
From the album: Chaps, December 2014
-
From the album: Second Saddle Project
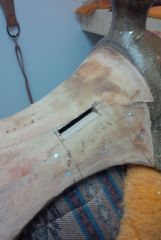
Slots cut for stirrup leathers - Cut sized for 2.5" leathers so I made slots 2.75" wide. Did this just before I i put final leather cover in. You can see that I have marked the ground seat where I do not put glue to ensure I can cut the tunnel piece out. -
From the album: Second Saddle Project
-
Randy, I see there is some discussion about ground seats...I agree that it is the one area of saddle building that is the most subjective and I believe it is probably, on working saddles at least, what really sets one maker apart from the other more than anything else... I believe everyone will have a slightly different take on what is comfortable / functional depending on riding style, body type, leg length etc. I have found Steve Brewer's how to on this site very helpful. it is available here: http://leatherworker.net/forum/index.php?showtopic=19473 I wish I could get my seats to look like his. Also, have a look at Steve Mason's websites - His saddles look to me like ones I could spend all day in...http://www.stevemasonsaddles.com/saddles.htm Also, I know the all leather vs tin ground seat is a huge debate - However, I believe that for a start-up maker the all leather option gives more flexibility as you can skive and skive and skive and, leather is in my opinion, is easier to shape then tin. Anyhow, happy building and I am looking forward to seeing the Will James rig! Ron.
-
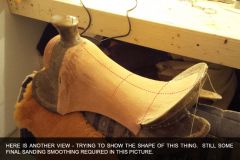
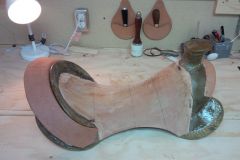
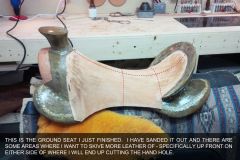
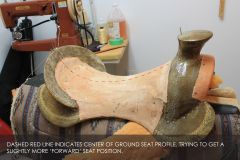
I really haven't had much time to work on this saddle as I have been very busy with work and a house I am renovating - However, on Saturday between building a staircase and loading a bunch of square bales I was able to get this final ground seat piece in - Overall shape is comfortable - I wish it was a little flatter in profile up front...Less rise I guess is what I mean. Ground seat shape is so subjective. I am very slim. My pin bones are right there. To me a ground seat with a little dome to it (If you were to section the saddle right where your pin bones sit) feels good. A seat like that I can ride all day and still feel just fine. However, I was riding some colts recently at an indoor arena with a friend and a cowboy/colt starter/farrier I respect showed up - He had some really nice saddles and we got talking. He likes a saddle with a ground seat that is fairly flat side to side. Now I am second guessing myself... I'd appreciate comments anyone might have on this...I know some people refer to the triangle 'bicycle' shape seat...How flat do you go with that? Anyhow, here is the picture of my completed ground seat - Red dashed lines highlight the center marks and other lines I made. To me, so far the seat feels alright...hard to tell tho till you spend a 12hr plus day in one... Anyhow, tonight after work I plan to cut out the skirts and maybe the rigging plates pieces...I need to make up some time as I want this rig ready for early spring.
-
From the album: Second Saddle Project
Cover piece on ground seat installed and sanded out. -
Randy, I am not qualified to comment so I won't...But I can see definite progress from your first saddle so good job! Regards, Ron L
-
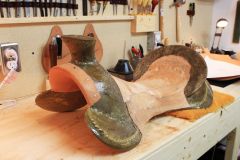
So on Saturday I got the ground seat for this rig started - I use an all leather ground seat based off of the tutorial provided by Steve Brewer in the saddle construction forum on this website.. I like the all leather for the simple reason that it gives me a lot of flexibility - Especially for an amateur maker - If you don't like how things are feeling you can skive away more leather. On this one I still need to install the final cover piece, however want to make sure I am good and happy with the fundamental shape I have before I go too far. It's feeling good so far. I'm actually amazed at how much easier this seems on the second go around - I'm doing a lot less second guessing myself and I have patterns all made up - Makes it a lot faster and more enjoyable. Here are some pics: Anyhow, If anyone has advice let me know. Ground seat shape is a bit subjective I suppose. I like a seat that doesn't plant me against the cantle - I want to sit fairly centered, but I still like some rise to the ground seat up front. I also like a slick seat - Nothing worse than 'grippy' feeling in a saddle seat in my opinion...I used some saddle paste on my first saddle this summer and it made that seat really tacky - Drove me crazy until it shined up. Guess thats why I'm unlikely to build a rough out or half breed although I think they look awesome. Anyhow, next step is final ground seat cover piece and cantle back. This one has a cheyenne roll going in and the cantle back piece will be tooled. Still have to work up a tooling pattern for it though. Regards, Ron
-
From the album: Second Saddle Project
-
From the album: Second Saddle Project
-
From the album: Second Saddle Project
-
Randy, I am impressed! Looks awesome I like the flow, I constantly struggle to get 'flow' when i try to create a floral pattern. Be nice to see this when its all tooled up! Regards, Ron
-
 Hello Randy, I had a machinist we used to work with price this for me - I think he said it'd be about $300.00...In the end I decided that I'd save my cash and pick up one of Bruce Johnstone's used rigs...I still think this idea would work - If everything was machined accurately, the roller should stay square - As long as the tolerances for play are kept to an absolute minimum... Anyhow, let me know if you pursue it! Part of the trick would be to keep the cutting edge centered directly over the center of the roller... Ron
 -
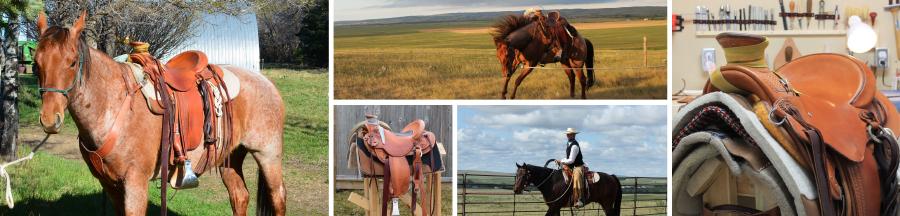
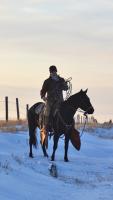
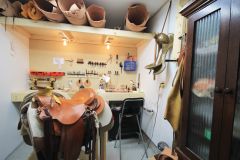
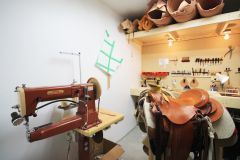
Here's my new saddle shop - It's really compact - 8'x10' - However that's all the room I had and it is definitely functional so far. And here is my first saddle which has a few months of riding on it now...There are things I am doing differently on these next saddles based on having used this one. Some differences will be: Narrower cantles - 12.5" instead of 13" wide. Less cantle dish - 1" instead of 1.5", stirrup leathers will be 2.5" instead of 3", trying to get a flatter more forward ground seat in...this first saddle is very comfortable for me - However I wish it had a little less rise in the ground seat. Regards, Ron L
-
From the album: Second Saddle Project
-
From the album: Second Saddle Project