Halitech
-
Posts
1,229 -
Joined
-
Last visited
Content Type
Profiles
Forums
Events
Blogs
Gallery
Store
Everything posted by Halitech
-
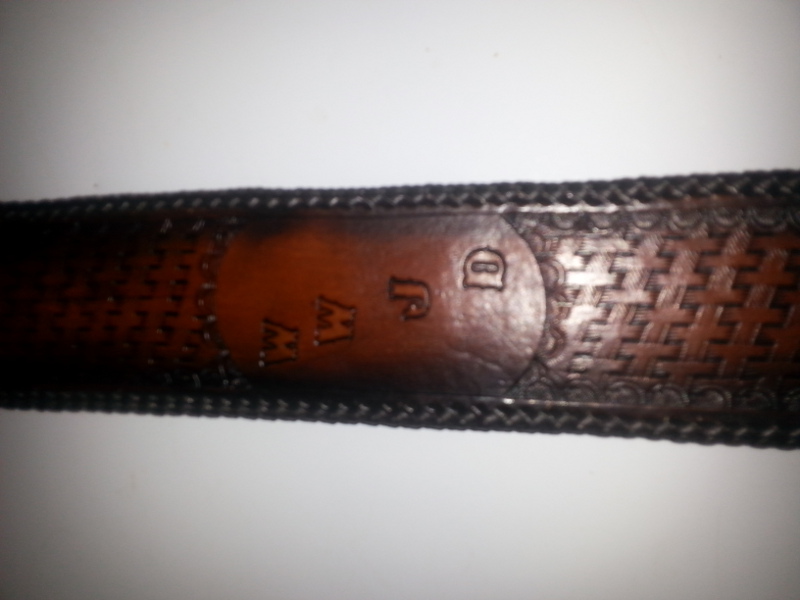
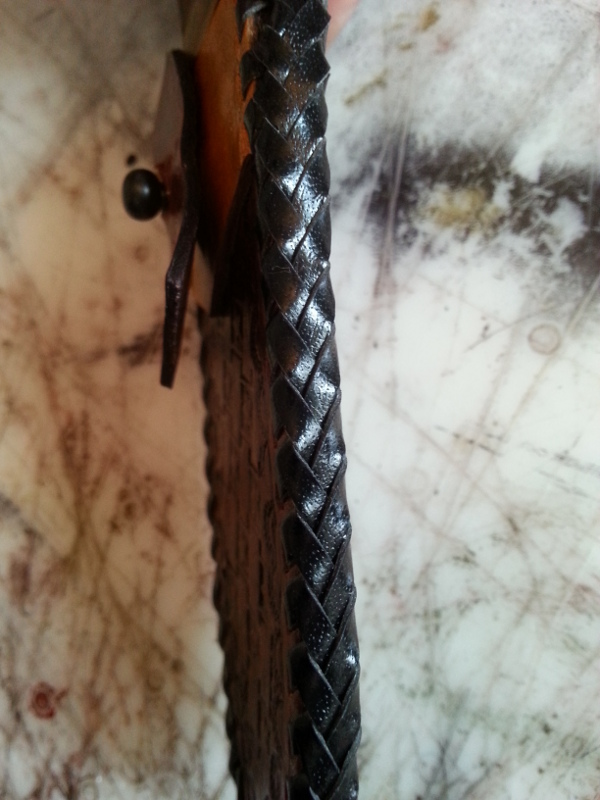
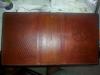
Dual layer adjustable guitar strap. Top layer is 5-6oz veg tanned leather. Liner is 4oz drum dyed leather. Edges are laced following Cheif's Mexican Round Braid videos.

-
Thank you Odin, it was a time consuming process but really not that hard thanks to Chiefs videos.
-
wow! great work on all of them
-
thank you Chief, it was your work that inspired me to do the Mexican Round braid on it and it's high praise coming from you that you think it's a work of art :notworthy:
-
thanks Rohn, I've seen a lot of your work so if you think it looks good, that means a lot to me
-
Hey Chief, just finished the lacing and posted the pics in a new thread http://leatherworker.net/forum/index.php?showtopic=58166 not as smooth as yours but a nice first attempt on something that big
-
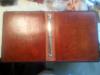
Wedding album I just finished as a gift for my cousin getting married in 2 weeks time. It's made in 3 pieces with each cover being outer layer of 8-9oz veg tanned, layer of stiffener then lined with 3-4oz. The spline is also made from 8-9oz and lined with 2oz glazed pigskin. Finished in Saddle Tan antique and then the edges were done in the Mexican round braid. Special thanks to Chief for his youtube video on doing the corners and splicing in new lace. The images on the front were "borrowed" images from a google search (I have 0 artistic ability when it comes to drawing)
-
Chief, I know this is an older thread but just wanted to say thanks for the videos. I'm working on a wedding album for my cousin as a wedding gift and the videos for splicing and turning the corner especially were very helpful. Kingsmere just doesn't explain it very well
-
Thanks Rohn I'm not much on wearing shirts with pockets so it will either be going in a back pocket on my jeans or in a belt bag that I usually wear so size isn't as much of a factor for me
-
thanks guys and Rohn, hope you don't mind but I may borrow your idea for the notepad/card holder. You did a great job on it and would be handy to have something to take notes and carry cards with when I'm out and about
-
Portfolio
Halitech replied to BigMatt's topic in Purses, Wallets, Belts and Miscellaneous Pocket Items
darn nice job on the stitching then nice thing about a blemish, long as it's not the entire thing, can usually get a fair bit of usable material out of try some gum trag or saddle soap and water and then give it a good rub. Hard to see the gusset on the bottom but from what I can see, it looks pretty good -
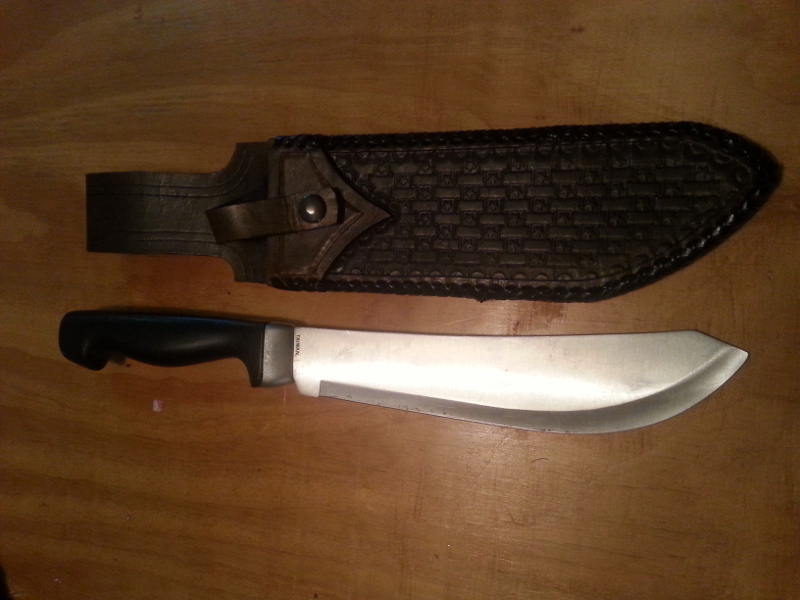
Had a customer that wanted a sheath to replace his worn out cardboard and duct tape one (I didn't ask why, not my business ) Showed him a few styles and he decided on this style with laced edges. I followed a tutorial on The Knife Network forum and the round weave instructions on Kingsmere Crafts. Finished it with Antique brown and a coat of snowproof since he said he was going to be using it outside in the winter. It does have a welt on it (3 layers in the main part of the body, 6 layers near the top.It was not easy getting the lacing chisel through that many layers so I think from now on, sewing only with a burnished edge. I know I probably made mistakes so if you could point any out that you see, would be appreciated.


-
Portfolio
Halitech replied to BigMatt's topic in Purses, Wallets, Belts and Miscellaneous Pocket Items
looks good to me. Stitching looks really straight and even. Did you hand sew it or do you have a machine? Only thing I would look at is the edges, maybe do a nice burnish on them or cover them with edge coat to prevent them from fraying and getting worn. What weight and type of leather did you use? -
can't say on the spray bottle, guess it would depend on the quality of the bottle I've used the preval sprayers and they are okay for a small job but generally I just grab my airbrush as I find I have more control with it
-
How To Make Mini Boots
Halitech replied to JimDavies's topic in Shoes, Boots, Sandals and Moccassins
well, I guess they could be scaled up to make actual boots for babies and be better quality then the ones sold in stores -
How To Make Mini Boots
Halitech replied to JimDavies's topic in Shoes, Boots, Sandals and Moccassins
thanks for this, very cool and I know a few people that are having/just had babies so will make a unique gift for them -
New Knife Sheath
Halitech replied to Halitech's topic in Gun Holsters, Rifle Slings and Knife Sheathes
thanks Wild Bill, I'm finding with a lot of things I make that less is more billybopp, that's true however the old sheath more fell apart from poor workmanship and crappy leather then from me using it. -
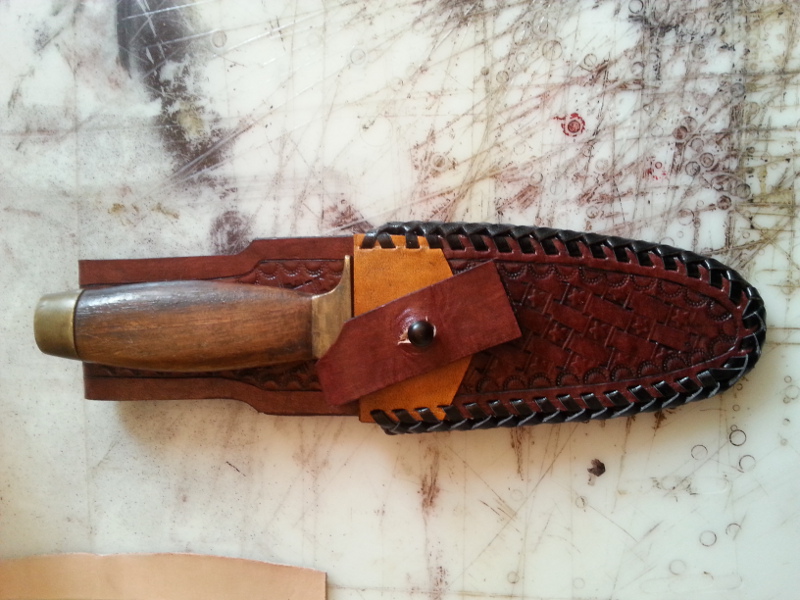
Decided my worn out sheath needed a replacement and I also wanted to try my hand at triple loop lacing so found instructions elsewhere and semi followed the directions and came up with this. The leather and lace is probably worth more then the knife :/

-
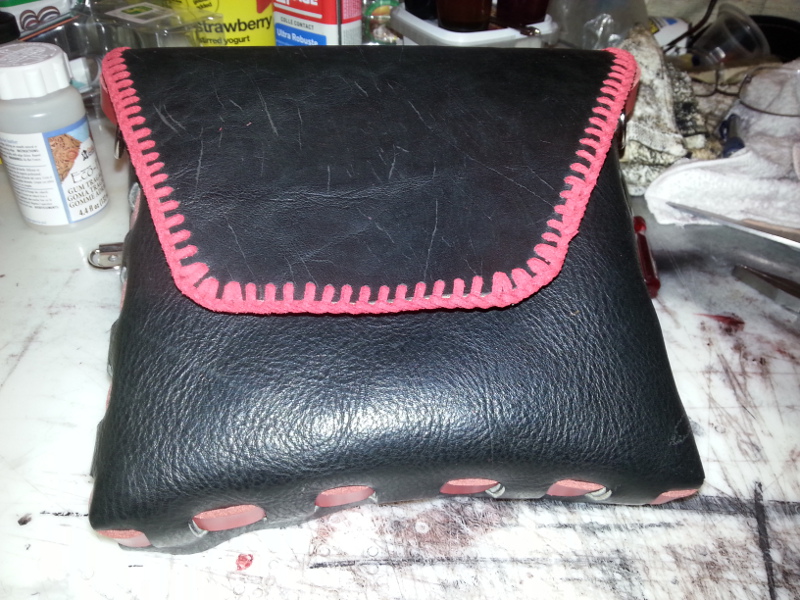
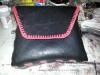
Newest bag I've made. Saw the basic design somewhere (possibly here) and made my own pattern. This is the second one I've done like this, first I've kept for myself as I liked it that much but it had black lacing instead of red. Haven't finished the shoulder strap yet as I don't have all the hardware. But will be able to wear on a belt or with the shoulder strap.
-
Fathers Day Wallet
Halitech replied to Leprechaunleather's topic in Purses, Wallets, Belts and Miscellaneous Pocket Items
I was born in Ontario but I've been here most of my life. We are actually about to have our Apple Blossom Festival this weekend, hopefully the blossoms are out for it. -
Fathers Day Wallet
Halitech replied to Leprechaunleather's topic in Purses, Wallets, Belts and Miscellaneous Pocket Items
wallet looks great and thanks for including your build info, will help others down the road and Congrats on your marriage -
Some Butterfly Bracelets
Halitech replied to BryonD's topic in Purses, Wallets, Belts and Miscellaneous Pocket Items
look forward to seeing what you come up with glad I was able to help you come up with some ideas -
Some Butterfly Bracelets
Halitech replied to BryonD's topic in Purses, Wallets, Belts and Miscellaneous Pocket Items
I've done the same and regretted it after wards so I now have a large selection of colors and sizes, makes it hard to remember what you need when you go to the supply shop when you get low though Not sure how it would look or even work, but what about 2 slots for the wristband to go through a little closer to the body of the butterfly? or maybe use 2 layers of thinner leather, have slots in the back on for the bracelet part and then sew around the edges? you could then use rivets to hold it in place and they wouldn't be visible just a few ideas -
Some Butterfly Bracelets
Halitech replied to BryonD's topic in Purses, Wallets, Belts and Miscellaneous Pocket Items
they look great and just a small thing for me, looking at the rivets you used, I'd probably look for some with a smaller head as they do look pretty big but then again, nothing to really compare them to so might be the smallest they have -
by beveler I mean the beveler stamp, not an edge beveler, sorry, should have clarified that. https://www.tandyleatherfactory.ca/en-cad/home/department/6060-00.aspx basically draw the line where you want it then use the stamp to push down the edge. Probably want to use your swivel knife to cut the line as well to get a better edge. Of course, I could be completely off but that's what it looks like to me https://www.dropbox.com/s/l7nbrgsqyjg6iba/20140428_101931.jpg