dakotawolf
-
Posts
124 -
Joined
-
Last visited
Content Type
Profiles
Forums
Events
Blogs
Gallery
Store
Everything posted by dakotawolf
-
Crimson Trace Cmr-202 Light
dakotawolf replied to steelhawk's topic in Gun Holsters, Rifle Slings and Knife Sheathes
Troop, I really like your tac-light holster. I think it there would be a lot of interest if you did a post on it. I know that I'd be interested in getting a closer look. -
Simple Holster
dakotawolf replied to Bryan M's topic in Gun Holsters, Rifle Slings and Knife Sheathes
Thanks for posting this! I'd never seen anything like it. -
Simple Holster
dakotawolf replied to Bryan M's topic in Gun Holsters, Rifle Slings and Knife Sheathes
The basket stamping looks good to me. If it were my pattern, I'd update it by eliminating that cutout near the trigger guard. Is this a one piece holster? Is the gun sandwiched between the holster on one side and the belt on the other? -
Very Different Than My Usual
dakotawolf replied to THein's topic in Gun Holsters, Rifle Slings and Knife Sheathes
Very nice! -
Gun With A Light
dakotawolf replied to cleanview's topic in Gun Holsters, Rifle Slings and Knife Sheathes
Sounds like a sound decision. It took me a few tries to get holster i made to an acceptable level. It felt like a Rubix Cube puzzle. Glad to hear he doesn't expect it to conceal. I always joke that trying to conceal a pistol with tac-light is like like trying to conceal a box of Corn Flakes. 😄 I do think the requests for holsters with lights will grow. I know from professional experience the lights are an awesome tool. Hopefully they can make the lights smaller as technology improves. I also foresee the need for holsters that will accommodate red dot optics, as they seem to be becoming more main stream (Google Glock 2015 Shot Show). -
Gun With A Light
dakotawolf replied to cleanview's topic in Gun Holsters, Rifle Slings and Knife Sheathes
Yes, exactly. The muzzle rested on the toe plug. -
I'm not sure why I can't paste the info here, or even paste the link, but if you go to www.fiebing.com there is information on this. It's in the tips and tricks section. In short, mix Fiebing's leather dye (not oil dye) with neatsfoot oil. The ratio they state is 6% to 94% neatsfoot oil. I tried it and the color (med. brown) was much easier to control with a dauber. I imagine you can go stronger or lighter with the dye concentrations.
-
Gun With A Light
dakotawolf replied to cleanview's topic in Gun Holsters, Rifle Slings and Knife Sheathes
I have done one. It was for a Sig P226 with a Streamlight TLR-1 tactical light. I put a thumb break on it, and the front and rear stitch lines were just two parallel straight lines. The key, at least for me, was to put in a partial toe plug. It was the first time I'd ever done one. I had to dust off my Al Stohlman books for instruction. On this particular holster, I made the toe plug sit under just the muzzle (the light extended beyond the muzzle). -
I like the color and finish. What method did you use? I assume that is saddle tan? How did you apply it to get such a consistent finish? It is really a striking rig. Machine sewn?
-
Any Tips On My First Revolver
dakotawolf replied to cleanview's topic in Gun Holsters, Rifle Slings and Knife Sheathes
That stitch line around the gun looks pretty good. How many practice ones did you do to get it dialed in? -
Any Tips On My First Revolver
dakotawolf replied to cleanview's topic in Gun Holsters, Rifle Slings and Knife Sheathes
If I want a gun to slip in and out with almost no friction (e.g. a thumb break), I let the holster dry with the gun in the holster. If I take the gun out right after wet molding, the leather shrinks a little bit and friction is greater. Usually I take them out after about 2 hours of drying. Of course it depends on how much friction you have to begin with based on stitch line placement. As for where the retention on a revolver comes from, I assume the molding in the trigger guard, and just having stitch lines in the proper place. -
Any Tips On My First Revolver
dakotawolf replied to cleanview's topic in Gun Holsters, Rifle Slings and Knife Sheathes
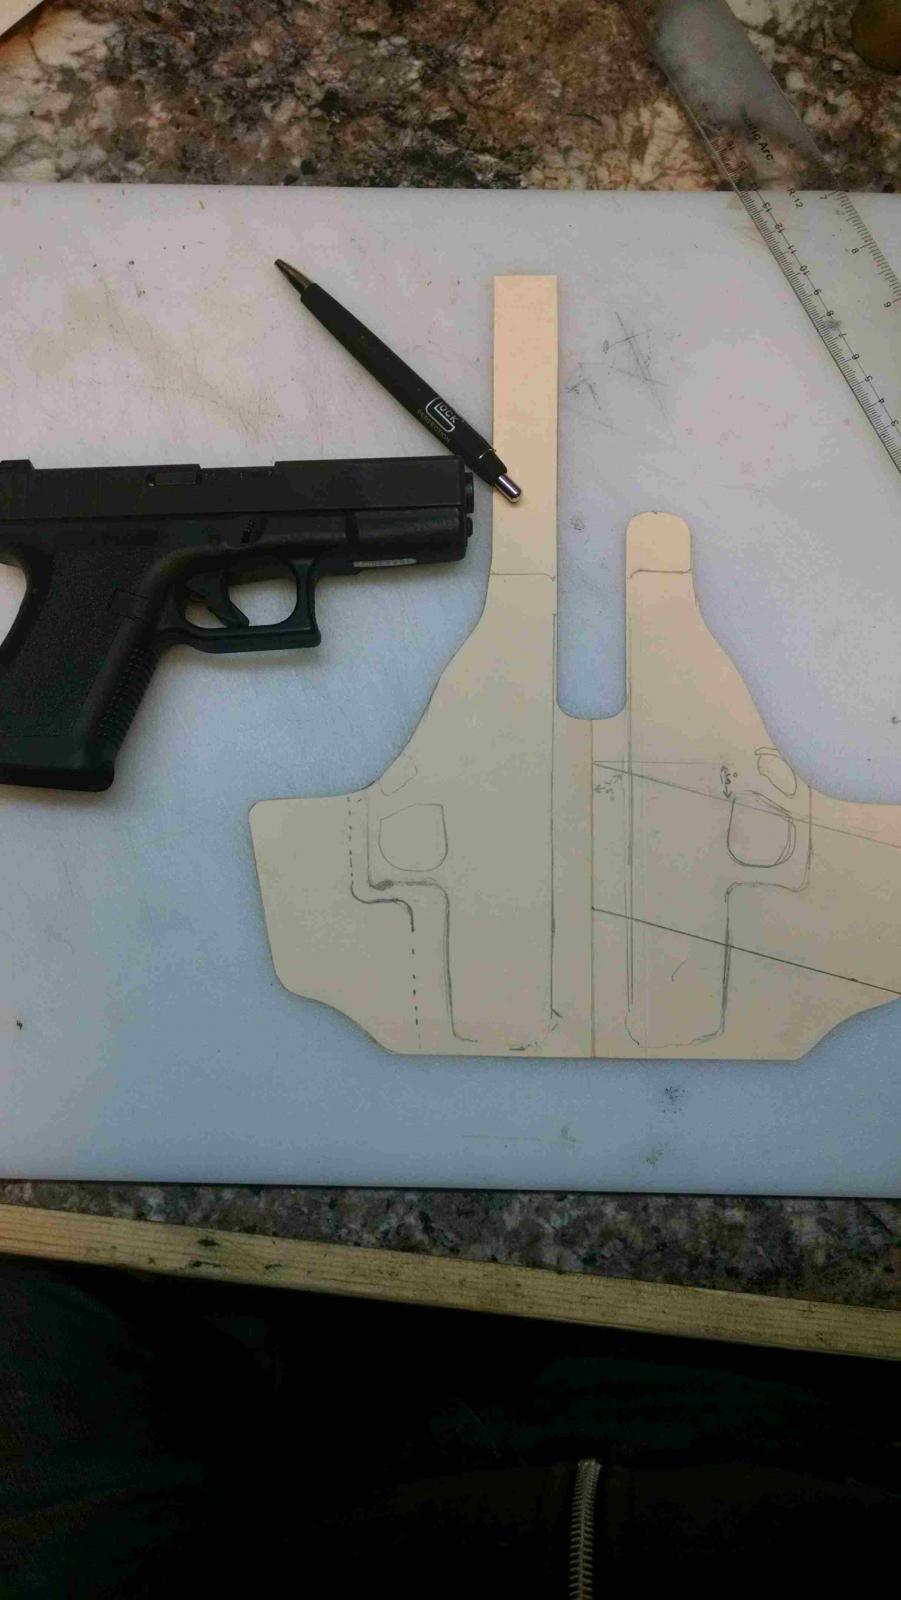
The stitch lines on the CZ holster look spot on. I found a revolver a little tougher to calculate stitch line placement because of the drastic difference in thickness of the frame/barrel vs the cylinder. Like you said, put it in paper and study it. A friendly critique on the CZ holster: try not the change stitch line directions at sharp right angles (e.g. the one behind the CZ's trigger guard). I'm not sure if there is a reason rounding them, at least a little, other that it looks better. I've never seen a pro have squared off corners on a stitch line. When I draw my pattern it has right angles, but then I round them. Typically I hold coins up to the intersection of the lines and trace the radius just until one line flows around the coin and meets the perpendicular line. The size coin you use should become apparent as you study your pattern on paper with the gun next to it. And yes, I realize the revolver pic I posted earlier has some squared off looking stitch lines. Live and learn. 😀 -
Any Tips On My First Revolver
dakotawolf replied to cleanview's topic in Gun Holsters, Rifle Slings and Knife Sheathes
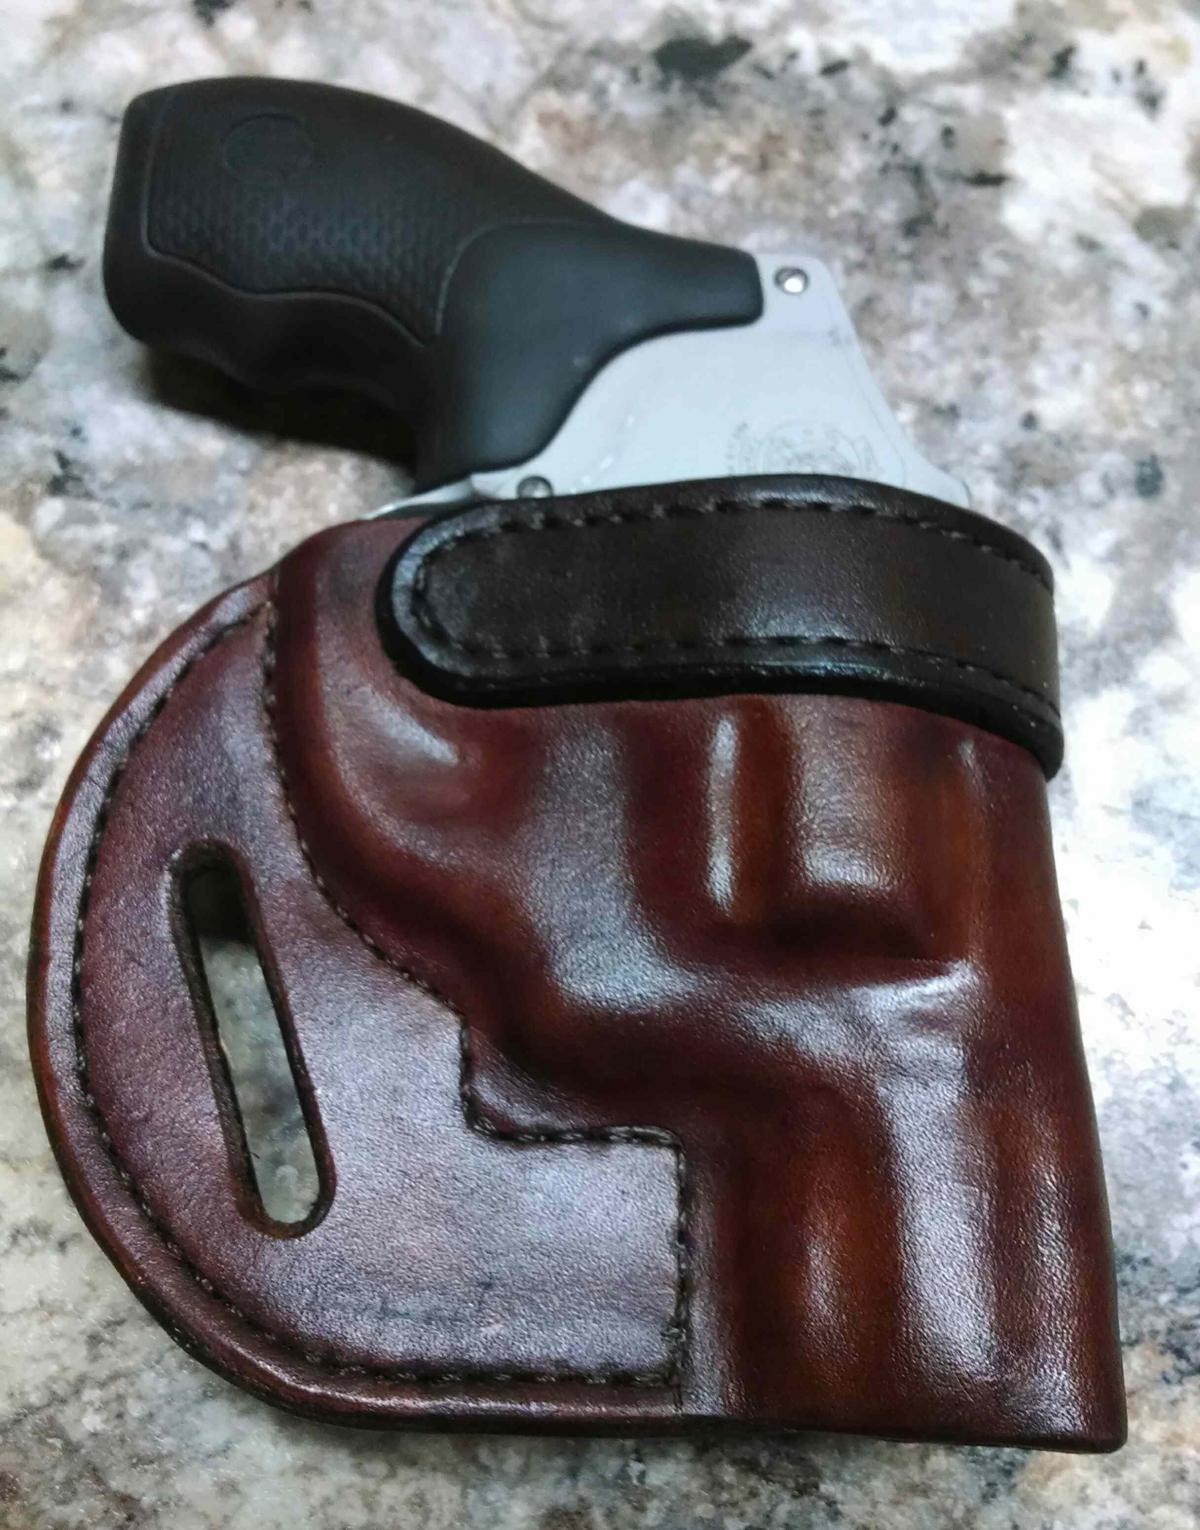
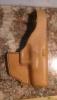
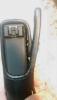
Found a pic of the one revolver holster I've done. Notice the horizontal section of stitching in front of the frame? That it's what will stop the gun from sinking in deeper over time. The trigger guard on this revolver is much more rounded (oval-ish?) than on most semi autos would be.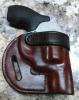
-
Any Tips On My First Revolver
dakotawolf replied to cleanview's topic in Gun Holsters, Rifle Slings and Knife Sheathes
The stitch line in front of the frame is like the stitch line in front of the trigger guard on a semi auto: it stops the gun from sinking any deeper into the holster. I've made about 20 semi auto avengers and one revolver one. I read old forum posts, and was able to get the revolver holster right on the first try. Maybe it was just dumb luck 😉 -
Any Tips On My First Revolver
dakotawolf replied to cleanview's topic in Gun Holsters, Rifle Slings and Knife Sheathes
Have you made one for a revolver before? -
My food dehydrator works quite well. It has a gentle fan, and I can set the temp as low as 90F and as high as 160F. I help some things along at 90F, but if I want to harden the leather (like in holster making) I set the temp at 135. Works wonderfully.
-
They all are very beautiful. The fifth one from the top caught my eye. Maybe because it speaks to my individual taste. I love that deep rich brown. How did you make that color, if that's not asking you to divulge secrets? The leather itself looks beautiful, what did you use?
-
Help With Holster Pattern?
dakotawolf replied to kjmilligan's topic in Gun Holsters, Rifle Slings and Knife Sheathes
One other thing, make sure you have enough room to get a full grip on the gun before you draw. I see you allowed plenty of room between the grip and the holster itself. However, since this is an IWB holster, the belt may interfere with obtaining a full grip. Yes, lowering the clip location might make it a little less balanced, and shift more weight above the belt. But being an IWB, I don't think lowering the clip would unbalance it too much since the belt is pressing in on the holster body. Adding some cant may solve the problem too, without changing the clip location (as in the pics Clean view posted). -
Help With Holster Pattern?
dakotawolf replied to kjmilligan's topic in Gun Holsters, Rifle Slings and Knife Sheathes
I think 8oz is perfect. I've heard that using two layers of leather is the cat's ass (Katsass, get it?). Just out of curiosity, what weight leathers are you bonding together to get 8? -
Help With Holster Pattern?
dakotawolf replied to kjmilligan's topic in Gun Holsters, Rifle Slings and Knife Sheathes
I have have a couple questions first: what style holster is this? I am assuming an in the waistband left handed holster? Secondly, make sure your holster doesn't cover the magazine eject button. Also, I find less than a half inch around most semi-auto trigger guards is better, usually s 1/4 inch or a smidge more depending on the thickness of your leather. I'm impressed by your graphic rendering; IMHO it shows you have the attention to detail to be good at this. -
Proper Position For A Thumb Break?
dakotawolf replied to cleanview's topic in Gun Holsters, Rifle Slings and Knife Sheathes
Doesn't really need it. The mouth reinforcement "for holstering" is kind of superfluous. It's a nice thing to decorate, but his wet molding and a little heat (like 135 F) will harden the collegen in the leather and make mouth reinforcement not completely necessary. -
Proper Position For A Thumb Break?
dakotawolf replied to cleanview's topic in Gun Holsters, Rifle Slings and Knife Sheathes
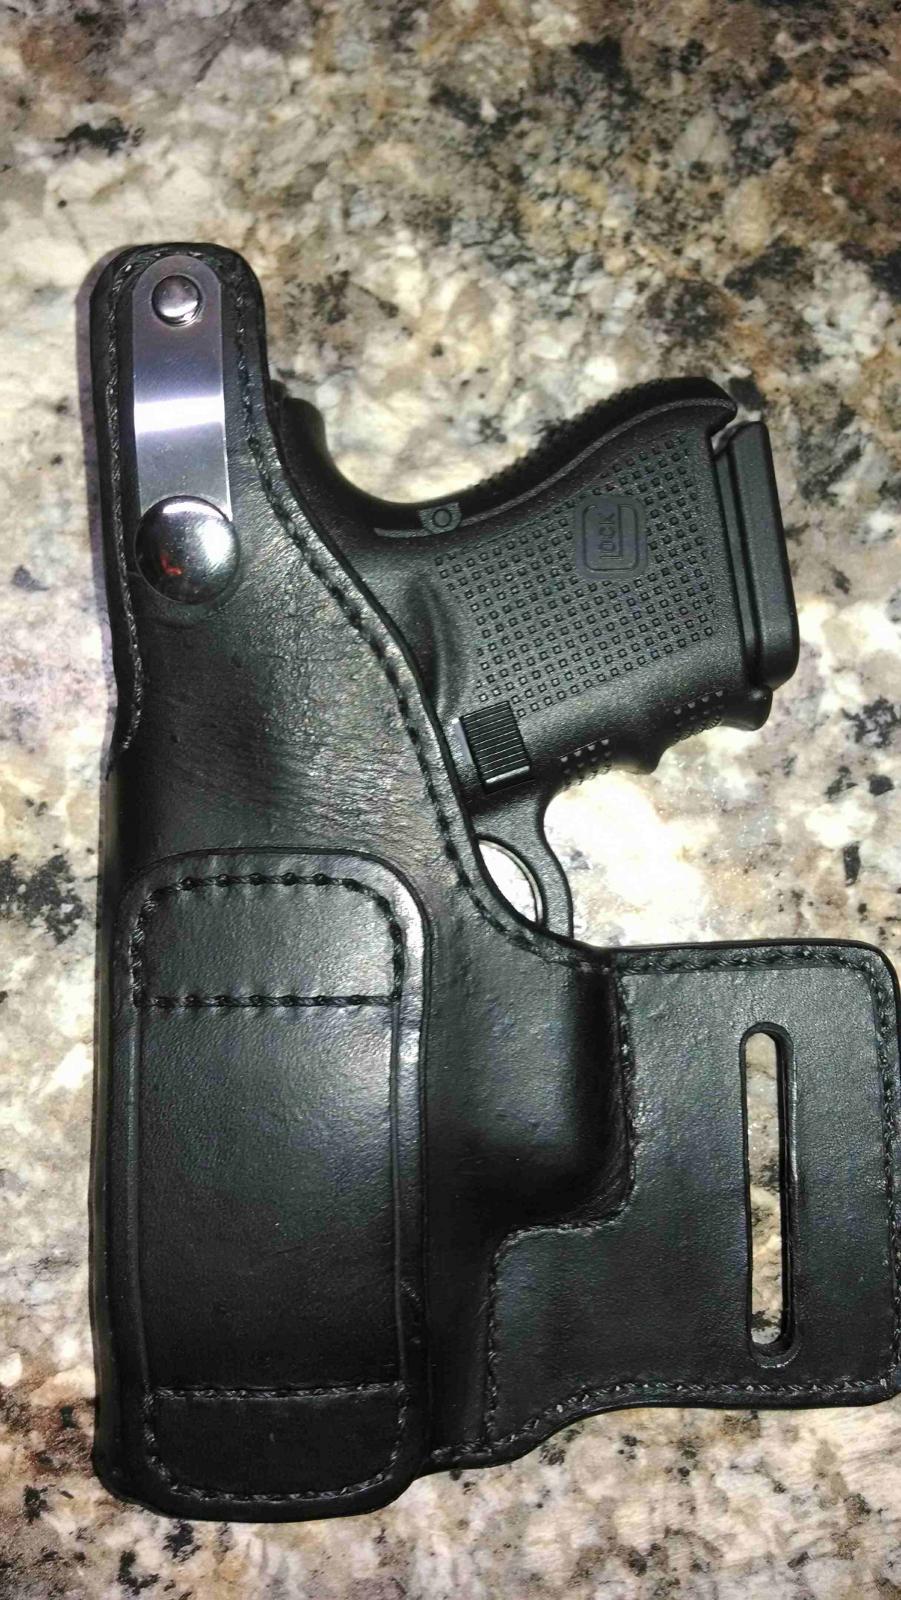
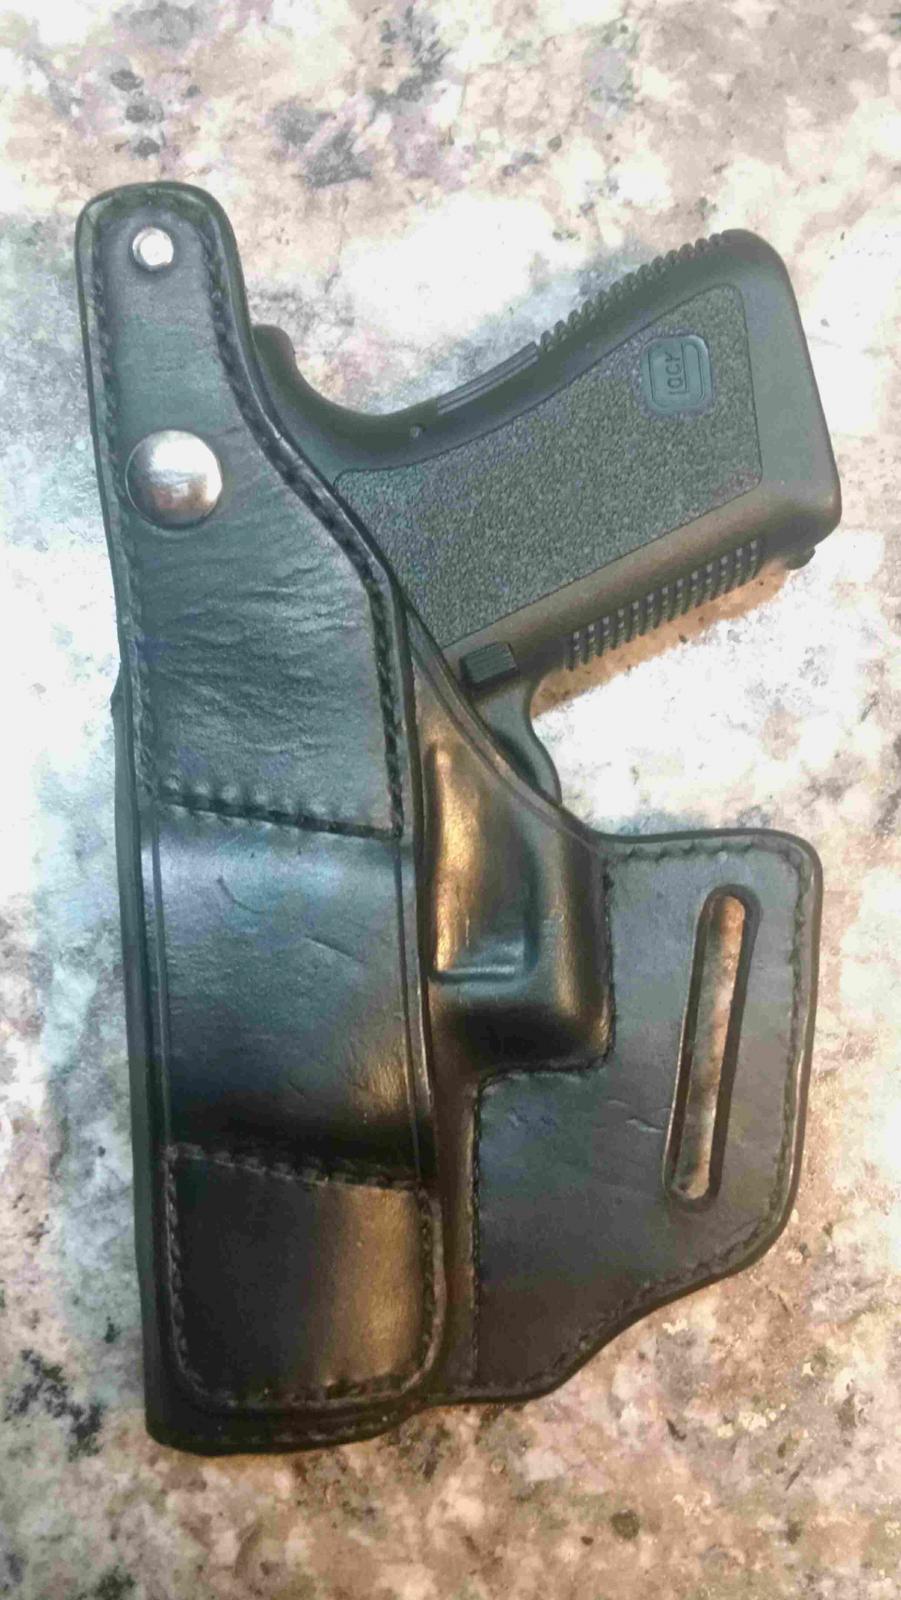
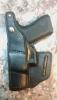
I forgot to add this photo to my previous post. This is the last thumbtack holster I made. The metal stiffener is not sandwiched. I've heard of people just using two layers of leather rather than s metal stiffener for the thumb break. I haven't tried it yet, so I don't know if it works, or retains rigidity over time.
-
Proper Position For A Thumb Break?
dakotawolf replied to cleanview's topic in Gun Holsters, Rifle Slings and Knife Sheathes
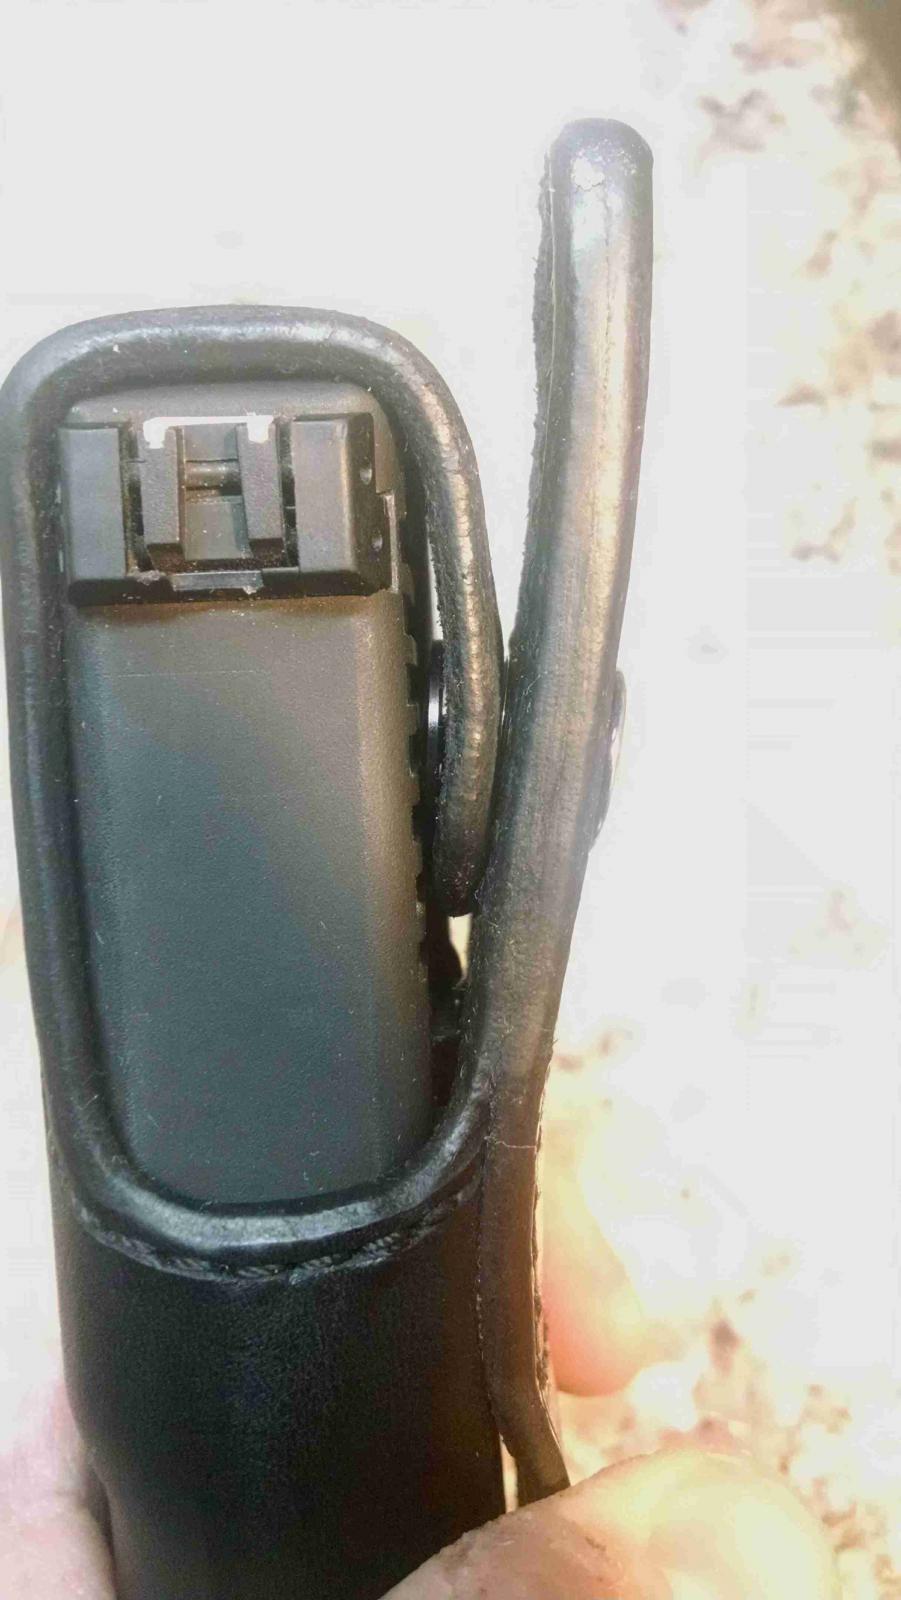
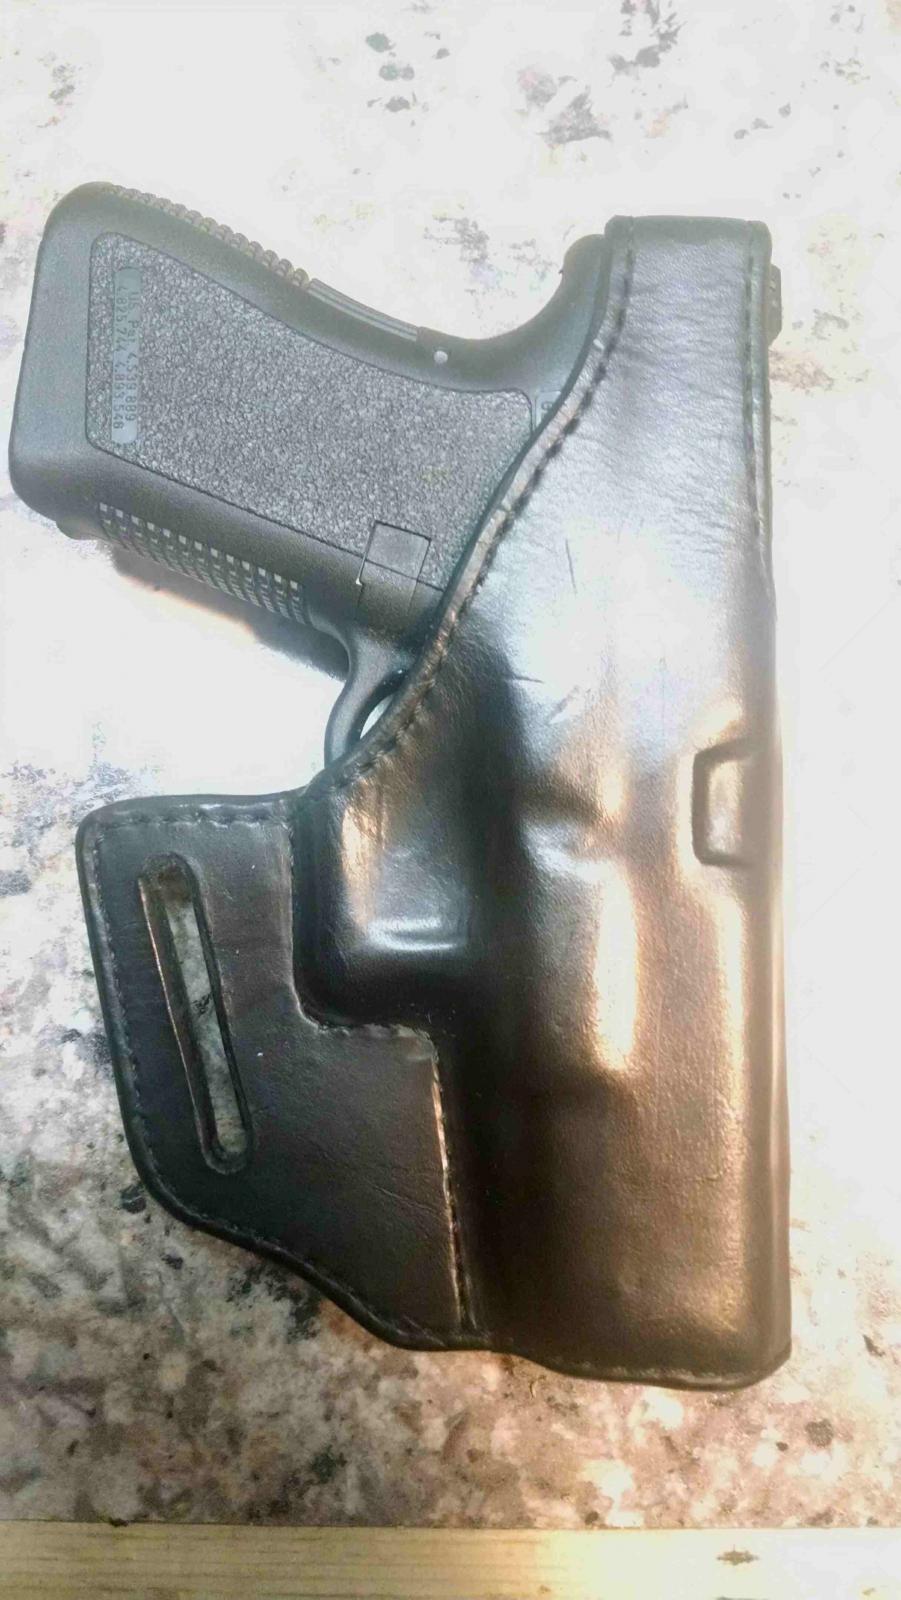
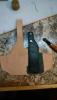
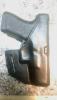
This is my latest attempt at a thumb break hoster. It actually worked quite well, but could have been prettier. It's for a Glock 19. I figured the position for the thumb break in the side against the body (having a couple thumb break holsters to examine at the same time helped). I left the other half of the thumb break long so I could figure the length after wet forming and with the gun actually in the holster. On this one I choose to sandwich the metal stiffener between two layers of leather, and recess the snap. My thumb break hardware (stainless stiffener and black plastic snap cover/thing to protect the fun from rubbing on the snap) came from High Desert Leather (Google can help u fund the website). The last photo is my previous thumb break (Glock 26). The stiffener was not sandwiched. I much prefer the sandwiched look, and think it performs a little better, in that there is less bulk under the retention strap due to the recessed snap. This was a quick explication. I kind of glossed over a bit, but the photos should tell most of the story.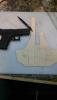
-
Glock Thumb Break Holster
dakotawolf posted a topic in Gun Holsters, Rifle Slings and Knife Sheathes
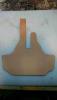
I still consider myself a novice to leather work and holster making. But I am glad to say I'm improving. I'm improving to the point I feel confident in the design and construction/durability of my holsters. I think I'm finally confident enough to switch from Tandy leather to Hermann Oak (never tried it, but there seems to be a consensus that it's high quality - usually). I made this holster from Tandy 7/8oz leather. I made it for a co-worker for $40. He seemed really happy with it. I'm particularity proud of the thumb break on this one (3rd one I've done). This is the first one where I extended the main belt loop leather up to the top of the thumb break (see back of holster photo), and then sandwiched the metal stiffener between two pieces of leather. I recessed the snap, which really streamlined the look. I had to improvise a punch for the snap recess: a 3/8 copper pipe cap was 'sharpened' and then hammered through before I applied the extended belt loop piece. I think the trailing belt loop could have been in towards the trigger a year more. I'm going to look for a little thicker thread. I used thick thread on the main belt loop and back side of the thumb break. I'm thinking something in between the two sizes I used would be better. The thin thread almost disappeared on the stitch line next to the gun. Speaking of the stitch line, I brought it in a smidge between the front of the trigger guard and the muzzle on my pattern (for next time). Any comments or suggestions for improvements are eagerly sought.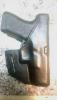


-
Glock Thumb Break Holster
dakotawolf posted a topic in Gun Holsters, Rifle Slings and Knife Sheathes
I still consider myself a novice to leather work and holster making. But I am glad to say I'm improving. I'm improving to the point I feel confident in the design and construction/durability of my holsters. I think I'm finally confident enough to switch from Tandy leather to Hermann Oak (never tried it, but there seems to be a consensus that it's high quality - usually). I made this holster from Tandy 7/8oz leather. I made it for a co-worker for $40. He seemed really happy with it. I'm particularity proud of the thumb break on this one (3rd one I've done). This is the first one where I extended the main belt loop leather up to the top of the thumb break (see back of holster photo), and then sandwiched the metal stiffener between two pieces of leather. I recessed the snap, which really streamlined the look. I had to improvise a punch for the snap recess: a 3/8 copper pipe cap was 'sharpened' and then hammered through before I applied the extended belt loop piece. I think the trailing belt loop could have been in towards the trigger a year more. I'm going to look for a little thicker thread. I used thick thread on the main belt loop and back side of the thumb break. I'm thinking something in between the two sizes I used would be better. The thin thread almost disappeared on the stitch line next to the gun. Speaking of the stitch line, I brought it in a smidge between the front of the trigger guard and the muzzle on my pattern (for next time). Any comments or suggestions for improvements are eagerly sought.