MikeG
-
Posts
247 -
Joined
-
Last visited
Content Type
Profiles
Forums
Events
Blogs
Gallery
Store
Everything posted by MikeG
-
Thanks, Jay. Beast pretty much sums it up. You have to be doing a lot of pretty heavy work to need one of these. It's a great conversation starter, though :-)
-
Seems like that's what everyone is interested in.
-
Sorry I missed that. This thing is HEAVY. it will have to be picked up. Halfway between Nashville and Chattanooga
-
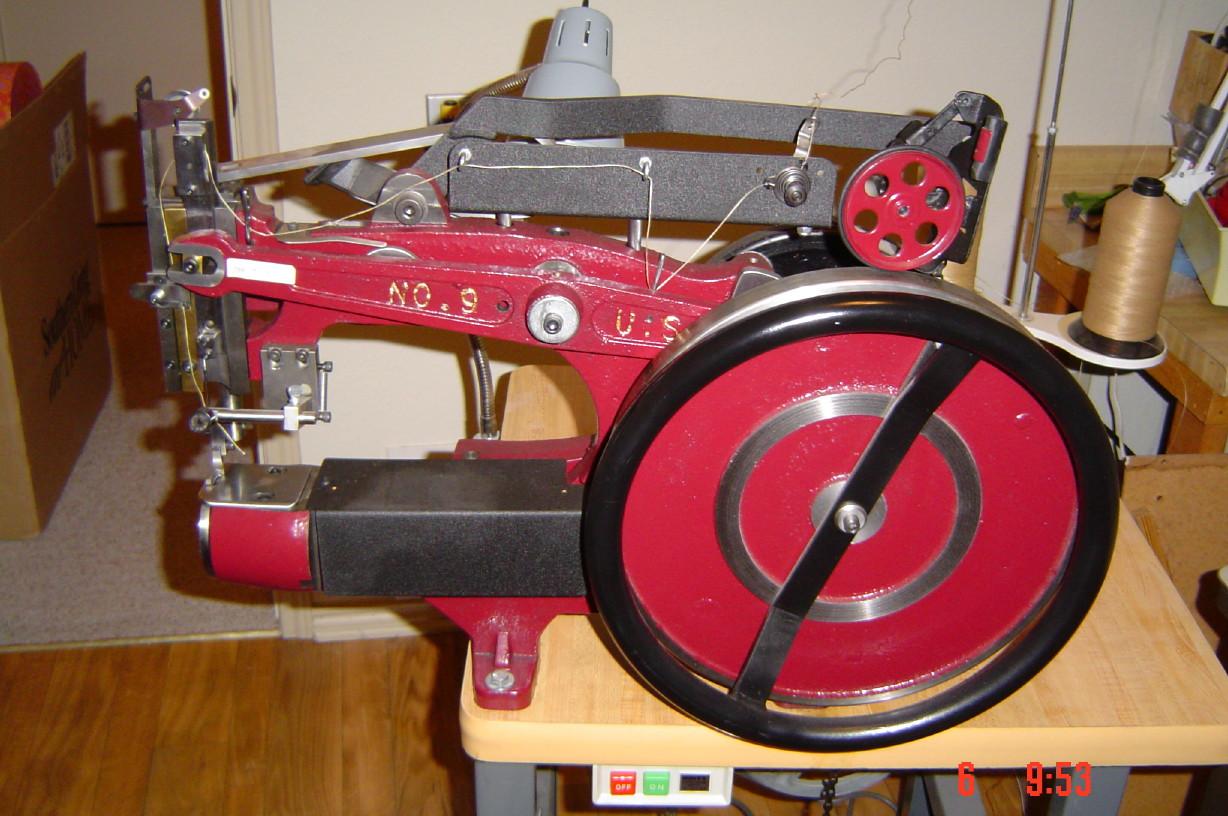
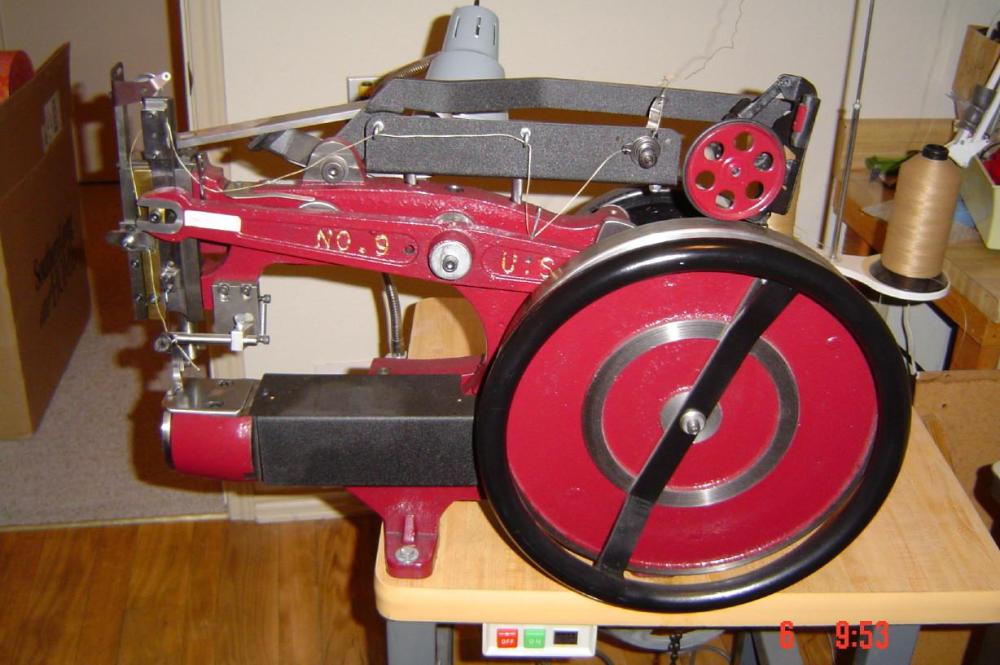
A niche machine for sure. I have owned it many years, but it has received very little use. It is upgraded with the hand wheel, roller guide and extra bobbins, needles, feet, accessories. It came with a clutch motor and speed reducer - I have installed a servo motor, but the clutch motor goes with it. I also have the original manuals and documentation for it. It is located in middle Tennessee. I am aging out of the leather business and it needs to go before I do. It was a very expensive ($3,500) machine before adding the motor, table, etc. - I will consider reasonable offers in the $2K range. I also have many, many craftool stamps, Leatherworker magazines, and miscellaneous items up for discussion as a package deal. I will not sell the tools prior to selling the stitcher. This is an overview of the machine. Note this video is for the Classic. Mine is a No. 9, which is the predecessor. Still a fine machine
-
black n burgundy
MikeG replied to JLSleather's topic in Gun Holsters, Rifle Slings and Knife Sheathes
Nice work as always. I'm sure he'll be pleased. "Midnight & Mahogany?" -
It has taken me a long time to finally pull the trigger on a servo for my No. 9 stitcher. I bought this monster early in my leatherwork journey before understanding it is way beyond what I really needed for the work I have been doing. As a result, I have had a love/hate relationship with this machine since I have owned it and have not trusted it to sew any important work - in short, it has been a very expensive sculpture and conversation piece. It has even resisted multiple efforts to sell it, just sitting there quietly gloating as I hand sew projects. So after over a year of considering a servo, I finally decided to get the Family Sew servo with brushes from Bob at Toledo. I received my motor in just a few days and spent an afternoon installing it - It was not quite plug & play as the mount on the servo motor is smaller & I had to drill new holes in the table and then enlarge them to get the drive belt aligned nice & straight. Once done, it is a nice looking and clean install and runs quietly and true. With the old motor, this machine sounded like the hammers of hell - I named it Mjolnir, after Thor's hammer. With the new motor, it will stitch quietly as slow as I want. I have not sewn any projects with it yet, but I tested it on 3 layers of 8oz. stock and it punches perfect stitches at a very slow speed. In summary, I am very happy I made this purchase and I believe the old stitcher and I may finally become friends. Thanks to all on these forums, past and present. I have probably read every sewing machine and motor post on here - many multiple times. Good place to hang out!
-
Mike, your work never ceased to amaze (and humble) me. Thanks for showing!
-
Thanks -- I contacted Bob at Toledo and ordered the Family Sew. He sells it with a small pulley and I already have a speed reducer, so it should do the trick!!
-
I probably should have mentioned - I have a No. 9 Stitcher. It can be operated by hand, which is what I do mostly because I can control it better. So no issues with running it at snail speed.
-
So, I would like to tame my machine by installing a servo motor. I have scoured these boards and there seems to be a lot of anecdotal information, but I still have a lot of questions I can't answer. There is a fabulous thread about which machines work for specific applications (thanks WIZ), I sure wish we could come up with something similar for motors. So here goes. 1. Starting speed: 100 RPM seems to be best. I cannot find that specification even on manufacturer's websites. They all claim "slow starting speed," but again . . . 2. Brushless versus brushes: Almost all new motors are brushless. From this forum, I'm almost convinced a motor with brushes will have better low speed torque. Don't know if this is true. Family Sew apparently makes both types, but apparently only one vendor sells the one with brushes. i cannot find it listed anywhere else, which makes me wonder if it is obsolete? 3. There is some opinion on "crappy" motors - most of this is older info. Enduro gets a bad rap, don't know if the new ones have improved. Rex seems like it might be the same as Family Sew, again, only opinions on here. 4. 220V versus 110V. I can use either. mak I assume that sewing leather, I am like many if not most here. I would like to stitch at about 1 stitch per second. If that was the only speed, I would be happy. If I could control it between 1 stitch per second to 5 stitches per second, I would be ecstatic. So would the right move be to pick up a Rex on ebay and take a 2 year warranty thru square trade? I've reread this about 5 times, and I'm worried it sounds like a rant. It's not intended to be. It's just the more I read, the less I feel like I know.
-
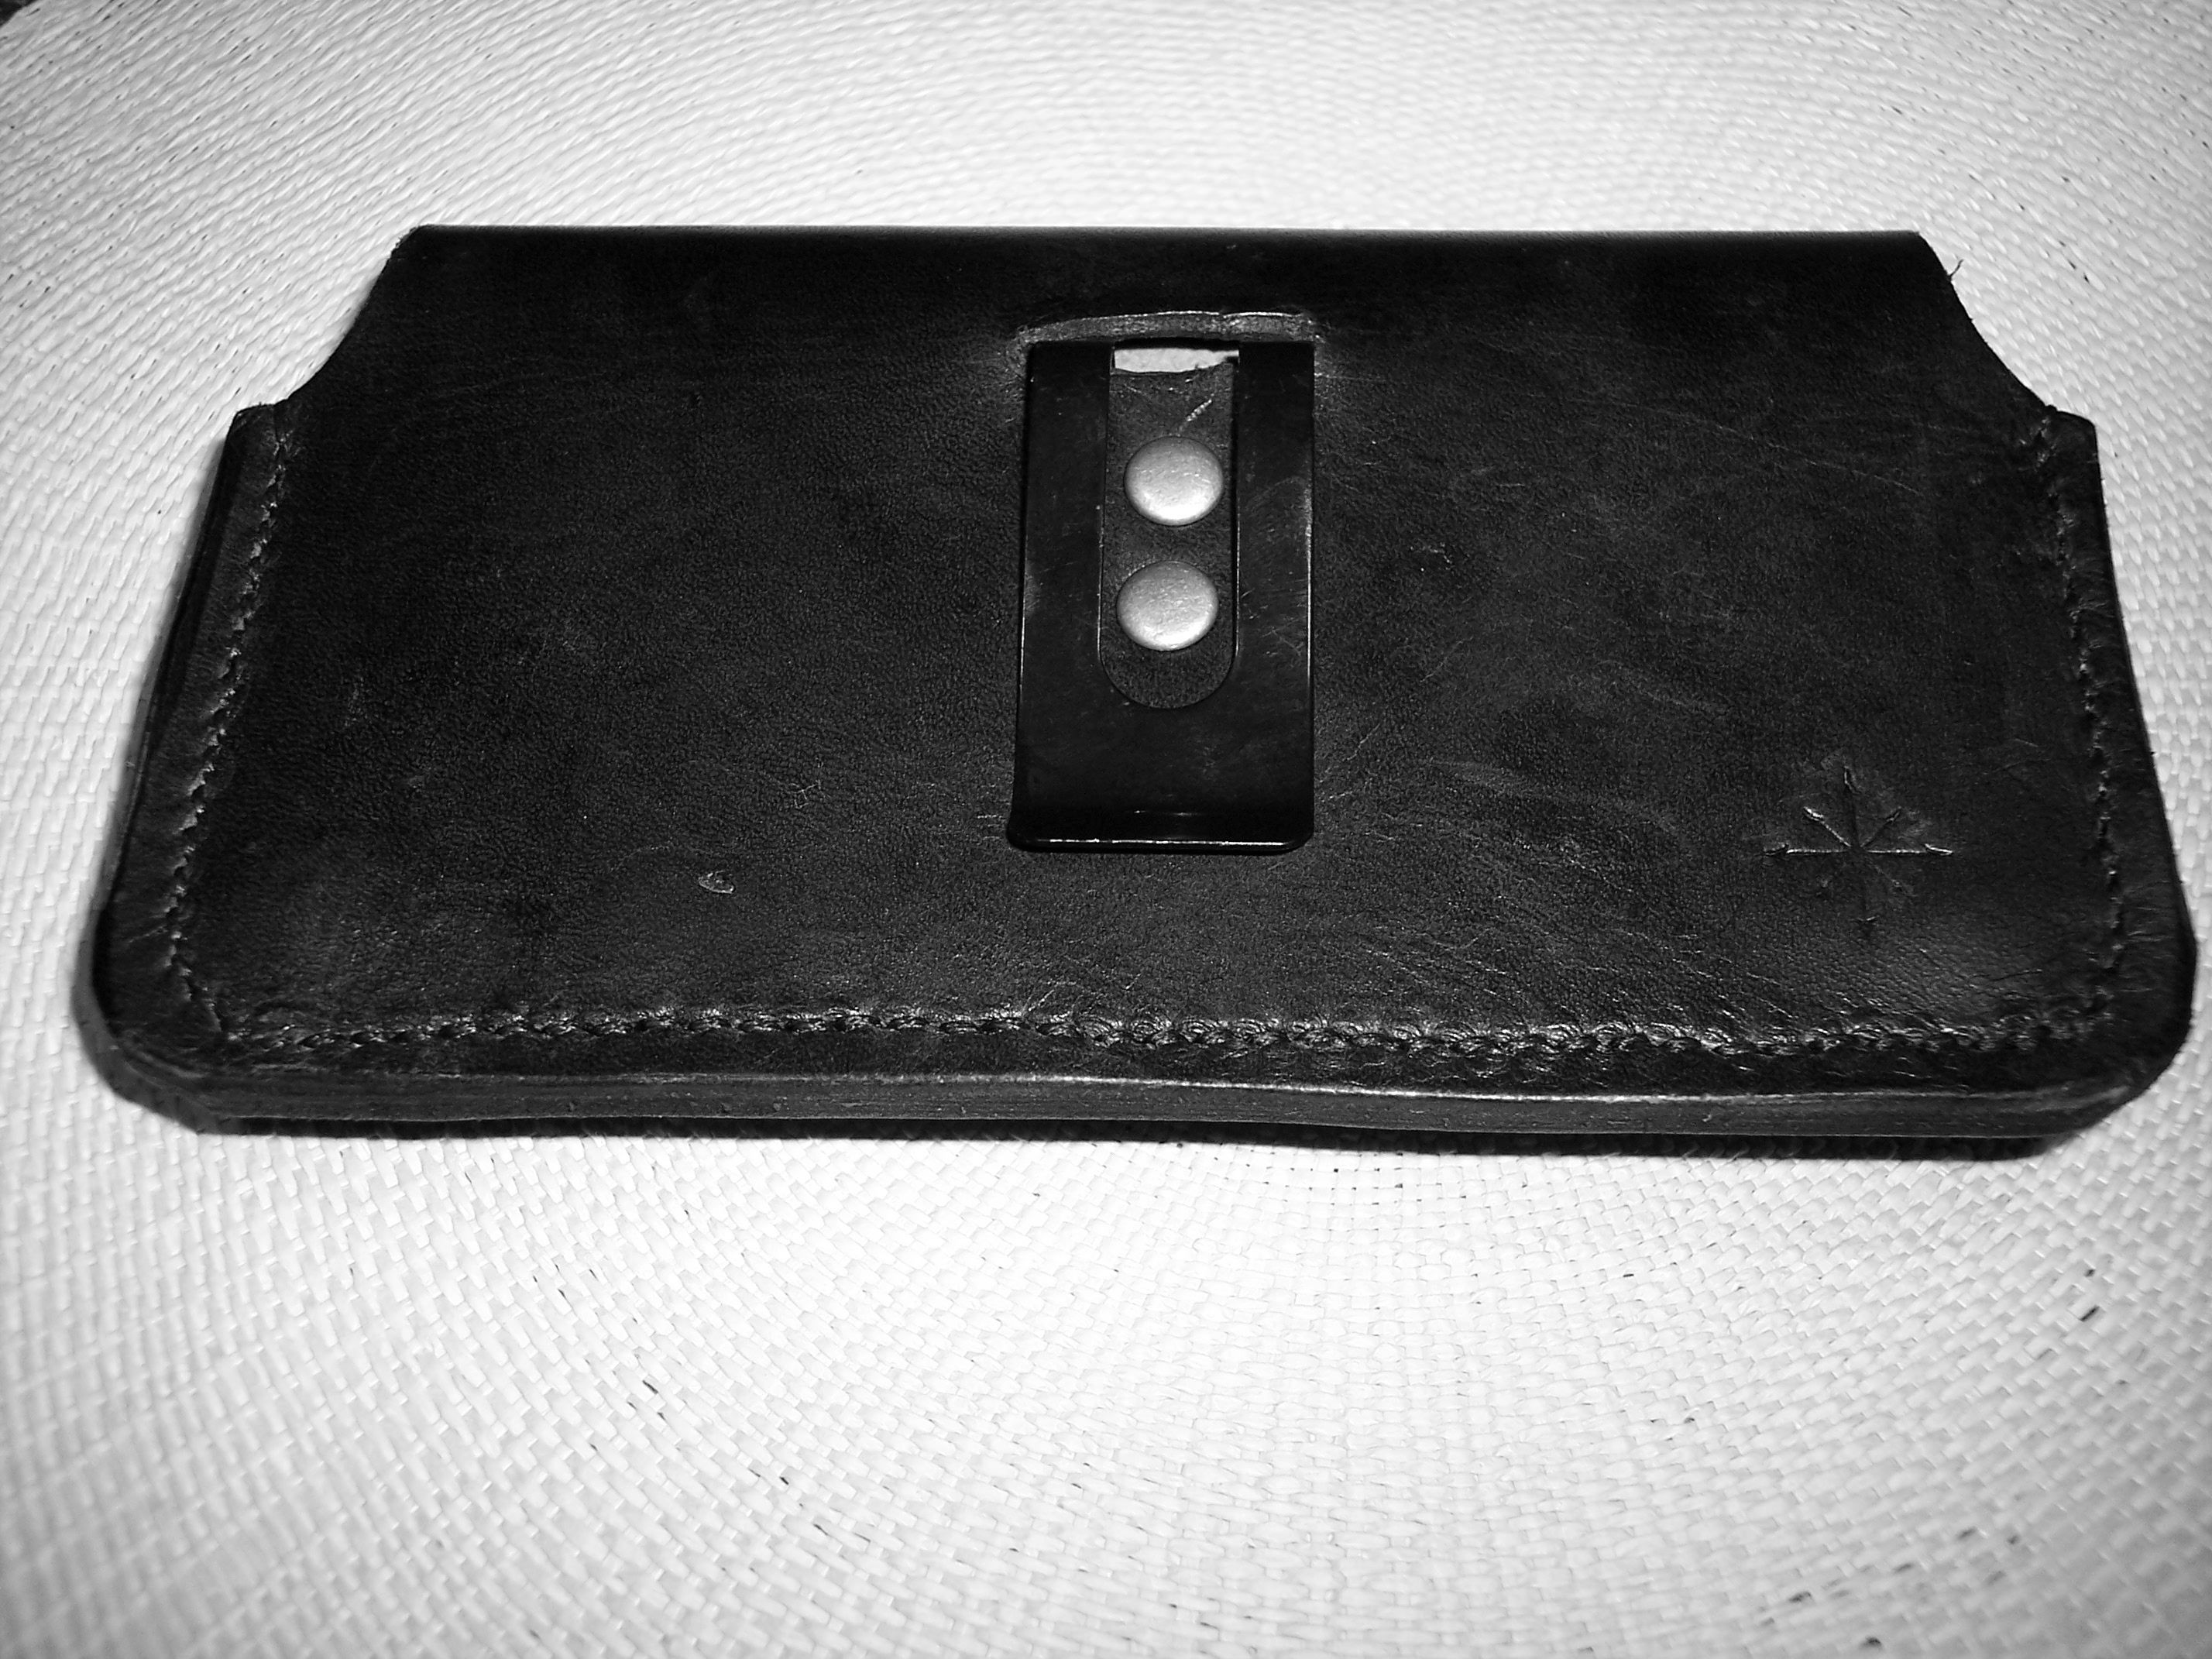
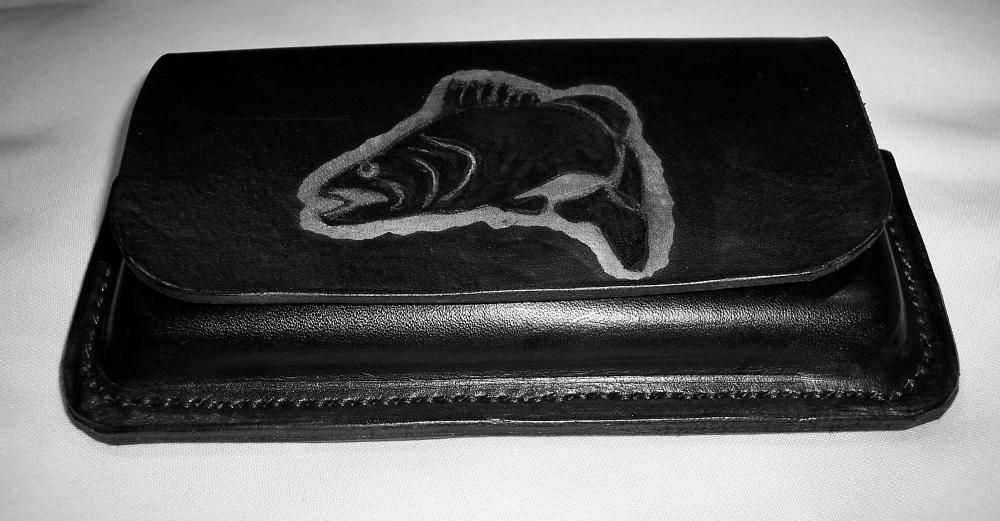
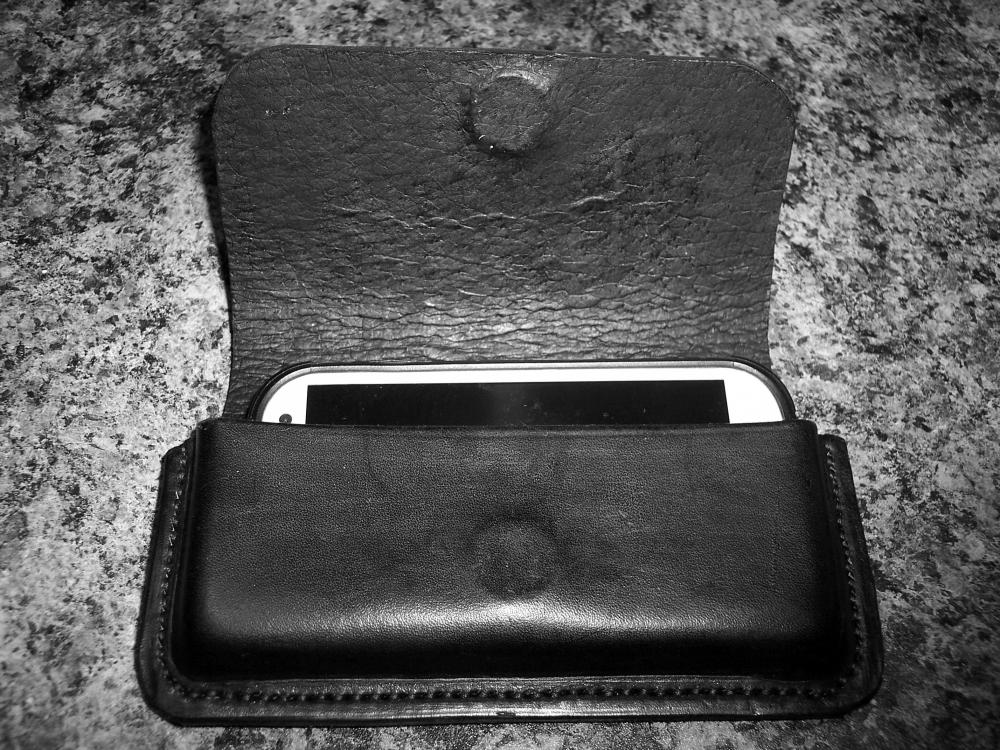
So I finished the case. Requirements were "horizontal," "black," and "with fish." I hate black except for duty wear. How do you put embellishments on black? Anyway, I worked it through and I think it came out pretty good. Thanks for the help and encouragement!

-
Thanks, Richard. I have always made wood forms. Your idea of stacking leather scrap is brilliant! I'm going to look for some suitable clips on my next outing. I tend to overthink everything, I appreciate the confirmation. Now to get to work . . . .
-
I have an order for a horizontal phone case. I have never made one and I have a couple of concerns.; hoping someone can help me. 1. On vertical cases, I use a simple spring belt clip, but the ones I have are too long for a horizontal case. I am concerned shorter clips might not be secure enough. I've been thinking of some type of decorative clips that can be exposed on each end, or belt loops (perhaps a single wide belt loop) if the customer agrees. 2. If the phone case is horizontal, especially with belt loops, wouldn't this put torque on the phone? Seems like each end of the phone will need to be away from the body. This would have the tendency to flop around and/or hang on things. (construction worker) 3. Seems like with a horizontal phone case the flap would be annoying, since it is so long. Or the flap could be molded and "hinged" to the case with a thin piece. --- or the phone could come out the front and not the top, which seems to me would make a more secure holster. Perhaps I am overthinking this - I hope so. I've scouted around for examples but not seen anything other than the factory made
-
The search button in the top right corner is your friend. There is an amazing amount of information on this site and most anything you can think of has already been discussed. You probably want to look at the Billy 2Shews method. You can find a free demonstration of his technique on YouTube for transferring photocopies to leather. Other than that, you can do laser engraving, which gets expensive. Good luck and welcome aboard!
-
I love the liner - can you tell me what material it's made of? I can't imagine it is canvas or paper. In any case, it's a beautiful application.
-
I like your videos, but is there a way to slow them down? At my age my eyes and brain cannot keep up. Good work!
-
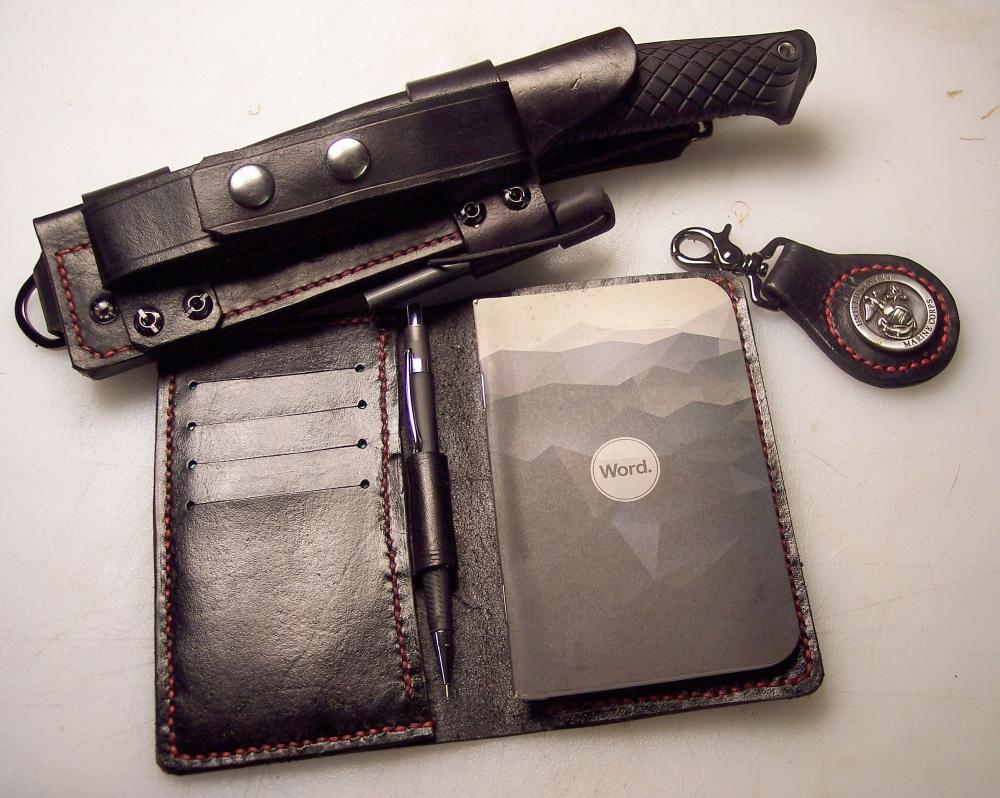
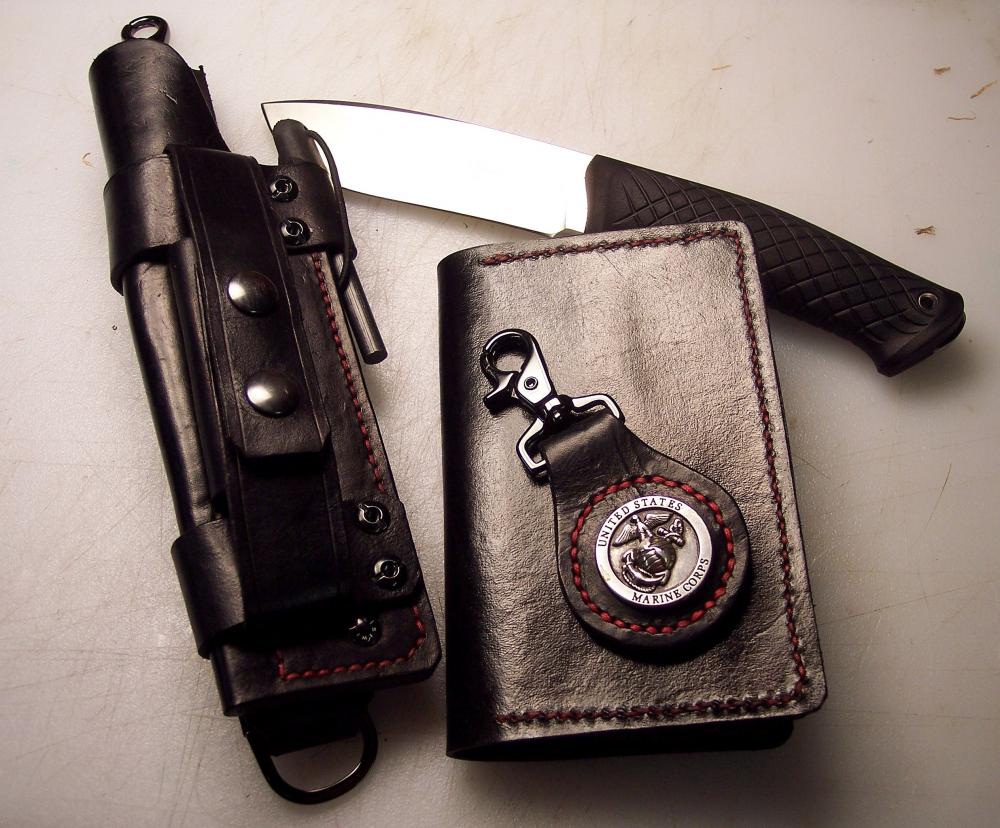
Thank you all for the kind words. This project was challenging, trying to design the sheath to include the sharpening stone, fire starter and compass. It is designed as a scout carry with the belt strap removable. The straps are fastened with Chicago screws, so the hand can be swapped. I struggled with black dye rub off and reviewed these forums extensively. In the end, I will now be using Angelus Pro Black for any future black finish. Again, thank you all for the nice responses. We are looking forward to watching the graduation ceremony. The knife is a Steel Will Druid. No, I got one that actually writes. BTW, thanks for the patterns and for the help & support you have provided to me through this forum.
-
Thanks! First thing I've been brave enough to post on these forums.
-
Graduation present for a new Marine.
-
My first Passport wallet
MikeG replied to Milli's topic in Purses, Wallets, Belts and Miscellaneous Pocket Items
Fun! nice work. -
There is a DVD on leather jewelry by Rene Berends that uses this technique. I posted a link to it below. It basically involves gluing different leathers together and then cutting at an angle to get the different "plies" to show. The angle of the cut and the thicknesses of the individual layers gives a different effect. When I attended his class (years ago), we used different colors to make a simulated gemstone. In one of your pictures it appears all the layers were made of the same leather. Good luck! https://www.etsy.com/listing/275248532/leathercraft-dvd-making-leather
-
-
I'm still looking forward to the first time one of my projects comes out exactly like I had envisioned and intended!
-
No good answer, but following this thread. I recently had the exact same issue using Fiebing's USMC black on a knife sheath. When I first dyed it and buffed it, some of the black came off, and I dyed it a second time. I carefully avoided buffing it too hard, and it was totally black. I applied neatsfoot oil, and a lot of the black came off. The result was a nice reddish dark brown around the edges. Really a nice rustic finish, but unfortunately not for a Marine knife sheath. I started over. dyed twice, let it dry overnight, carefully and lightly buffed it, and very carefully applied leather sheen. It seems to have worked, I cross my fingers the black wont rub off with use. Next time, vinegaroon.
-
Solved: Singer 16-38? - it's a 16-88, I just can't see
MikeG replied to MikeG's topic in Leather Sewing Machines
Thank you - the ad was 16-38 and I didn't look closely. With my eyes, it might not have mattered.