.jpg.d60258221c476480a6e073a8805645bb.jpg)


TomSwede
-
Posts
2,653 -
Joined
-
Last visited
Content Type
Profiles
Forums
Events
Blogs
Gallery
Store
Everything posted by TomSwede
-
Thanks Crystal!! Yeah, I don't see to much of block/inverted dyeing category so I thought it'd be good to show an alternate way to do this. Kate allready has great tut on subject so I thought of this as a complement..also I read somewhere that the dye/antiquing subforum needed more write ups about things. Thanks Bigsis!! I was allways kinda inverted person, lol;-) THANK YOU very much Luke!! Orders are coming in for belts now for some reason so just have to deal with that ASAP. Glad I had time to fix the edges on the belt before showing it off in public. What amazes me is how much you can learn from this place in 1½ years time and still plenty to learn. It's a team effort!!! Cheers bud Tom
-
I'm not gonna ask IF I can join in too;-) Sure wish I could join in on the class but the time is not right for expensive travels. Tom
-
Black dayplanner with raven
TomSwede replied to TomSwede's topic in Books, Journals and Photo Albums
Thank you very much Clay!! I drew up the feathers by myself but kept a keen eye on the one you made and mixed in some elements of Crystals findings on Raven facial hair and for that I looked back at the original drawing. I am really happy with the outcome and couldn't have made it without you two. LW is fantastic and so are the people here. Most of what I do could not have been completed without this board so thanks all for that Thank you sis!! Ravens are really very beautiful!!! Tom -
Sure is a winner!!!! Scales look very good and very original with your nifty little scales punch so bonus points for creativity!!! Neat braiding and the colour is very slick too. Great customer too but hey, if he doesn't buy that first top it means someone else will have a seat like him, smart move, I'm adapting that right away...double the profit..;-) Tom
-
Just remebered that I used denatured alcohol to rub off Fiebings leathersheen from my first rod tube. The silver text got a purplish tone since I had lift from mahogany and red dye that got mixed into the sheen. It came off fine but I had to re-apply one coat of silver because the purle tone still showed evidence on the silver. Put some sheen on a scrap piece and test it. Tom
-
Skullbelt
TomSwede replied to TomSwede's topic in Purses, Wallets, Belts and Miscellaneous Pocket Items
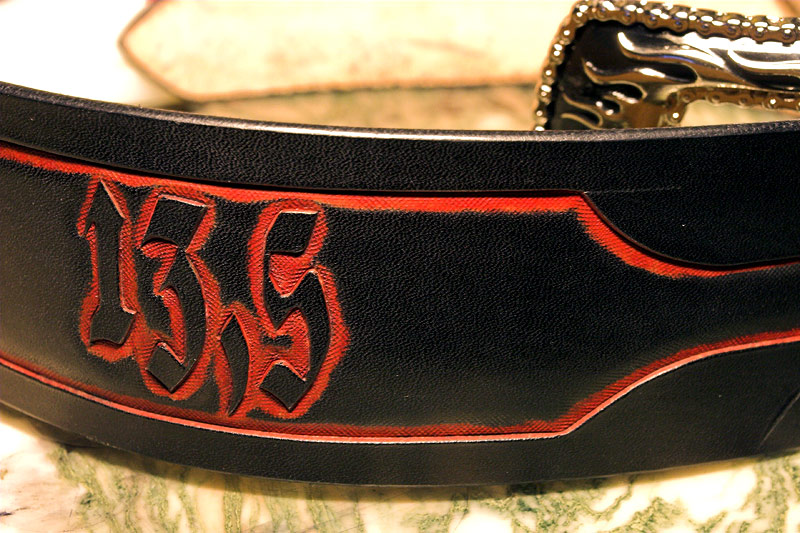
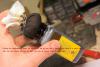
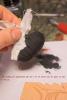
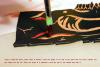
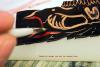
Okay all who asked, edges was done today so here are two shots of them. Had to do inside, it's raining.....again. I sanded off the rough stuff first then I used water, spit, tandys bonefolder and some good 'ol elbow grease. Last but not least a layer of black edgewax polished with a cloth. Also put on a top coat of leatherbalm...darn, I knew I was going to get probs with lift getting into the decorative cuts. If anyone wondered why the red is slightly pinkish, now you know, I expected lift from the topcoat. Why did I not apply the balm with the same type cottonball rag as I blockdyed with... Tom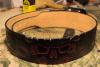
-
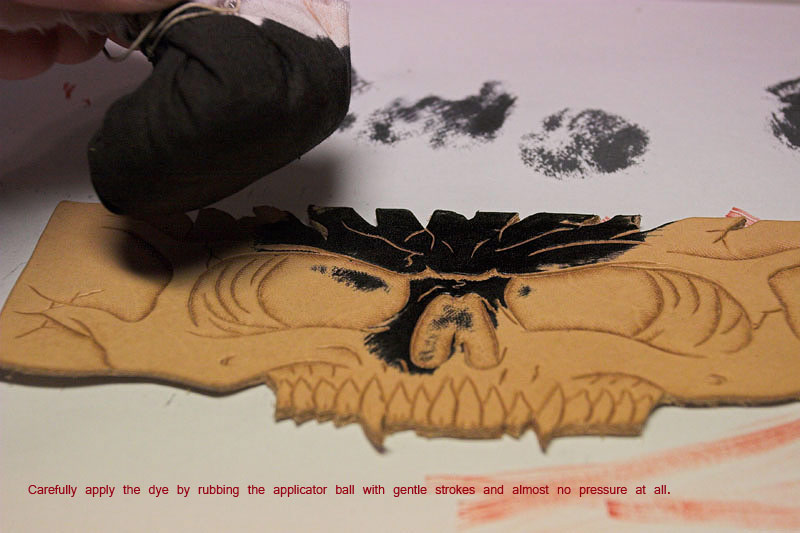
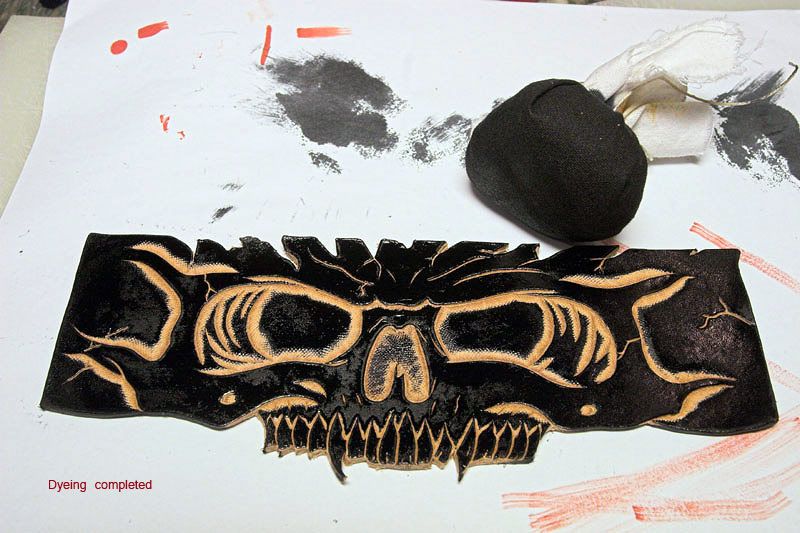
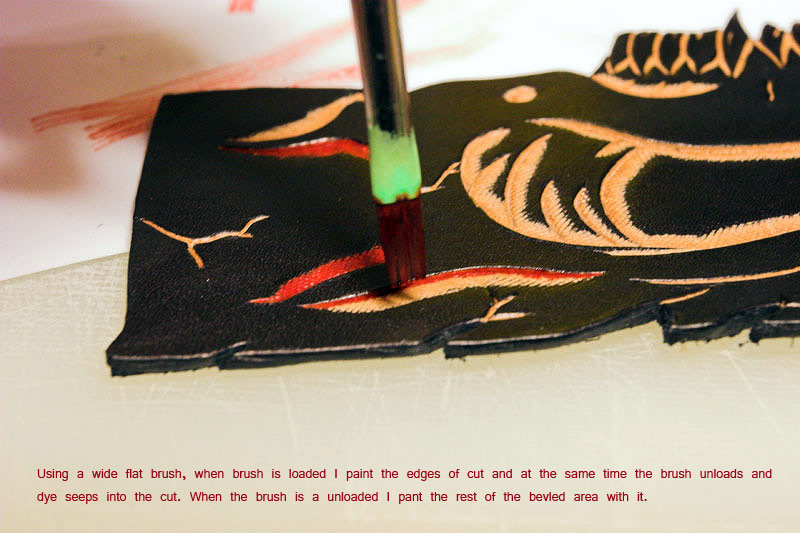
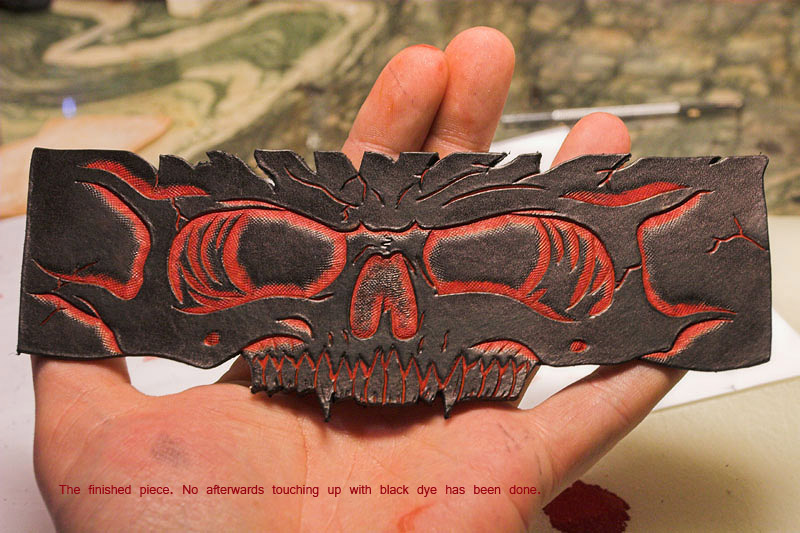
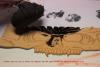
I put together this little step by step illustration with text on pics on how I did the colouring on the skullbelt with block dyeing tecniques. Tom


-
Credit Card pouch
TomSwede replied to rdb's topic in Purses, Wallets, Belts and Miscellaneous Pocket Items
Doesn't have to have fancy tooling, juicy braids or nutting like that because it looks perfect in execution and probably you achieved what you had envisioned for it to be and that makes it awesome. I really like it!! Tom -
Skullbelt
TomSwede replied to TomSwede's topic in Purses, Wallets, Belts and Miscellaneous Pocket Items
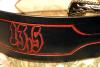
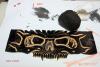
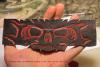
Thanks Kustomizer! Hi John!!! Thanks alot!! There is no lettering above the skull, just the cracks that has been cut out. I have my name at the belt tip and the tooled numbers 13,5 and -20 on the sides. Metric scales, -20 is the more than 20 kilograms (44 lbs) of weight I've lost and 13,5 (5,3") is how many centimeters I have lost around the waist. Starving artist could also be a fitting term but loosin weight is a planned thing. I just changed a few things in my daily intake of nutritions + one month of lost appetite when I separated. The belt is under slicking process now and should be done today. I've put one coat of Aussie leather conditioner to it and buffed really well. Think I'll go with some leather balm and buffing tonite as a top finish. Finishing up a matching bracer for it today. Plan is to enter IFoLG this year aswell but it'll come down to an economical issue once I get near the deadline for sending. Also have a really massive fishing rod tube to make asap. Thanks John!! Tom -
Hope all goes well Badger!! Keep the good spirit up!! Tom
-
Skullbelt
TomSwede replied to TomSwede's topic in Purses, Wallets, Belts and Miscellaneous Pocket Items
Thanks Johann!! Yeah black 506 and it matches perfect. With a blue pair I'd be forced to instantly get to those edges;-) I'll get around to it when I have time. Tom -
Happy birthday Bruce!!! Tom
-
Mysterybraid Dunno know how many times I posted link to this site but here we go again,3 strand:http://www.kingsmerecrafts.btinternet.co.uk/page51.html 5strand: http://www.kingsmerecrafts.btinternet.co.uk/page52.html When I make the final pass I have the bottom piece wet and cut to oversize with a punched hole and a cord through it to pull with because it is very tight. Tom
-
Skullbelt
TomSwede replied to TomSwede's topic in Purses, Wallets, Belts and Miscellaneous Pocket Items
Yeah it's a fun but nervewrecking technique to work with. All the swivelcuts must be very even and polished down so that they don't protrude from the surface. Here is the tut that Kate made that gave me the basic knowledge about this method:http://leatherworker.net/forum/index.php?showtopic=2712&hl=block Tom -
Thanks for sharing Kings X..and thanks Bob off course! Tom
-
Hi and welcome Milli!! Your description sounds like my first ventures here. I still find answers to questions I didn't know I had so just lurking around and studying the conversations is an excellent tool to learn and this place sure has some fantastic people and lots of fancy stuff to admire. Questions is most likely to be answered aswell. Tom
-
Pen Holder
TomSwede replied to appleman's topic in Purses, Wallets, Belts and Miscellaneous Pocket Items
I agree with Ray, simple yet elegant design. Welcome to the board Appleman!! Tom -
Very good looking cases!!! I like the trick with the feathers extending from the cap down onto the case, very slick. Welcome to the board, nice introduction!! Tom
-
Black dayplanner with raven
TomSwede replied to TomSwede's topic in Books, Journals and Photo Albums
Ah, greetings to you Damon! I sure have a hard time attending meetings, lol!! Tom -
Skullbelt
TomSwede replied to TomSwede's topic in Purses, Wallets, Belts and Miscellaneous Pocket Items
HA ha thanks Scissormedic, feels more like it's th few colours I have left...moneydrained..lol...but a belt for me gotta be red/black, off course. -
Black dayplanner with raven
TomSwede replied to TomSwede's topic in Books, Journals and Photo Albums
Thank you Kings X!! Like I said earlier, kitchen is where the ideas of shapes is born BUT I have also seen many albums and dayplanners etc here that has an extra piece sewn onto the back and often that piece uses this curved shape but the actual shape stays rectangular. Thank you Scissormedic!! Thank you Andy!! It is not the best thing when you are braiding the edge tough, gotta make sure you get the holes matched up so you have one centerhole on the bump. Edit: Thank you Vikti!! Tom -
skull bag
TomSwede replied to Scary Leatherworks's topic in Purses, Wallets, Belts and Miscellaneous Pocket Items
AWSUM AWSUM AWSUM...did I say AWSUM?? Cool skull you got there Murse, I want one;-) Tom -
Hi and welcome Jana! The board is very friendly and helpful and lots of inspiration to be found here. Ask questions, poke around or just enjoy pics in showoff. Speaking of pics, it looks like some really really interesting stuff in your pic. Any chance of seeing that targe/plate looking thingie with celtic designs a bit better?? Tom
-
Black dayplanner with raven
TomSwede replied to TomSwede's topic in Books, Journals and Photo Albums
Thank you for the help Crystal, without you and Clay It had only come out half as good. The bump on the sides shape is something I have played with even before getting into leathers. I often turn to my kithen and look up round and oval objects and put them to my patterns and draw shapes around them, be it in a design or the shape of a pattern. I used this on the just posted skullbelt aswell. Thanks Madmax!!! Yeah, I'm very happy with the Raven considering how little I've ventured into this kind of designs. Thanks Hilly!! Nice words from you!! Tom -
Skullbelt
TomSwede replied to TomSwede's topic in Purses, Wallets, Belts and Miscellaneous Pocket Items
Thanks Schno!! Long time no see so good to see you around!!! Thanks MAdmax!! Oh forgot to say that the skull is drawn by tattoflash artist Bob Paulin and is layed out as a leatherbracelet so that was not my idea to put it down this way. Inverting the colouring was my idea. I used cotton balls in a tightly wrapped linen cloth, before applying I wiped excess off on a blank paper so it wouldnt be saturated and get into the cuts. I have done no touching up on the black colouring, just applied it with the cotton ball and thought to myself..it is what it is. Thanks Roo!! I can promise you that there is cleaning up on every cut with the modelling spoon to make the black colouring come out allright. Only get one shot at it. Tom