TwinOaks
-
Posts
4,513 -
Joined
-
Last visited
Content Type
Profiles
Forums
Events
Blogs
Gallery
Store
Everything posted by TwinOaks
-
New Holsters From This Weekend
TwinOaks replied to Imapeopleperson's topic in Gun Holsters, Rifle Slings and Knife Sheathes
"Proper construction" is not up for grabs. There IS a correct way to make holsters, and more than a few incorrect ways. Specific elements can vary, but the basics Do Not Change. That's what some of the people that make holsters for a living have been nice enough to share with the members here. An improperly formed holster will not hold the weapon correctly, possibly resulting in damage to the finish, the weapon falling out and being damaged or lost, or depending on the weapon...a negligent discharge. None of those are acceptable risks to a customer, nor should they be acceptable to the maker. The leather may originally be 7-8oz, but from the coloring, it looks like it is doubled (flesh to flesh), much the way Katsass describes. The major difference is that he's bonding thinner leather to start with. And before anyone jumps on the "Who the heck are to say......" wagon....look at the profile of the person you're about to insult. You might just find that they are a professional in the field with many years of experience to give them all the credibility they'd need. I know.....a long while ago I jumped on the stump and beat my chest at a pro holster maker.....then years later I ate crow and thanked him for trying to tell me what it took me two years to learn and another year to get right. You'll probably find that hardly anyone here is making comments/critiques that aren't intended to help the OP. -
Top Thread Being Stripped & Snapped
TwinOaks replied to Gamekeeper's topic in Leather Sewing Machines
Sounds like there's a spacer in there that needs to come out.....however....i'm far from the expert on your machine, so I'll defer to them. Give them a little while to get here, and i'm sure we can help you figure it out. -
And that is one of the other nice features of the Boss....easily able to put it in the car for a trip.
-
Pancake Collapses
TwinOaks replied to bugboy449's topic in Gun Holsters, Rifle Slings and Knife Sheathes
I'll chime in with the note that there are two types of pancake style holster. The one you made is the most common, which utilizes the flexibility of the leather of both front and back panels. The other type is often referred to (on here, at least) as a 'flat back' holster. All of the molding/shaping is done on the top panel of the leather, leaving the back completely flat. While this type of design will stay open more readily (the back panel is taking all the tension), it will not hold quite as securely unless additional steps are taken. These could include a thumb strap, super detail molding, lipstick on the pig, etc. -
As long as you are doing ONLY costume work, then you can do whatever you want....you can even hang it upside down at your ankle if you see the need for it. But, if you are EVER going to make holsters for real guns, get all the hollywood/tv/movie "looks cool", or "I saw it in this movie...." garbage out of your head, and start studying the reasons holsters are made the way they are. In the real world, form follows function. There's a ton of good information here from some professional makers who've generously provided decades worth of practical experience.
-
There's undoubtedly more reasons than I can think of in my current caffeineless state, and Chuck Barrows could probably rattle them off in his sleep....but I'll start with a few. First there WERE crossdraw holster back then, though typically not at that extreme angle. Second a holster does two things- it holds the gun, and protects the gun. Remember the time period, and consider that modern ultra tough finishes were't around. Also, modern metallic cartridges weren't developed until around 1860. Until then, pretty much everything was a 'cap and ball' style gun. That meant that the gun needed to be as protected as possible from water/moisture which would ruin the powder. Construction materials for holsters were also quite different. Aside from jiffy rivets not exitsting, a snap for a thumbstrap would have neen seen as exorbitantly expensive. Rivets were certainly available in those days, but they were more like what we know as burr rivets. The downsidse to using a rivet is that it can scratch the finish of the gun. Now, the idea of protecting the wearer from a hot barrel seems like it has some merit, but the majority of people didn't go around shooting their gun fast enough to need that protection...nor did they wear shorts, exposing their legs to hot barrels. Now...to your particular design: Has it occurred to you that several generations of holster makers over close to 150 years of doing this never stumbled across this idea? If you think that, then you are mistaken. The design is impractical for the time period. A gun of any sort was a pretty large investment in those days, used as much (or more) for groceries, as defense. A lot of care was taken to protect that investment. Your design relies on the strap for retention instead or relying on the weight of the gun and the friction/fit of the holster. Here's a very important historical note for you: There were no fast draw gun fights like you see on TV. Hollywood invented it. And since there was no 'fast draw'. There would have been no fast draw holsters. I had more in my mind when I started typing, and I'm sure some will come back once i get caffeinated, but that's all for now. Also, this forum is open to the public...please don't curse.
-
http://leatherworker.net/sharpenheadknife.htm
-
You are 100% correct that the airbrush method doesn't get as much dye INTO the leather. In my e perience this has not been an issue, but if you have a hard use item that you know will see a lot of abuse/wear, you minght consider dip dyeing it instead.
-
Horse butt pieces are available from Springfield, but the are leftovers. If you want a full sized piece of hide, you'll do well to check with Horween. Thetanneryrow.com There is more contact information in this thread: http://leatherworker.net/forum/index.php?showtopic=36866
-
Wrinkled Flapjake...er Pancake...
TwinOaks replied to SooperJake's topic in Gun Holsters, Rifle Slings and Knife Sheathes
Are you dampening the wings during molding? -
If there's steel wool left in the jug, it means that you have 'used up' all the acid (vinegar). You can add more, or just start a new batch. Take a piece of scrap leather and dip it in the mix. You should have a near instant color change. Dark gray is okay, let it sit for a few minutes, then apply a light coat of oil or conditioner. It should then turn black. If it turns black immediately, then you"re good to go. Don't forget the neutralizing bath. Strong 'roon can make the leather too acidic, and degrade it.
-
Yep....caught me typing on a tablet. Thanks for the correction.
-
I hate to break it to you, but there really isn't an inexpensive option that will work the way it should. You can MAKE a cheap singer from ebay make stitches, but it typically isn't in the correct thread size. Your best option for 'cheap' is to look for a used singer 111 and hand turn it until you can sace up enough for a DC servo motor. The average price point for a NEW machine that would do what you want is around $1000...give or take, maybe plus shipping. A used one could be anywhere from $200-$500, depending on the condition/age. Take a few minutes to read the thread by Wizcrafts on which type of sewing machine to look for.
-
You might have better luck searching for " squaw" (apologies to our Native Americans) instead of "squall".....the latter is a storm.
-
Welcome to leatherworker.net! I'm sure you'll have lots of questions, and we'll help you out where you can.
-
Check put Berni346's youtube channel....he explains a lot of it.
-
With the advent of the Tangleboss, I doubt there will be a large demand for these. The tb allows a greater range of pressure, and appears to have a standard blade, meaning more versatility
-
That script looks all pretty and such, but is sure is difficult to read with these old eyes.....
-
Some very nice work! Welcome to Leatherworker.net!
-
You may be in the realm of making your own, which shouldn't be hard to do. Start with steel rod stock, grind/sand the flat, and use some needle files to cut the groove size you want. I also recall that someone was making/selling edgers made from table knives. If you've got a spare, you could start with that as it's already got a handle and most of the polishing work ( as well as heat treat) is done for you.
-
You are most welcome.
-
Very Simple Question - How Do You Do This With A Belt?
TwinOaks replied to laspace's topic in How Do I Do That?
You might also just contact the person directly.....She's a member here. -
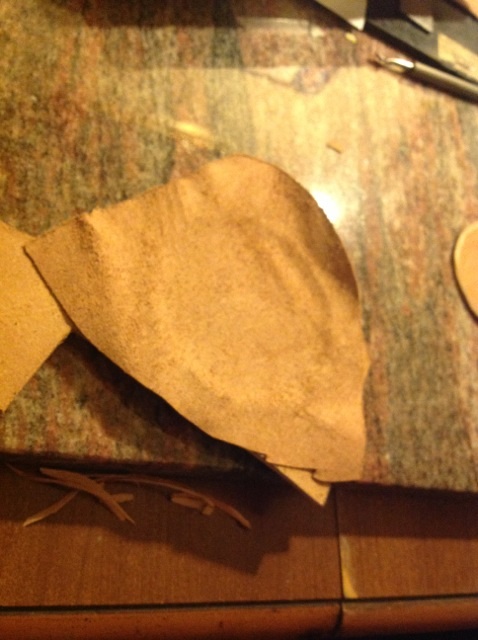
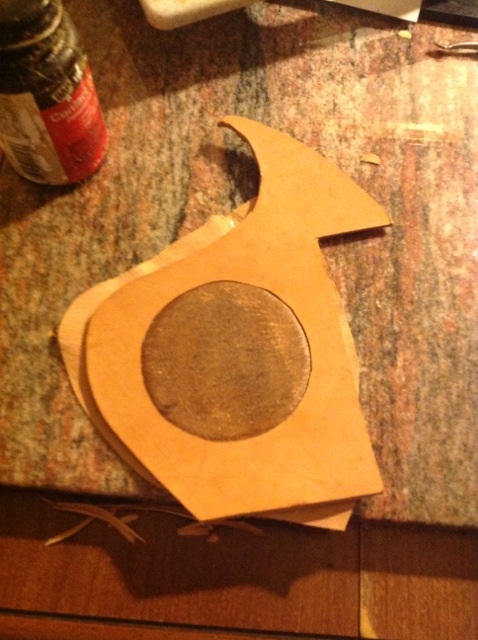
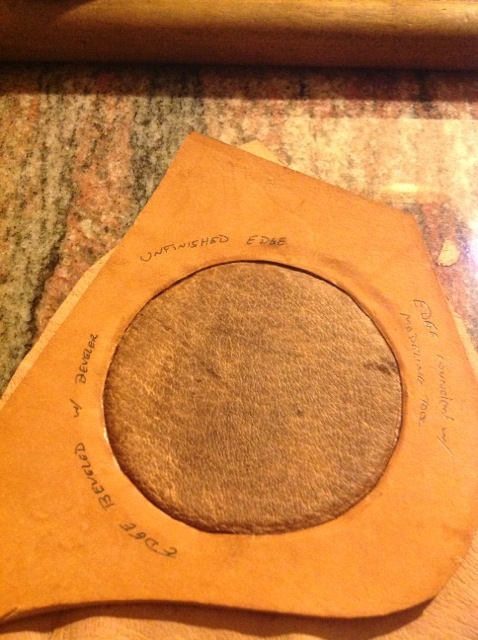
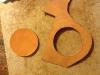
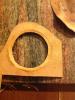
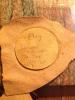
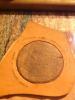
I was recently asked about how to do this, so instead of repeated PMs, here is a brief primer on how to do an inlay. Special thanks to Dave Cole aka DCKnives, Requiescat in pace, for his initial posting of the technique on his website. Start with a shape and cut it out. Next, skive the flesh side to allow the inlay material to fill the cutout without creasing. If it's thick material, you can also skive the plug so there's no hard corner. Glue right to the edge of the skive, then press the inlay material in place. Now, glue in the plug and roll or tap with a mallet to get out all the air bubbles. Once that is done, flip it over and press it flat again (unless it's supposed to be raised). . This pic shows the inlayed piece right after being flipped over. But we don't like raw edges, so..... Here's some options for dealing with that unfinished edge: First is just using a modeling tool to round over the corner. Next is to actually use a beveler to bevel the edge. Of course, if you take your time and get a really good and even skive, as well as being very precise with your plug placement (mine was round and I neglected to put an index mark on it) you may be able to make a 'feather edge' that will perfectly blend to the surface of the inlay. I hope this has been helpful, and that you can extrapolate any little changes you may need to make. Mike ETA: OOPS!! I forgot to mention that after you do the inlay, you can glue/sew another piece of leather to the back of the whole thing, being careful to cover everything you cut out ( or a whole section). That will protect the inlay from being pulled loose. If the inlay is in the outer layer of something, you won't need an additional backer, as the piece behind it will serve the same purpose, i.e. a lined holster or quiver.


-
Outta the blue, my neighbor just called and says that she and "several" other riders want saddle scabbards....so apparently, I'm now in the Western gear business.
- Show previous comments 4 more
-
I am sure they will be gorgeous!
-

WOOO HOOO!!!! and HO CRAP! (in that order

-
Can't complain about that!
-
It's "Beads and Leather", located on the I65 service road (south bound) between Cottage Hill and Gov't/90.