HarryB
-
Posts
146 -
Joined
-
Last visited
Content Type
Profiles
Forums
Events
Blogs
Gallery
Store
Everything posted by HarryB
-
OK, this may be a little drawn out but here goes. I got the following from a wood carving magazine and I don't see why it wouldn't apply to us, too: Take your MATERIALS cost (actual leather cost PLUS 20% for waste, hardware, cement, thread, etc. Don't short yourself in this step!) add LABOR ( I figure mine @ $25/hour, figure yours at whatever skill level you think you are). Take MATERIAL and LABOR X 15% for your OVERHEAD. Figure PROFIT at OVERHEAD + 15%. The BENCH PRICE is MATERIAL + LABOR + OVERHEAD + PROFIT. The bench price is what I charge if YOU come to ME to pick up your order. If I am going to a show to set up, I add SELLING EXPENSES: BENCH PRICE X 20%. My WHOLESALE PRICE is then the BENCH PRICE + SELLING EXPENSES. Example: 50" x 1 1/2" belt strip would be .52 square feet of leather at $6.50/ square foot will be $3.38 PLUS 20% ( 68 cents) = $4.06 for leather. Plus 2 chicago screws, dye, and finish (figure $1.00) gives you $5.06 for material. I round my numbers up to the nearest quarter ($5.25). Say 30 minutes labor for a plain belt @ $25/hour = $12.50. That's $5.25 + $12.50= $17.75 for this step. OVERHEAD will then be $17.75 X 15% = $2.66 ($2.75) for the OVERHEAD. PROFIT is $2.75 + 15% = $3.16 ($3.25). BENCH PRICE is (M)$5.25 + (L)$12.50 + (O)$2.75 + (P)$3.25= $23.75. SELLING EXPENSES will be $23.75 X 20% = $4.75. WHOLESALE PRICE is $23.75 + $4.75 = $28.50. So, $23-$24 if you come to my shop and pick it up. $28 - $30 if I take that belt to a show. If you are a retailer, I will charge you the bench price minus a discount for quantities and you can charge whatever you want to your customers. I try to stress to new crafters: do not be intimidated by business owners to lower your prices. I am a skilled craftsman and artist, not a factory. The retailer simply can not get the same mark-up for my individually made goods as they can for a mass-produced item. Thank you for your patience and letting me ramble a little. Use this formula for EVERYTHING you make and don't short yourself. If you cutt back on this price, it comes out of YOUR pocket; not your suppliers or the utility company's! You can always play with the percentages (a little bit) and your hourly rate. Hope this helps out.
-
Wyvern, this is only my personal opinion but, PATCH MACHINES ARE A PAIN IN THE BUUUUUTTTTTT! I've had two of them and, after the first one I swore I would never get another one, but I did. It left a long time ago and will never be replaced: this time I mean it! They are great for their intended purpose: sewing patches on shoes. If you are going to use them for anything else they are more trouble than they are worth. Besides, everyone and their brother will see the patcher and say "oh, I've got something I need a little sewing on. Can you just stitch up this little place on my shoes for me?" For whatever reason, no one wants little things stitched up on any of the other three machines I have. Just the patcher. Do yourself a favor: count your blessings that you did not get the machine at auction.
-
I compared the Chuck Smith and the other high end knives at the Texas show. I liked the Smith better because it was a little beefier built. The other one had way too small diameter shaft that holds the finger yolk on. Just liked the weight and feel of the Smith a little better. If you are just starting to do leather work, save your money and get fewer, better tools. Using poor quality tools will discourage you from practicing.
-
Well, after almost 50 years doing this, I have about a dozen swivel knives, 8 round/head knives, about 15 different hammers around the shop not counting all the duplicate stamps, mallets and other tools I have. After all, for a complete floral carving you only need ONE swivel knife, ONE veiner, about three bevelers, etc. Definately not the hundreds of tools we all seem to collect (you never know when you might need that particular tool!). You will find yourself checking all the flea markets and yard sales during the day for more tools and surfing the internet at 3 in the morning looking for what you didn't find at the flea markets. Get used to it; it comes with the territory. Just accept it and dig a little deeper for your next tool purchase! After all this time I finally purchased a Chuck Smith swivel knife and now I won't put it down . The others are now just "back-ups". You know; in case someone breaks in and steals my Chuck Smith, I'll have another one to fall back on.
-

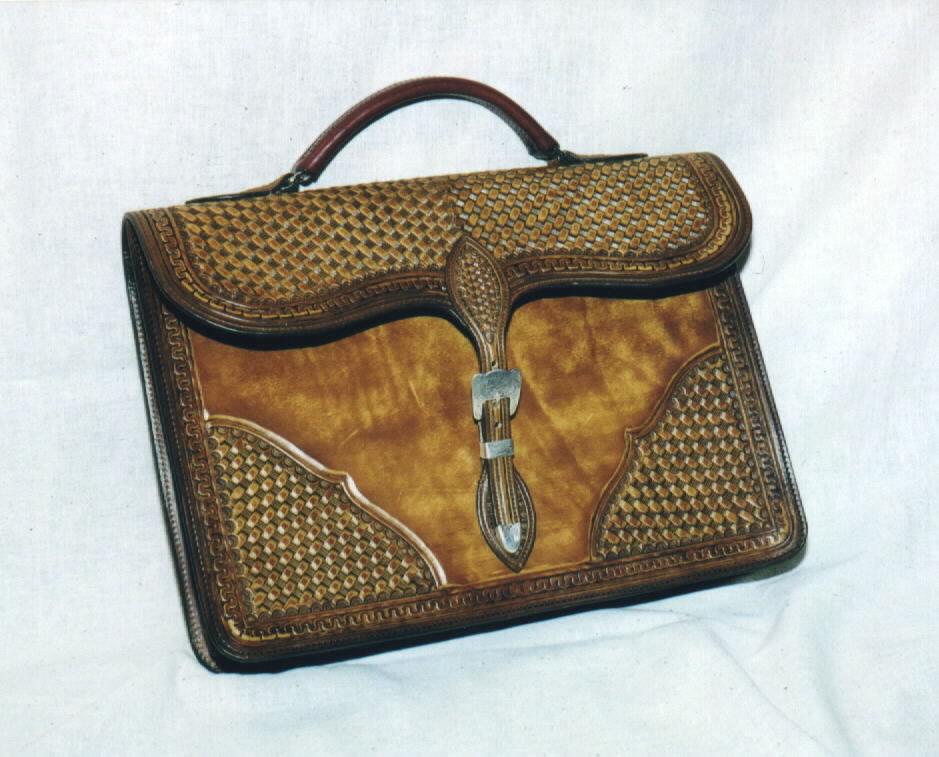
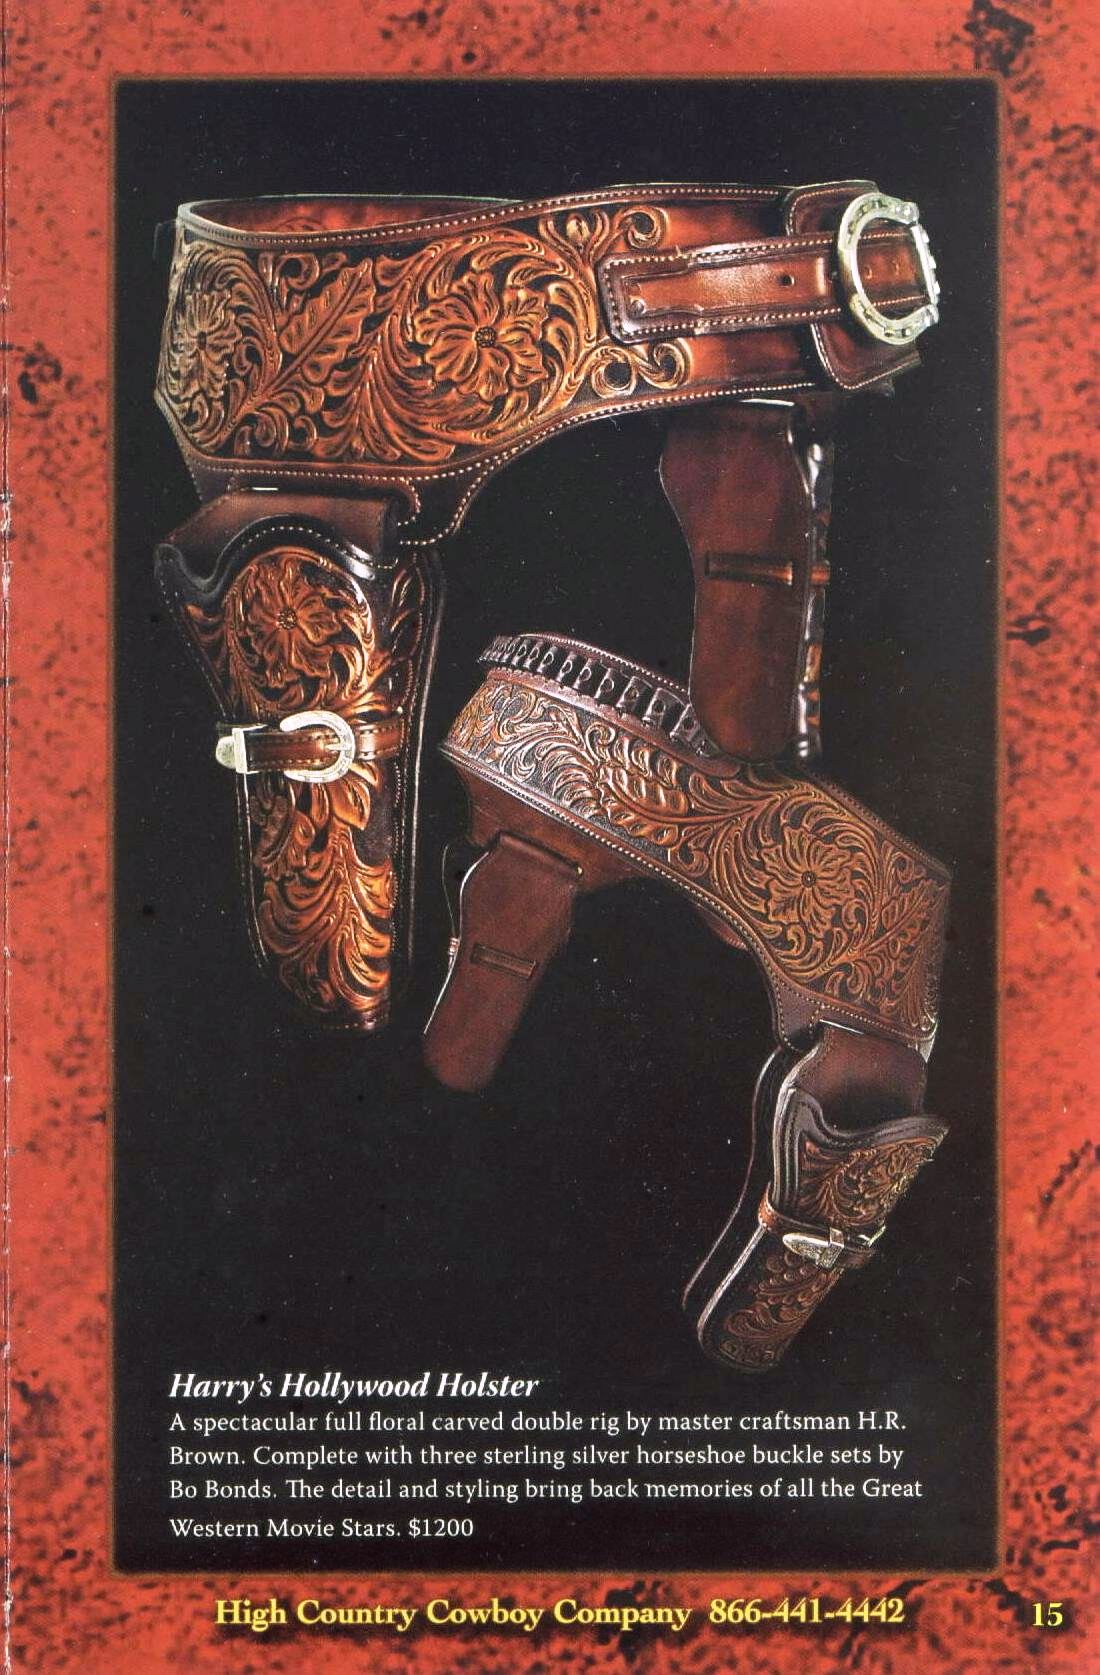
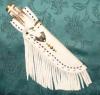
Some of my older stuff
HarryB replied to HarryB's topic in Gun Holsters, Rifle Slings and Knife Sheathes
-
Looks like it might be regular veg tan. I've braided veg tan in the past and it's easier to get it to lay together than chrome tanned leathers unless you find a source for manufactured lace the width you want and that is getting really hard. Veg tan can be dyed, dampened, braided, saddle soaped and finished to make a really slick braid. Try it.
-
Just a couple of my older things. I'll post a few more as soon as I get the pics off my other computer. Thanks for looking.

-
Try reducing the left orbital bone and the left zygomatic arch. That might help.
-
Just in case you haven't found a good source yet, just got a sales flyer from Siegel's of California with them in it. Other good stuff, too!
-
Old wives tale: a rat will swim a river backwards to get to a saddle that has pure neatsfoot oil on it. If you have leathergoods available to rats and mice, they will eat it, period. There is little difference between pure and compound. Be sure to shy away from cheap compounds; they are usually mixed with used motor oil, mostly old and sometimes burnt. You will never get the burnt odor out of your leather! I only use neatsfoot oil on unfinished vegetable leathers. Anything else is questionable.
-
? Is there anything under the leather? If you just glue it around the perimeter, it will pull loose in no time. It will also stretch out of shape if the glue does hold! I would either cover a piece of plywood and then screw it from the bottom or attach the leather to canvas and attach with nice tacks from the top. Done LOTS of woven leather chairs, put canvas under the seats and they have held up great.
-
Got one. E-mail me with your address and I'll be glad to send it to you. You have to adjust the bolt holes for whatever type of stirrup you are using. I'll send instructions. Harry B
-
Mink Oil?
HarryB replied to Schno's topic in Dyes, Antiques, Stains, Glues, Waxes, Finishes and Conditioners.
Schno, it depends on the type of leather the floggers are made of. Old saddlemakers used to use unsalted butter as a finish! I just find it very hard to spend a lot of time making a project and then putting on anything natural like olive oil or butter or anything that can turn rancid. Mink oil, neatsfoot oil, Fiebing's Aussie conditioner are all good as are any of the products from Bee Natural. -
Welcome to the wonderful world of "dying leather black"! It has to be the most frustrating thing I have ever tried to do. I apply a thin coat of Neatsfoot oil to dry leather to open the pores, apply 3-4 coats of dye, let it dry troroughly and buff off the residue with a paper towel or cloth, apply a good coat of saddle soap and let that dry. Then try to apply your finish with a very light hand. Usually, I try to use the same brand dye and finish.
-
Going To Try Some New Leather
HarryB replied to Randyc's topic in Gun Holsters, Rifle Slings and Knife Sheathes
Yes: DON'T USE SHEARS! I use a utility knife with a new, stropped blade and take three - four cuts to cut through heavier leather and I use a round knife for the rest. I know it takes a while to learn to use a round/head knife and it hurts your hand for a while but if you are going to do leather work, learn to use the proper tools. My ol' pappy always told me "don't use a tack hammer to drive a railroad spike" ! Also, some people complain about problems using a utility knife for getting a good, square cut. That is why you don't try to cut through 8/9 oz. leather with one cut. Take your time, hold the knife firmly and make several cuts. It will get easier and more accurate with a little practice. -
Going To Try Some New Leather
HarryB replied to Randyc's topic in Gun Holsters, Rifle Slings and Knife Sheathes
Have used W&C for years. Very satisfied with the leather and the service. I almost allways order skirting and have it split to whatever thickness I want. Their shoulders and "craftsman" sides are a dryer tannage and about the same tannage as Hermann Oaks. Both tanneries offer excellent sides, I just prefer the skirting tannage from W&C. Probably for the molding, I would use the dryer tannage. -
When do you dye?
HarryB replied to gavingear's topic in Dyes, Antiques, Stains, Glues, Waxes, Finishes and Conditioners.
Didn't mean to "offend" you but yes, by blotchy I usually mean unintentional. What you get when you are getting started and not real sure what you are doing. I make lots of holsters, belts, etc using a multi-tone dye technique that is both intentional and very time consuming. If the two-tone look is done on purpose then it came out just the way you wanted it to! -
When do you dye?
HarryB replied to gavingear's topic in Dyes, Antiques, Stains, Glues, Waxes, Finishes and Conditioners.
If I want a good, even color, I dye before assembly. The secret is: don't be in a rush! I let my leather dry COMPLETELY, apply a thin coat of neatsfoot oil, let that dry to the point no oil is standing on the surface of the leather and then dye. Let the dye dry COMPLETELY and apply a coat of saddle soap, rubbing it off as much as possible after a couple of minutes. When my leather has dried, I machine stitch together, dip holster in warm water and wet form. Set aside and let it dry COMPLETELY (are you getting the idea?!), saddle soap it again, let it dry COMPLETELY and apply a finish. I use Tan-Kote almost exclusively because I like the mellow finish instead of a hard, laquer look. The biggest mistake I see people make is trying to rush through a project. Any time you apply either a water based or solvent based dye to wet leather, it is going to turn out blotchy looking. Hope this helps. -
Bigsky, here is what I have done on SEVERAL pair used by working cowboys and have had no complaints. I hold my tap and stirrup together with a spring clamp, mark the concho location for the outside concho and drill a hole through the leather into the stirrup. I then attach my leather string (for the bleed knot) through the leather into the wood with a #4 or 6 screw and finish washer then cover that over with the concho. I then mark a corresponding hole for the inside, drill and place a screw and finish washer on that side. You absolutely must be sure that the screw does not protrude through the stirrup. This will scratch the devil out of your boots! Otherwise, this makes a strong anchor for the taps. Good luck.