MorningStarL
-
Posts
139 -
Joined
-
Last visited
Content Type
Profiles
Forums
Events
Blogs
Gallery
Store
Everything posted by MorningStarL
-
Thanks. I sometimes go very shiny, if I'm building a sheath for someone's uncle's knife he carried and was shipwrecked with three times in WWII, for example. It seems to fit. (I really did one for that kind of knife.) I'll look at Satin Shene. Thanks!
-
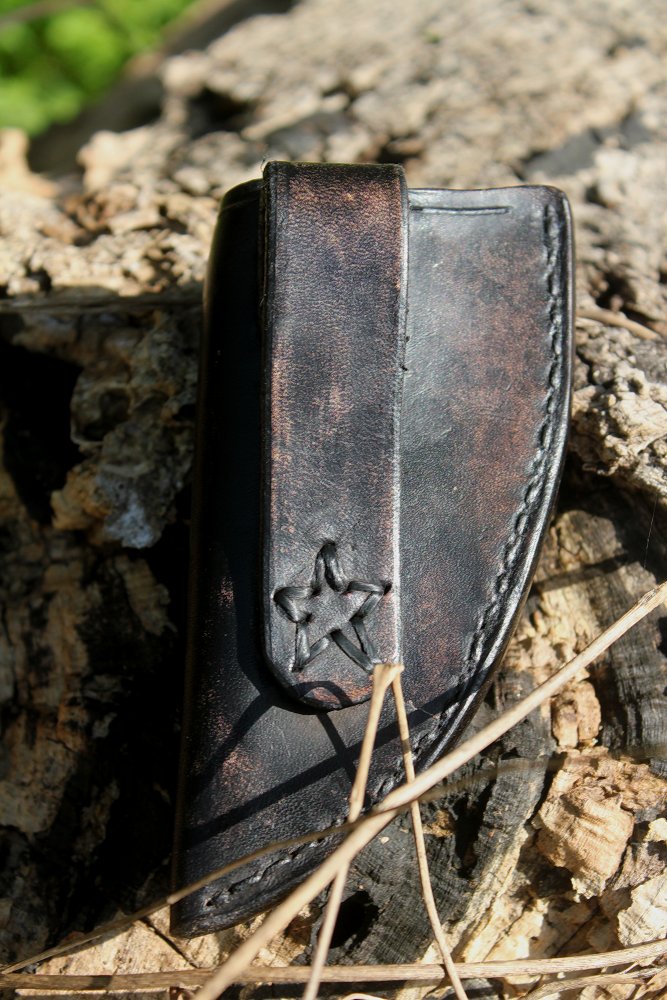
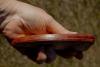
I've added a couple of pictures of sheaths I really did shed some blood, sweat and tears working on yesterday. All y'all have been so good with advice -- I think these, especially the wider skinner sheath, have some of the best work I've done. Once I'd stitched and done the edge-burnishing, I swabbed on a good coat of Fiebring's USMC Black leather dye. I let it dry and then rubbed off the powdery residue. (I only get that with the USMC Black and not with brown dyes.) Then another coat of the black dye, and left them hanging overnight, well over 12 hours. Today I rubbed the paraffin into the edges and buffed that. I'm trying different finishes. I don't like the SuperSheen -- makes my leather look like plastic. I have Eco-Flo matte and satin finishes, and they've left streaks on sheaths before. I prefer a lower-gloss finish. Today I tried mink oil that was in the shop from someone else's work. Rubbed it on, let it dry for a couple of hours, rubbed the surface then put it on the buffing wheel, and that's when the black dye started coming off the leather. You can see the patchiness here in the pictures. So -- now what? My partner thought maybe the mink oil acted as a solvent on the dye, but the dye was dry. I know the thread I used yesterday was more heavily waxed than usual and I'm wondering if I transferred some by my fingers and made a resist -- but it didn't show up til I buffed the finish. I'm thinking of trying the homemade finish - got beeswax and vegetable oil to melt it into. The one I saw has vodka in and there's good reason not to keep drinkin' liquor around here -- I'm going to see what I can find about using rubbing alcohol instead.

-
I've added a couple of pictures of sheaths I really did shed some blood, sweat and tears working on yesterday. All y'all have been so good with advice -- I think these, especially the wider skinner sheath, have some of the best work I've done. Once I'd stitched and done the edge-burnishing, I swabbed on a good coat of Fiebring's USMC Black leather dye. I let it dry and then rubbed off the powdery residue. (I only get that with the USMC Black and not with brown dyes.) Then another coat of the black dye, and left them hanging overnight, well over 12 hours. Today I rubbed the paraffin into the edges and buffed that. I'm trying different finishes. I don't like the SuperSheen -- makes my leather look like plastic. I have Eco-Flo matte and satin finishes, and they've left streaks on sheaths before. I prefer a lower-gloss finish. Today I tried mink oil that was in the shop from someone else's work. Rubbed it on, let it dry for a couple of hours, rubbed the surface then put it on the buffing wheel, and that's when the black dye started coming off the leather. You can see the patchiness here in the pictures. So -- now what? My partner thought maybe the mink oil acted as a solvent on the dye, but the dye was dry. I know the thread I used yesterday was more heavily waxed than usual and I'm wondering if I transferred some by my fingers and made a resist -- but it didn't show up til I buffed the finish. I'm thinking of trying the homemade finish - got beeswax and vegetable oil to melt it into. The one I saw has vodka in and there's good reason not to keep drinkin' liquor around here -- I'm going to see what I can find about using rubbing alcohol instead.
-
This is one of the three sheaths I worked on yesterday. It's the one that has the best stitching I've ever produced: holes made with a diamond-point awl instead of a drill bit; very straight and even, enough that I could this time have done a stitching groove down the back cuz it looks like I'd have hit it. This has other problems, and I'm going to post about one, but I'm SO much happier with the stitching than I've ever been -- it's just been getting better and better since I joined this group in December. Thanks, everyone.


-
I'm letting it load now -- thanks, Tinker.
-
We were talking about sewing machines last night, Tinker, because I stabbed my fingers a couple of times when the awl caught the leather tight and I pushed the sheath down off the awl and my hand rebounded. A foot that held the sheaths down, instead of my hands, would fix that. I like the idea of the cork. Two of the sheaths yesterday were very narrow. I had them on the backer block to hold them flat so the awl would be vertical, but the awl didn't touch the block -- it went through just beside. I'm bad at visualizing, but I've shared what you said about the threaded rod and the set screw with my partner and he'll know how to do that. Thanks a lot!
-
I got the best-looking line of stitches on the third sheath I did today that I've ever done. I also got two punctures in my right index finger and a deeper, messier one on my left. And for good luck, the least of the punctures on the right hand then took a buzz with 180-grit on the belt sander. Sigh. But I have three sheaths done through to dying, and they'll be dry enough to finish-coat and take pictures of tomorrow.
-
Thanks, Mike. I'll have some pictures to post by the end of the week.
-
I bought some good Douglass awls, but with a combination of arthritis in some fingers, trigger finger recurring in another, and some kind of repetitive strain thing starting down the back of my right thumb into my wrist, I couldn't use them. Someone here suggested I drill a hole in a piece of 1/4" hardwood dowel, insert the blunt end of the awl into that, and chuck the dowel into my drill press. Then I could use just the lever to push the awl through the leather. Except the blunt end of the awl was so non-blunt that when I reached the woodblock behind the leather, it pushed the awl up into the dowel and I had nothing left to go into the leather. My knifemaker was putting together a sculpture of a dragonfly this week and bought some steel rods for the legs. I had a Eureka! moment and got him to cut about 1/2" of the rod for me, inserted THAT into the drillpress chuck, then the dowel with the awl in it. Boy HOWDY! I am now stitching belt loops onto knife sheaths through perfect diamond-shaped holes and I'm very happy.
-
Bob, I was sure I'd replied to this already, but our internet's very slow and things get lost. I really like that and I'd never have thought of birch-bark as an inlay. Great work -- I'd use it a lot too. And I said we must have been almost-neighbours. Until I moved to the Yukon in 2010, I'd spent my whole life living in Dundas, and we'd drive to Long Point to go camping.
-
Tom, thanks, I hadn't thought of that. I've got a splitting maul at home up north and I'd hate to be threading that through. My partner just put a new handle on the axe I'm making the cover for -- it's about 27 - 28". We wound up out all day hospital-visiting with family, so I'm glad you said that tonight, cuz tomorrow's the day I get to spend at the bench.
-
I found this tutorial on British Blades. I'll use it, basically. Don't need a belt loop for this. And I'm going to do a toggle and loop closure. We've got lots of antler around and I can cut the tip off a prong to make a toggle. Pictures when it's done. Thanks, everyone. http://www.britishblades.com/forums/showthread.php?6066-Sheath-Tutorial-for-Axe
-
WOW! I'd done a Google search for directions, but didn't think to do one for images. There's a lot of imaginative, talented people out there. I hadn't thought of the kind that look like a wallet with a slot in the bottom for the handle and a fold-over top. I don't think I'll do that this time. I've seen some fasteners I like though. Thanks, Tree Reaper!
-
Kansan, I like the basketweave one most of all. Thanks for showing me.
-
Kansan, I know exactly what you mean -- we used to keep bank documents in big heavy envelopes that closed like that when I first started doing office admin. Thanks. I'm going to go look at your picture now. I'd have cut out leather today, but like so many other days, this one went sideways. It's 5:30 and I HAVE managed to get groceries, but that's all.
-
One of the problems is, I don't know the client. We're doing this online and have never met. He did send me a link to a site that has a picture showing me how he wants it. (I don't mind to aska stranger how tall he is, but I'm a little shy about asking about his belly size.) If I blow that up enough to measure the angle on the one the picture, and it's 30 degrees, then I cut the loop at a 30 degree angle from the short edge? ChiefJason, the tutorial on British Blades is like that. He cuts the sheath, does the tooling, grooves the stitch line on the front and punches the holes through the top only. He adds an extra line of holes for the belt loop just inside the ones for the whole sheath. Then glues in the welt and puts the stitching holes through that. Sews the loops in place on either side and then puts the whole thing together. He dyes before gluing and stitching, and reminds you to do the tooling first too, cuz he had the loop sewn on before he did. That's how I was thinking of doing it. Thanks, everyone.
-
My second question for the day. Well, it's my second commission for the day -- that ain't bad. I belong to a knifemakers' group on FB. One of the guys asked about a sheath maker. I told him to Google Paul Long. And the next day, since he'd no other answers, I posted a picture of a sheath I'd done for someone last year, similar style, and told him my technique has improved since then. Which is true, thanks to all y'all. But he wants a crossdraw sheath, to sit just below flat. I've never done one. Found a great tutorial on British Blades, lots of pictures; looked at lots of posts on cross-draw sheaths here. (Not making a pancake.) I'm looking for what angle to attach the belt strap, or how to figure out the angle. I'm not making enough on it to want to experiment a lot and have to start over. Thanks again, in advance here, and for past help in general.
-
I wasn't very clear, was I? No-one's going to carry this on a belt -- but I'm used to making belt sheaths for knives and I hate any kind of restraining strap with a snap or stud on it. So, they're not my best thing. I'm thinking about a snap for this cuz it's flat. I'll check out the British Blades forum -- haven't been there for a while, and I'll look up wranglerstar. Thanks, both of you.
-

What Is The Appropriate Punishment?
MorningStarL replied to tboyce's topic in Leatherwork Conversation
Somehow this reminds of the guy who asked his best friend, while they were fishing: "If I go first, promise you won't let my wife sell my fishing gear for what I told her I paid for it." -
A friend I've made knife sheaths for over the last couple of years just dropped off an axe. I've never done one of these before. I'm looking on line. I'm using 9-10 ounce vegtan, and I know that for this, I'm going to need a strap and snap. I can do those but I make knife sheaths that don't need them, cuz they're such a pain when you need to get your knife off or back on your belt. If you know something that might help me make a better axe cover, please tell. I really like the guy who brought it and I want him to have the best possible.
-
New Techniques For Me
MorningStarL replied to MorningStarL's topic in Gun Holsters, Rifle Slings and Knife Sheathes
Thanks, Joel. I'm going to try that. -
New Techniques For Me
MorningStarL replied to MorningStarL's topic in Gun Holsters, Rifle Slings and Knife Sheathes
Thanks, Eddie. I had the awl chucked into the drill press, not turning it on, and pressed it through. It's 9-10 ounce vegtan, and what it does do is hold the knife perfectly without a strap. That was important because it's going in a purse or pocket and not on a belt. Boy! That's elegant, Eddie. -
New Techniques For Me
MorningStarL replied to MorningStarL's topic in Gun Holsters, Rifle Slings and Knife Sheathes
Thanks, Stu. I got some help from some of the guys about the stitching holes. I'm using an awl. I have a worse time of it near the open end of the ssheath and I think that's because it is open. I've skived the welt down to nothing at the bottom and it's pretty solid -- but at the top that big open space is hard to hold steady. It's the sheath that shifts a little, not the awl. I think if I start using a pony it'll hold the whole thing tight enough together that the learther won't distort under the pressure of the awl. (I hope.) -
This is the first sheath I've made in full since joining. So my stitching holes are made with an awl, and I use hidepounder's edge technique, and I read a lot about finishes. I have an almost half-full bottle of the old formulation of Super Sheen, which I haven't used before and prolly won't again cuz it's too shiny and looks like vinyl instead of leather. I tried using neutral shoe polish over it to dull it down, but it didn't work. Largely, I'm pleased with this. The stitching holes didn't go through straight though, and the B-side is wobbly. The stamping is more ornate than I like or usually do, but I completely misjudged how much room I needed for a pair of leaves, one of my new favourite stitch-line trims. It doesn't have a belt loop because the woman who's getting it doesn't wear belts and wants a knife to carry in pocket or purse. Can't think of anything else, but if you have any suggestions for improvement for next time (I got a lot of good ones on the stitch line on the reverse side on the another forum here already), please give them!


-
I like the lettering and the colour. Thanks for sharing.