particle
-
Posts
1,352 -
Joined
Content Type
Profiles
Forums
Events
Blogs
Gallery
Store
Everything posted by particle
-

Snap-On Owb 1911 Holster
particle replied to woodandsteel's topic in Gun Holsters, Rifle Slings and Knife Sheathes
Looks fantastic! Love the coloring. Regarding the finish, lately I've been using 50/50 Angelus 600 and water. For my first coat, I brush it on liberally with a sponge brush. This helps it soak into the leather much more than airbrushing allows. I brush until the finish is almost completely absorbed into the leather, and am careful to not dunk my brush in the solution too much, as by the time I'm done, it's acting more to absorb excess than applying more finish. For the second coat, I use the same 50/50 solution, but I apply it with an airbrush. This usually entirely kills any uneven appearance in the finish. Did you dye it before assembly, or after forming? I don't know, but maybe it's possible the alcohol is cutting the glue, which is resulting in your lifted edges? Did you scuff the grain side of the leather prior to gluing down the exotic skin? -
If you still have problems, I posted the free video (in 3 parts) on Youtube as well. Part 1 Part 2 Part 3
-
Looks nice! Wish we could see more of it...
-
Very nice! If you had to guess, how many holsters like that could you make out of that one bag of pieces?
-
Looking good! Is that Herman Oak leather? If you're looking for input, I'd say your edges look a little sharp. Personally, I would try to relocate your over-stitch / lock-stitch to a lower portion of the reinforcement on the back of the holster. They over-stitch / lock-stitch never looks very good from the back, and moving it down a couple/few inches on the back (perhaps to the spot just prior to where the reinforcement begins to wrap around the slide) would help hide it. Otherwise, nicely done!
-
Great looking leather! Very nice.
-
Avenger For Defender
particle replied to colt1911's topic in Gun Holsters, Rifle Slings and Knife Sheathes
Looks great! You might try pulling the slot for the belt slot on the reinforcement towards the trigger guard maybe 1/4", and also move the trailing edge of the reinforcement toward the trigger guard about 1/4" as well. And definitely give HO or W&C a try with your next order. -
Help Creating First Pancake Holster Pattern
particle replied to mlapaglia's topic in Patterns and Templates
Looks pretty good. I'd suggest pulling the top of the holster away from the grip area - you want to make sure you can wrap your fingers around the pistol grip without catching on the leather. Regarding your stitch line, you want to offset it at least 1/2 the thickness of your firearm, plus maybe another 1/16" to 1/8". This helps allow for the thickness of the leather, as well as a molded sight channel. Lastly, I'd suggest you use a bad section of your hide to try out your pattern for the first time - especially if you plan on lining it - no sense in wasting time and "money" on a pattern that isn't quite right, and you'll learn a lot about your pattern the first time you build a holster from it. -
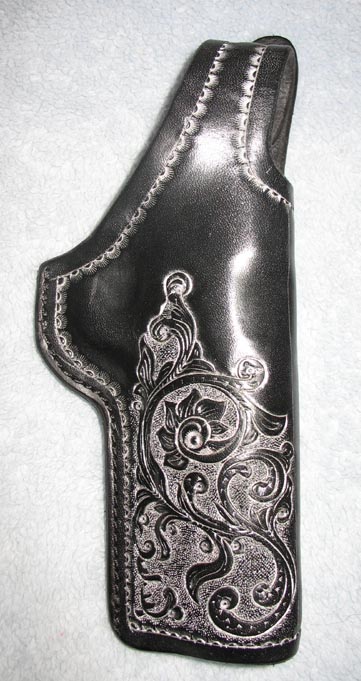
I believe in previous posts he has said the graphics are burned in with a laser.
-
New P220 Iwb Holster
particle replied to Shooter McGavin's topic in Gun Holsters, Rifle Slings and Knife Sheathes
Cool - thanks for the pic. Makes total sense. Not sure I'd ever seen any his holsters before. -
Hi newfiebackflip - were you referring to my post? If so, you can find a free video I posted a while back on my website listed in my signature.
-
New P220 Iwb Holster
particle replied to Shooter McGavin's topic in Gun Holsters, Rifle Slings and Knife Sheathes
Very slick! Is that basically a clam shell design with reinforcements sewn on before folding the holster closed? Nice looking holster. Can I ask why you used different finishes on the black and mahogany? -
Old Style Cross Draw Rig
particle replied to katsass's topic in Gun Holsters, Rifle Slings and Knife Sheathes
Very nice! -
You need to wet your leather first before you bend it. When I make an Avenger style holster, which is what I assume you are trying to make, I take a wet sponge and dampen the exterior grain side a little, then apply a liberal amount of moisture to the flesh side with my sponge. This should prevent the leather from cracking.
-
Have you tried scrubbing the tooling with a dry, clean tooth brush (or shoe shine brush, as the instructions on the container probably recommends) to remove the excess polish?
-
I have mostly blue guns from Rings, with a few aluminum dummies from Duncan. If an identical dummy is available from Rings and Duncan, I will choose the Rings dummy every time because I like the detail of the Rings dummies better. If Duncan has something that I need that Rings doesn't carry, I have no problem buying the Duncan dummy.
-
Sanding Holster Edges
particle replied to Garange's topic in Gun Holsters, Rifle Slings and Knife Sheathes
I use a drill press with sanding drums of various sizes. I also have a little sanding drum for my dremel that I use to get into the really tight curves around sweat shields, but I also mount that in my drill press. -
Is Leather Quality Dropping?
particle replied to George B's topic in Gun Holsters, Rifle Slings and Knife Sheathes
I haven't been at this long enough to know much difference, but I've certainly been less than impressed with my last two orders from W&C. I noticed the same things you described on my previous order. With my current order, I asked them to split it down the to 8oz, thinking that would eliminate the unattractive flesh side, but no luck. Still large (several square feet) sections of "raw" looking spots on the hide - with multiple deep cuts. Also noticed this particular hide is very difficult to edge with my edger. Maybe this is all normal and I just need to get used to it - but I figured I was paying for "the world's finest" and was expecting a little more than what I have been receiving. -
Painted Holster
particle replied to 1911 Jerry's topic in Gun Holsters, Rifle Slings and Knife Sheathes
I believe this is the holster you're referring to. I can't remember who made them - I saved them locally for inspiration down the road (and so I wouldn't have to find them again).
-
Opinions On These Pancake Designs...
particle replied to Wareagle50's topic in Gun Holsters, Rifle Slings and Knife Sheathes
Make sure the top edge of the holster doesn't interfere with getting a good combat grip on the firearm. You want to make sure you can still wrap your fingers around the pistol's grip without the holster getting in the way. Also, I don't think you've allowed yourself enough room for a stitch line around the firearm. You need to allow, at a minimum, 1/2 the thickness of the firearm. Measure the thickness of the slide, then divide that by two, then add about 1/8" - use that for your offset around your firearm for the stitch line. Your sweat shields seem a bit large to me as well. Also, you might want to rethink the cut-out area above the trigger. There's really no need to expose the trigger guard like that - bring the top of the holster just below the mag release. On the orange one - assuming your bold black lines indicate where you want to place the slots, you'll need more clearance above the sloth under the grip - remember that you'll have a stitch line running around the perimeter of the holster - make sure you leave enough room around the slot, or you'll have a weak spot that could easily tear with use. The only other word of advise that I could offer is this - since this is the first time you'll be making a holster from these patterns, I'd start off with some scrap leather instead of the more expensive horse hide. Assume you won't get it right the first time and consider your first attempt as practice pieces - especially since you're making them for someone else. -
Ok Im Finally Proud Of One
particle replied to Wareagle50's topic in Gun Holsters, Rifle Slings and Knife Sheathes
Wareagle50 - you can buy a good bone folder from Springfield Leather. I personally wet my holster, then while the holster is fairly wet, I begin to "find' the shape of the gun with my fingers. I use double layers of 8-9oz leather (totals about 1/4" thick), and that can be pretty hard to manipulate if the leather isn't wet enough. However, if the leather is too wet, you'll be like a dog chasing his tail - it's fun to watch, but he just keeps running around in circles... As the leather begins to dry out, you can begin refining the detail of the holster with your bone folder's smooth edges, then proceed to the sharper edges of the folder to cut in the detail. I like to use a pear shader to help make the indention in the trigger guard area. You might also take a look at the craft section of your local art supply store - look for their clay modeling tools. You should be able to buy a set of wooden modeling tools with various edges, shapes, curves, etc. Sand them smooth, seal them really well, then buff them smooth and they should last a long time. Or, you can just use them as-is, and they'll probably work just as well, though they may wear out more quickly. -
Looks great! May I ask what technique you used for the coloring on the exterior? I'm assuming you dappled a nearly dry sponge or something to that effect along the perimeter? I've wanted to try something like that on my holsters, but haven't gotten around to it yet. Looks great! May I ask what technique you used for the coloring on the exterior? I'm assuming you dappled a nearly dry sponge or something to that effect along the perimeter? I've wanted to try something like that on my holsters, but haven't gotten around to it yet.
-
First Leather Holster
particle replied to colsan3333's topic in Gun Holsters, Rifle Slings and Knife Sheathes
Looks a lot better than my first attempt! Nice job! How did you apply the dye? Nice gun you have there! -
LOL - I forgot all about this thread. I agree - we really need to know more about what kind of holster he's looking to make. Since he said front & back pieces for a belt holster, I assumed pancake. I'd (of course) love to have him watch my video, or there is always Al Stohlman's holster book that's an excellent starting point for someone looking for the basics. I found the following site very useful when I was first starting out: http://www.jdlawhon.com/tutorial.html I just found his other post showing the fruits of his labor. Looks like he's well on his way to building some nice gun leather!
-
Messenger Bag
particle replied to AndyL1's topic in Purses, Wallets, Belts and Miscellaneous Pocket Items
Andy - big fan of your work! Very beautiful stuff. I love the coloring and weathering effect.