


fredk
-
Posts
5,958 -
Joined
Recent Profile Visitors
25,000 profile views


fredk's Achievements
Leatherworker.net Regular (4/4)
-
True or not its a well told fun story I once had a fight with a seagull whilst motorcycling to work early one morning. Them gulls have a big wingspan and razor sharp beak, I won the fight eventually but was covered in white feathers
-
My #1 son and I do the occasional toy car faires. We are usually first to set up and last to leave. Other traders take their time getting in and are usually packed up about 45 minutes before the show ends. We do a ton of trade before the rest arrive & after the other traders are packed up It has been known for us to be still selling an hour after the show closed with the toy collectors coming out to our cars to see what we have We can't understand why the other traders pay a heap of money for a stand and don't stay to the death Our stuff is easily arranged in several plastic boxes; one box is all £1, another is £2 et cetera. Everything is secretly marked to show which box it came from. No sly ones get past us
-
@hansgruber you can get paint pens with an 0.8 mm point. The paint in them can either be acrylic or oil. They are meant for detailing automobiles. I use them on my game boards. I'd use deer skin rather than sheep
-
Its too thin to tool but it takes dye nicely
-

Wholesale hardware suppliers beyond Buckleguy, Tandy, Weaver, Ohio etc.
fredk replied to PheesOriginal's topic in Suppliers
Try Le Prevo in England -
add; and my wee engraving pen, which I've never used. That cost me £6.50 ($7?) But I need to find them in my storage unit!
-
You could do that and earn your money back by offering the heads to other leather workers eg, on here. Do it the 'Airfix' way; make the parts and let the buyer assemble them and paint it (if they want to)
-
a silly thot; ask dieselpunk.ro. (Tony See) I bet he'd come up with a pattern to make a leather one! edit; to correct a word
-
That might be a bit small. Might do for a Shetland pony tho
-
Interesting machine. I see it could have its uses. I might try something with my old Burgess wood carver. Might have found a new use for it
-
When doing a long item I dip dye. I dilute the dye 1 : 1. I use any deep container that I had to hand. Then roll the item up in a coil and place it in the dye for a minute or so then a I see-saw it; an old technique for developing films; I bring the two ends of the item out of the dye then with each end in each hand I slowly dip one end in the dye and pull the other end further out, then that end gets dipped and the first end comes out. I do this for as long as necessary to get an even dye 1.5 ft by 2 ft; I wet the leather first, then use a 1 or 1.5 inch wide paint brush to apply the diluted dye, working from the center to the edges
-
I don't think 3D printing would really work. You'd be paying as much as the commercial heads. I would look for an amateur or hobbyist wood worker to make them from wood; kinda like rocking horses heads but scale bigger
-
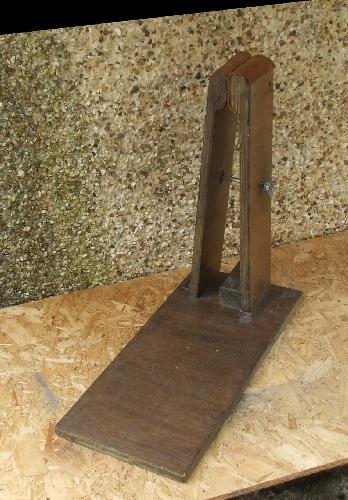
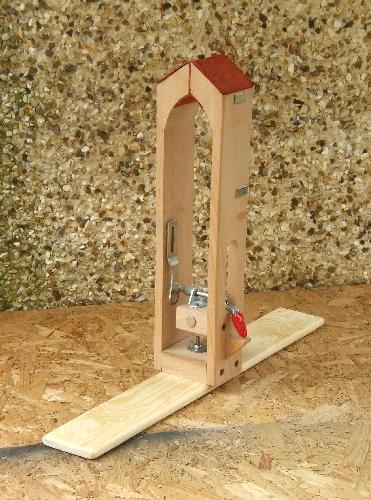
@revilop I would advise you to get a stitching clamp. It'll make things easier, your sewing will improve greatly being able to have something to hold your work in. A clamp can cost as little as $10, but is worth its weight in uranium Or you can make your own from scraps of wood. When I started in this lark 25 years ago I made my own clamp, and still use it My ancient home-made one; My bought in one, more transportable cos it comes apart easily & is smaller;
-
We need more information on what tools you have, what tools you are using and so on
-
afair there is type of hemming or binder tape that is water-soluble. Meant for dress makers to hold a hem whilst sewing then it dissolves in the wash. Could something like this be used?