EdOdgers
Members-
Posts
91 -
Joined
-
Last visited
Content Type
Profiles
Forums
Events
Blogs
Gallery
Store
Everything posted by EdOdgers
-
-
I should add to the above comment that when stretching in a seat, I use a spreader stick to widen the pull of the draw down strap and avoid pulling the seat flaps excessively inward early in the shaping process. If that's not clear, I can take a photo in the next few days when I stretch in the seat on the pictured saddle.
-
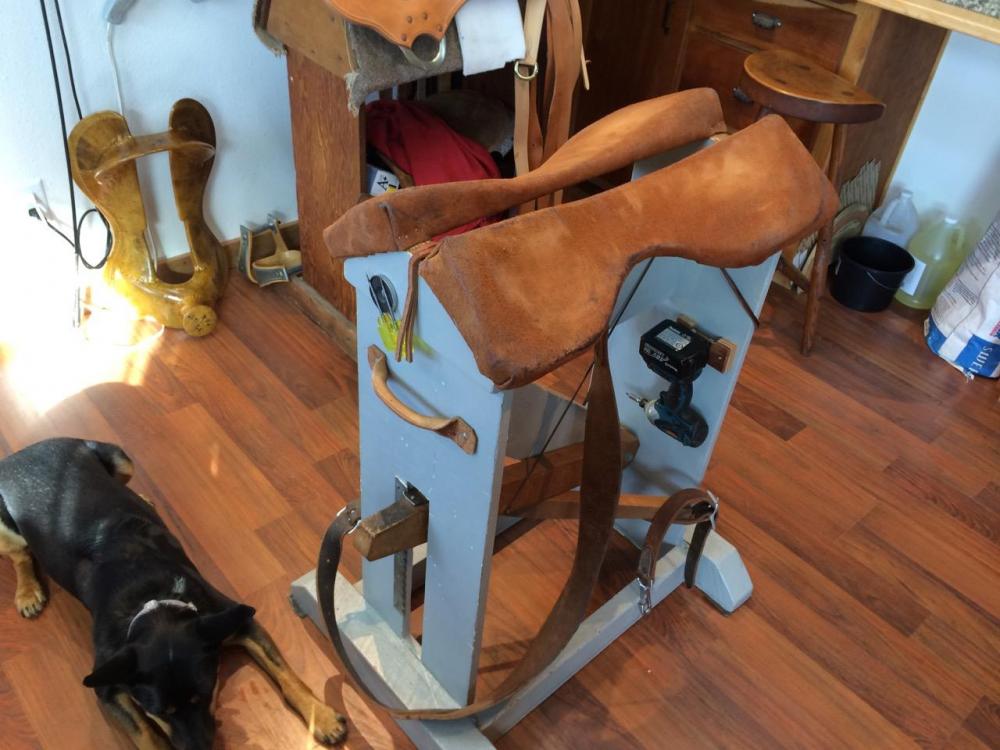
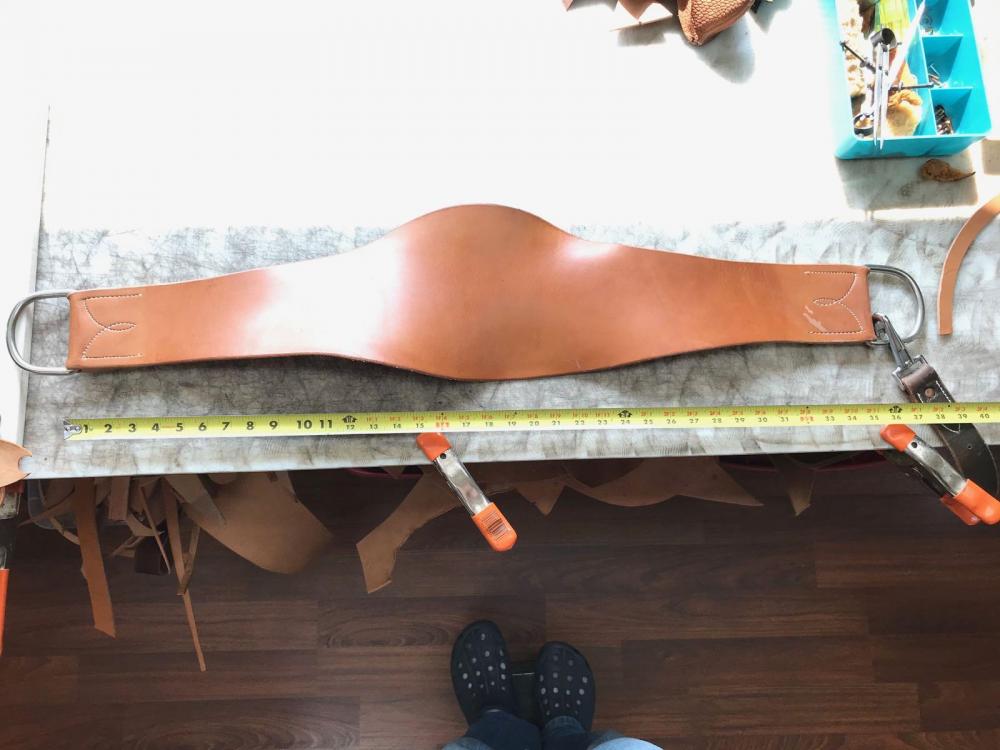
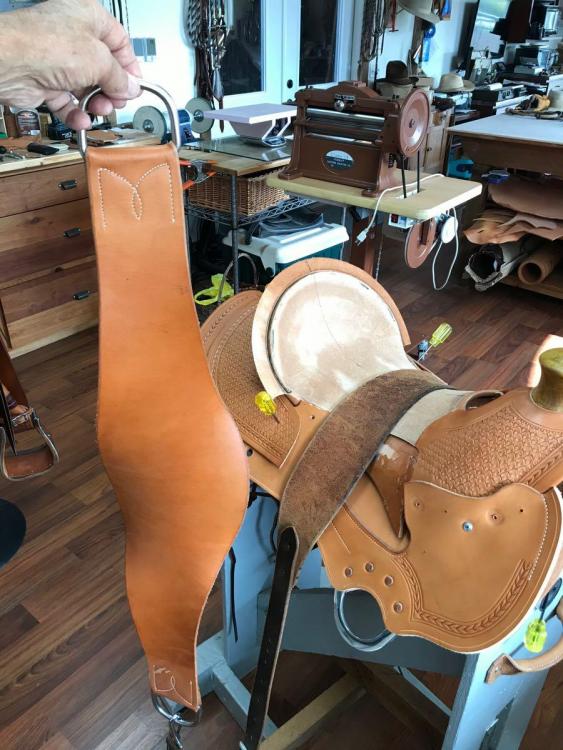
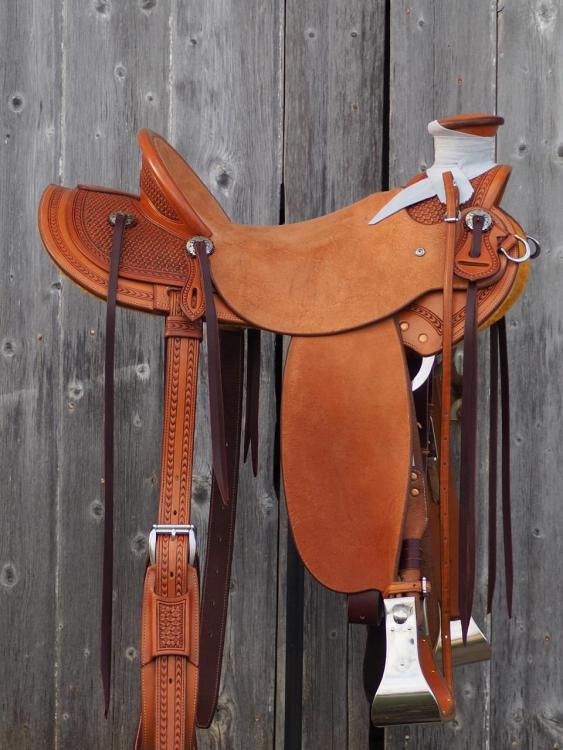
I use two different draw down straps. For general construction purposes I use a simple, straight one (shown on the saddle in the pic below). The other is used exclusively for stretching in seats. I'm very careful with the latter strap and don't want any nicks, glue or gouges on it. I try to keep it pristine so that it doesn't mar or scratch a smooth-out or tooled saddle seat during stretch-in. It's also wider so I can run my rub-stick over it with less risk of rubbing on the edge which could cause a hard to remove crease on the seat. The "seat strap" shown below is 8" wide at its widest, and 36" long.
-
This is a great time to learn saddle making. There are a lot of resources available and folks are willing to help. It wasn't that way 25+ years ago. Try to find a mentor that does quality work and is willing to answer your questions, give you honest feedback, and help you work out problems. You mentioned that you watched the Watt DVD. If you don't already own it, you'll probably want to invest in it or one of the other good DVDs by Mecum, Schwarz, Harwood, etc. You'll need to review and revisit the videos many, many times as you work through your first few saddles. Plan to attend the Rocky Mountain Leather Show in Sheridan, WY next May and take all of the workshops that interest you. You'll also be able to shop for hard to find tools and materials there and meet saddle makers and leather-workers of every skill level from all over the world. Every few years TCA has a saddle workshop in Oklahoma City that shouldn't be missed. To learn about trees, study the wealth of posts on Rod and Denise Nikkel's website and buy their DVD. It's well worth your time and money. As far as tools go, that could be a long, long discussion. Buy quality tools. Invest in sharpening equipment/materials and develop the skills to keep your tools SHARP. One very important tool that is often overlooked is your draw-down stand. Spend the time to make a good one. It needs to fit a tree the way the tree fits a horse. It's also important to have the tree sit level on the stand as if it were on a horse. Choose a style of saddle that you admire most and find the best examples by master makers. Study those examples carefully and try to emulate them successfully before striking out with your own style. That will emerge soon enough. Sketch your saddle designs in detail and list out all of the specifications. Get very good at the basics and building a high quality, good looking plain saddles before investing your time in learning the decoration (tooling, stamping). You can put lipstick on a pig but it's still a pig. Use the best materials you can get, especially the trees. You'll never build a saddle better than the tree. Get in the habit of objectively evaluating your work. Make a list of things you did well and those that need improvement after each saddle. Never utter the phrase "good enough." Finally, because there are a lot of resources and folks willing to help, it doesn't mean its all good. Pick your resources and mentors carefully. You can learn from everyone but often its what not to do. You've probably already figured that out when repairing tack-store saddles. Good luck and have fun.
-
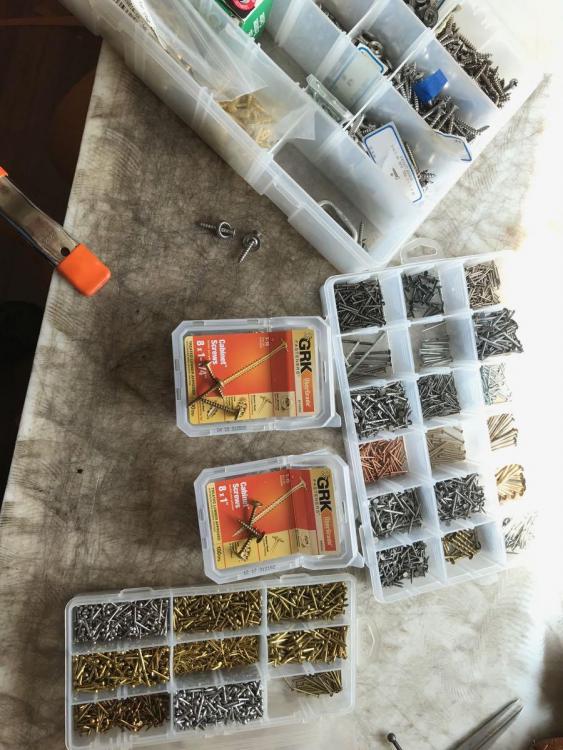
I use a wide variety of nails and screws but no blued tacks. Anything that stays in the saddle is stainless steel or triple coated. I use GRK brand triple coated cabinet screws, mostly 1" and 1 1/4" for final assembly and screwing down conchos, breast collar attachments, etc, etc, (Menards or other large home centers). The GRKs are slender, self tapping, super strong and have a good, flat head shape that holds leather and doesn't stick up too proud. Stainless, oval head screws with cup washers for attaching riggings (Weaver or a very complete hardware store). A variety of stainless ring-shank nails for strainer plates, horn cap filler, etc, etc (Hagel's Cowboay Gear). I use a lot of very thin wire nails for temporarily attaching and fitting parts and when blocking skirts to the tree (hardware store or home center). I like the thin, wire nails for temporary holding as they don't leave a big wound in the rawhide. I prefer to use a screw over a nail for most applications. If it needs to be a nail and it's going to stay in the saddle, it's got to be ring-shank. Lastly, I have an assortment of brass and stainless steel escutcheon pins (round headed nails) for decorative applications like stirrup linings and attaching the back flap of a fork cover that goes down through the hand-hole to the gullet (Weaver and other leather supply).
-
Time and sunlight will continue to darken saddles if you want it or not. I've found that the oil & sun method detailed above by JHayek works even better if you use olive oil. Regardless of the oil used, it may not darken as much as you want. For darker color you can add an oil soluble dye to neatsfoot or olive oil. I think I've purchased mine from Weaver. When using oil/dye mixture, start out easy and don't use any dye with the initial oiling or it's likely to be uneven. Another option is to use dyed skirting. I use Herman and Wicket and both offer a variety of colors and shades. The downside to going this route is that you have a whole lot of scraps of various colors that are hard to utilize. To minimize uneven oil and the blotchy appearance, I like to oil before the saddle completely dries after washing/cleaning and is still fairly moist. The moist leather won't suck up the oil as aggressively upon contact. It will penetrate but more slowly as the moisture evaporates. Prevents over-oiling as well. Unless I've been lucky enough to keep the saddle parts pristine, I too like to use a weak solution of oxalic acid to spruce it up before oiling. Works wonders.
-
English Saddle Pictures Some Of The Stages
EdOdgers replied to gmace99's topic in Saddle & Tack Maker Gallery
Great photos! I'm a western saddle guy but appreciate seeing the process and craftsmanship that goes into the other half. Thanks. -
Superior Stirrup Leather Buckles
EdOdgers replied to bruce johnson's topic in Saddle Supplies, Tools & Trees
I'm in agreement with Ken, Bruce and others. Superior are my go-to buckles. Most riders like them once they understand how to use them. Less mechanically minded folks might get confused and prefer the familiarity and simplicity of the Blevins. Choice is good. Another small plus is that they save a couple of ounces in weight compared to Blevins. I only use the longer post models and sometimes wish they were a bit longer (for leathers over 13 ounces, you can't add a reinforcing strip). One minor complaint is that the grooves cut in the posts for the clips are a bit sharp and tend to grab the sides of the holes punched in the leathers, sometimes making the posts hard to pull out for adjusting. To alleviate this, I soften the edges of the grooves with emery paper and also burnish the holes. Lately I've seen interest in the Farrow style buckles sold by Ron's or Sipp'n Glass. Super simple, compact, light and they don't mar or scrape your latigos. I like them but I've had some hard-riding users tell me that durability is an issue (not the hardware but the locking lace and leathers). ****An important caution to add: For Superior Buckles, I add 5/8" to the length of the stirrup leathers compared to Blevins. For the Farrow style I add 3 3/8" to the stirrup leathers and 2" to the leg of the fender. -
Definitely plug your skirts so they retain their shape. Plugs should extend to the bars and be skived to lap part way onto the bars to help retain the blocking or bedding. If your skirts are 13/15 ounce skirting you will want to split down your plugs. I like the total skirt/plug thickness to be 20 to 22 ounces, no more. I can't imagine wanting 30 ounce thick skirts, they would look and feel like they were cut out of plywood. Plug under the riders leg but skive it down to 1/2 thickness. Omitting the plugs there will be nice at first but turn sloppy soft after years of use. I generally don't make a saddle with heavy weight (13/15) skirting, though I like to have some around for stirrup leathers on a working saddle. Even for a hard-use saddle, I think medium (12/14) makes an ideal thickness for the fenders and seat and even lighter skirting will be fine for jockeys, cantle backs, skirt plugs, etc. With rare exceptions, my saddles are now made entirely with medium and light skirting. Remember, most of the leather's strength is in the dermal side (hair side) and doubling the thickness doesn't double the strength. That said, thicker leather retains its body or stiffness longer and some riders prefer that to lighter weight. I always order a mix of skirting thickness. When ordering 10 sides of Hermann Oak I usually get a mix of medium (12/14) and light (11/12) along with one side of heavy. For lightweight saddles I will use the 11/12 skirting sides for everything except the stirrup leathers. This makes a nice saddle that is 32 to 36 pounds and still durable enough for most folks. Six cord linen for saddles. No need to go to 5 with the exception of fine work for bridles etc. There are also some nice polys available for hand stitching. Check out Gordon Andrus for techniques and thread. I don't recommend many of the methods in the Dusty Johnson book and especially don't like the ground-seat procedure and end product. There are much better resources available for learning saddle making than the Johnson and Stohlman books. Consider the excellent videos by Mecum, Watt, Harwood, and Schwarz.
-
Leather not metal. Metal will be noisy and wear out. Use good skirting, case it well befor folding. If this is to be a pair of rings for a breeching, screw to tree bars and have jockeys cover all but the ring and fold of leather. That way you can lift the ring up to feed in the strap. If for a crupper, incorporate ring into frog and screw the tab into the bottom of the cantle gullet.
-
I didn't want to come right out and say it but I agree with BigSioux. Your saddle can never be any better than the tree. That and the fact that I'm going to spend up to 100 hours to finish a saddle, compels me to use the best trees I can. That said, I don't know your skill level, expectations, budget, etc. so it's your call. The information about the symmetry of the tree isn't conclusive to determine if it needs to be rejected from that standpoint. The 1/8" of rocking is about as much as I would accept, given that variations in the thickness of rawhide could cause nearly that much. As far as the square and center measurements you gave, I don't think your methods are going to accurately conclude that the tree is or is not square. I don't recommend establishing center-line and reference points by standing the tree on either end. Because the distance between the bar tips is so short (about 1/3) compared to the length of the tree, the slightest variation at the bar tip will throw the tree out of vertical in an exaggerated way. The tree maker might have sanded one bar tip a bit more or maybe the rawhide thickness as it is gathered and folded across the edge is varied. Either or both of these could make an otherwise good tree appear to be off by a fair bit. I think there are better, more accurate ways to evaluate and lay out a tree that doesn't rely on standing it on end. It's pretty difficult to describe in writing how to lay out a tree but I start with the tree laying on a flat surface (I use a piece of thick plat glass 24" X 24") then have two hardwood 3/4" X 3/4" X 24" sticks flanking the bars on each side. With two machinist's or tri-squares, one on each side and a steel ruler between, I establish center-line at the cantle, horn cap, fork. I place tape across the bar-gap and mark the center-line behind the cantle and at the stirrup leathers. At this point I use a laser to mark symmetrical locations for rigging and stirrup slots. Before the laser I used a large dividers and a carpenters square (just as accurate just slower). You might get the idea. If not, I'll take a few photos with the next tree I lay out.
-
Its imperative to maintain clearance over the spine for both horses and mules, no exceptions. Design and construction principles won't vary between a mule and horse saddle. The spinal process (ridge of bone extending vertically) of each vertebrae is not covered by muscle and is very near the surface along the top-line, making it vulnerable to injury. That's why our saddle trees have a gullet under the fork and the bars are spaced about 3" apart. That clearance should continue under the cantle where there is another "gullet" or arched area to create clearance. Skirts should be "blocked" or "bedded" to the tree bars such that the skirts are molded away and don't apply pressure to the horses back. When blocking skirts, you'll need to mold the skirts up into the gullet under the cantle and continue that arch to rearward to the bar tips. In addition to proper blocking, the angle of the cut on the skirts where they come together behind the cantle needs to cause the joined skirts to flare upward, continuing the angle of the bar. When cinched down, you should be able to slip your hand under the skirts behind the cantle fairly easily until the bars are encountered. Beyond the bars, the skirts shouldn't apply pressure to the back, period. Thus the saying "ride the tree, not the skirts" is important for saddle makers to adhere to. If the saddle maker hasn't molded the skirts to maintain that arched tunnel under the cantle and behind it, or if the skirts aren't cut properly to angle up up away from the horse behind the cantle, there will be pressure and friction that may sore a horse or mule in the loin area. This is a fairly common but easily avoided problem. Lacing the skirts together can add to the problem by not allowing the skirts to flex away from the horse. Also, the added thickness of the lace can cause a pressure point. All this is avoidable with proper blocking and the proper angle on the skirts where they join. The problem is caused by improper construction, not just the lacing. A properly built saddle can have the skirts laced together and maintain good clearance. That said, lacing the skirts together is not essential and could be eliminated if you made other provisions to secure the skirts to the tree. My practice is to install two screws through the skirt edges and up into the gullet of the cantle. This helps secure the skirts and ensures that the arch I molded into the skirts is maintained. I normally lace the skirts together behind the cantle but haven't always. I usually don't lace past the bar tips and not so far back as to be visible from under the jockeys. Leaving the last few inches of the skirts unlaced allows the skirts to flex away from the horse if the saddle happened to be used on a horse with unusually prominent muscles on their croup. Occasionally I have laced all the way to the back of the skirts as a design feature. This shouldn't cause any pressure or problem if you have designed ample upward flare to the back of the skirts. If you don't lace the skirts together, I suggest the previously mentioned screws into the gullet of the cantle and stitching pockets onto the topside of the skirts to slip the bar tips into.
-
I apply the beeswax/oil mixture after the initial oiling of the rough-out saddle. I don't have specific recipe to give you since I've always made it by eye and feel. I usually make up a few cups to a quart at a time. Start with a cup or so of olive oil in a glass or microwave safe plastic container. You could use a quality neatsfoot oil but never use neatsfoot compound. Warm in microwave until it just melts the beeswax. The temp will be too hot to touch (150-175 maybe) but don't overheat. Break up about a cup of solid beeswax into small chunks of about one cubic inch or so. Slowly add beeswax, allowing it to melt before adding more. Keep adding bees wax and reheat, if necessary, until the consistency of syrup. This part will take experience. It should solidify when cooled to room temp but remain soft enough to push your finger into it and leave an indentation. If too hard when solid, reheat and add oil; too mushy, add beeswax. To apply, reheat and completely liquefy in the microwave then cool a little until you can tolerate to touch it. Dip a piece of clipped sheepskin into the liquid and start rubbing it on. It helps if the saddle is in a warm place or in the sun. Cover small areas at a time, working it into the leather and removing the excess before it cools and solidifies. Its going to look like a real mess at this time but keep rubbing to even it out and remove any build-up. You can use a hair dryer to rewarm and work out any spots of build-up. When finished, put it in the sun or other warm place (near my wood-stove in the winter) for a day or two and it will even out more. The goal is to have the warm oil/beeswax mixture penetrate 'into' the leather not 'on' the surface. Reapply every year, more or less depending on use. The wax will resist evaporation so the leather won't dry out for a longer time than oil alone. The beeswax helps to shed water and resist mold. Like other saddle butters, compared to applying straight oil, this mixture helps prevent over-oiling since the leather won't absorb it excessively. Related note: Over-oiling can soften leather so I'm very careful not to over-oil stirrup leathers, particularly in the vicinity of the buckle holes. I also use this mixture at room temperature to lube saddle strings and lace. I simply run the string or lace over the solidified mixture, then rub it in. Warning, this is not the finish to apply if the client wants a pretty, fuzzy, light colored rough-out. If that's the goal, stick with a lighter application of straight oil and don't put on this mixture or any other saddle butter. This finish will be darker, slicker and may look a bit blotchier initially but it will be a super durable finish that can take the weather. I've known other saddle makers to use the oil/beeswax mixture but I've never heard any specifics. I encourage them to chime in and describe their methods.
-
You won't need to re-varnish but do allow the rawhide to completely dry before applying glue. Also, only rehydrate the area that needs to be nailed down. Varnish of some sort is applied to rawhide covered trees to stabilize them after drying and to prevent the trees from absorbing moisture. A layer of barge cement should also act as a moisture barrier. To maximize adhesion, most saddle makers lightly sand where glue is to be applied. There is debate about the usefulness of sanding to improve glue adhesion but the point I'm making is that it is commonly done and, provided the sanded surface is coated with barge, it won't be a problem. Since I mentioned preparing glue surfaces by sanding, which I do, I should add a warning to never sand or roughen the rawhide so deeply that the rawhide surface is scored. This is especially important for the bars in the vicinity of the stirrup leather slots, an area of high stress and potential failure.
-
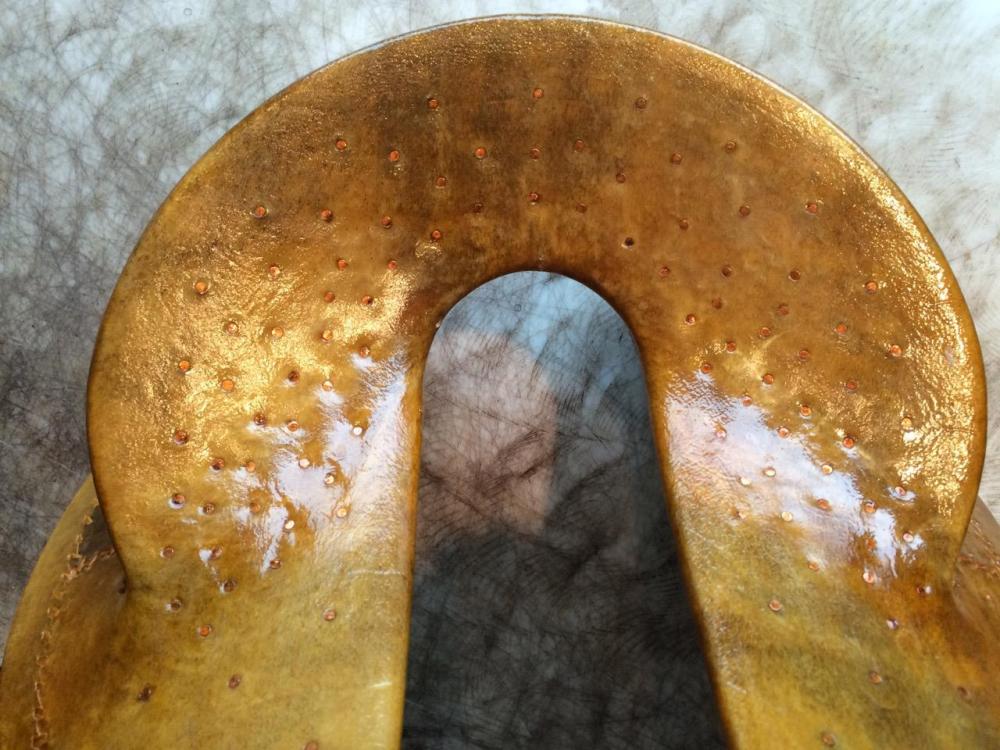
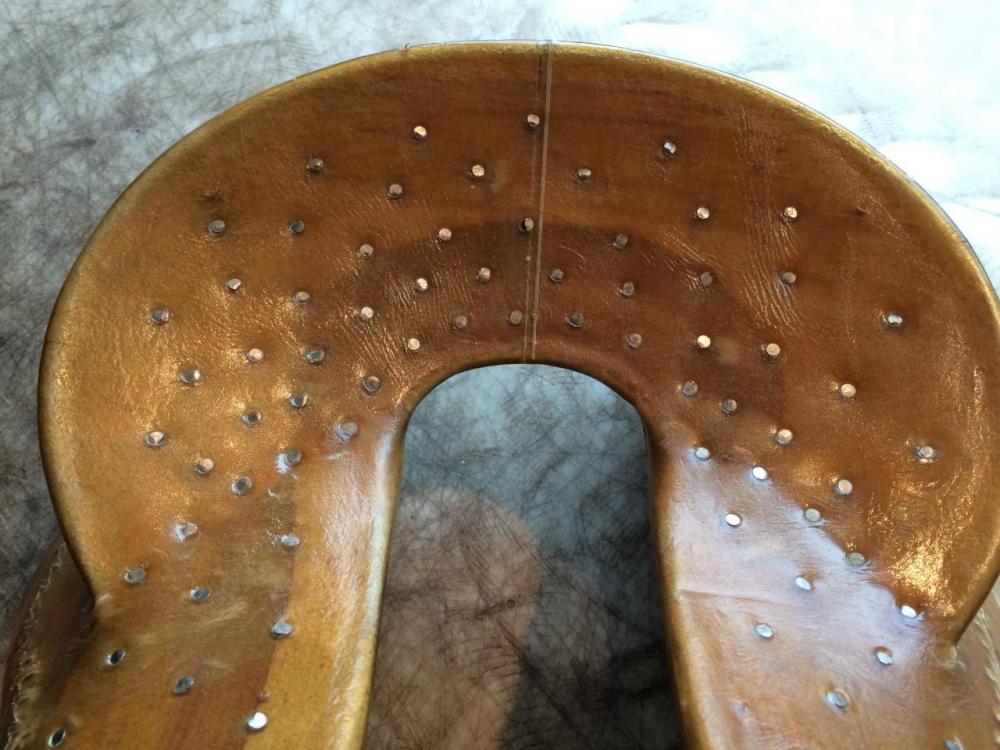
DirtyDusty, The rawhide work shown in your picture is definitely not normal, at least not for what I consider to be a well made tree. Below are a couple of photos of trees in my shop illustrating how the dish of the cantle is commonly secured. The trees are from two different, first rate makers. Looking at the above photo of your tree, It appears that the rawhide is bubbled up in a few places within the dish of the cantle. Needless to say, the stapling job was inadequate, even if staples are considered appropriate, which I don't. I presume that the bubbled up spots can be pushed down and pop back up, right? If so, and if you plan to use this tree, I think you will need to nail these areas down tight to the cantle. I suggest using small ring shank nails of about 3/4" to 1" length and a head of about 3/16" diameter. If you have a lot of flattening to do or if the nails are cracking the rawhide, you should rehydrate and soften the rawhide. To do this you will need to lightly sand off the protective varnish and place a wet rag (wring it out well) on the area to be flattened for a few hours to overnight. Before deciding if you should hydrate the rawhide, try a nail or two and see how well it works without wetting. However you do it, it will be important to have the dish area of the cantle secure and tight against the wood. During installation of the groundseat you will be gluing leather into the dish of the cantle and then sculpting it to the desired shape. If the bubbles are left in the rawhide there won't be a solid, consistent base under the leather which will make carving the groundseat difficult and may leave a hollow or spongy spot in the finished seat.
-
Do you mean that the tree maker used staples to hold the rawhide down inside the cantle dish and other concave areas where it would pull away when drying? If so, you could pound them down flush. I'd also pull the staples that are bent over. I presume that the rawhide seams are sewn together with rawhide lace and not stapled, right? Sure hope so. You are right that most (all that I've seen) tree makers use small ring shank nails to hold down the rawhide in the areas described. Ideally, your tree should be fairly smooth. Significant bumps can telegraph through the applied leather. Depending on the location, that may or may not be a problem. Proper rawhide application to a tree includes a slow drying process with daily pounding down of the seams and bumps to ensure the cured rawhide is smooth and skintight to the tree. I'm suspicious that if they left proud and bent staples that the tree may have other issues??? Before you start construction, now would be an ideal time to check the fit of the tree on your mules. You can really see the fit in ways you can't with a finished saddle. Check fit first without any pad and then with a moderately thick pad to simulate the final fit. The fit won't change in terms of even contact but the front of the tree will rise with the pad, giving you a better assessment of wither clearance and help determine where the tree is level with the animal. Knowing where the tree is level is important to determine the cut of you skirts/jockeys, rigging location/alignment, as well as the construction of your ground seat (pocket location and rise). Make sure the tree is positioned properly on the back with the bar tip just behind the shoulder blade. On good-backed horses and mules a proper fitting tree will fall right into place there. On animals that lack withers there won't be a real definitive place where it wants to fit in. Those are the mules that will need a breeching and breast collar.
-
Nice! Compact, elegant lines. Impressive how you carved the fork lip (swell/gullet transition) of the one-piece cover. The flowerless carving is unique and flows. Who made the tree?
-
Covering a saddle-maker's stand?
EdOdgers replied to Squilchuck's topic in Saddle Supplies, Tools & Trees
Yes. High density styrofoam was glued to 3/4" hardwood boards then sculpted to achieve the horse shape. I also made a similar stand with thick white pine planks, then sculpted the pine. This worked well too but was a lot more work to carve. I used white pine because it is a softer wood and has good carving qualities, plus its what I had on hand. The sculpted wood was later covered with a 1/4" thick foam rubber for a bit of cushion, then leather. The foam is much easier to sculpt and as a base it doesn't require the rubber padding as it has a little bit of give that helps the tree make good contact. Having done both, I recommend the styrofoam for ease of construction. Both stands described above hold a tree well and have a good "feel" to them when pounding, rubbing, carving, etc. Some stands I've seen (some commercially available) are heavily padded to create a conforming shape. I haven't worked on these stands but suspect they would be too bouncy. I appreciate a solid base particularly when nailing, carving a ground seat, or molding a seat. The styrofoam I used was the variety of building foam board used under concrete floors. It's the blue or pink stuff at building supply stores; Extruded Polystyrene (XPS). Its similar and looks like the foam board installed on the exterior walls of new homes but is a denser version or higher compressive strength rating (25 psi or greater). The standard density material would probably work fine but not last as long before compressing and deforming from repeated use of numerous of saddles. -
turning a barber chair into a draw-down pointers please
EdOdgers replied to MarkB's topic in Saddle Trade Resources
You might find this thread useful: -
As an update to an old but valuable thread, I'd like to add that Steve Mecum now has a instructional DVD. He makes a fine saddle and I've seen bits and pieces of the DVD and it looks very good. Also, I understand the Harwood DVD is no longer in production.
-
Are these decent production saddles?
EdOdgers replied to CourtneyYEG's topic in General Saddlery Discussion
McCalls are ok production saddles. Made in Vernal Utah on Timberline trees which will fit a horse just fine. You could also look for a quality used saddle but do your homework carefully. Wade, Association, etc. are the names given to saddle trees based on the shape of their fork. The name has nothing to do with how it will fit the rider or horse....absolutely nothing. Each company or tree maker will also have their own interpretation of what a Wade, Association etc. fork will look like. There is no standard within the industry on what is a Wade or Association or what semi-quarter horse bars are, etc. How a tree fits a horse will depend on the bars of the tree and that will depend on the patterns and skills of the tree maker, which will vary from maker to maker. Most higher end saddle trees will not have a pre-made seat. The saddle maker will install a "ground seat" that is unique to their style and skill. Thus, how a saddle sits for the rider is dependent on the skill of the saddle maker. Learn everything you can and keep asking questions. Good luck. -
There are advantages and disadvantages to any rigging style but I'm one that believes a good skirt rig is every bit as strong as a flat-plate. Close contact and weight savings are advantages to the skirt rig but the downside is they are trickier to build, complicated to reline and repair, and some say are more prone to damage by sweat if used real hard. I don't think the last concern is valid if you're using a good pad system but then again, I don't live where the temperature commonly exceeds 100. My skirt rigs resembles the top panel of a flat-plate. I'm very fussy about the leather I select for the rig panel and the skirts. Here is the weight savings I get with my style skirt rig compared to a flat plate: Eliminate rig liner at 1lb. 2oz.; eliminate skirt plugs for the front half of skirts for savings of 10 oz.; Optionally eliminating hardware for rear rig for savings of 13oz. Thus the total savings is 1 3/4 lb. if retaining rear rig hardware, or a savings of 2 1/2 lb. if eliminating the rear hardware and using a slot for rear rig. I was a diehard flat-plate guy for many years but started building and riding skirt rigs after roping with Dave Weaver (Californios) and getting his endorsement for the durability of skirt rigs over 15 years ago. He's roped more critters than anyone I know. I now make more skirt rigs but still like flat-plates for some uses and riders. Below are a couple of pics of my versions of skirt rigs, one with slot, one with hardware for rear rig: Note that the slot for the rear rig is through three thicknesses of skirting and surrounded by three rows of stitching. The skirt plug is extended forward for the third thickness. I feel this is every bit as strong as rivet-on hardware, so it comes down to personal preference like so many saddle features.
-
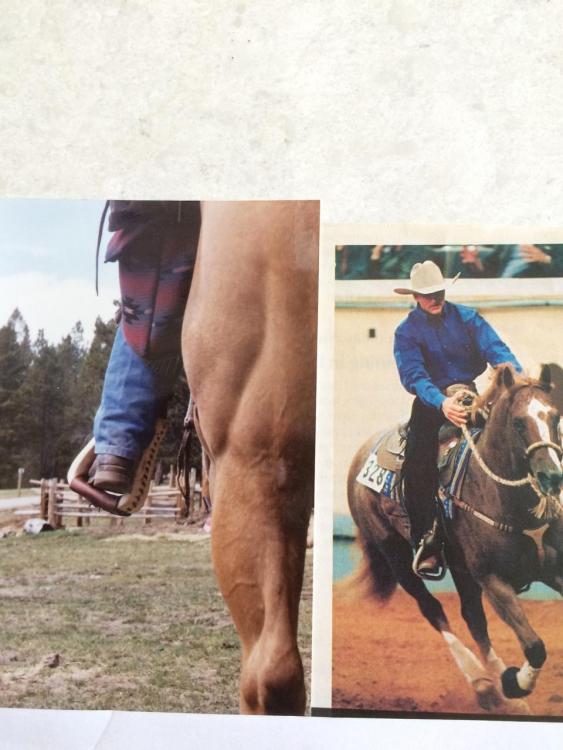
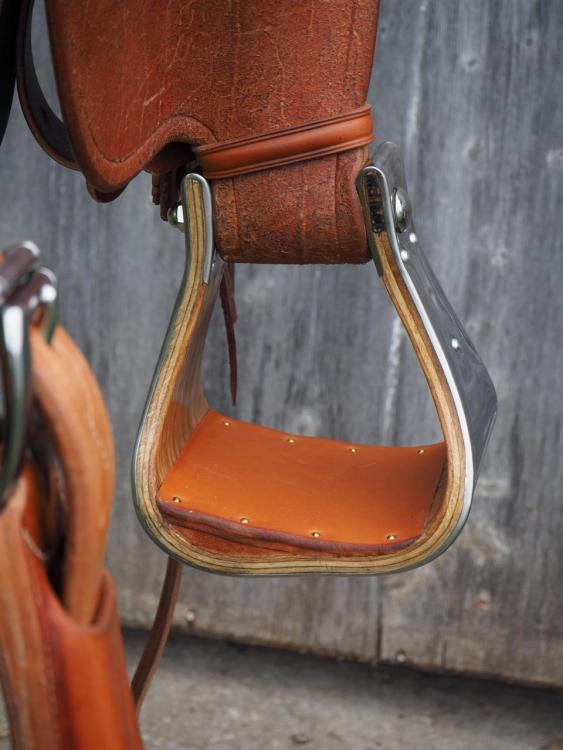
Testimonial photos that argue for angled stirrups followed by a pic of a more dramatic buildup in a monel stirrup. In response to Cattledude's comment, I've seen and like the Orell stirrups but noted that they don't come in wider widths or the very popular monel style. Do they custom make them wider? I'd like to add that it's important to make the foot-surface of any stirrup dead flat or the rider will get sore cramped feet.
-
Covering a saddle-maker's stand?
EdOdgers replied to Squilchuck's topic in Saddle Supplies, Tools & Trees
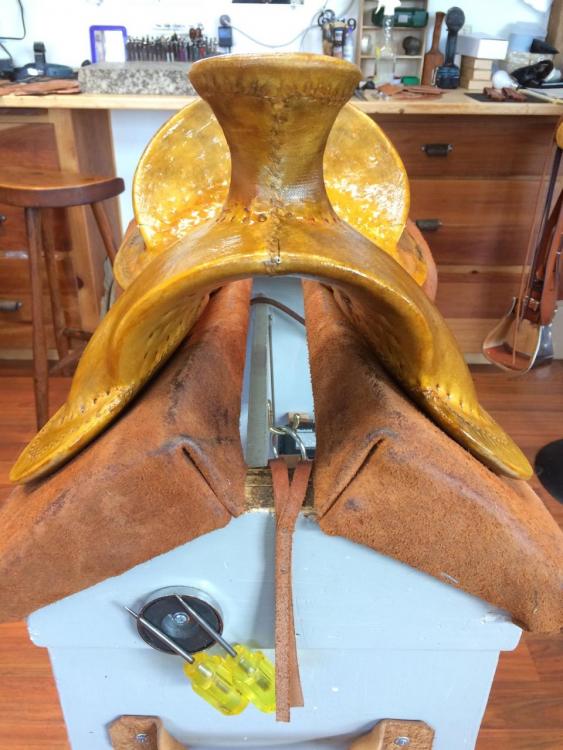
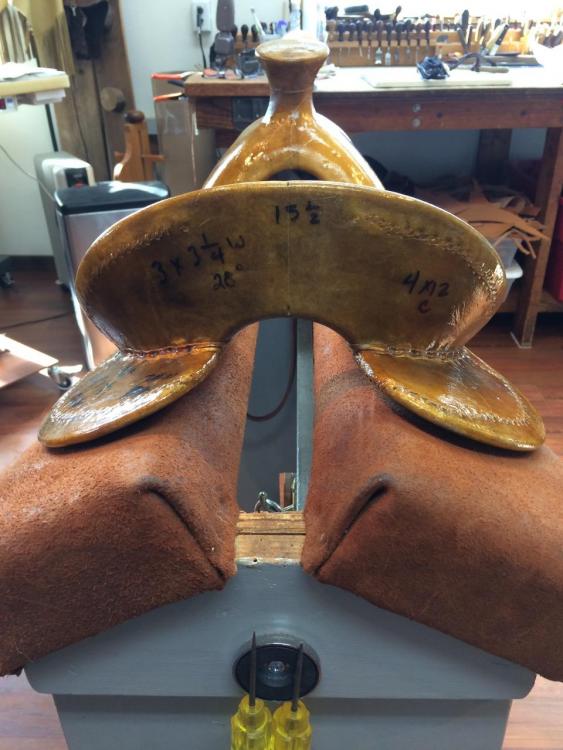
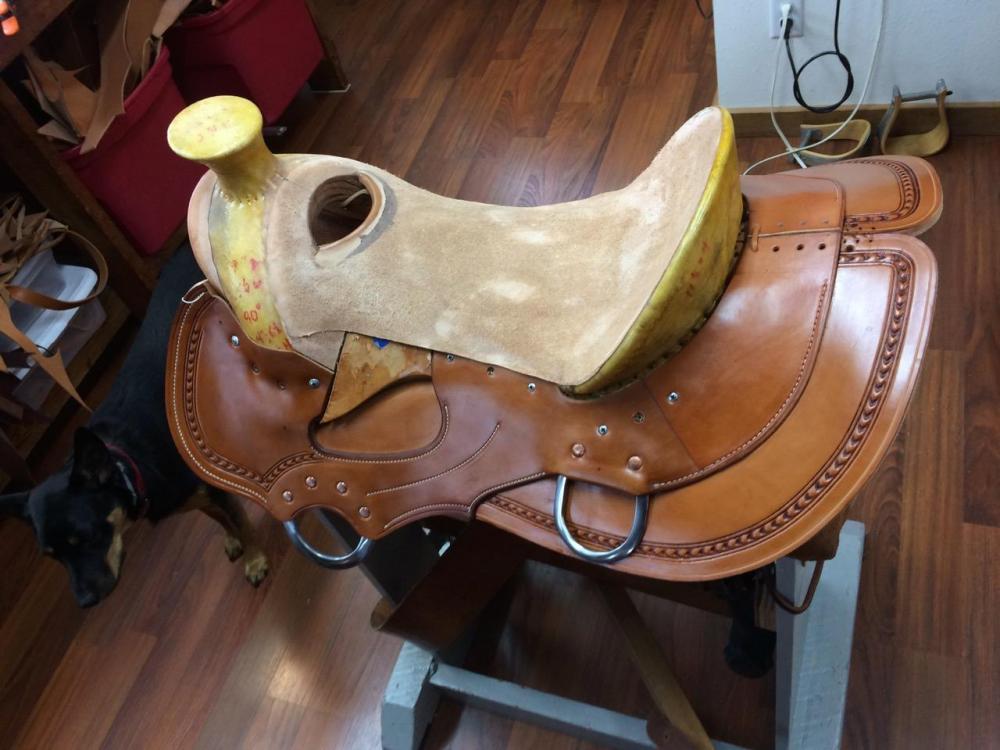
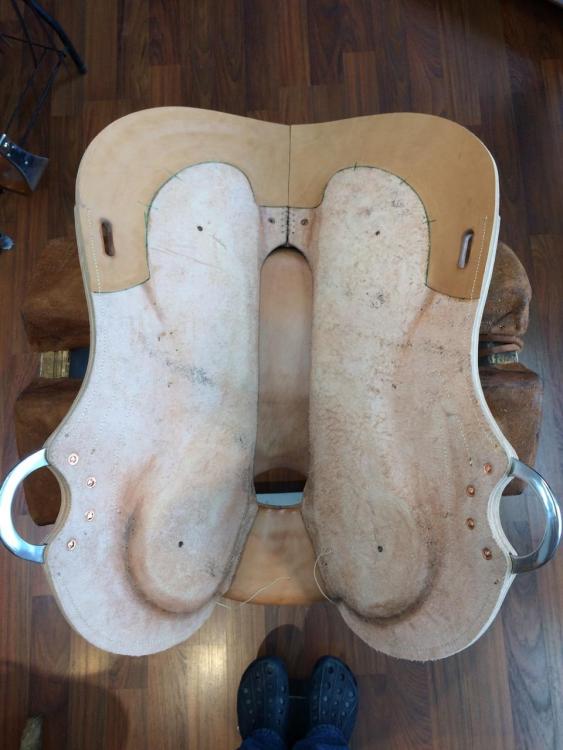
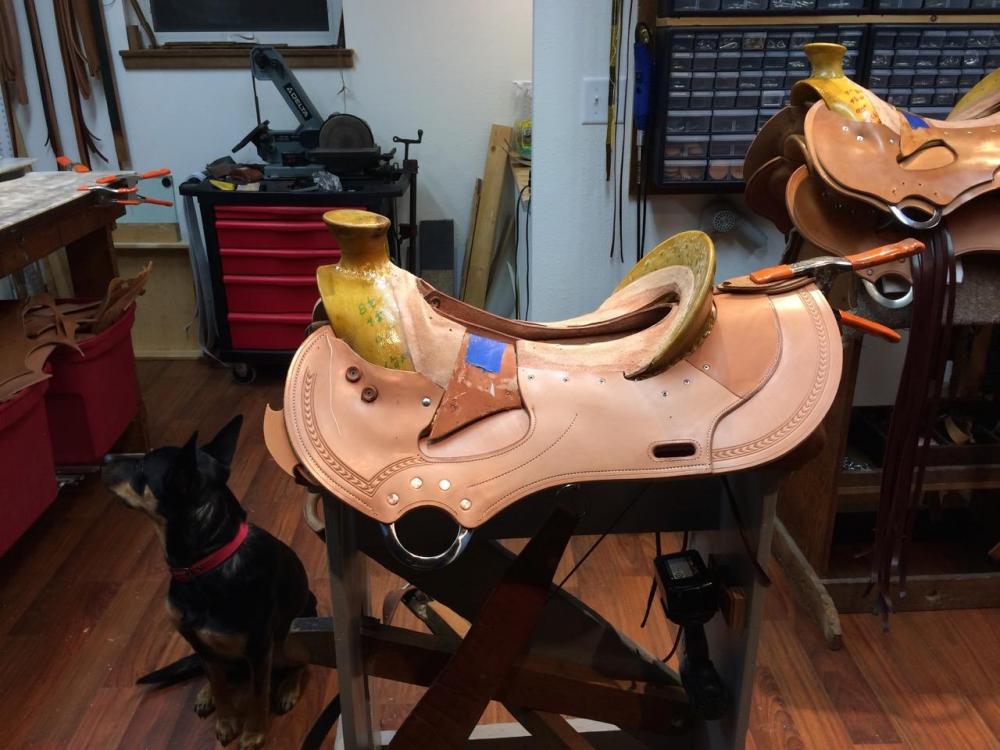
John, Here are a few pics of one of my saddle stands. It's pretty simple and basic. This one was recently recovered with rough-side-out chap leather for good grip. The cut outs from the middle of the supporting surfaces are there so I can mold a "waist" into the skirts below the center of the tree to mirror the narrow region behind the horses shoulder, where the rider's legs hang. I do this to reduce the need for the rider to "break in" the saddle, and to ensure the rigging lies flat and accurately when being installed. The pictures don't show it well but the tree makes nice even contact with the stand in the same way I want it to fit a horse. The photo with the carpenter's level indicates how I "calibrate" the tree, as described previously, to ensure that the stand carries the tree level, as it would on a horse. Another note is that I use a different hold-down strap when installing seats. It's wider and tapered toward the edges so that it doesn't leave any marks on the seat when I work a rub stick over it. I'm protective of the surface of that seat hold-down as well as the rub stick to prevent marking up a smooth-out seat. -
Ditto to what BigSioux said. HO isn't necessarily better than WC, just different. I like the color of the russet WC. For working saddles I like the firmness of HO. On the other hand, for a saddle that won't get hard use and won't get broke in for a long time, WC will be more supple. I'd rather carve HO; stamping is a toss up. WC will sell you any number of sides you want, even one, and give you good service. I buy HO 10 at a time from the factory, which is their minimum order. You can mix weights within the 10 side minimum. Also, as BigSioux said, don't count on getting a saddle out of two sides. You need to be very picky about laying out your components. Forget about yield and focus on quality and durability.


.thumb.jpg.eb9478a996253b7f53c7c5bfbebcc460.jpg)
