EdOdgers
Members-
Posts
91 -
Joined
-
Last visited
Content Type
Profiles
Forums
Events
Blogs
Gallery
Store
Everything posted by EdOdgers
-
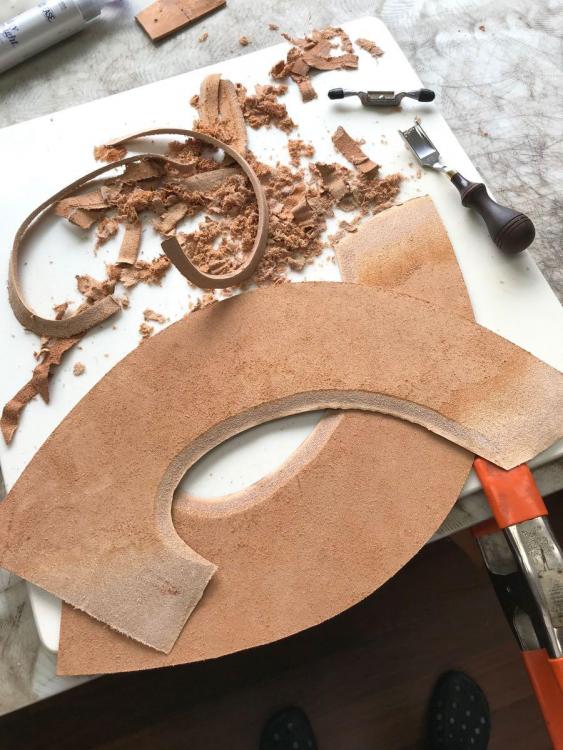
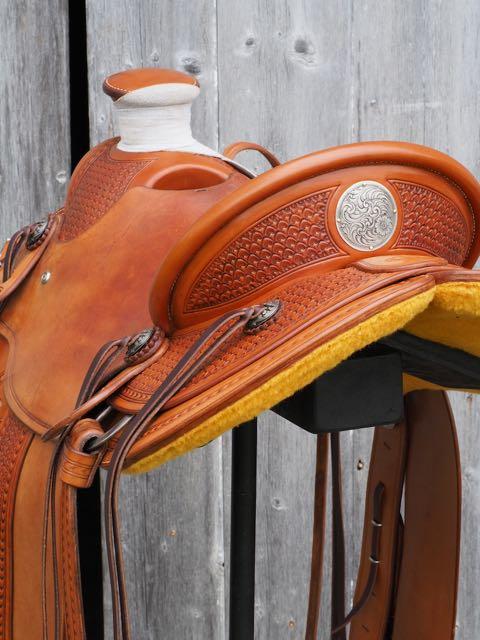
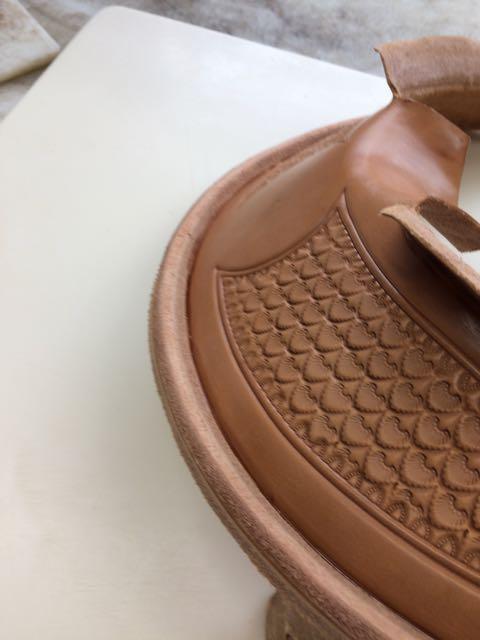
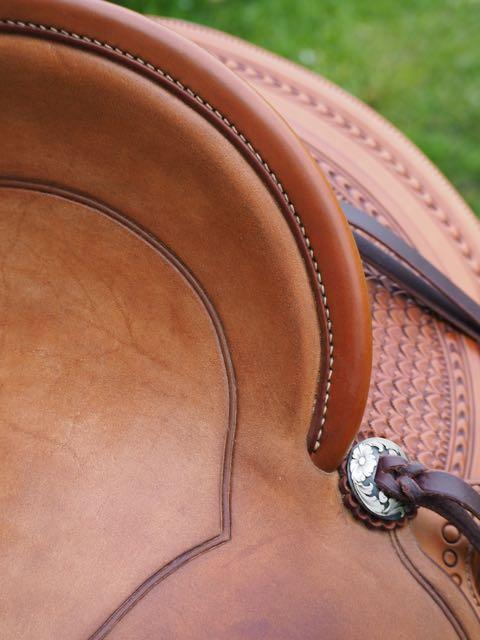
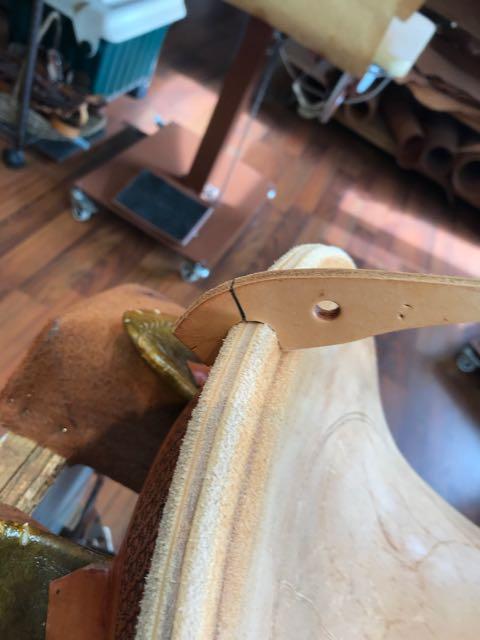
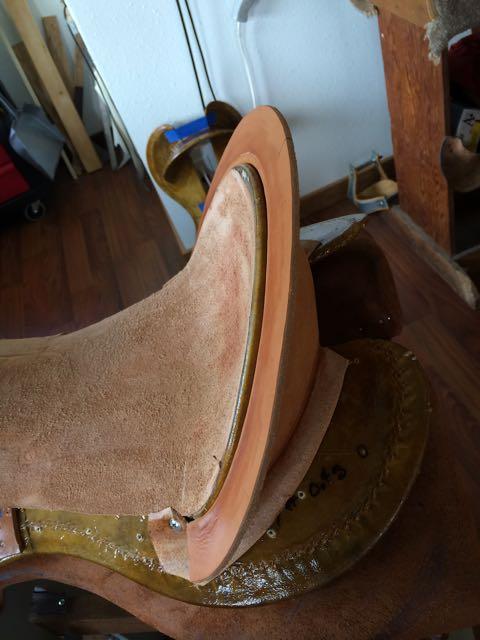
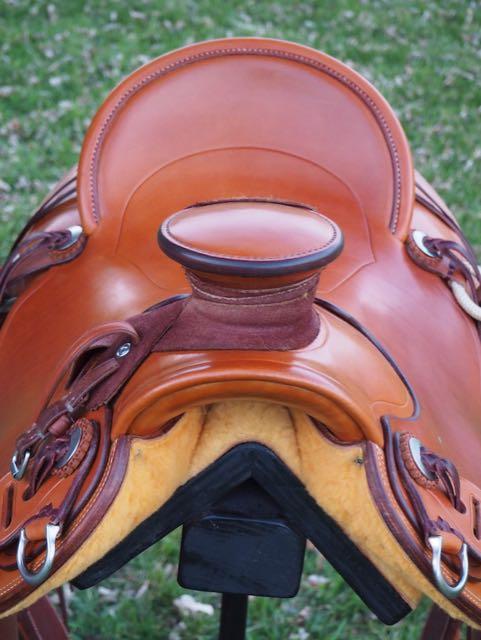
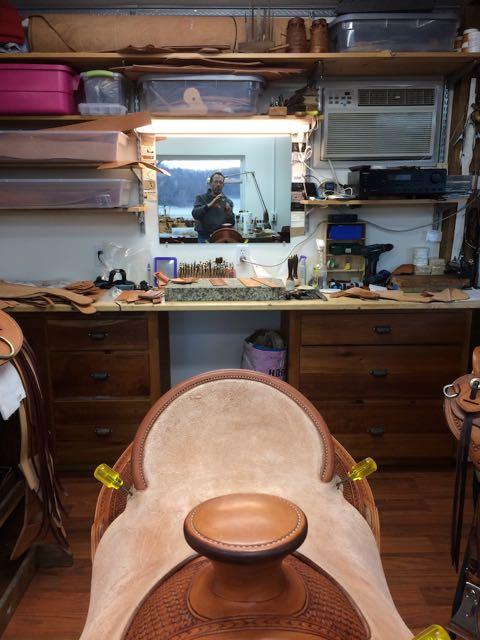
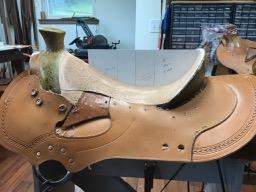
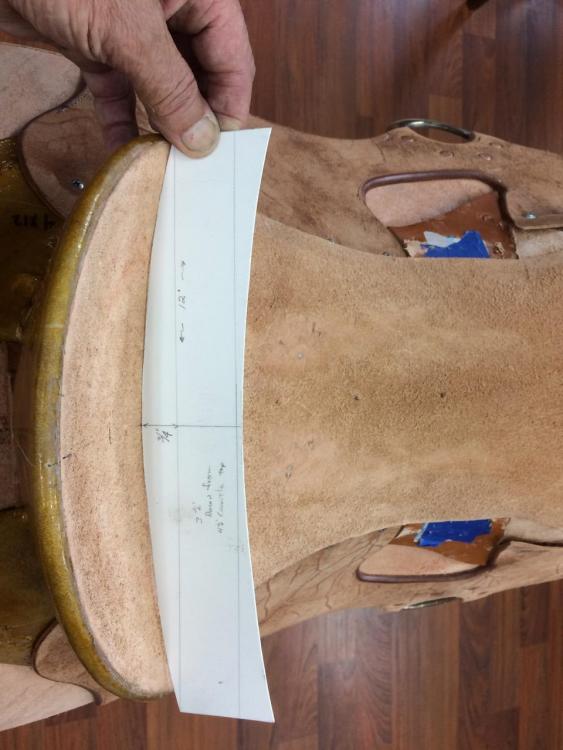
Yes, that's what I do for the "shadow roll" which is shown on the finished saddle above. This creates a very round binding in cross section, with an indentation on the backside where the stitch-line goes. Just another variation that I like the looks of. It gives more definition to the binding as distinct from the cantle back. The strip is a cut-off from trimming a previous seat; already has the perfect arch. If you want a more conventional binding that is flush with the cantle back, cut a curved filler about 3" wide and skive to a feather edge on the bottom; now glue and tack it to the back of cantle with >1" sticking above, then mold to match the intended shape of the seat (photo 2), then attach and mold cantle back, then proceed to stretch in seat and mold seat rim to cantle filler/back. Should look the same on the cantle face but the binder won't have as pronounced indentation on the back. I often use a binder that is split to about 8 1/2 ounce, usually 2 1/4" wide and skived a bit on the back. The saddle in the photos below has the conventional binder without the shadow roll. You can see in the first photo how the filler and cantle back are laminated together and molded prior to fitting the seat. Don't forget to check the thicknesses. I want the sum total of the seat, filler and cantle back to be the same as the height of the binding. Note the gauge shown in photo 5.
-
For a straight up binding, I think it's important to have the seat recessed a bit so the cantle binding isn't proud of the inner face of the cantle. This way the binding isn't being rubbed on and catching the rider's pockets. To do this the filler should be on the back side of the cantle (traditional way) or on the back side of the cantle back for what I call a shadow roll, as in the fourth photo. Either way, I like to fit the cantle back but not glue it on until the seat is stretched in (fitted) but not installed. If a filler is being used between the cantle back and seat, it too could be attached after the seat is fitted but not installed. Procedure: fit cantle back, fit seat, attach cantle filler (if used), attach cantle back, glue in seat, apply binding, stitch.
-
First Saddle - 1/2 tooled Cliff Wade
EdOdgers replied to MLGilbert's topic in Saddle & Tack Maker Gallery
I could be wrong but I don't think that Bowden or any other tree maker uses all of the Lane card data to make a completely unique tree. Given all of the cards and the four positions you place them, the number of different combinations would be staggering. From my discussions with tree makers, they know which of their bar shapes and width/angle combinations will work for the "body type" that the cards indicate. They will all tell you building a tree for an individual horse is not a good idea but fitting a range of body types is what our goal should be. -
Never heard of rawhide being used as a liner for a flat-plate. I think it's a bad idea. That large a piece of rawhide isn't going to flex and stretch in unison with the top piece of skirting, thus it is likely carry more than it's share of the tension and start to crack and fail. When you laminate two pieces of leather together you want them to work together and to do that they need to have similar properties under strain. I have heard of a small area of rawhide sandwiched between skirting leather to form an "all leather" rig. I've done that for the rear rig around the cut-in slot for the billet. The rawhide stiffens the area around the slot or cut-out so that it won't become distorted with use; it's not intended to carry the rig's tension. I've occasionally used lighter (9/10 ounce) harness leather for lining flat-plate riggings. I like the concept (in theory the harness won't dry out and thus may hold up better) but then again, I've never known of a skirting leather liner as the cause for replacement or failure. Conclusion: skirting is fine, harness is a nice addition if you have it handy. Incidentally, I don't think you want your rig panel and liner to both be heavy skirting. I split down or select thinner skirting for the liner such that the total thickness of the rig is about 22/23 ounces, same as when plugging skirts. For example if the rig panel is 13/14, the liner will be 9/10.
-
That would have been me. I was suggesting to plan out the details of a saddle before ordering a tree and in particular consider the binding type. Straight up binding will add at least 3/4" to the height and 1 1/2" to the width. That said, a straight up binding is usually intended to be a taller look. My most common and favorite cantle for a straight up binding is 4" height by 11 /2" wide, tree measurements. For Cheyenne roll 3 1/2" or 4" high by 12 or 12 1/2" wide is typical. Occasionally I do 4 1/2" high on straight-ups and this can look good but is about the limit of where the cantle can start to interfere with the rider mounting the horse. The 5" straight-ups I've done (not many) were "shovel" style cantles and 11" wide. I don't like to do a Cheyenne roll with a cantle taller than 4" as it just looks odd IMO. Your 4" X 12 1/2" cantle can work out just fine with a straight up binding and is done quite often. It will obviously appear fairly wide and will actually have the illusion of being shorter than a narrower cantle. Also, the sides of the cantle will be rounder and less characteristic of a straight-up IMO. I like a straight up to rise from the base more vertically. It's all a matter of taste. I posted a few photos for comparison. The first saddle has a 4 1/2 X11, second saddle has 4 1/2 X 12 1/2, the third is 4 X 11 1/2. Couldn't find a 4" X 12 1/2" straight-up photo but the middle one is pretty close.
-
I have two versions. This one is a two stamp set from Horseshoe Brand (Watt) called Wheat Leaf. There is just one size. The other is similar and just one stamp from Barry King called Shell Border in size #1. I like them both but the Wheat Leaf takes antique better. The space between the beaded lines is 5/16" so the stamp is just shy of that in width.
-
You can make the skirts as short as you like, in fact you don't need to have skirts (think McClellan saddles). On the other hand, do you want to have a good looking saddle? Some folks mistakenly believe that skirt length will necessarily affect the horse/mule and needs to be short for animals with shorter backs. Sadly, they probably believe that because of bad experiences with improperly built saddles. A saddle with properly blocked-in skirts that are angled up and away behind the cantle, won't interfere with the horse or mule's back. Thus the saying: "ride the tree not the skirts." I've attached photos to illustrate how the angle of the topline of the skirts behind the cantle and the blocking of the skirts (bedding of the tree into the skirts) can be done to provide clearance and prevent the skirts from putting pressure on the back. So, assuming you design and install them properly, skirt length is primarily an aesthetic consideration for which you are the judge. I usually make my skirts from 5" to 6" behind the cantle back. I feel that within that range I can create a balanced, pleasing look. I only use the shorter 5" length for skirts that are narrower (vertical measure) and/or have "mother hubbard" housing (no jockeys). I know some makers who make beautiful saddles that commonly use 6 1/2". The saddle in the photo is 5 3/4" and is very typical for my saddles with that skirt shape and depth. On an occasion or two I've been talked into going a bit less than 5" and regretted it, later realizing the saddle looks chopped off, imbalanced and ugly. On the other end of the saddle, I extend the front of the skirts 1 1/2" to 1 3/4" in front of the bar tips. Thus my total skirt length for a 16" seat is going to end up at 27 1/2" or maybe close to 28". Seat lengths that are shorter or longer will have proportional skirt lengths. If riders are concerned about saddle length interfering with the animals hip, and they should be, it's the bar length they need to be concerned about. To avoid long bars they need to avoid long seat lengths. As you pointed out, the bar length for a 16" seat is going to be about 24" and for a lot of shorter backed animals that's about all they can handle well. I always warn anyone desiring a longer seat they have the responsibility to ride bigger, longer backed critters. A 17" seat saddle and a 250# rider is not a good fit for a 14-3 horse weighing jsut 1,000#. You can't put five quarts in a gallon jug.
-
The SS ring-shank nails I use most are about 0.09" or 2.25mm in diameter (about 3D) and lengths of 3/4", 7/8", and 1". These were sourced from Hagel's Cowboy Gear (Sara Hagel).
-
The short answer is 5/8". Here's why: The common term for what I presume you are calling fender straps is "stirrup leathers." If so, when they are "exposed stirrup leathers" or on the outside of the fenders, the only difference in length is that the stirrup leather wraps around the stirrup bolt and the "leg of the fender" or sometimes called the "turn-back" of the fender. In other words, there is one additional thickness of skirting under the stirrup leather as it wraps around the stirrup bolt (nothing changes as the leathers wrap around the tree). Assuming the thickness of the fender leg is about 13/14 ounce, this will add 5/8" to the length of the stirrup leather. That's the same distance I move the fender up on the stirrup leather when attaching the top of the fender to stirrup leathers when the leathers are on the inside. I actually don't even factor the additional 5/8" into the length of exposed stirrup leathers since their length is approximate and should always be longer than needed by several inches, so 5/8" is splitting hairs. In general, stirrup leather length should be in proportion to the fender length. You can find charts to approximate fender and stirrup leather length needed for a given rider's inseam. For example, for a tall rider (me) with a 34" inseam you could select a 20" fender with a 64" stirrup leather for Blevins type buckles. Obviously that won't work for a 5' 4" rider as you won't be able to pull the finder up far enough into the saddle. Likewise you don't want 64" stirrup leathers hanging down below the stirrups if the saddle has 17" fenders for the shorter rider; If you ever pulled the stirrup leathers and fenders down far enough to use the last holes of the 64" leathers, the top of the fender attachment would be exposed below the seat jockey and it would be pinching your leg. One size does not fit all! Speaking of stirrup leather length, I think it's important to pre-stretch them before final cutting and especially before punching buckle holes. I did an article on this in the Nov/Dec 2019 volume of the Leather Crafters & Saddlers Journal. IMO and experience, If you don't pre-stretch, it is likely that the leathers will be significantly uneven after long use and the holes will be difficult to align with the buckles.
-
Sewing sheepskin to fleece
EdOdgers replied to Punchyleatherworks's topic in Saddle Identification, Restoration & Repair
Sew in the existing holes. Doing otherwise will weaken the edge which may eventually pull away. Too many perforations result in a "tear on the dotted line" effect. -
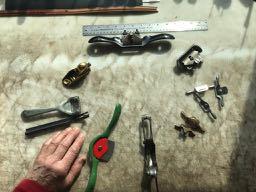
Here is a photo of the shaves, skivers and planes I use for saddle making. I come from a carpentry and woodworking background so I've gleaned tools and techniques from those trades. Descriptions starting at the top or 12:00 O-clock, and proceeding around clockwise. -Stanley spoke-shave. Commonly available at most good hardware or woodworking stores. 2 1/8" flat blade. A very versatile tool that I use for groundseats (everywhere except the dish of the cantle) and leveling or thinning large pieces of leather. Before I had a large splitter, this is how I thinned and evened fork covers, cantle backs and other saddle components. This is my most used shave. Planes and shaves work best for leather if the angle of the blade is very low, much lower than what is generally used for wood. To modify this tool for leather, simply install the blade with the bevel facing down; that will reduce the angle. This tool is easy to adjust and removing the blade for honing and sharpening is a snap. It has to be very sharp to work satisfactorily because you are pushing the blade into the leather rather than slicing into it. -Stanley spoke-shave with handles cut off. I thought this would be very handy and usable in the dish of a cantle but it's applications are limited. I don't use it often. -Zona brand miniature spoke shaves intended for model making and hobbies. These are incredibly handy little spoke shaves for saddle work. Next to the Stanley above they are my most used. They are very inexpensive at about $8. Crude and simple. The 7/8" flat blade is small enough that it works well in the dish of the cantle, particularly when used in arcs along the rim. A bit tedious to remove, adjust and sharpen the blade but so handy that I've learned how to get along with them. To sharpen, I mount the blade in a vise grip which I then use as an angle guide while honing. Get some extra blades to swap out during use. One of the Zona planes in the photo has a custom, higher quality blade that I made. When these planes are sharp and adjusted, they are amazing. -Bronze miniature woodworking planes. These used to be available from Garret Wade and other woodworking supply houses but are no longer in stock. Not sure where to get them. Similar to the Zona above but one has a convex blade and the other a rounded shoe. I use the one with the convex blade in the cantle dish while carving groundseats. -Heel shave. This is a vintage leather tool that was commonly used by saddle makers for carving groundseats when I was learning. Not used by many today and for good reason. Tough to sharpen and slow to set up. This one has a radius that is too small to my liking. I rarely use it now. -Kunz woodworking, convex spoke-shave. Available at woodworking supply stores. Nice tool but the radius is too small to work well for groundseats. I don't use it much. -Potato peeler leather skiver and pull type skiver. These are very popular and commonly used. I modified the "peeler" by installing a Sam Stag stud on the end for an extra handle. Some saddlers swear by these but I swear at it. There is no "shoe" or bottom guide to help gauge the depth of cut, consequently it is very easy to gouge out the leather deeper than intended. Also, the end product is a series of ridges that requires sanding to even out. These tools lack precision and I just don't feel I can get the surface as smooth and even as with spoke-shaves. I also hate replacing the cheesy blades constantly which you have to do to avoid gouging and grabbing. Can you tell I don't like these? Yes I know many folks get along with them but not me. Lie-Nielson Violin Makers, low angle block plane. This is my pride and joy plane. It has a bronze body and a high quality 7/8" blade that holds an edge well. The blade angle is appropriately low for leather. It's very easy to adjust and just the right size for saddle work. A true joy to use. This and a couple of my head-knives are my favorite tools. It is very handy to true-up or adjust straight or arced cuts (think skirts). Cuts crisp and clean and can take off the thinnest ribbon of leather. Can't say enough about this little plane. In conclusion, I strongly recommend a saddle maker's shop include a Stanley spoke-shave, a few Zona mini spoke shaves, and a small block plane such as the Lie-Nielson Violin makers plane.
-
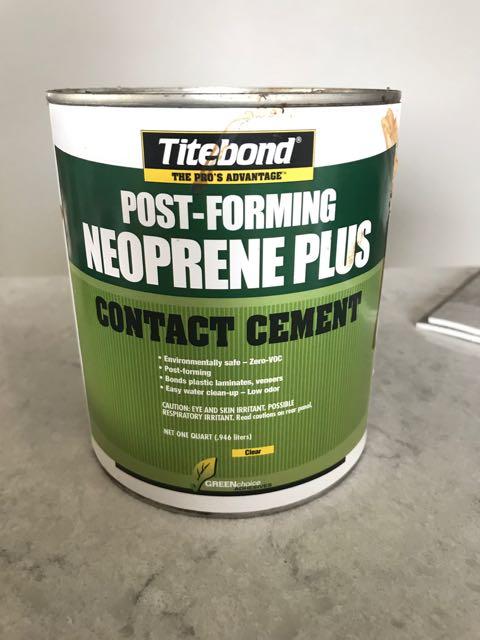
Another option is the pictured Titebond product. Comes in a handy quart size that is small enough you won't have such a long shelf life and you can dip your brush into the can. I never kept careful track but I'm guessing I was able to glue about 5 maybe 6 saddles (shearlings only) with each can. I was using this for a number of years before Aquilim 315. As near as I can tell it performs, applies, looks, and cleans up the same. Water based and no fumes. I used to be able to source it at a home center and a woodworking store nearby. They stopped carrying it thus the switch to Aquilim which I picked up every year at the Sheridan show. If locally available, maybe the Titebond will work better for you. If I can find it, maybe I'll go back to it myself since I'm about out of Aquilim and there won't be a Sheridan show this Spring for me to restock. Bummer about Sheridan being cancelled.
-
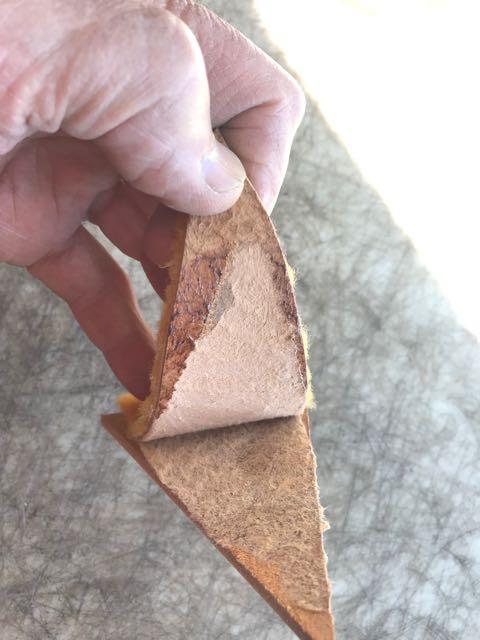
I've been using the Aquilim 315 to adhere saddle shearling for the last half dozen saddles. I like it because I can paint it on with a brush and most importantly, the lack of fumes. I ran a test to determine if the bond was too strong for future repairs and I feel confident the shearling will release fairly easily yet also hold adequately. The test piece appeared as if the fibers of the sheepskin detached rather than the cement failing. I haven't been using it long enough to confirm the sheepskin can be removed after extended use but I suspect it will be fine. I should add that I don't wait as long for the glue to dry as the directions call for before attaching the shearling. I attach as soon as the glue appears transparent which is about 5 minutes after completing the application. My reasoning is that I don't want optimum bond. Photo shows my test removal of shearling glued to skirting with aquilim 315.
-
Looking for Cary Schwarz ground seat DVD
EdOdgers replied to Squilchuck's topic in Saddle Construction
John, are you still looking to purchase this DVD. If not, I have one I would sell. Ed -
Very classy! Congratulations on a great saddle.
-
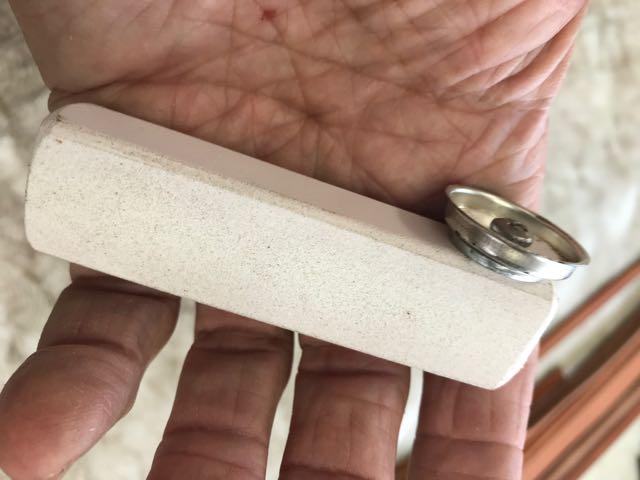
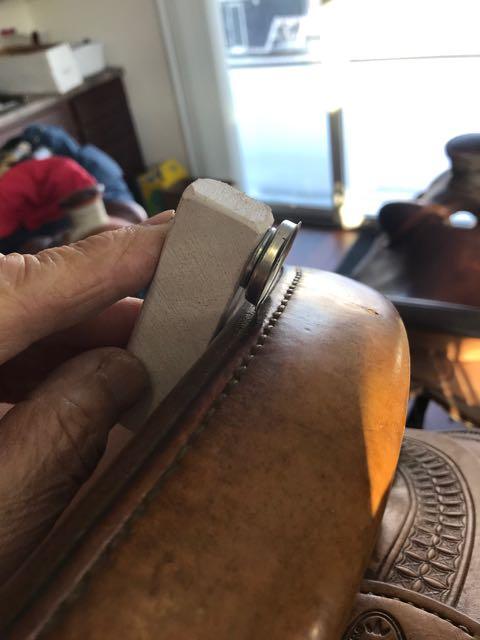
Randy, Congratulations on # 10. Nice saddle. I like the unique border design around the horn neck. You might want to try applying antique to the stamping next time. It's extra work and messy but really makes the tooling stand out and pop. Start experimenting with some tooled scraps. A tool like the one shown in the photos will help you establish the cantle binding location more consistent with the rim of the cantle and help gauge the width of your Cheyenne roll . You can make up this tool in any number of ways; I made this one with stuff on hand. The gap on this one is 1/4" which works well. To use, slide it along the inner dish of the cantle and create a slight crease on the rim of the cantle. Also, you can run a dividers along that crease line to scribe the cut location for trimming off the Cheyenne roll. That way the roll will be a consistent width. When you stretch on the binding, use the crease line as your guide and just barely cover it. Sorry, I didn't have a photo using the tool on a saddle under construction so I tried to give you the idea with a finished one. Ed
-
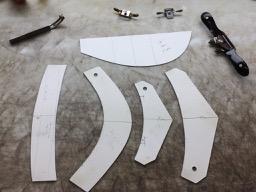
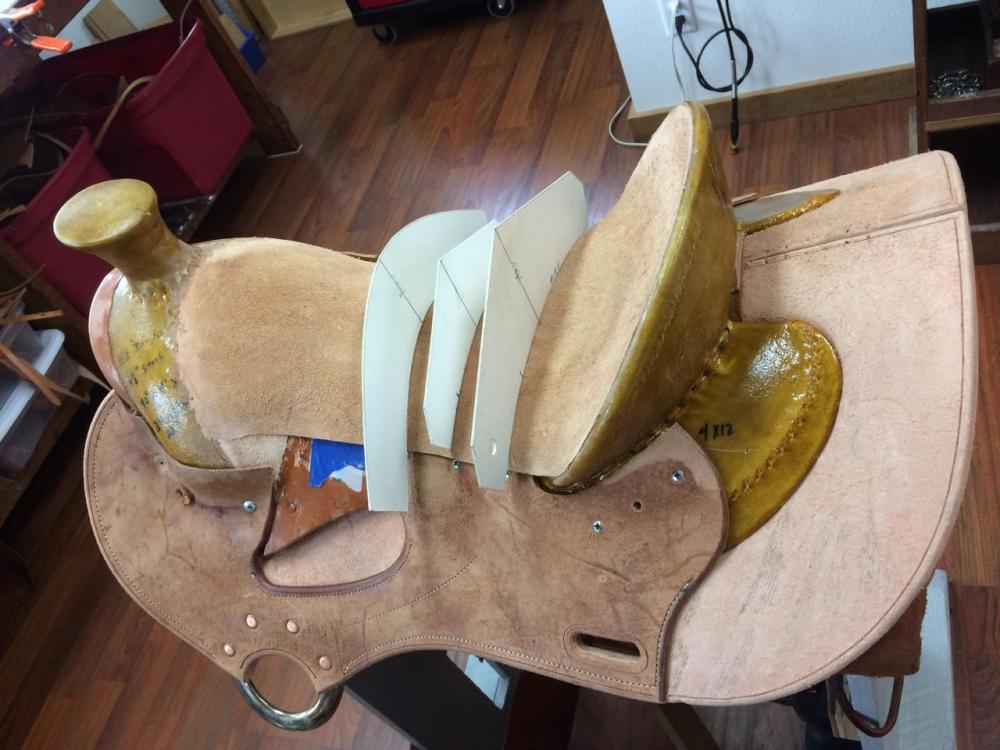
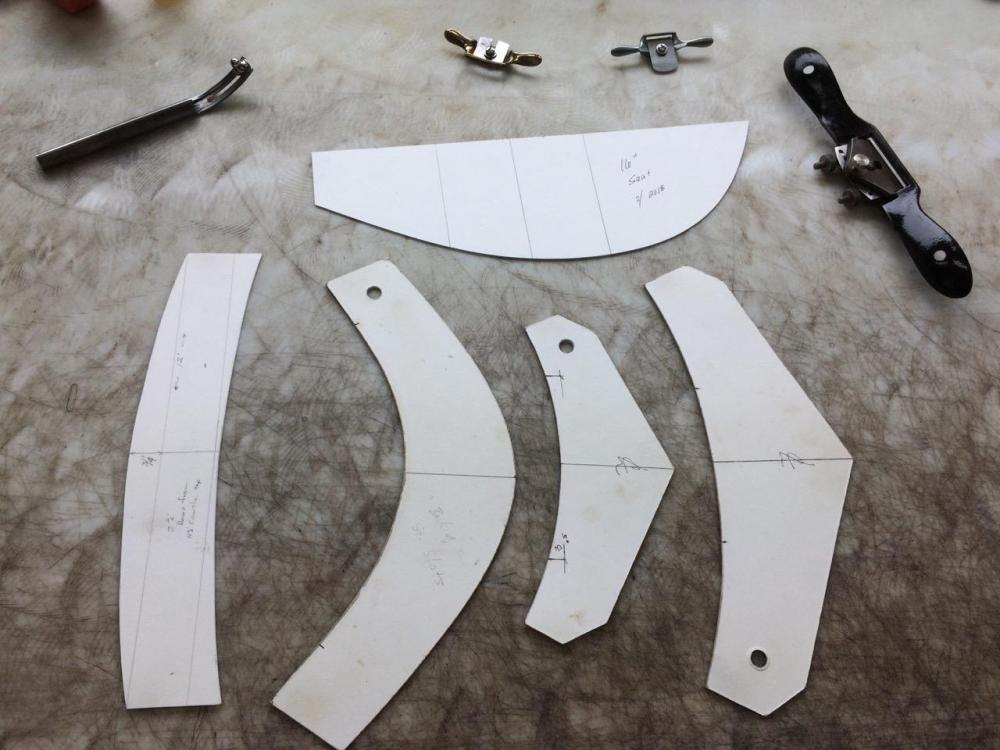
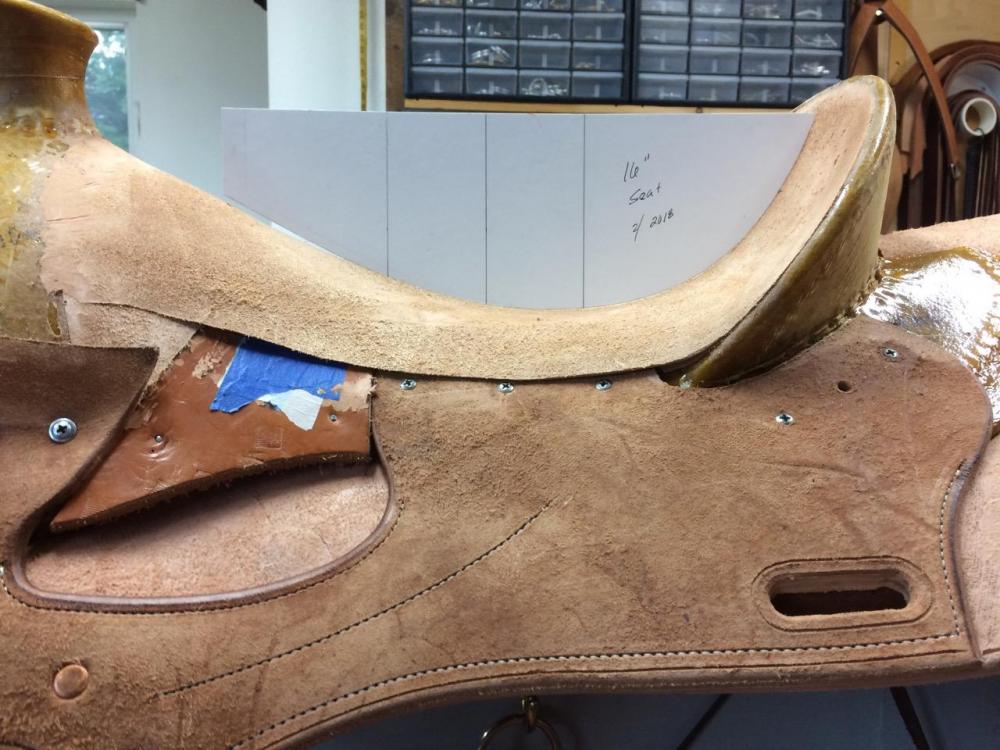
It’s my opinion and experience that you can build gender specific seats but you don’t have to. While it’s true that men can get along with a seat conformation that women won’t tolerate, a seat that accommodates women can also work nicely for most men and may actually improve their riding posture. Men’s pelvises generally rest closer to the cantle and as a result men are more forgiving than women as to the height and location of the seat rise. My seats are characterized by closeness to the horse, a low rise, a pocket (low point in profile) that is more elongated forward, full and fairly flat between the bases of the cantle, and as narrow as the tree allows over the stirrup leathers. I use 5 patterns or profile cards to guide the shape of my groundseats while ensuring symmetry and consistency. If requested I can tweak that base shape to fit the client’s riding style and preference. In the photos I attached, the first photo is of the longitudinal pattern or profile card in a nearly complete groundseat. The 3 transverse cards ( lower right in the second photo) are placed where the vertical lines are drawn on the longitudinal card. The first, most forward line on the card is at the back of the stirrup leather slot. The card furthest left in photo two is for cantle dish. I'm not sure how much we can tell from the wear patterns shown in your photos. The human body asserts the most pressure under the only skeletal contact in the seat which is our sit bones (ischial tuberosity). The rest of our anatomy that contacts the saddle seat is soft tissue. Being "soft" tissue, it may not leave a lasting impression on the saddle but it sure can be uncomfortable. You can see the sit bone locations in your photos but not where the soft tissue may or may not have uncomfortable levels of pressure. Men's sit bones are typically spaced a bit closer together and will rest about 1" further back in the seat than a woman's. A pocket (low point in the seat) that is too close to the cantle and/or rises too quickly toward the fork, will not provide a woman with enough room for their crotch. I usually establish the lowest point of the seat about 3 1/2" behind the stirrup leathers and, as stated above, that pocket is quite elongated. Cary Schwarz has a pretty good DVD that discusses groundseat construction and shape.
-
Very nice. Attractive and a good fit.
-
First Saddle - 1/2 tooled Cliff Wade
EdOdgers replied to MLGilbert's topic in Saddle & Tack Maker Gallery
Morgan, Happy to be of any assistance. For the horse it's all about the tree bars; for the rider it's the ground seat. Here are pics of my templates for the ground seat. The three vertical lines on the profile card indicate where the transverse cards are to be located. The furthest forward line is at back side of the stirrup leather slot. I have a profile card for each seat size but the transverse cards are the same for all. This profile card is for a medium rise but I often use a lower rise card, depending on client preference. Ed -
First Saddle - 1/2 tooled Cliff Wade
EdOdgers replied to MLGilbert's topic in Saddle & Tack Maker Gallery
ML, That is an exceptional job, especially impressive for your first saddle, though clearly you have come to this project well prepared and skilled in leather work. You have nailed most of the basic design elements and your leatherworking skills are impressive. Great lines and "architecture" and the carving flows nicely from that architecture. I really like how your carving of the jockeys considered the rosette (string conchos) location; well planned. You didn't get this far without the desire for improvement so in the spirit of continued advancement I offer a few critiques and observations. Agree or disagree but consider these and any honest critiques as you build your own set of guidelines and opinions. Mine are always freely offered and always subject to change. -Groundseat: The pocket or low point of the groundseat, as viewed from the side, should extend further forward. My seat templates put the low point at 3 1/2" behind the stirrup leather slot for a 15 1/2" seat. This will help the rider maintain proper position relative to their stirrups. To best judge this, it's important to have your draw-down stand match the back of a horse and carry the saddle "level" as if it were on the horse's back. I like that you didn't build too much rise to the seat. The combination of pocket location and modest rise will ensure comfort and a classic riding posture. This is especially important for a female rider's comfort. If you don't already have them, I suggest that you develop a set of templates for your groundseats. Using templates helps establish consistency and symmetry. They also give you a reference point when making modifications for a specific rider or when trying to repeat a seat you've made for a repeat client. Yes, there is an art to carving seats that relies on your eye and "feel" but templates are a good test and keep your eye honest. -"Ear" cuts in the seat: The shape of the ear cut around the base of the cantle is traditionally round for a straight-up binding. Yours is nicely fit but typical of the cut for a Cheyenne roll. A rounded cut better matches the roundness of the straight-up binding and is aesthetically more pleasing. To do the round cut, I start with a 1/2" C punch. It will open up to fit nicely around a 3/4" binding. See photos below. -Cantle shape: In my opinion, the cantle shape of your tree is better suited to a Cheyenne roll. I prefer a more vertical sided cantle shape for straight-ups, not necessarily a shovel but narrower and more verticle coming up from the bases of the cantle. When ordering a tree, I always specify cantle dimensions with consideration to the binding type intended. The finished cantle dimensions for a straight-up binding will be about 1" higher and 2" wider than the tree specifications. My preferred dimensions for a straight up binding is 4" high by 11 1/2" wide which will finish out at 5" X 13 1/2"; plenty high and wide for most riders yet looks proportional. Speaking of cantle width, you want to have the finished dish proportional to the width. Similar radius but shorter arc. For a narrower cantle, like the one I just described, 3/4" is about right. Templates help here too. -Stitching cantle binding: You indicated that you weren't happy with this but I can't see from your pics what your concern is. I'm assuming that the backside isn't as straight and even as you wish. My method is to start with about an 8 ounce binding that is about 3/8" wider than final. After casing and before applying to cantle, I deeply crease, (don't cut or gouge), the stitch channel for the inside or face of the cantle. I then glue and mold to cantle. Pierce with your awl the first stitch in the center of the cantle top. From that point mark your stitches with a stitch wheel down each side. On the back side, starting at the pierced hole, use a tickler to mark the stitch line across the backside of the binding then run the stitch wheel in that crease to match the marks on the face of the cantle. From the backside, push your awl at least halfway through each marked stitch toward the opposing face, but don't come through. Finally, from the face of the cantle, proceed to pierce with your awl each marked stitch aiming for the opposing partial hole in the backside. If you were reasonably accurate, you will be able to feel when your awl finds the piercing from the backside and it should follow that piercing and come out in the marked location. The end result is a stitch line on the backside that is nearly as good looking as the front. I like a clean neat stitch line on the back of a straight up cantle binding, but you can also do a "hidden" stitch in the back by splitting the cantle binding, folding it up for stitching then gluing it back down before final trimming. I always match the stitch spacing and thread size on the horn and cantle and will usually use a heavier thread and spacing compared to the machine stitching of the skirts etc. If machine stitching is 6/inch, horn and cantle usually 5/inch. Not hard and fast rules, just my preference. -Jockey margin: This is purely opinion but I would prefer a bit wider margin between the skirt and jockeys on the back of your saddle (behind the cantle). The narrow space and the double stitching doesn't leave much room for the carving which appears to be hidden there. I usually strike a mark on the rough-cut jockeys with a dividers set at a uniform 1 5/8" from the skirt margin on similar round skirted saddles. To me this is a nice balanced look that comes close to the "golden rule" of proportions. A uniform reveal isn't a must but I would still prefer to see yours start a bit wider behind the cantle. I like the length of the skirts behind the cantle which appears to be just under 6" or so; nicely proportioned. -Double stitch line on skirts: It's a good feature to add that extra stitch line; one for the skirt plugs only, the other attaching the sheepskin. Another option for the added stitch line is to hide it just under the outer margin of the jockeys. On skirts that are stamped or carved, it leaves a little more room for the decoration and presents a cleaner look. -Latigos: A small matter but most riders will prefer to avoid the bulk of a tie knot under their leg and use a cinch with a buckle tongue. For this style I like a wider, 1 3/4" latigo with oblong holes spaced about 2 1/4"; 6'-6" long for riders that take two wraps and 8' for those that take three. Again, this is one fine saddle and I congratulate you for this accomplishment and for seeking input. I always write up a critique, both good and bad, of my own saddles after completion and wish I had pursued feedback from other makers in my early days of saddle making; I do now. Nice job and keep up the great work. I'll look forward to seeing your future creations. Ed -
One correction to the post above about spoke shave setup. There is a simple modification to this woodworking tool to improve its performance with leather: Mount the blade with the sharpened bevel facing down. This creates a lower angle of the cutting edge relative to the surface of the leather. It will work the other way but not as well from my experience.
-
Nothing special to set up the Stanley spoke shave, just getting it razor sharp. Nice knives you made. You'll find the straight knife handy for skiving. You are going to be skiving a lot when saddle making so it pays to get set up right with your tools and skills. I use a a wide French edger (3/4" and 1") a lot for narrow skives, like the plugs in the photo above where the plug blends onto the bar edge. I use a large head knife for wide skives and a straight knife (like yours) for narrow pieces. Whatever you use, it has to be SHARP and get frequent maintenance. Dusty will deliver you a nice tree. Have fun.
-
I agree completely. I've noted that a lot of makers omit this, particularly on carved or stamped saddles. On working saddles I still do the double row of stitching 3/16" to 1/4" apart. What I'm now doing on the saddles with stamped or carved skirts is to put that extra row of stitching to hold the plug up under the edge of the jockey so that it is hidden. Since I often scribe the perimeter of the jockeys about 1 3/4" in from the skirt's edge, this usually puts the stitch row for the plug about 2 1/4" from the skirt edge. The single stitch line for the sheepskin makes for a cleaner look on fancier saddles and allows for more room on the narrow skirt margin for tooling. On skirt rigged saddles, my rig panel covers the bars behind the cantle and the same stitch line that attaches the rig panel to the skirt also goes through the plug.
-
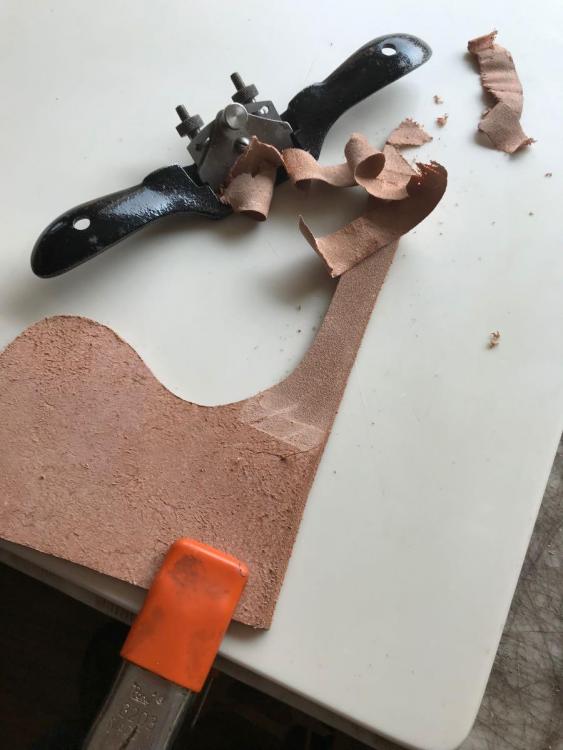
A final comment on plugs. As I mentioned in a previous comment, I want the combined thickness of the skirt and plug be about 21/22 ounces. Since all of your skirting is 13/15 ounce, you could end up with 26 to 30 ounce total thickness. That will be too much so you'll want to split down your plugs. Since I presume you don't have a splitter, you can use a very sharp spoke shave to thin down the rough cut pieces of skirting. I used this method for many years before I had a large splitter. It takes a little bit of time and skill but it's not that bad. Furthermore, it's a good skill to have that can be useful to even-up a piece of leather for a cantle back or fork cover that is thicker on one side than the other. I routinely use a variety of spoke shaves for leveling, skiving, and carving my ground seats. The photo below shows the spoke shave I use for leveling large areas. It's a Stanley and is the largest shave I use. It can be readily found at a good hardware or woodworking supply store. The blade has pretty good steel, which you won't find in some cheaper knock-offs.
-
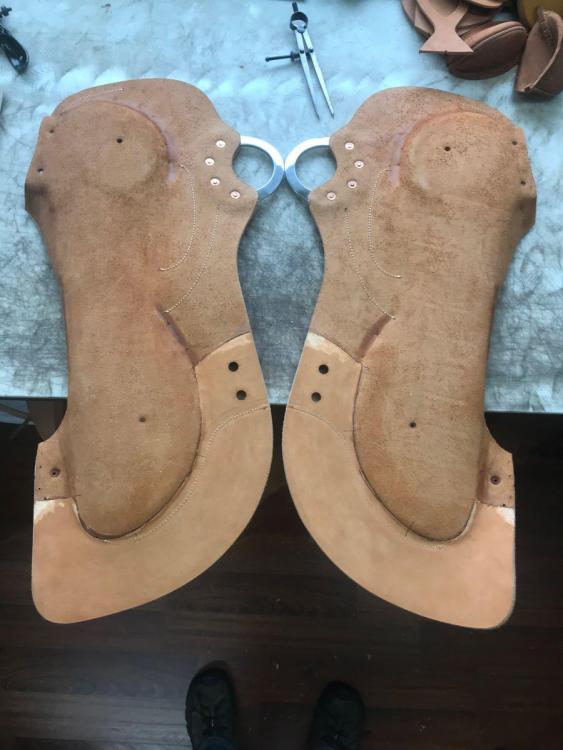
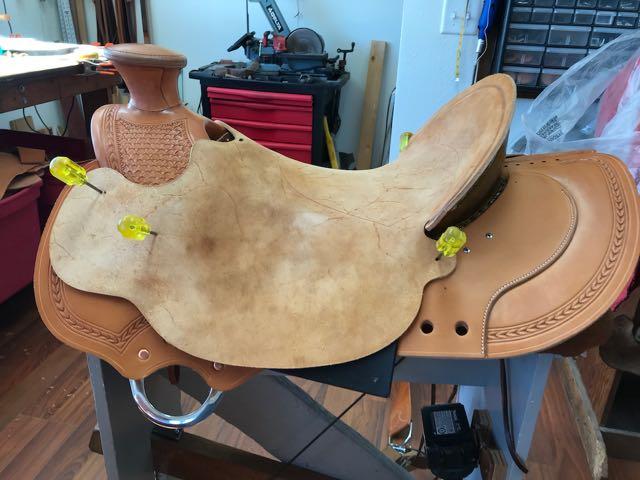
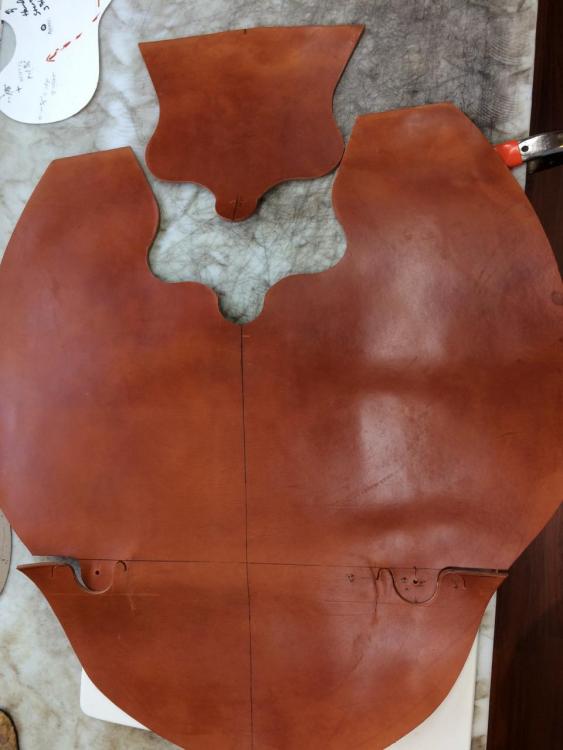
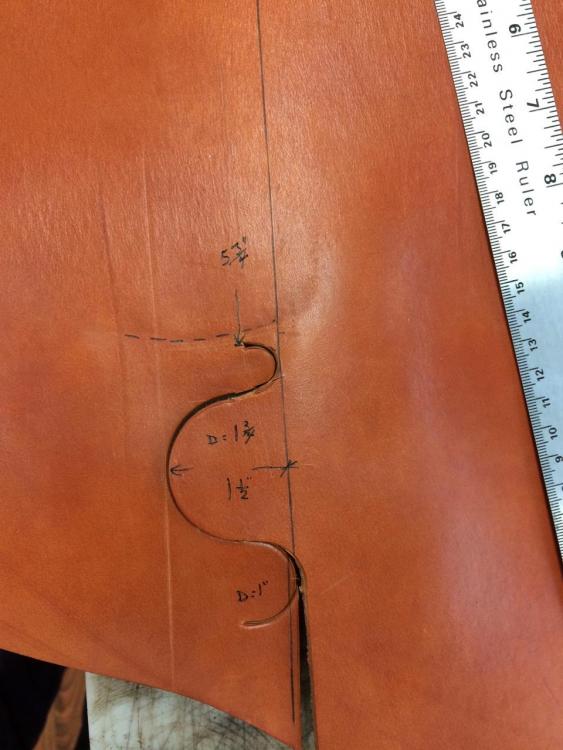
More on the skirt plug questions. Here are photos of plugs being prepared (skived and fitted) and the final product on a skirt rigged saddle. Note that the installed plugs have been trimmed using the skirt perimeter as a guide. When first glued on, they extended past the skirt edge by about 1/2". Also, because this is a skirt rig and the rig panel is attached to the skirt, no plug is needed from the rear rig forward since this area is already two layers thick. In the area where the rear rig slot will be cut (two punch holes in photo) there are three layers for strength and stiffness: skirt + rig panel + plug. If this saddle were a flat-plate or ring rigged saddle, the plugs would go from the gullet to the back of the cantle. In that case, I would make the plugs from two pieces for each skrirt and splice them under the riders leg with a lap-skive. I would also thin the plugs there for closer contact.






.thumb.jpg.d5392ac54d519b3bc430e7e5fa32797e.jpg)
