
TomBanwell
-
Posts
371 -
Joined
-
Last visited
Content Type
Profiles
Forums
Events
Blogs
Gallery
Store
Everything posted by TomBanwell
-
I also was surprised to find that the leather alone held air. I had assumed I would have to cover it with a sheet of plastic to contain the vacuum, which would have made it much tougher to slide the leather around to eliminate wrinkles. Can't wait to see if cowhide behaves the same way.
-
I have ordered a side of 2/3 oz veggie cow and I'll give 'er a try. This is a better weight for making masks in general I suspect. Glad to help out.
-
Forming a full face mask using a vacuum Let me first say that the following information is based on a single attempt to create this mask, as a response to Leatheroo's request for help with it. While I have years of experience working with leather and with vacuums, I had never done much using the two together. Hopefully my results and report will provide a starting point for others to experiment. The Equipment The ease of pulling leather down over the face form was accomplished by using a strong vacuum rather than the pulling and pushing normally associated with wet-forming leather. The overall system consists of a vacuum pump with an on/off switch, connected to a rubber hose connected to an open/closed valve, connected to a galvanized pipe with an open end. With the pump turned on, a vacuum will be pulling air into the pipe. The valve is used to control how strong the vacuum is--anywhere from full vacuum to zero vacuum. The face form itself has a smaller (½") galvanized pipe about 6" long attached to it by means of a floor flange, into which the pipe is threaded. This shorter pipe is placed inside the larger pipe coming from the pump. By placing a plastic bag over the form and holding it tightly against the larger pipe a seal is created, and by turning on the pump the air will be quickly sucked out of the plastic bag, pressing it tightly against the face form. Which vacuum pump you use is critical for success. Vacuum pumps come in many different sizes and strengths. The important specification is how strong a vacuum it pulls. In the U.S. this is measured in inches of mercury. The pump should pull at least 28"Hg to be effective. Household vacuum cleaners aren't strong enough to be used for this purpose. At the other extreme are high vacuum pumps measured in microns and used in industry and medicine. These are pricey and not necessary. In between are pumps used for removing freon from refrigerators (and many other purposes) and this is the right sized pump for our purpose. One such pump available on ebay is the Robinair model 15600, which is ½ hp and draws about 29"Hg at 6 cubic ft per minute. The CFM measurement isn't important for this procedure since there is no rush to pull the leather down. The Material As anyone who has tried to force a flat piece of leather into a three dimensional shape knows, there is a lot of resistance in the material. What is required is a leather that becomes very pliable and stretchy when it is wet, and will retain it's shape when dried. It seems obvious that the thinner the leather, the more readily it will conform to the face form. While we might assume that leather needs to be vegetable tanned in order to absorb water, in fact I used garment lambskin, which I assume is chrome tanned. It does absorb water from the flesh side, though apparently not from the topgrain side. I purchased this leather years ago from The Hide House in Napa, California, and it measures about .04" or .8mm thick. When saturated with water it becomes almost gooey on the flesh side. I haven't tried the 1mm (2/3 oz) veggie tanned leather that Leatheroo used, so can't say how it would behave. I suspect that cowhide is not as flexible as lambskin, and so may not perform as well. The Technique I cut a circle of the lambskin about 18" in diameter, enough so that it would drape over the form and all cut edges could be gathered together against the pipe. I soaked it in lukewarm water, rubbing the flesh side against itself under the running water to force it to absorb it. Once saturated I squeezed it to rid it of excess water, then draped it over the form (I should have waited a few hours to get it dryer, but I was too anxious to be that patient). I then gathered up all the edges below the form against the pipe, and pulled down hard enough to smooth most of the leather out. Using black vinyl electrical tape, I wrapped around the leather where I was holding it to seal it against the pipe, and went round and round, overlapping the tape as I worked downward until all of the leather was covered. It is important that there be no air leaks anywhere in the system, and so covering the leather all the way down the pipe is part of this. For a face mask, the top near the forehead is going to be cut off there, and on the chin it will wrap only a short way otherwise it would poke the throat. The sides are where the leather must extend the furthest, so I insured as I pulled it that the sides were smooth, and all wrinkles went to the top and bottom. At this point I tested it and turned on the vacuum pump. Immediately the leather was sucked against the form, with wrinkles showing up in various places. I knew I could work those out. My bigger concern was that the leather was bridging several parts of the face: Across the eyes, around the nostrils, and between the lips. What was happening was that the leather was being sealed against the form by the vacuum leaving air in those pockets. I knew that the way to resolve this was to direct the vacuum directly to those areas, so I removed the mounting pipe and floor flange and drilled six small holes from the face to the back of the form. Two holes each in the inside corners of the eyes, the nostrils, and the corners of the mouth. I reassembled everything and this time the lambskin all pulled down nicely into every crevice of the face. I did need to work out some of the wrinkles, which was quite easy to do. I could reduce the vacuum as needed by adjusting the valve, in order to move the leather around to where I needed it. Once I vacuumed it the second time I spent less than a minute easing the wrinkles out of the chin. I used a heat gun set on low to speed up the drying, as the pump isn't designed to run for hours at a time. You can't turn the pump off until the leather has completely dried or you will lose some of your shape. It would probably be a good idea to seal the mask while on the form, but I did nothing more to it. The finished mask is delicate in that it is easily deformed, so if you were to make it to actually wear I feel it would need either some reinforcement, or be made out of cowhide which would be stiffer.
-
Here is a teaser photo for Leatheroo showing the results of my tests today with using a vacuum to pull leather down over a face form. I am quite pleased with the results. I will follow up in a few days with details and diagrams. After I took the photo I noticed the wrinkles on the bottom of the chin, and I removed them. This is so simple to do, once you have the equipment. I look forward to sharing with you all.
-
Ms. L, Give me a couple of days to get it together, and I will post this info as a new topic under How Do I Do That?
-
Roo, have you considered using a vacuum to pull the leather down around the form? It can be very effective. You'd need a fairly strong vacuum to do this, stronger than a household vacuum cleaner. You can either embed a pipe into the bottom of your form and suck down a plastic bag around the whole form, or you can build a vacuum table upon which you set your form. If you're interested I could post some pictures.
-
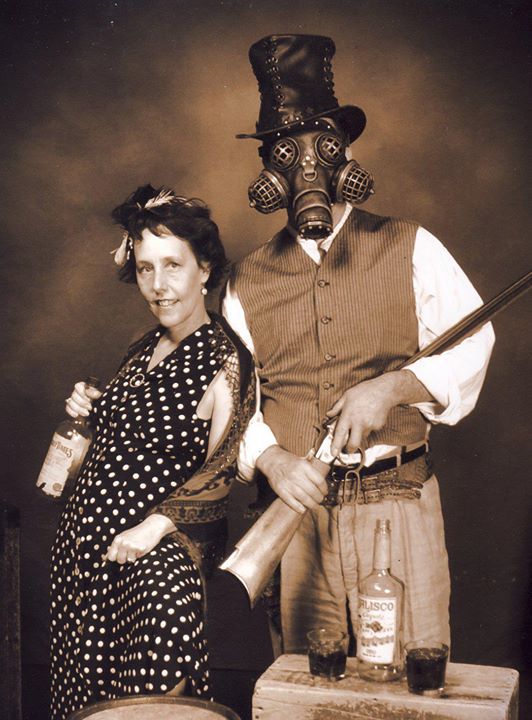
 My understanding is that the title could only be passed down to a male heir. After three generations no boys were born, and so the title was lost. Here is a pic of the gentleman.
-
Now all let's guess what it is! I see a sea monster emerging from flames.
-
Thanks for all the suggestions. Ferret, if only! "Thomas Banwell, baronet"! Has a good ring to it.
-
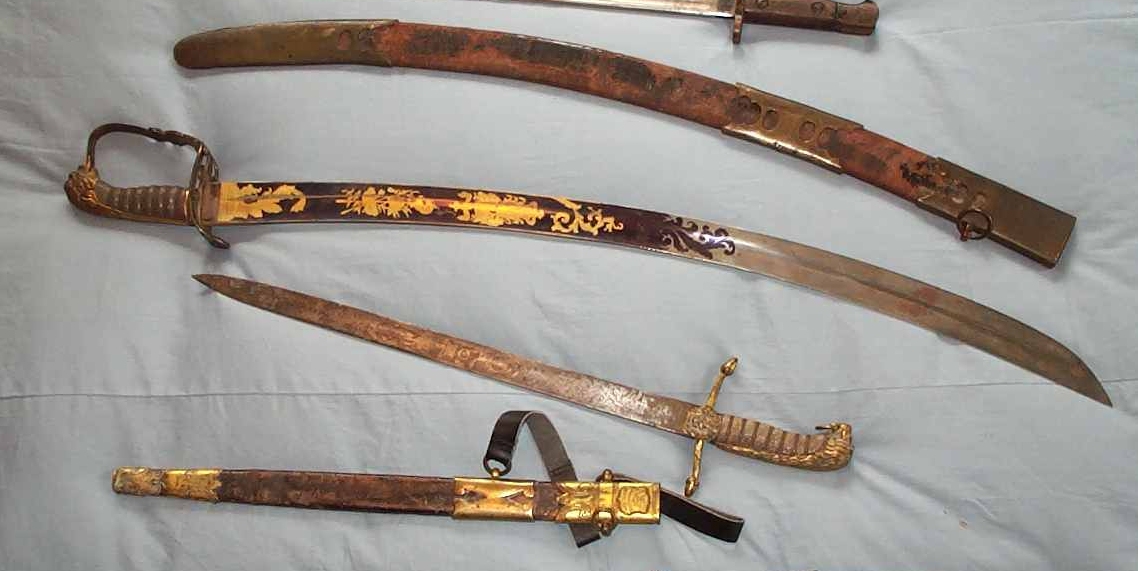
Here is a picture of the sword (the top one). It belonged to Vice Admiral William Parker of the British Royal Navy who was awarded a baronetcy for his role in fighting against the Spanish (who were allied with Napoleon).
-
Great job, Roo! I love how you incorporated the fins into it to take up some slack. The detailing around the nose and mouth is awesome!
-
I use plaster forms (Commedia del arte) or nothing at all (Bulldog), relying on the pattern for the shape.
-
Butter Flys
TomBanwell replied to JustWakinUp's topic in Purses, Wallets, Belts and Miscellaneous Pocket Items
Very nice work indeed! -
I'm no expert at making sheaths, but I can tell you how to get that sharp definition you want. The key is to cut out your shape in a piece of sheet acrylic (or something similarly smooth), and use the outer part as a form. Place the cased leather with the top-grain side down onto the form and press the leather into the form opening. You can see an example of this here http://www.tombanwell.com/sigurdkit.html halfway down the page the leather pieces with the serpentine design were done this way. What it accomplishes is that sharp definiton where the edge of the acrylic form is.
-
Hi Pip, Your Liverbird is looking great! And that's your first mask? The staining doesn't look very bad. I would suggest either you paint the beak in an acrylic paint which will cover it over since it's opaque, or after you've dyed everything do a little antiquing on it so that the "black nose" isn't noticeable. Good job!
-
Kate, I work in a lot of materials other than leather. In fact I work with resin and wood mostly, so my materials are really designed for them. The antiquing I use is called Jel'd and made by Wood Kote, and works great on wood and resin. It doesn't really work that well on leather, but it's what I've got in the shop. ;0) Frankly I think I'll look for antiquing made for leather. I think that Fiebings made that, years ago, when I first got into leather working. I don't know what's available today.
-
Thank you everyone for your kind words. As I mentioned in an earlier post I want to make a minotaur/bull mask. I started with the bulldog as it was a little easier, but I think I'm ready now for a whole lotta bull!
-
I looked at your website, and I must say you do really beautiful work! I haven't made any papier mache masks, but I have made several latex masks. Each medium has its own beauty!
-
Thank you! I first brushed on a clear gelled wood stain, followed by a brown gelled wood stain which is then wiped off, leaving the brown only in the recesses. If I didn't put on the clear first the leather would absorb too much of the brown. It's the same technique I use for my avatar helmet. Also, I airbrushed some black dye around the outside edge and around the eyes.
-
I've been inspired by the board to try more masks, and here is my first one, a bulldog. Here is how I made the pattern. I sculpted the face in modeling clay, then covered it in tape. Then I marked the lines for the separate pattern pieces, then cut them out with an Xacto knife. I laid the tape onto cardboard and flattened it out, then cut out the cardboard pieces. Made of veggie tanned 5/6 oz cowhide, stitched together wet since some parts need to stretch or compress to fit together. All seams were done with the raw edge hidden. Once it was all stitched (all by hand) I cased it and reshaped it as needed, especially the ears. The pattern is below if anyone wants to try it.
-
I am posting a picture but moving it to Show Off.
-
I have my gggg grandfather's sword and scabbard that is now over 200 years old. I doubt that anyone has ever treated the leather scabbard, and it is very dry and cracking. What is the best way to preserve it and keep it from degrading any further? Thanks,
-
Heh heh, ya got me laughing! Its a mask of a bulldog to be worn by a person. I'll post a picture.
-
I'd go with the Sharpie. I just finished a dog mask and signed it that way, and I'm confident it won't wear off.
-
Thanks, all! The eye is just a plastic doll eye from a craft store.